Read time: 9 minutes
User Query: I’ve been using Qmail for a very long time. Somehow, I’m aware of Office 365 and its incredible tools and services. Now, I want to switch my email client and migrate Qmail to Office 365. Does anybody have a recommendation to initiate a secure, fast, and 100% error-free migration from Qmail to Office 365 with complete mailbox integrity?
Qmail is an email transfer agent that enables users to move emails with the help of a client-server architecture. It was designed as a secure alternative to Sendmail, which was affected by security bugs. But, as people keep moving towards new technologies and services, Qmail users are also looking for the best solution to move to Microsoft.
But, looking at the information available over the Internet, there is no direct method that can be used to migrate Qmail mailboxes to Microsoft 365. Though there are plenty of options available, they are of no use to every user.
In this blog, we will discuss key differences between Qmail and Office 365, reasons, and how you can migrate Qmail mailboxes to Microsoft 365 with all emails, attachments, and metadata intact.
Key differences between Qmail and Office 365
Explore all differences below to understand the strengths, limits, and true potential of Qmail and Office 365 email services.
|
Qmail |
Office 365 |
|
Open-source email server with basic features for technical administrators. |
Cloud-based email with enterprise-grade reliability, security, and scalability. |
|
Requires manual setup, configuration, and maintenance on local servers. |
Powerful collaboration with Outlook, Teams, OneDrive, and shared calendars. |
|
Limited collaboration tools beyond standard email send and receive. |
Automatic updates, backups, and security are handled by Microsoft. |
|
Depends heavily on administrator expertise for security and reliability. |
Accessible anywhere across devices with a seamless user experience. |
|
Best for small teams with custom server control needs. |
Game-changer platform that scales easily for modern businesses. |
These differences will make your decision clear and give you a clear idea of what you need to select for your business needs. Still have any hesitation, let’s explore some reasons that will help you make your decision faster.
Why migrate Qmail mailboxes to Microsoft 365?
There could be plenty of reasons behind migrating Qmail to Microsoft 365, but users mostly do it due to the advantages of Microsoft 365, such as:
- Microsoft 365 gives you the ability to work from anywhere as it is a cloud-based application and works fine with an Internet connection.
- It gives you access to the latest MS Office applications without any additional charges. Also, you get the latest features without buying new Office applications.
- Microsoft 365 offers better security compared to Qmail.
The above reasons clearly define why moving to Microsoft 365 has become a necessity for users and various organizations.
Disadvantages of Qmail
Qmail is a simple email manager that is easier to use and stable enough to provide a safe environment. But it has many shortcomings that make it redundant to use-
- Lacks modern build systems, making compilation and installation less straightforward.
- Email IDs tied to file inode numbers make queue management, like removing looping mail, difficult and challenging to move between volumes.
- Features many hardcoded upper limits (e.g., message size, connection counts) that are inflexible.
- Does not natively support IPv6 connections, a significant drawback for modern networks.
- Tends to send 8-bit data by default, which can cause issues with older systems expecting 7-bit.
Things to remember before Qmail to Office 365 migration
Data Backup: Keep a full backup of Qmail emails to prevent data loss.
User Account Check: Verify all user mailboxes and passwords migrating Qmail to O365.
Data Size Review: Check the mailbox size to plan time and storage needs in destination.
Permission Setup: Assign correct admin roles in Microsoft 365 before migration.
Downtime Planning: Inform users early to avoid confusion during email transfer.
DNS Record Update: Prepare MX record changes to migrate Qmail to Office 365.
Test Migration: Perform a test migration through manual or professional methods.
Methods to Migrate Qmail Mailboxes to Microsoft 365
There are not many methods to migrate Qmail mailboxes to Microsoft 365, but some general procedures can be followed to import IMAP mailboxes to Microsoft 365. So, let’s have a look.
Method 1: Migrate with IMAP Configuration
If we go with the manual methods, then the first method to migrate Qmail mailboxes is to use the IMAP configuration method. And for that, keep some of these basic rules and guidelines in mind, such as:
- Create your users in Microsoft 365 mailboxes before migrating Qmail mailboxes from the source email environment
- Add the domain name to Microsoft 365 account before creating users in the account
You can add users individually or in bulk. Keeping these ground rules in mind before starting the migration process. And after that, you can follow the below steps to migrate Qmail mailboxes to Microsoft 365.
- Collect your source email server name with Outlook on the web
- Generate a list of the mailboxes that need to migrate to Microsoft 365
- Connect Microsoft 365 to your email system before migration
- Make a migration batch and migrate the mailboxes
- At last, verify whether the task worked or not
To know these steps in detail, you can check the official Microsoft documentation.
Method 2: Synchronize Qmail account in MS Outlook
Another method is you can easily add your IMAP-enabled Qmail account to Microsoft Outlook and move all your mailboxes to the primary with all data intact. Let’s go through this step-by-step guide to migrate Qmail to Office 365.
Step 1: Open MS Outlook and click on File > Add Account option.
Step 2: Enter your Qmail email address and password.
Step 3: Enter IMAP server details, like:
Incoming: imap.yourdomain.com [Port 993, SSL]
Outgoing: smtp.yourdomain.com [Port 465 or 587, SSL/TLS]
Step 4: Outlook will add your Qmail account and show mailbox in the left panel.
Step 5: Now, drag and drop your essential email from Qmail to primary mailbox.
These manual methods will help you migrate from Qmail to Microsoft 365, but nothing is guaranteed. These manual methods have lots of drawbacks that make your data corrupt and will not serve 100% migration results.
Limitations of manual methods
- IMAP Only Migrates Mail: Standard IMAP migration (often used manually) only moves emails in folders (Inbox, Sent Items, etc.) and not contacts, calendars, or tasks, requiring separate manual imports.
- Item & Size Limits: Manual methods often hit limits like 500,000 items per mailbox or 35MB message size for IMAP, leading to skipped items or failed transfer.
- Time-Consuming: High effort for mapping, validation, and managing individual mailboxes, especially for many users.
- Permission Loss: Permissions (delegation, shared access) don’t travel well with manual exports (like PSTs), causing major access issues for shared mailboxes.
- No Real-Time Monitoring: Lack of built-in tools to track progress or identify errors, increasing risk.
Now, it’s time to make your Qmail to Office 365 migration easy with professional IMAP migration software to safeguard all your Qmail data in Office 365.
Alternative Solution to migrate Qmail to Office 365 – Automated Tool
Kernel IMAP to Office 365 is a unique tool that is specially designed to help you migrate IMAP mailboxes to Microsoft 365. The IMAP to Office 365 migration software can be used to migrate Qmail mailboxes to Microsoft 365 directly with the advantage of applying specific filters to Qmail mailboxes for selective data migration. Also, it follows a simple migration process with minimum steps, which includes:
Advanced features of this IMAP to Office 365 migration tool:
- Migrate Qmail to Office 365’s Shared Mailbox and Public Folder directly.
- Incremental migration to move only newly added data in future migration tasks.
- Multiple filters to migrate selective data from Qmail to Office 365.
- Supports bulk Qmail users’ migration to Office 365 with ease.
- Compatible with all the IMAP mail servers like Gmail, Yahoo, AOL, G Suite, Zimbra, GoDaddy, Rackspace, etc.
- Download a detailed Qmail to Office 365 migration report in a CSV file.
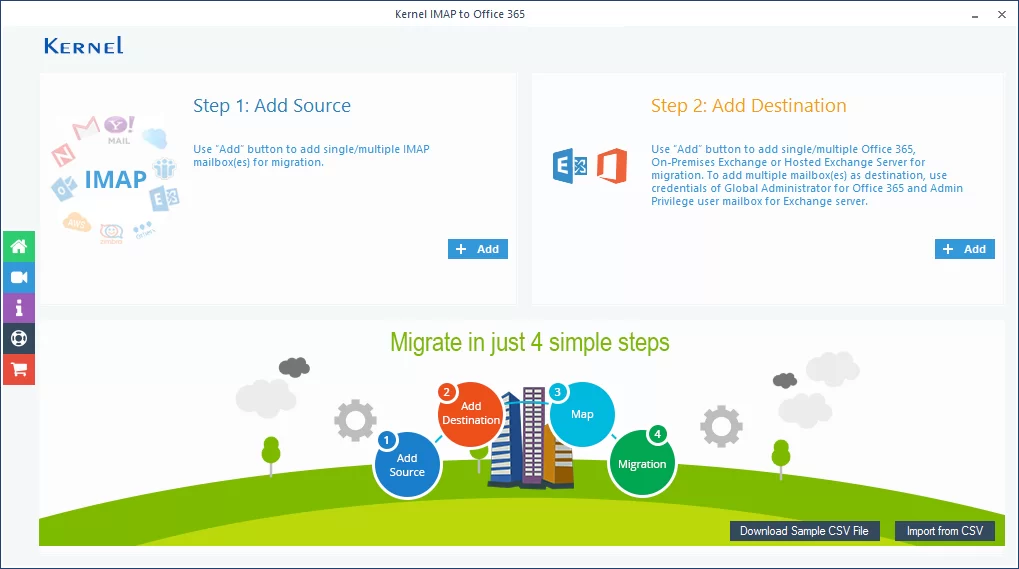
- Download the Kernel IMAP to Office 365 tool and install it on your computer.
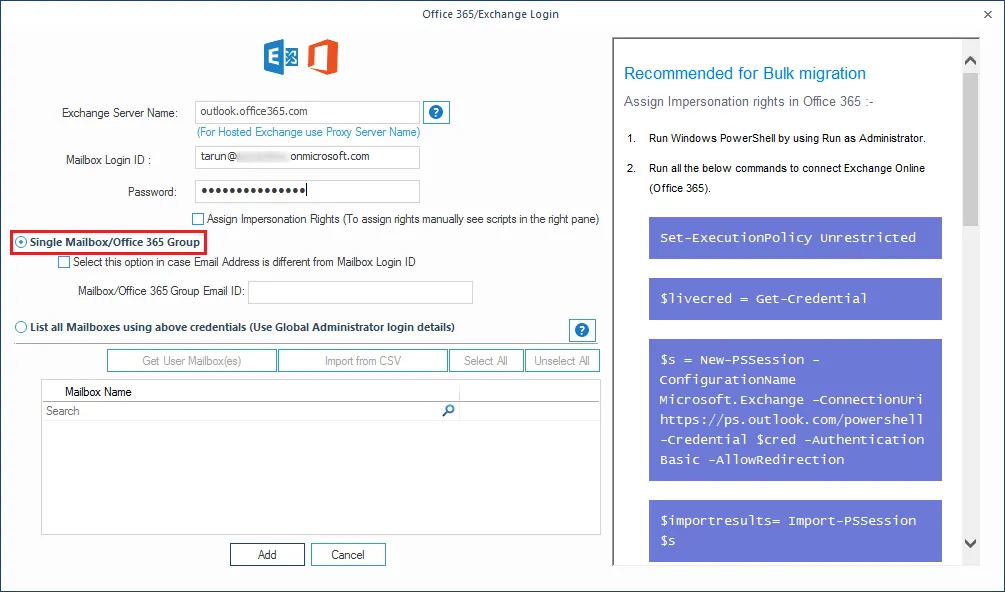
- In the home screen, click the Add Source button to add the Qmail account.
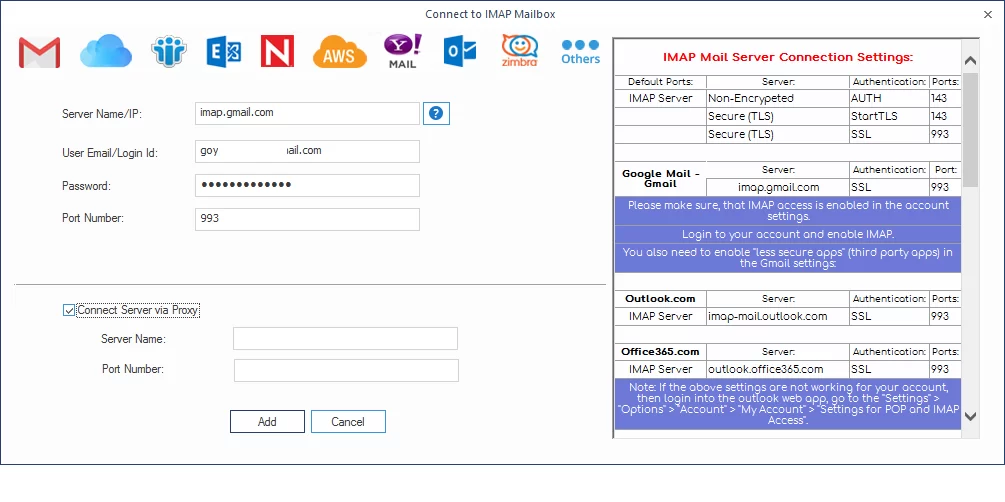
- Provide the credentials for the Qmail account and click Add.
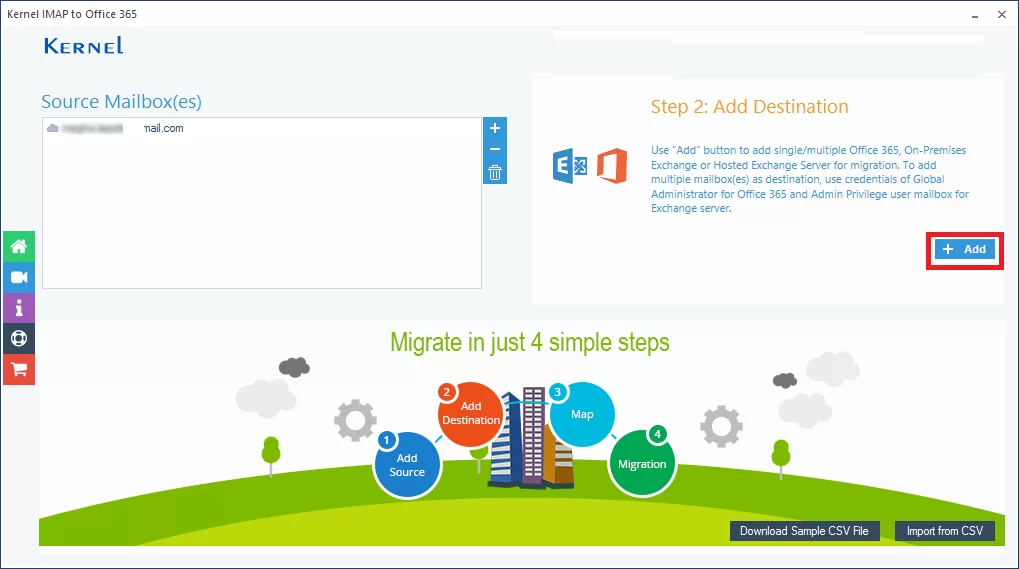
- After adding the Qmail account, click Add in the Add Destination section.
- Enter the credentials for Microsoft 365 account and click Add.
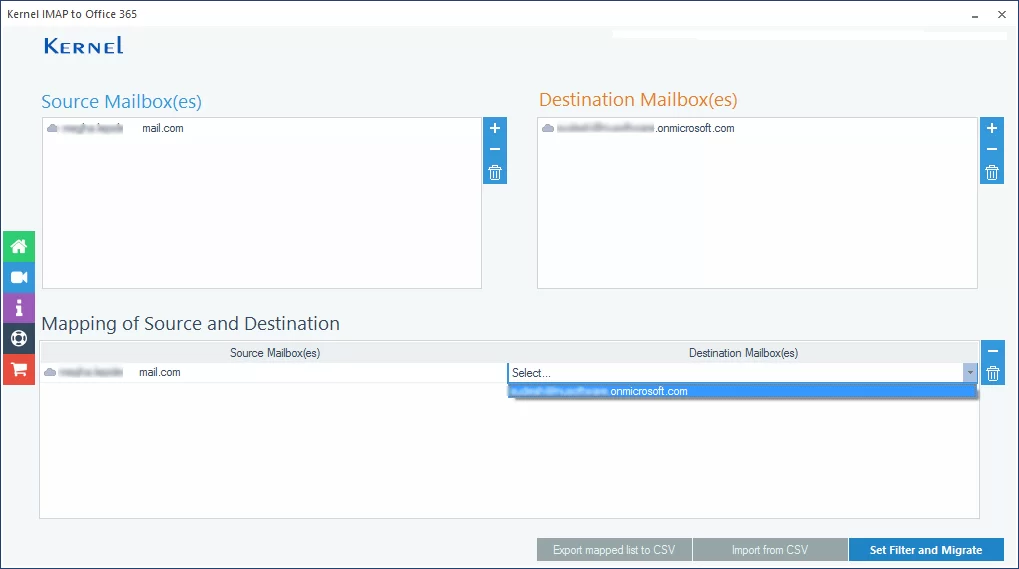
- Once you have added the source and destination mailboxes to the tool, map mailboxes to each other, and then click Set Filter and Migrate.
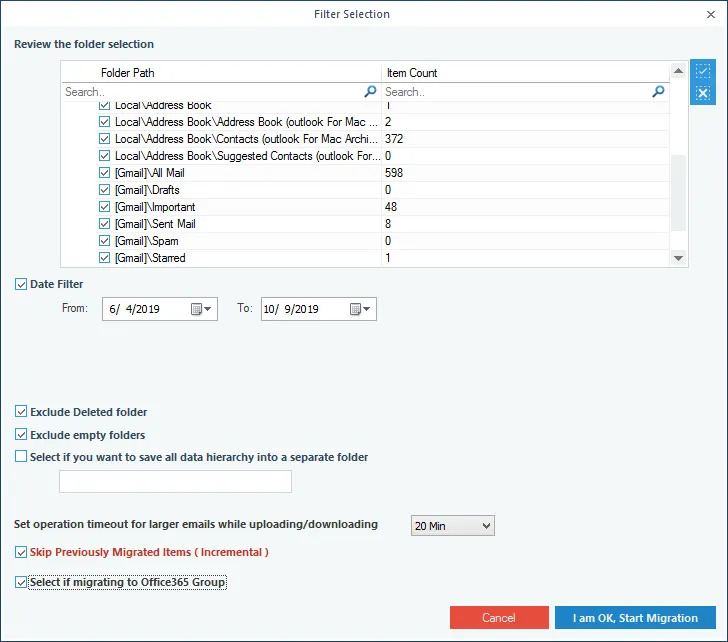
- Now, choose the type of mailbox that you want to migrate to Microsoft 365 and click Migrate.

- Apply necessary filters to the mailbox as per your requirements and click I am OK Start Migration.
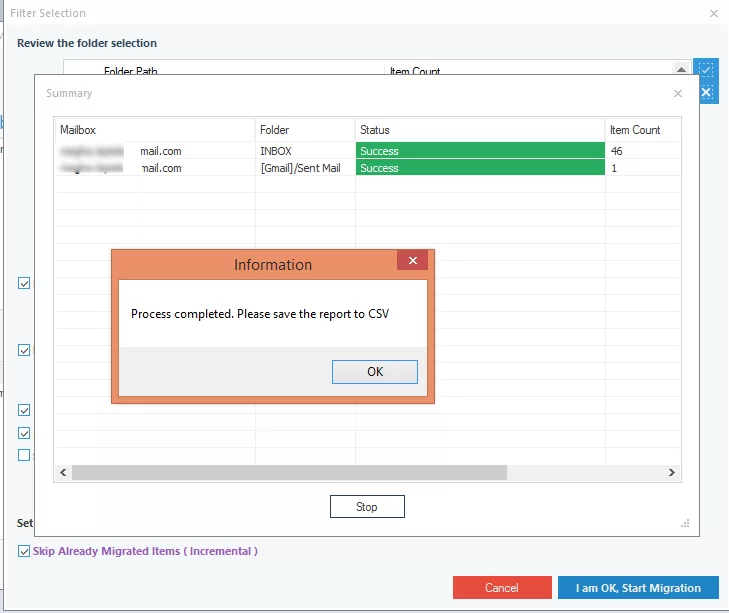
- The software will start migrating the mailboxes one by one. After its completion, a message will appear on the screen confirming the completion of the migration. Click OK to end the process.
Quick steps to migrate Qmail to Office 365 using this tool
Here is the step-by-step guide to migrate from Qmail to Microsoft 365 using our solution:
You can save the migration report in CSV format after finishing the task. That’s the easiest way to migrate Qmail mailboxes to Microsoft 365. You can download the tool’s trial version and migrate Qmail to Office 365 (10 items per folder) for free.
Conclusion
Qmail works as an email transfer agent that enables users to migrate their mailboxes from one place to another. But there are no direct ways to transfer emails from Qmail to Microsoft 365 using the Qmail application. That’s why you need to go through complicated manual methods that can’t guarantee migration results. However, utilizing our recommended Kernel IMAP to Office 365 Migration tool will help you migrate Qmail to Office 365 with complete data accuracy.