Read time 7 minutes
Check this guide to know all troubleshooting measures to handle the issues in migrating IMAP mailboxes to any destination.
The most common method of IMAP migration in Office 365 Admin Center often throws errors while performing the migration. We are going to discuss some most common errors encountered during the complex migration process. We also and suggest some easy troubleshooting solutions.
Common issues with IMAP mailboxes migration
- Issues on starting the migration batch
If able to start the migration batch using the play option, the following issues can occur- Duplicate emails
- The mailbox is full
- Trouble signing into the account
- A recipient wasn’t found for user@contoso.com on the target
If unable to create/start the migration batch, the following issues can occur
- Batch <name> already exists
- Errors with CSV files
- Connection to the server couldn’t be completed
- The connection to the server servername.contoso.com timed out
- Mailboxes migration is running too slow
Troubleshooting solutions
We will go through the troubleshooting solutions in all the situations above.
Migration batch issues when it gets started
First, try resuming or starting the created migration batch again by clicking on the play icon after selecting that particular migration batch. Click Yes to confirm starting the migration. If it runs, then also it can result in different issues for which we are going to discuss troubleshooting solutions now.
- Duplicate emails
It happens with the migration procedure forgets to include the Gmail folder under the Exclude folders section. It is possible to rectify the situation by performing two actions.
- Selecting the Gmail folder under the Exclude folders section while creating the migration batch again.
- Removing labels from emails to migrate in the source mailbox – First, filter the emails with labels, select those emails, and then the Labels Clear the selected checkboxes against all labels and click Apply option finally.
- The mailbox is full
It is an error saying, “The mailbox is full. Please free up some space so that the email can be downloaded.” This error generally occurs when the storage limit for Microsoft 365 mailbox is exceeded. It happens due to duplicate emails.
Users can try deleting the existing migration batch by navigating to recipients>migration, selecting the existing migration batch, clicking the Stop option, removing the labels from emails as done earlier, and deleting duplicate emails and Gmail folder from the Microsoft 365 mailbox.
Also, make sure to remove labels from emails before migration and exclude the Gmail folder while migrating it to the cloud destination.
- Trouble while signing in to the account
After starting the migration batch, users may encounter the error “We had trouble signing in to this account. Confirm that you are using the correct user name and password.” It generally happens when the CSV file used for the migration includes incorrect usernames and passwords for IMAP accounts.
Users can either provide correct passwords against the accounts in the CSV file or use the administrator credentials with required access rights (Full Access/Receive As) to all user mailboxes in that account. For example – a user name “x” can get the entry in the CSV file like this.
EmailAddress,UserName,Password
usera@example.com,contoso/mailadmin/userx,P@ssw0rd
If the above details are already correct, check if the IMAP mailbox exists or not by visiting the recipients>mailboxes location in the Exchange Admin.
Also, it is required that the IMAP access for user mailboxes to be migrated is enabled via IMAP settings in the application (like Gmail) in order to run the migration batch successfully.
- A recipient wasn’t found for user@exmaple.com on the target
This error can be rectified by the user if he creates a new user mailbox within the target Microsoft 365 account using the mentioned proxy address and try starting the migration batch again.
If it does not solve your problem, check the CSV file for the IMAP migration first column, i.e., EmailAddress, for correct entries with a proxy address for the target Microsoft 365 account mailbox. Then, restart the migration batch and check if migration runs smoothly.
Migration batch issues when it does not get start
If you have attempted to start the migration batch, but it does not get started rather throw errors, then you need to perform some different troubleshooting solutions.
- Batch <name>already exists
It is a common error if you have selected the same name as the existing migration batch. Hence, you need to either create a migration batch with a different name or delete the existing migration batch by navigating to recipients>migration in the Exchange Admin Center, selecting the existing batch, and then clicking the Delete option to remove it. Then, you can create a new migration batch with the same name and proceed with the migration.
- Errors with CSV files
Some common CSV errors responsible for the issue in starting the IMAP migration batch along with troubleshooting solutions are –
- The CSV file contains more than 50,000 rows – This is the rows limit on the CSV file prepared for migration. So, it is suggested to use multiple files or batches for more than 50,000 users’ migration.
- Column <column name> is missing from the CSV file – If any of the columns from the standard CSV file format – (EmailAddress,UserName,Password) is missing, then this error occurs. So, check your CSV file and add the required details for the missing column, retry the migration batch starting.
- Upload file can’t be empty – It is a horrible mistake made by the user where they forget to add the right CSV file or enter the empty file without required details. Hence, a recheck is needed, and required details must be provided to the CSV file before its addition.
- Row X has the wrong number of columns – The error is encountered when any column information is missing in one or more than one row of the CSV file. It is a common mistake but can be corrected by editing and adding the CSV file again.
Connection to the server could not be completed
This error occurs during the specification of the IMAP server’s FQDN in the following scenarios. Also, take the related troubleshooting solution for each one of them.
While creating a migration batch with no endpoints – Here is the process to specify the public FQDN correctly.
- Log in to the Exchange Admin Center of the account used for migration (with administrator credentials).
- Go to recipients>migration.
- Click on the plus icon to select the Migrate to Exchange Online
- Choose IMAP migration and click Next.
- Then click the Choose file option, browse, and add the CSV file. Click next.
- Then enter the public and resolvable FQDN (example.com) and click next to proceed with creating and running the migration batch finally.
While creating the migration batch with the existing endpoint, follow this process to determine the public FQDN.
- On the Exchange Admin Center, go to recipients>migration.
- Click the 3 dots or More option and then select the Migration endpoints
- Select the migration endpoint
- Then check the FQDN of the IMAP Serer at the bottom of the page.
- Recreate the migration endpoint if it is incorrect or not publicly resolvable.
The connection to the server <servername.example.com> timed out
It happens when –
- Firewall does not allow IMAP connections to IMAP Server via Microsoft datacenters – For that, check the Firewall settings, install the client to verify correct flow to IMAP Server, etc.
- The IMAP service application is not running – Ensure the IMAP service like Exchange, Notes, etc. is running in its source environment. Run msc in the Exchange Server and confirm if Microsoft Exchange IMAP4 service is started or not.
Mailbox migration is running too slow
Please find the below pointers to deal with the situation where your mailboxes under migration are moving at a very slow pace.
- Increase the default number of simultaneous moves from 20 to a larger number by navigating to recipients>migration>More>migration endpoints, double-clicking the endpoint to move to Max concurrent migrations, and changing its value by clicking Save.
- Check the migration report by visiting the View details section of the selected migration batch. It would tell the status of the mailboxes under migration, whether Syncing or Items Synced.
- Increase connection limits to the IMAP Server
- Check server and IDS settings
- Delete existing migration batch and recreate it
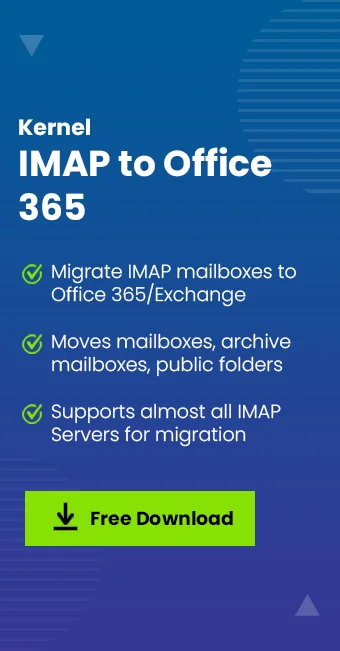
So, now we have apt troubleshooting solutions for IMAP mailbox migration to the cloud platform but dealing with such a number of issues while performing native IMAP mailbox migration requires immense patience. So, we would like to suggest the most efficient and automated professional tool known as Kernel IMAP to Office 365 that performs precise migration of IMAP Server mailboxes with a lot of options and smart GUI.
Conclusion
During the migration of IMAP mailboxes to Office 365 using manual methods, email users may face a lot of issues. Though there are some fixes for all these issues, they may consume a lot of time and effort. Also, these methods are technically complex. So, it is recommended to use a professional solution for IMAP to Office 365 migrations.