Read time 9 minutes
The emergence of cloud computing has allowed businesses to keep their data over a secure cloud platform like Office 365 and access it from anywhere. Although Exchange Server is a powerful email management server, it can be combined with the benefits of Office 365 in a hybrid deployment scenario to achieve more. In the present article, we will go through a method to migrate the archive mailboxes from Exchange to Office 365.
Here are some points which you need to understand before starting the migration –
- There should be a hybrid configuration between the on-premises Exchange Server and Exchange Online.
- The user should have Organization Management and Recipient Management permissions to start the migration.
- Enable the Mailbox Replication Proxy Service (MRSProxy) on Client Access Servers if you have installed Exchange Server 2013 on-premises.
- The time to complete the migration depends on the number and size of the mailbox.
The process to migrate Exchange archive mailbox to Office 365
After fulfilling the prerequisites, you can further start the migration for the Exchange archive mailbox. Here are various stages of the migration:
Create Migration Endpoint
Before migrating the on-premises Exchange Server mailboxes to Office 365, you need to create a migration endpoint which contains the information of the on-premises Exchange Server which has active MRSProxy Service. The migration endpoint is useful in creating remote migration batches.
Why is Migration Endpoint important to Migrate Office 365?
Migration Endpoint is the component that saves the Administrator credentials and connection settings for source Exchange server containing the archive mailboxes. For the cutover and staged migration, the Migration endpoint also contains the information for the number of mailboxes selected for migration. The Exchange Administrator requires to create the migration endpoint for multiple types of migrations like cross-forest move, remote move, cutover migration, staged migration, IMAP migration.
There is the Get-MigrationEndpoint cmdlet available to run in Exchange Management Shell to bring the minute details of about the created migration endpoint.
The available parameters are ConnectionStrings, Diagnostic, DiagnosticArgument, DiagnosticInfo, DomainController, Partition, Type.
Follow the steps to create the migration endpoint –
- Follow recipients>>migration and click (•••). Select Migration endpoints.
- Click the Add (+) icon to create the migration endpoints.
- Select Exchange Remote among the option and click the Next button.
- Input the email address, full account name (with a domain), and password. Click Next.
- Provide the Remote MRSProxy Server FQDN and click Next.
- Provide a new name to the Migration endpoint, number of maximum concurrent migrations, number of maximum concurrent incremental sync. Click the New button.
- You can see the new migration endpoint at the list.
Enable the MRSProxy Service
Follow the upcoming steps to enable the MRSProxy service if it is not already enabled.
- Go to Servers and then Virtual Directories.
- Select the Client Access Server from the drop-down, then select EWS virtual directory and click the Edit button.
- check the option MRSProxy enabled and click the Save button.
Migrate Archive Mailbox from Exchange Admin Center
Follow these steps:
- Login to Exchange Admin Center and go to Recipients>Migration.
- Click the Add(+) button and select the Migrate to Exchange Online.
- Select Remote move migration option at the select a migration type wizard. Then click Next.
- Click the Add(+) at the select user page and select the users which you want to migrate to the Office 365. Click Add and then OK. Finally, click Next.
- Input the on-premises Exchange Administrator account name and input the related password of the account. Click Next.
- Confirm the Migration endpoint which you had created earlier and also mention the FQDN of your server after confirming the migration endpoint.
- Next page is Move configuration. Here, you provide a new batch name to the New migration batch name field. Use the drop-down menu and select Target delivery domain for the mailboxes that are migrating to Office 365. Now, verify that the select option of ‘Move primary mailbox along with archive mailbox’ is selected. Click Next.
- Next page is Start the batch. Select an account which will receive the batch migration report. Select the option ‘Automatically start the batch’ and click New.
The migration will start, and the mailbox data along with the archive mailbox will instantly migrate to the Office 365 mailbox. The time of the migration will depend on the size and the total number of mailboxes.
Common issues related to archive mailbox migration to Office 365
Sometimes, during the manual process, the archive mailbox is not migrated to Office 365, but a new archive mailbox is created. It causes a failure of whole process and the user requires to restart the whole process.
Causes
If the user creates a migration batch from archive mailbox to Office 365 and enable the archive mailbox after the creation of batch, then it will not migrate it. Only the primary mailbox will be moved.
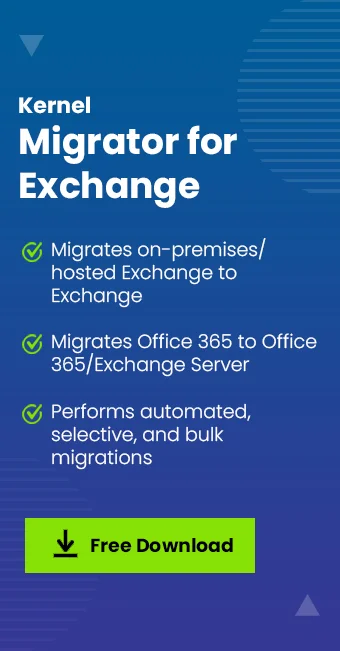
The method indicates that it migrates the archive mailbox along with the primary mailbox and there is no option to handle the archive mailbox separately. In such cases, you need to take the assistance of a professional migrator tool which can manage the environment of the Exchange Server and Office 365. Kernel Exchange Migration – Express Edition is a powerful yet user-friendly software which can access the mailboxes from the Exchange account and place them to the Office 365. It automatically synchronizes the mailboxes at Office 365, and you can access them instantly.
Assisting the users on various migration topics such as, migrate from Office 365 to Hosted Exchange, how to perform Hosted Exchange to Hosted Exchange migration, how to migrate Exchange archive folders, and more, it’s the one stop shop for all your migration requirements.
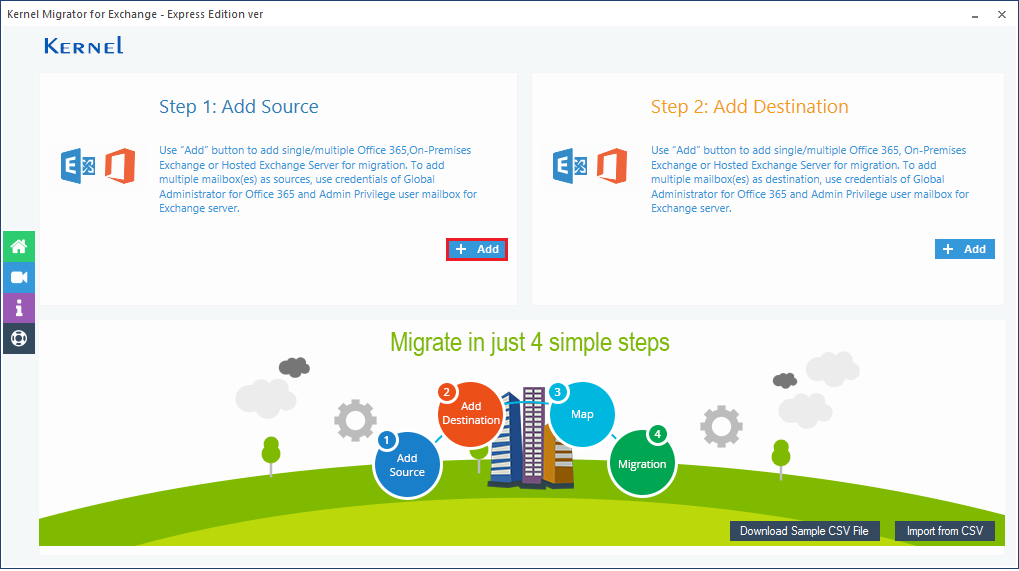
Follow the upcoming steps to use the functional procedure of Kernel Exchange Migration – Express Edition:
- Run the software after installing it successfully, then click the Add button at the Add source section.
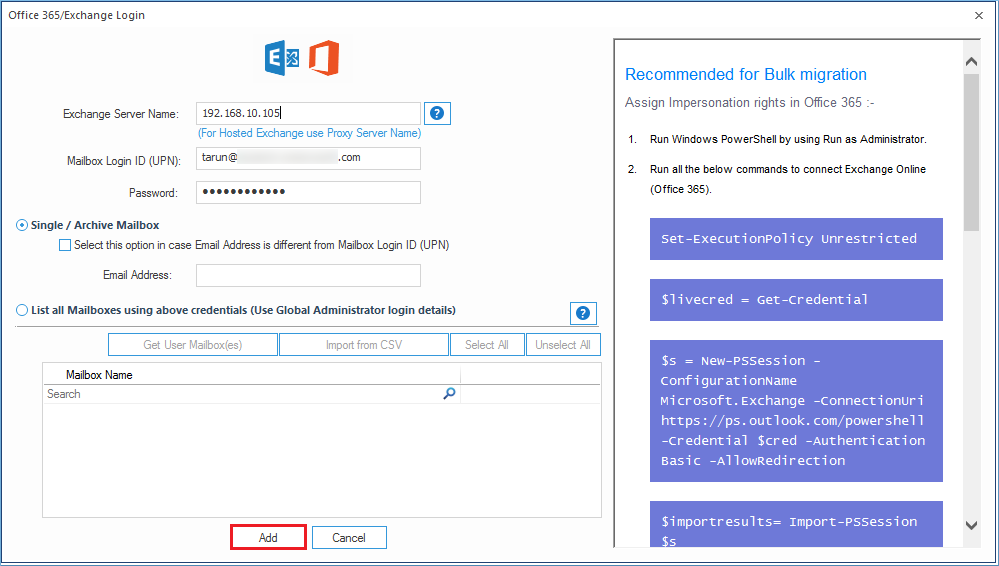
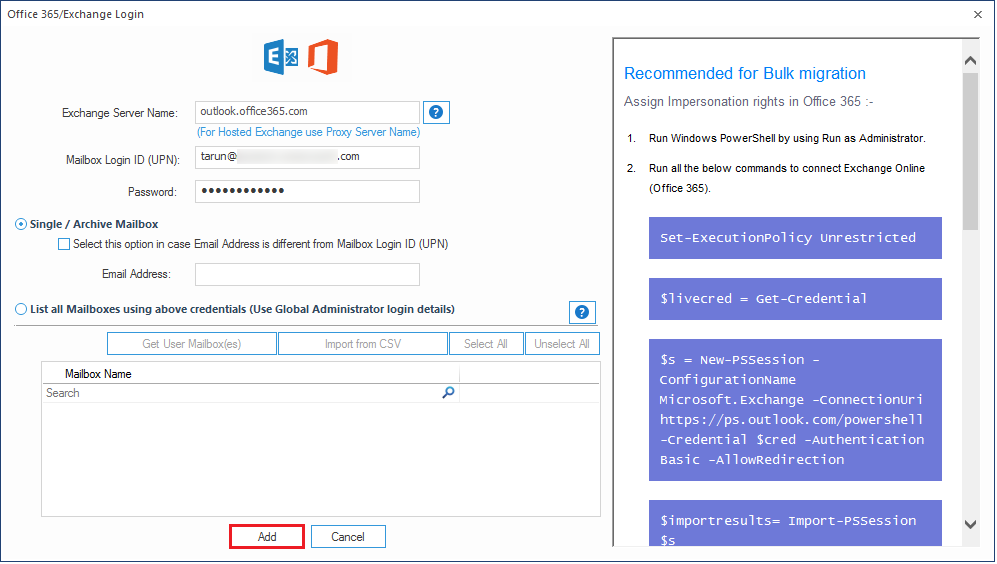
- Input the Exchange Server name/IP address, full account address, and password. Then click the Add button.
- Click the Add button at the Add destination section.
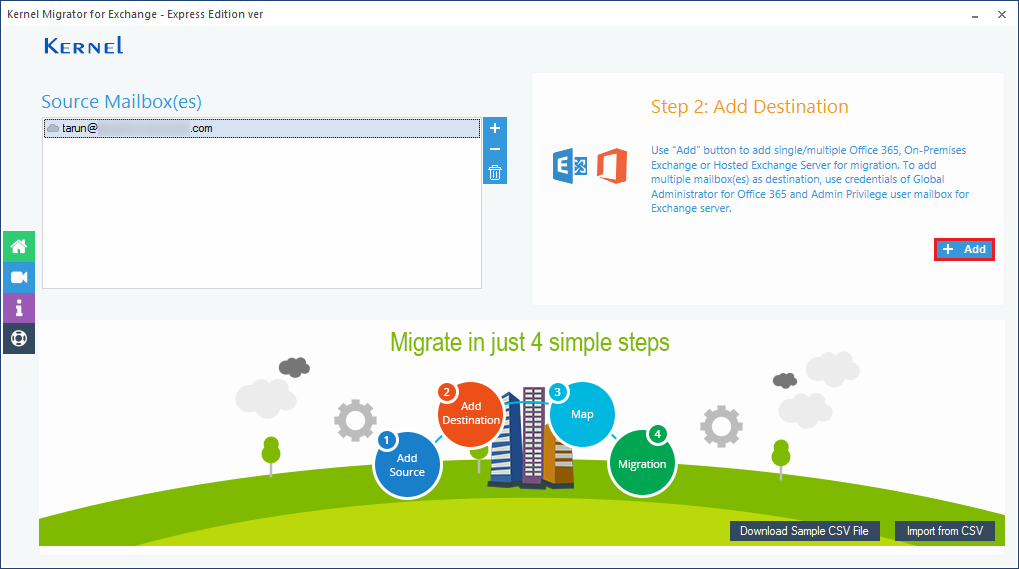
- Input the login credentials of the Office 365 account and click the Add button.
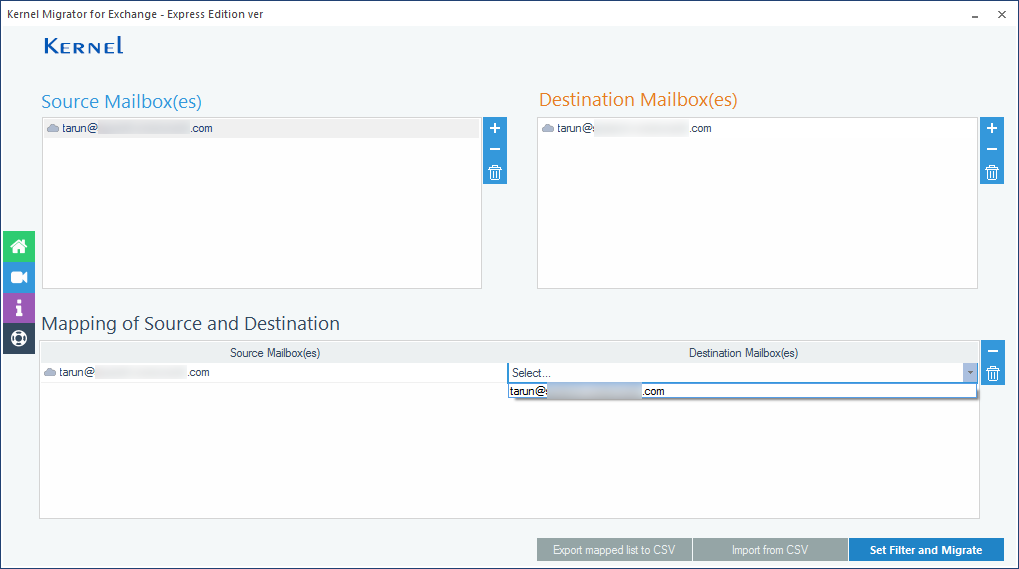
- After selecting both source and destination account, you need to map both the accounts. Use the Select drop-down to choose the account.
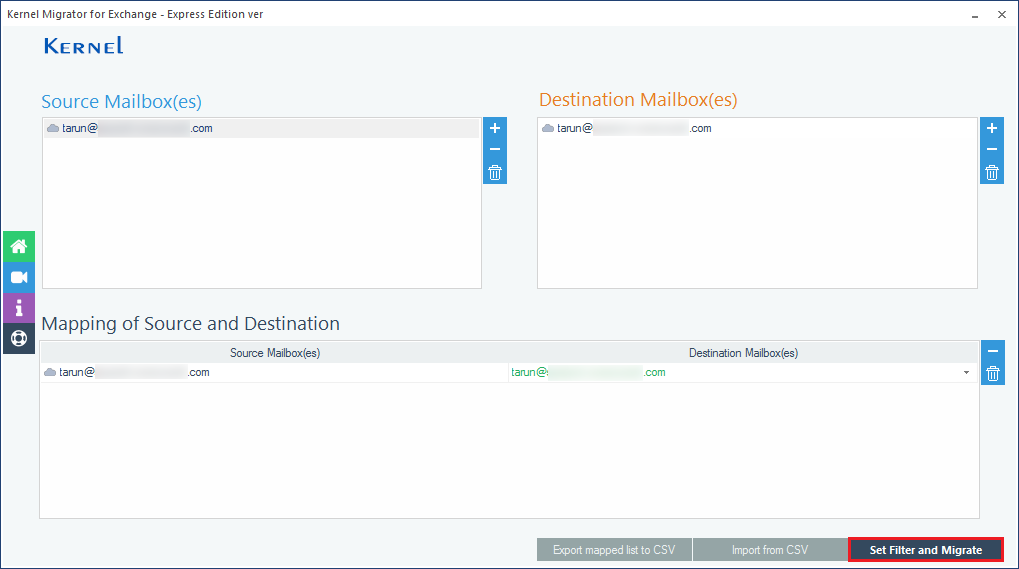
- After mapping the source and destination account, click the Set Filter and Migrate button.
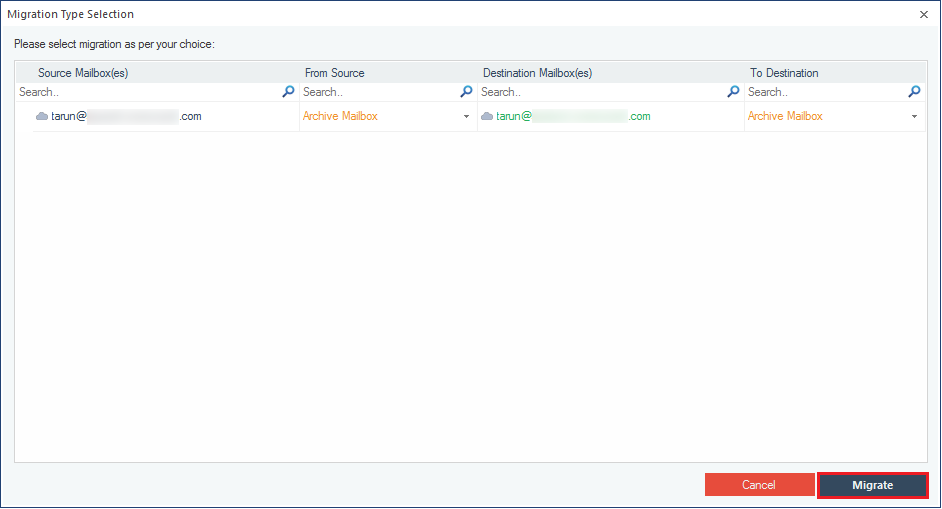
- Now, you can select the Archive mailbox from the source Exchange account and choose the desired mailbox from the destination.
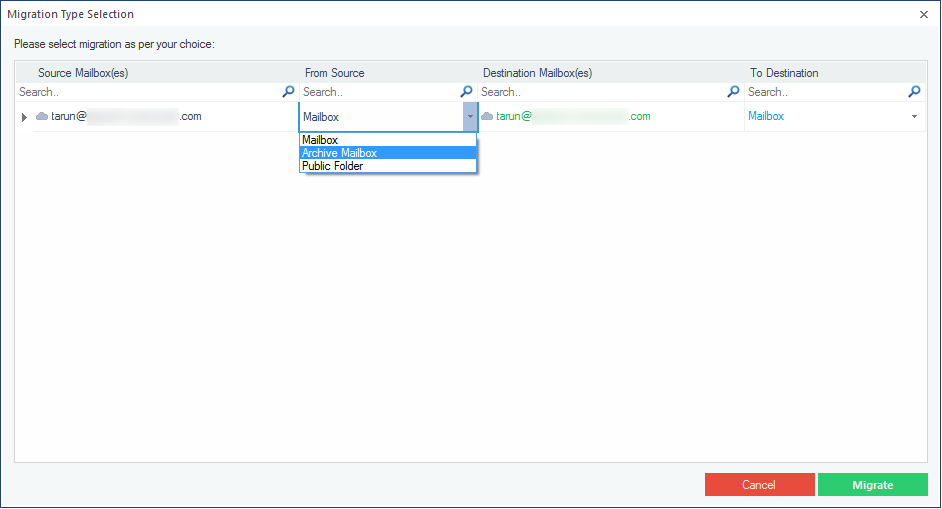
- After properly selecting the archive mailbox from both source and destination, click the Migrate button.
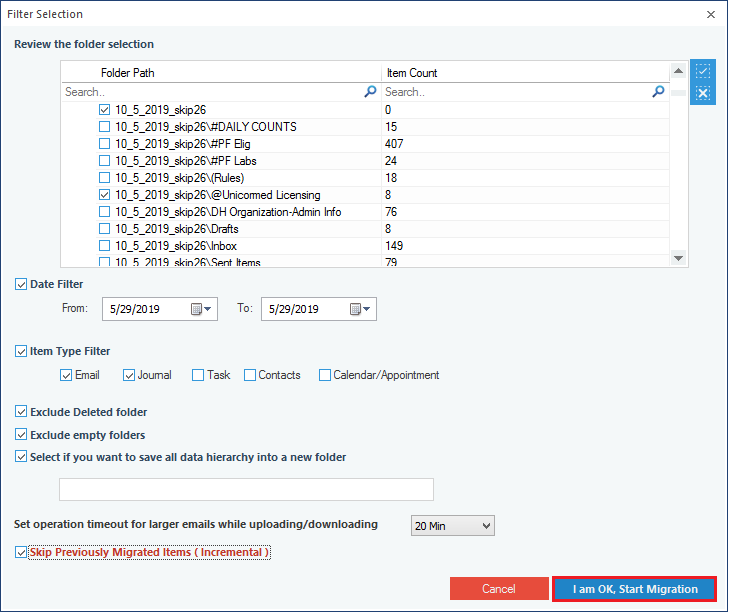
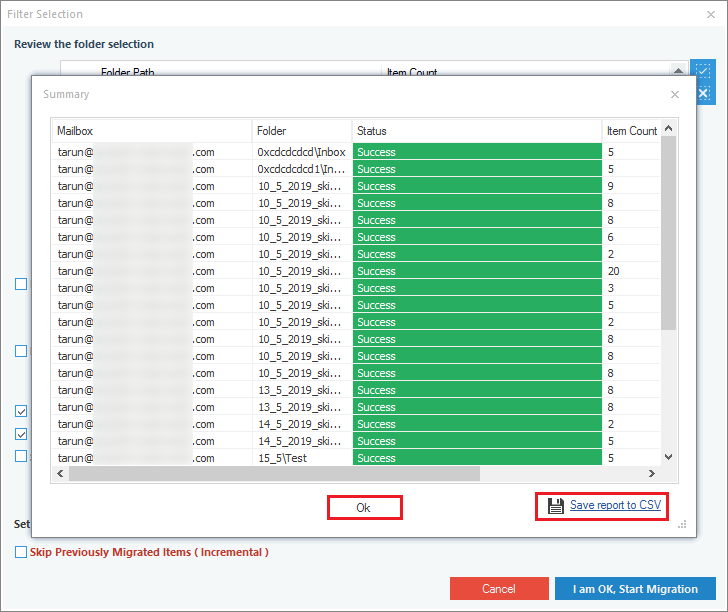
- The Filter Selection page provides a bunch of useful filters to select the important data and leave the rest properly. Apply the filters as per your choice. Click I am OK, Start Migration.
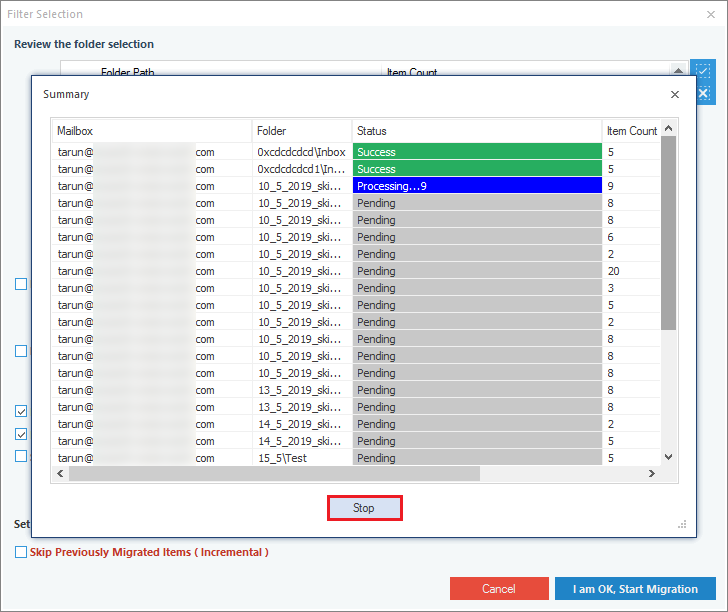
- The migration starts. You can choose to stop the migration in the midway.
- Click OK after getting a success message on migration completion.
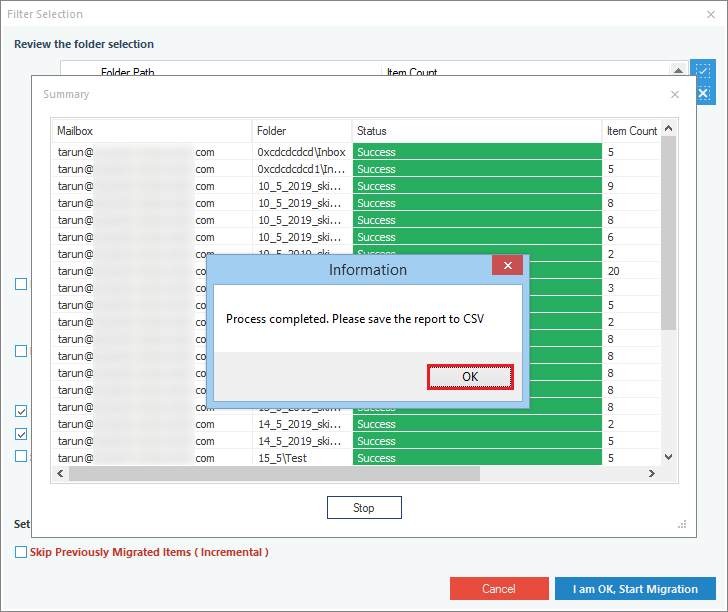
- Save the migration report as a CSV file and then click OK.
Conclusion
Kernel Exchange Migration – Express Edition is a complete migrator tool which removes all the complexities related to the migration and safely places the data at the destination Office 365 mailbox, and if you’re looking help on how to migrate Office 365 to Hosted Exchange, need not to download a new tool, as Exchange Migrator Express Edition is an all-in-one.