Read time: 8 minutes
In a hybrid deployment, where both on-premises and online version of Exchange Server are present provides a benefit to the administrator to move mailboxes more freely. One advantage with the Exchange Online mailboxes is that they are auto-mapped after transferring the accounts between forests. The auto-mapping feature makes the mailbox accessible to the Outlook application in a new forest easily.
When we talk about the non-hybrid deployment, automapping works when a user is assigned with full access permissions to the mailbox before the migration. In this case, for assigning full access permission, Add-MailboxPermission cmdlet is used by adding different values to user and his mailbox (to link the objects). The links used are – msExchDelegateListLink (for mailbox to which permission is assigned) and msExchDelegateListBL (for user to which permission is granted).
What causes automapping issues in hybrid Office 365?
Automapping is a feature within on-premises Exchange as well as Exchange Online. It provides access to mailboxes with Full Access automatically within the delegate email client (Outlook). Doing this doesn’t involve any complicated process to allow access, allowing users to access user, shared, room, and equipment mailboxes easily.
The reasons for failure of automapping of Office 365 mailboxes with their Outlook profile could be that the user is running the older version of Outlook application or Active Directory attribute values are not available to enable the auto-mapping. Let’s check what can be a reason behind such issues within Office 365:
- Improper configuration of Autodiscover for hybrid Office 365 deployment results in failure at sending the required information to Outlook.
- Assigning permissions to the cloud mailbox even while the user is still on the on-premises Exchange server, necessary attributes will not be added for automatic map the mailbox.
- If permissions were assigned to the user after the mailbox migration, msExchDelegateListLink property of AD might not properly sync with Outlook.
- Automapping might fail if the user account exists within the on-premises and the shared mailbox is on the cloud (or vice-versa) or if you use outdated version of Outlook during migrations.
Automapping issue in Hybrid Deployment
There can be two scenarios in hybrid deployment of mailboxes:
- The permissions are assigned before moving the mailboxes to cloud.
- The permissions are added after the users or mailboxes are migrated.
In both the conditions there is a requirement for enabling the automapping feature.
Permissions assigned before migration
In the first scenario (permissions are assigned before migration), the automapping attributes, msExchDelegateListLink/BL are to be synchronized by Azure Active Directory Sync (AAD Sync) to the cloud prior to migrating the mailboxes. And while migration is being performed, Mailbox Replication Service in Exchange Server transfer the permissions.
Permissions assigned after migration
If we talk about the second scenario (permissions are added after moving the mailboxes), the permissions which are added through Add-MailboxPermissions cmdlet. But since the user resides in the on-premises environment, the automapping attributes, msExchDelegateListLink/BL is not added then.
Solution to the issue
Users can manually add the automapping attributes to mail user object to synchronize it to the cloud. And the synchronization can be performed through AAD Sync. Go to your Active Directory PowerShell module and set the attributes manually using Add parameter of the Set-ADUser cmdlet. Also, users should ensure that user mailbox for migration is running the May 2015 Public Update (PU) for Outlook 2010 or later updates.
Resolving automapping issue in Office 365
You can also troubleshoot the automapping in Office 365 mailboxes. When a mailbox is to be auto-mapped to a profile, there is a need to return information to Outlook within Autodiscover XML. Inspect for this user condition by following the below steps:
- First start your Outlook application and then hold the Ctrl key and right-click on the Outlook icon displayed (in the notification area of the computer). Select the Test E-mail AutoConfiguration option from the list.
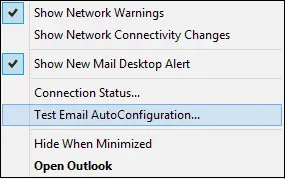
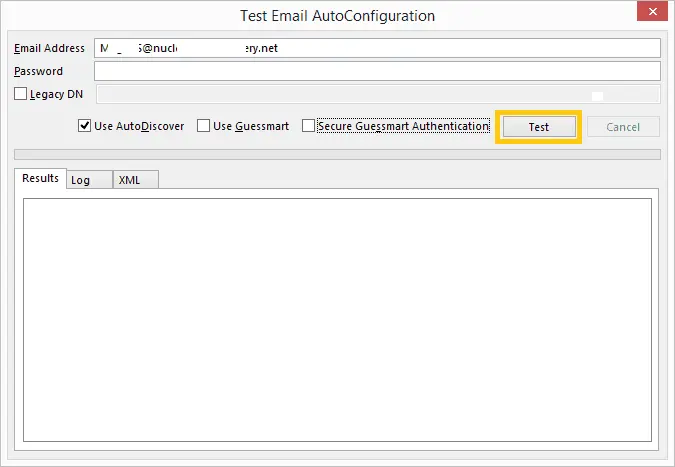
- In the opened Test E-mail AutoConfiguration dialogue box, unselect the Use Guessmart and Secure Guessmart Authentication options. Click Test.
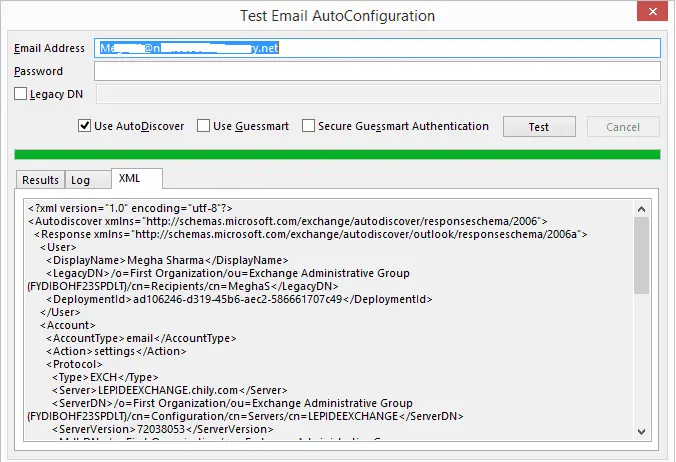
- Once the test is finished, click on the XML tab to review the contents.
Steps to fix Automapping issue in Office 365 hybrid deployment
All the steps involved in the process to troubleshoot automapping issues are described as follows
Step 1: Connect PowerShell and remove permissions
- Open PowerShell, run the following command and enter your admin credentials.
$Credential = Get-Credential
- Connect to Exchange server on your tenant using the given command:
$ExchangeSession = New-PSSession -ConfigurationName Microsoft.Exchange -ConnectionUri “https://outlook.office365.com/powershell-liveid” -Credential $credential -Authentication “Basic” -AllowRedirection
- Import the connection to PowerShell with the cmdlet:
Import-PSSession $ExchangeSession
- Use Get-Mailbox command to test if you’ve connected successfully.
- Close Outlook and run the following command to remove the permissions.
Remove-MailboxPermission -Identity sales@microsoft.com -User john.smith@microsoft.com -AccessRights FullAccess
- Input Y and then click Enter.
Step 2: Delete shared mailbox from Outlook
- Open Outlook and check if you can still see the shared folder or not.
- Click File then Account Settings > Account Settings, select primary mailbox and click
- Click on More Settings and under Advanced tab, select shared mailbox and click Remove. Exit Outlook.
Step 3: Re-assign permissions to the mailbox
Open PowerShell again and write the following command to add the permission to the mailbox with Automapping feature of Office 365 disabled.
Step 4: Add shared mailbox to Outlook
- Open Outlook then go to File and select Account Settings > Account Settings.
- Click on the Email tab and select New.
- Enter the user email address (shared mailbox) and user name. Click Next.
- Write the user credentials with permissions to the mailbox.
- Mark the check box to remember the password. Click Next.
- Exit Outlook and relaunch it.
Quick fixes to resolve automapping issues in Office 365
Here are a few solutions you can check to fix the issue:
- Assign correct permissions: Establish that the user account you use to access on-premises mailboxes is assigned with the correct permissions to use cloud mailboxes. You may also need to add the user to security groups.
- Make target mailbox visible: Verify that the users within the on-premises mailbox can see the target cloud mailbox in the Global Address List. If not, create a new GAL or update the existing one.
- Enable automapping: Check that automapping is enabled and if not, use Exchange Management Shell to enable it for the target cloud mailbox using the command:
Set-Mailbox -Identity <CloudMailbox> -Automapping $true
- Configure Autodiscover: Autodiscover configures user profiles and allows mailbox mapping with the Outlook user profiles. Run the cmdlet Test-OutlookWebServices to validate that Autodiscover is properly functioning.
Common Challenges in Hybrid Deployments
You can face a lot of technical complications and challenges, like inefficiency in the mail flow, network configuration, etc., during Office 365 hybrid deployments. Let’s see what those are:
- Unnoticed renewal of the security certificates (SSL/TLS) can disrupt security and mail delivery.
- Email flow from on-premises Exchange to Office 365 (cloud) can fail due to firewalls blocking STARTTLS command execution.
- Duplicate UPNs (User Principal Names), Proxy address in AD, and other conflicts, often lead to the failure of mailbox move requests.
- Misconfigured on-premises send connector can create routing loops, sending emails to and fro between on-premises server and Office 365.
- Sometimes, Microsoft puts limits on the amount of data to be migrated on an everyday basis, which can consume a lot of time during large datasets.
Thus the automapping issue after Office 365 migration can be managed easily by end users. However, if you want to avoid issues and perform hassle-free Exchange cross-forest migrations, then select the expert-suggested Kernel Migration for Exchange software which provides instant migration without any automapping issues. The tool is capable to perform all type of Exchange and cloud migrations including migration between Office 365 tenants. It also migrates user mailbox permissions from the source to destination.
Conclusion
In the ideal situation, there should be auto-mapping between the mailboxes after migration between the accounts. The hybrid environment helps to connect both Exchange Server and Exchange Online within the same or different domains. If you do not get the desired results using the troubleshooting methods, then you can use the recommended Exchange migration tool that will remove any auto-mapping issues. The software maps each account securely and then starts the migration. So, there will no improper mapping.
Frequently Asked Questions
Ans. Automapping means that the shared mailbox whose permissions you are assigned automatically maps to the primary user mailbox, without performing the manual steps.
Ans. To disable automapping feature in Office 365 hybrid deployment, first install ExchangeOnlineManagement module on your workstation. Use the given command to remove the full access permissions:
Remove-MailboxPermission -Identity customer.feedback@azure.skrubbeltrang.com -User hans.c.orsted@azure.skrubbeltrang.com -AccessRights FullAccess
Add the permissions again with automapping switch disabled for a while using the commands below:
Add-MailboxPermission -Identity customer.feedback@azure.skrubbeltrang.com -User hans.c.orsted@azure.skrubbeltrang.com -AccessRights FullAccess -AutoMapping:$false