Read time 6 minutes

Summary: Securing your emails on Exchange Server involves installing an SSL certificate to ensure confidentiality, authentication, and protection against threats. Learn how to create an SSL certificate request and transfer it when migrating. Consider using Kernel Migration for Exchange for efficient and secure data transfer.

Securing your emails begins with the essential installation of an SSL certificate on your Exchange Server. This certificate serves as a crucial safeguard for your professional communications, offering multiple benefits. Firstly, it ensures the confidentiality and integrity of your email content, shielding it from prying eyes and potential interception. Secondly, it authenticates your identity to recipients, assuring them that the emails they receive are indeed from your trusted source. Lastly, it provides a robust defense against hackers and malware, fortifying your email infrastructure against malicious threats. However, it’s important to note that Exchange Server does not come with an SSL certificate pre-installed. To obtain this vital security feature, users must procure it from accredited certificate vendors and then seamlessly integrate it into their Exchange environment.

A correct procedure exists for creating an SSL certificate request file within the Exchange, accessible through the Exchange Admin Center. Subsequently, you can utilize this file on the vendor’s website to provide essential details about your organization.

Generate SSL certificate request from the Exchange Admin Center

SSL certificates are managed in Exchange Server from Servers > certificates in the Exchange admin center. Here is how you can generate an SSL certificate request:
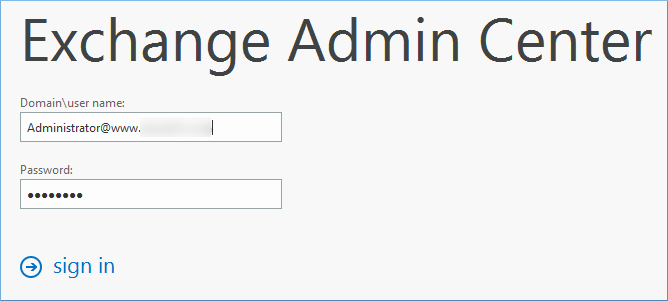
  1. Login to Exchange Admin Center.
    Login to Exchange Admin Center
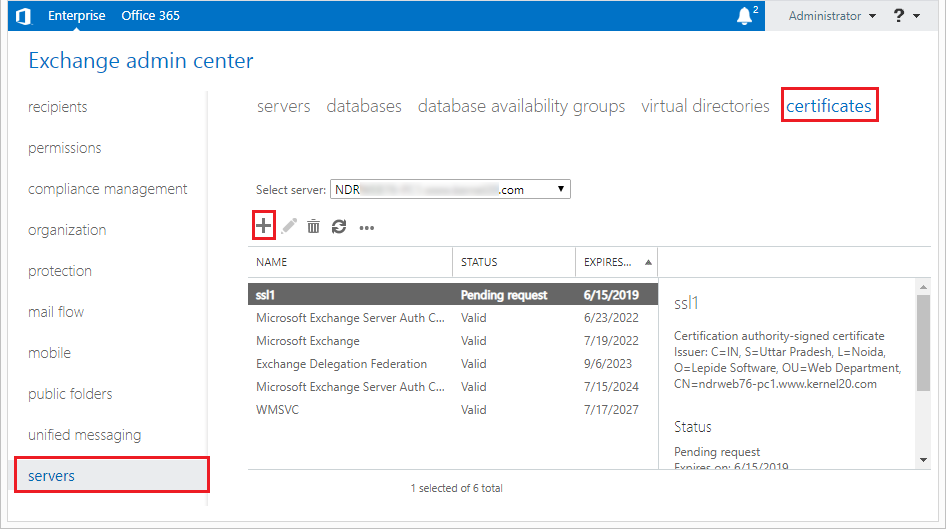
  2. Go to the Servers category, then click Certificates.
    Go to server category
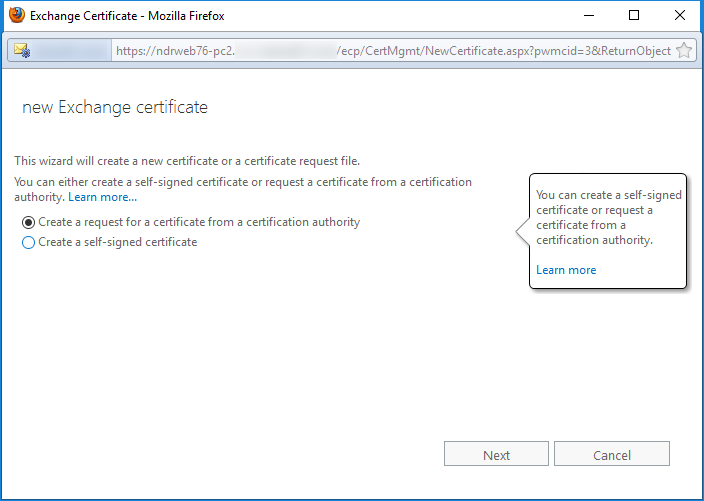
  3. Choose the first option to ‘create a request for a certificate from a certification authority.’ Click Next.
    create a request for a certificate from a certification authority
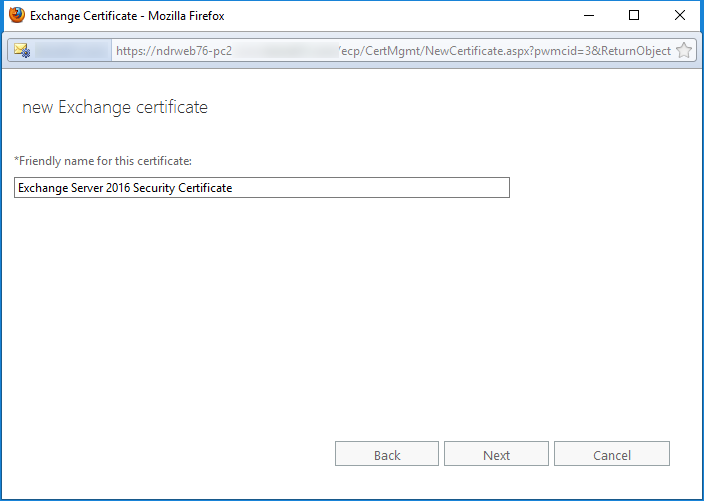
  4. Provide a descriptive name to the certificate. Then click Next.
    Provide a descriptive name
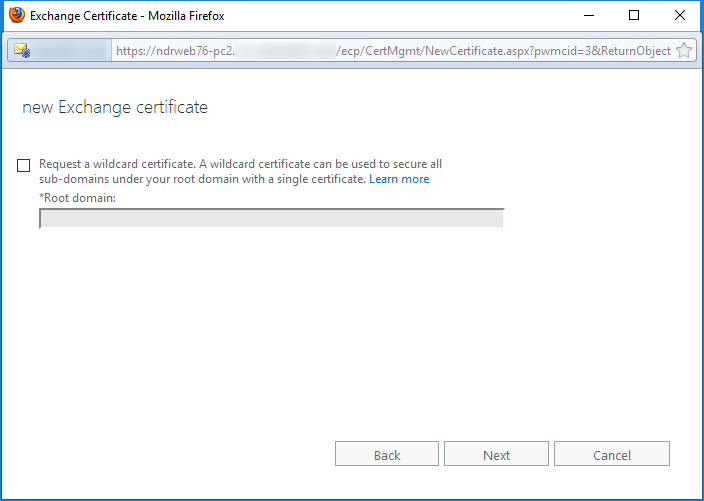
  5. When you get the option to input a request for a wildcard certificate, then you have three scenarios to consider;
    • If you require the wildcard certificate, then input the wildcard character (*) and the root domain name. For example, *.testdomain.com.
    • If you require a subject alternative name (SAN) certificate, then skip the option.
    • If you require the certificate for the single domain or host, then skip the option.
    • Click Next.

    wildcard certificate

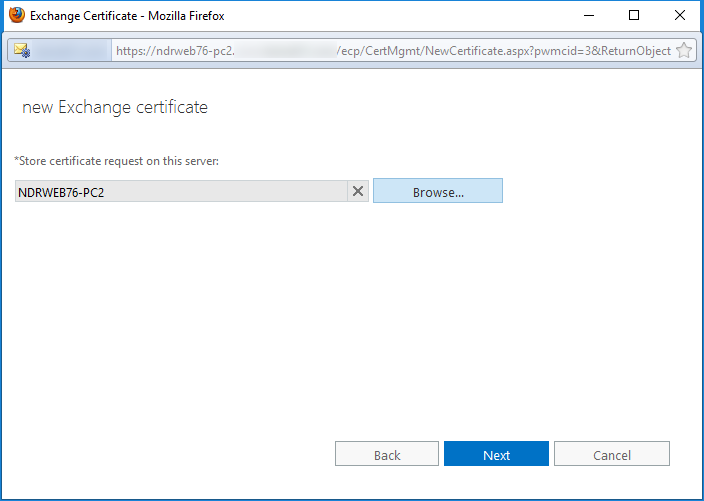
  6. Click the Browse button and select the Exchange Server for which you want to get the SSL certificate. Then click Next.
    Select the Exchange server for SSL certificate
  7. Specify the domain page allow you to choose the internal and external hostnames which you need for the following Exchange services:
    • Exchange Web Services.
    • Exchange ActiveSync.
    • Autodiscover.
    • Outlook Anywhere.
    • IMAP.
    • POP.
    • Outlook on the Web.
    • Offline Address Book generation (OAB).

    When you select a service option, then the wizard determines which domain is suitable for the certificate and displays its information on the next page. Click Next.
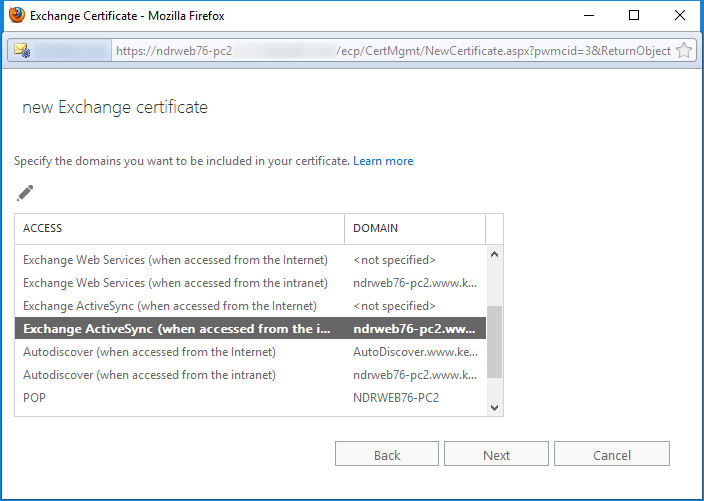
    Choose the internal and external hostnames

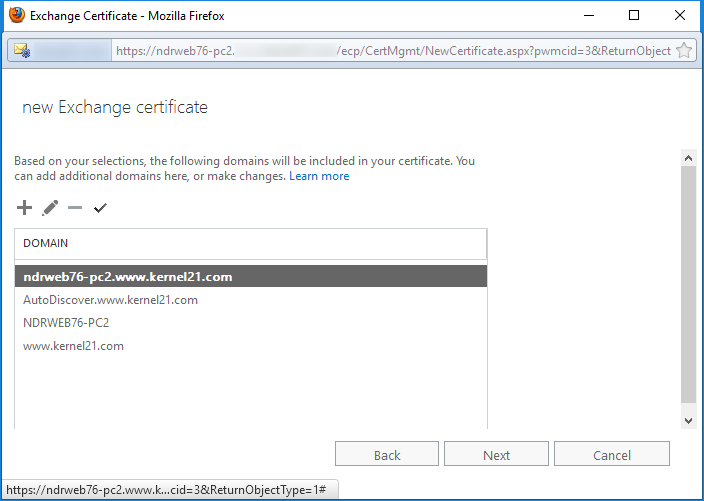
  8. The wizard shows the domains which it will include in the certificate. You can also choose to edit the domains. Finally, click Next.
    Domain which it will include in the certificate
  9. Specify the following organizational details in the form –
    • Organization Name.
    • Department Name.
    • City/Locality.
    • State/Province.
    • Country/Region Name.

    After filling the form, click Next.
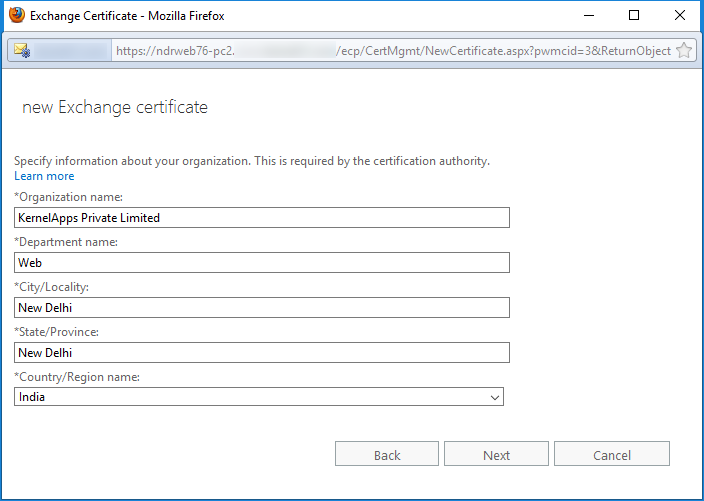
    Specify the following organizational details

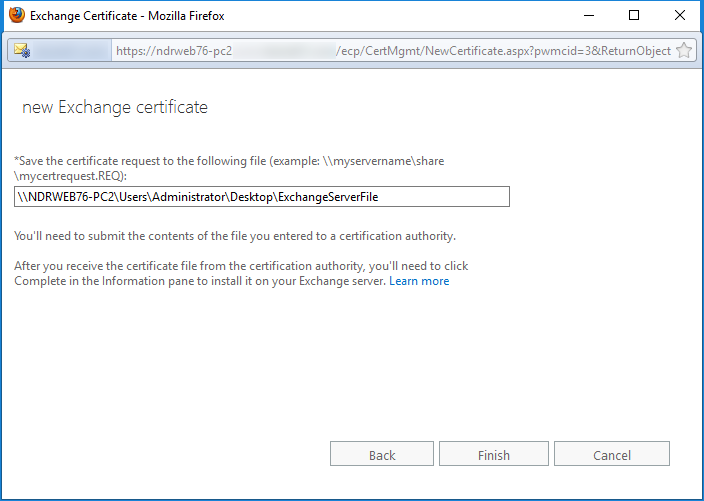
  10. The ‘Save the certificate request to the following file’ page requires a UNC path to save the requested file. Input the whole path and the filename for the certificate request. Finally, click Finish.
    Save the certificate request to the following file

Now, you can go and see that a new .req has been created at the UNC path you input. You can also check at Servers >> Certificates that the request is present in the certificate list and its status is ‘Pending request.’

You’ll require the request file while filling out the new certificate form on the certified vendor’s website. Once you receive the certificate from the vendor, you can then proceed to finalize the pending certificate request.

When migrating from one Exchange Server to another, it’s essential to transfer your SSL certificate to the new Exchange Server. Below, you’ll find a concise guide on how to accomplish this:

  1. Go to the Source Exchange Server and open the IIS (Internet Information Service), Manager.
  2. Expand the websites, select the default website, right-click, and select Properties.
  3. Go to Security tab, click Server certificate and export to the PFX format.
  4. Now go to the destination Exchange Server and follow the same procedure. But Here, you need to Import the PFX file. The SSL certificate will be enabled for the new server.

Though migrating SSL certificates and configuring other Exchange settings are easy, the actual Exchange migration is not that easy for administrators. When you migrate the Exchange mailbox data to another Exchange, you may face a lot of difficulties. That’s why you should try a professional tool to handle Exchange migration.

Kernel Migration for Exchange

Kernel Migration for Exchange stands as an advanced migration solution, designed for swift and secure transfer of unlimited Exchange mailbox data. It facilitates seamless migrations across all versions of Exchange Server and accommodates diverse deployment scenarios, whether on-premises, online, or hybrid migration This robust software boasts an array of powerful features, including a pre-migration analyzer, Exchange data filters, a scheduler, and more, all finely tuned to align with the specific migration needs of your organization. Additionally, it empowers you to effortlessly conduct batch migrations by utilizing CSV files and provides real-time monitoring for a comprehensive view of each migration process’s progress.

Kernel Migration for Exchange