Read time 8 minutes
When Exchange Server on-premises wants to deploy their mailboxes to Office 365, then cutover migration is a favorable migration method. It can work on Exchange Server 2003 and newer versions of Exchange and migrates mailboxes that are lesser than 2000.
The Migration Dashboard in Exchange Admin Center
When cutover migration is going on, then the Administrator can check the status of migration at the Exchange Admin Center on the migration dashboard. In the present article, we will check that you can perform an incremental sync after a cutover migration is complete and the simple process to follow it.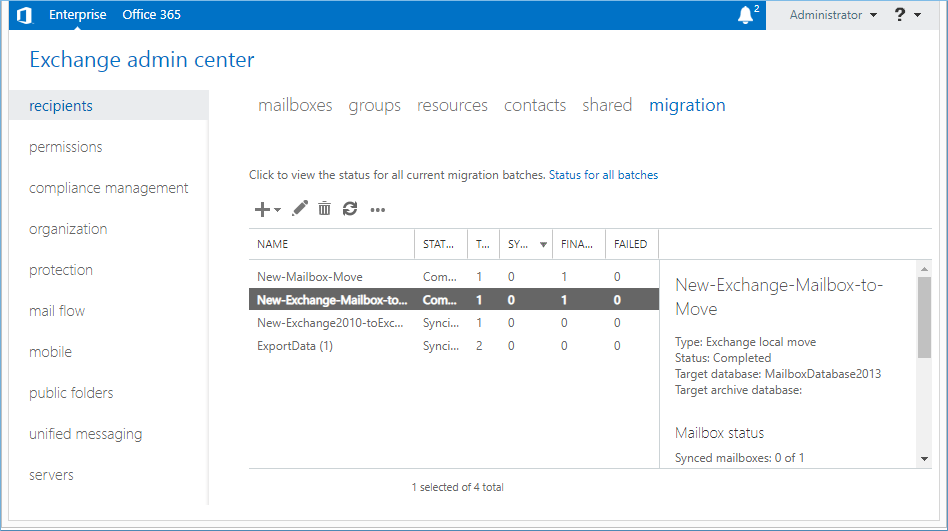
The Migration Dashboard enlists all the active migration batches and their statuses. When you see the Syncing status, it shows that the migration has started, and is in progress.
The Migration Dashboard helps you manage the migration batches uisng a set of cmdlets. When you select a migration batch, you can see the following details.
- Name – The name of the batch you have created.
- Status – The status of each batch. Initially, it shows ‘Syncing’ and after the migration is shown ‘Synced.’
- Total – Total number of mailboxes present in the batch.
- Synced – It shows a total number of mailboxes successfully migrated.
- Finalized – It shows a total number of mailboxes successfully migrated in total batches.
- Failed – It shows the number of mailboxes from all the batches where migration failed.
Note: If a commad is not available(it is is either dimmed or not displayed), it means that migration batch is in a status state that isn’t supported by it.
How to perform Incremental Sync?
There are different PowerShell cmdlets which you can use at various stages of migration batch to change the status.
- Stop-MigrationBatch cmdlet: When the batch has started, it shows its status as ‘Syncing.’ It means the mailboxes are being migrated. You can run the Stop-MigrationBatch cmdlet to stop the batch.
Stop-MigrationBatch -Identity “MigrationBatchName”
The batch will stop migrating the mailboxes.
- Start-MigrationBatch cmdlet: If the migration batch has stopped working and is showing ‘Stopped’ status, then you can use the Start-MigrationBatch cmdlet to start it again.
Start-MigrationBatch -Identity “MigrationBatchName”
The batch will start migrating the mailboxes again.
- Complete-MigrationBatch cmdlet: Use the Complete-MigrationBatch cmdlet as the last step of the batch migration. It is the final step of mailbox migration when all the mailboxes are securely migrated, and you want to finalize the whole process.
Complete-MigrationBatch -Identity “MigrationBatchName” -NotificationEmails “username@domainname.com”
The command is helpful to fulfill the following conditions –
To run a final incremental synchronization.
To point the user’s Outlook account to a new domain name.
To convert the source mailboxes to a mail-enabled user account. - Remove-MigrationBatch cmdlet: When the migration is complete, and you do not need the batch anymore, then use the Remove-MigrationBatch batch cmdlet.
Remove-MigrationBatch -Identity “MigrationBatchName”
Performing batch migration using the Cutover method requires multiple steps to fulfill and many times the batches are migrated incorrectly. Sometimes, when the batch migration is completed, its status shows ‘Synced with errors’. Here, you need to run the batch again and check if the mailboxes are migrated for the second time. These errors can further corrupt or delete the data and ruin the whole process. If you want to avoid threats like corruption or deletion, then use the Kernel Migration for Exchange. It is a migration tool which puts the safety of Office 365 mailboxes first and conducts a highly safe migration.
Kernel Migration for Exchange
Kernel Migration for Exchange accesses the Office 365 (on-premises, hosted, cloud) mailboxes from the source server and directly migrates them to destination Office 365 mailboxes. primarily, it is not just useful for Exchange migration but it is also useful for the Office 365 migration to-and-from any version. It maps the source and target mailboxes and provides numerous filtering options to optimize the migration procedure. Here is its complete procedure –
Step – 1. Run the Exchange Migration tool and click the option ‘Add Project’.
Step – 2. Provide a name to the project and click OK.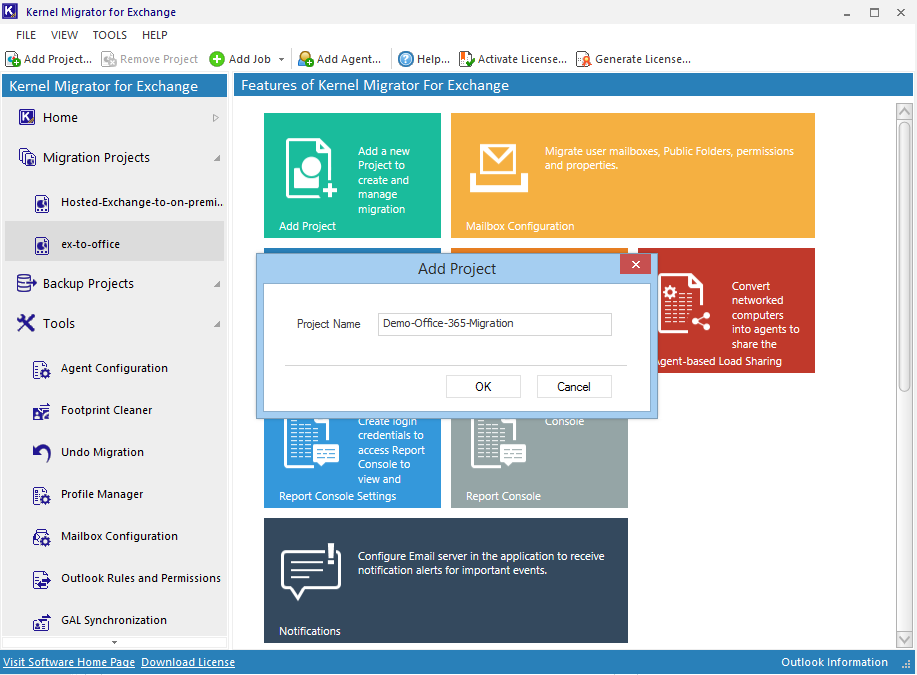
Step – 3. The software creates a project. Now, click the Add job for Mailbox for migration job.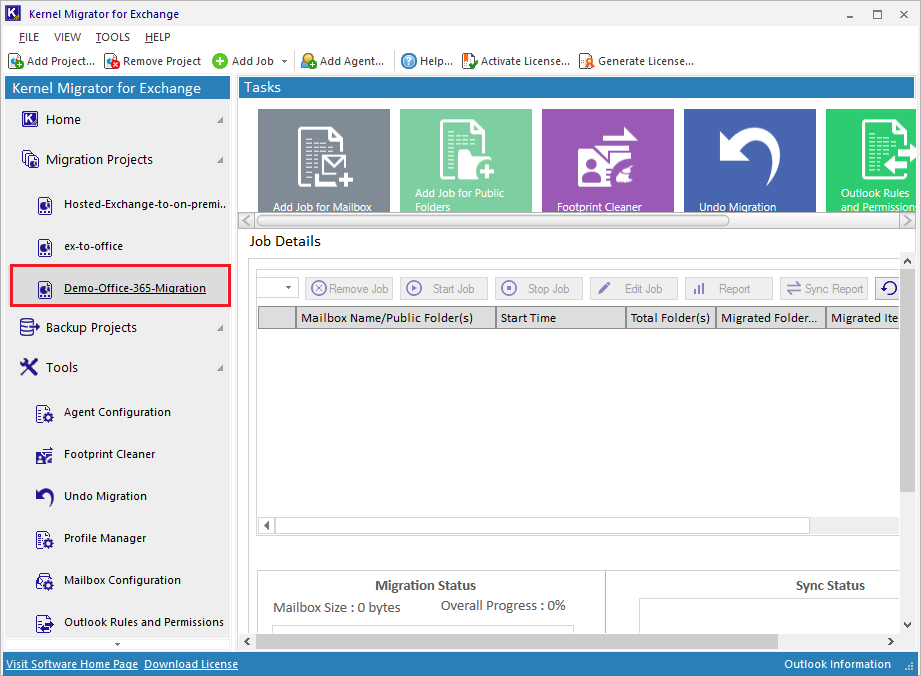
Step – 4. Select the project name from the drop down and input a new job name. Then click Next.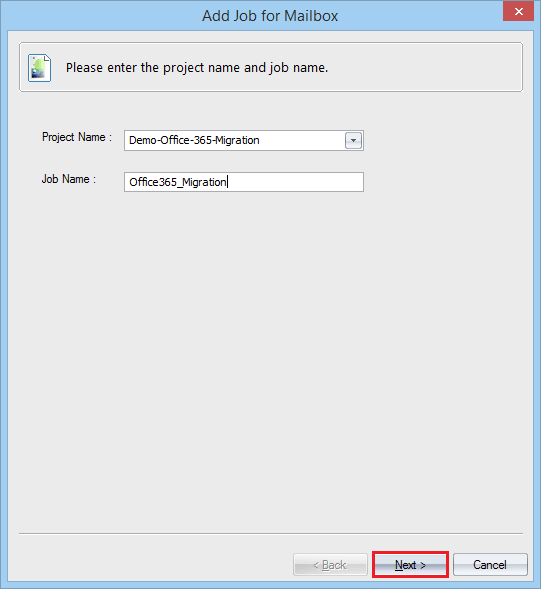
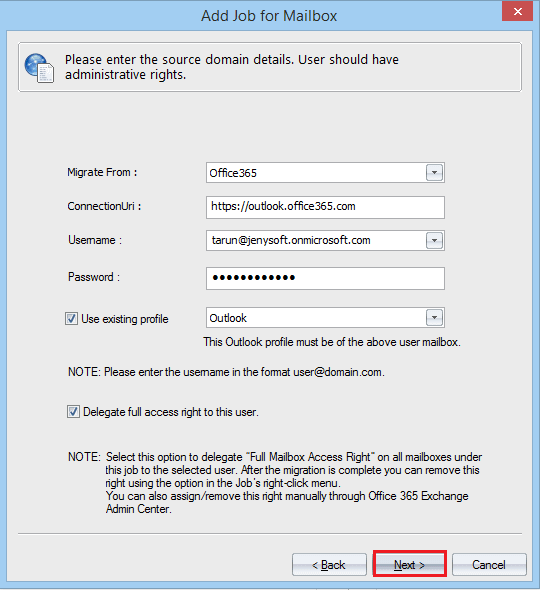
Step – 5. Select the Office 365 from the drop-down. Input the username, password. Select the existing profile and check the option to delegate full access right to this user. Then click Next.
Step – 6. Add the mailboxes to migrate. Then click Next.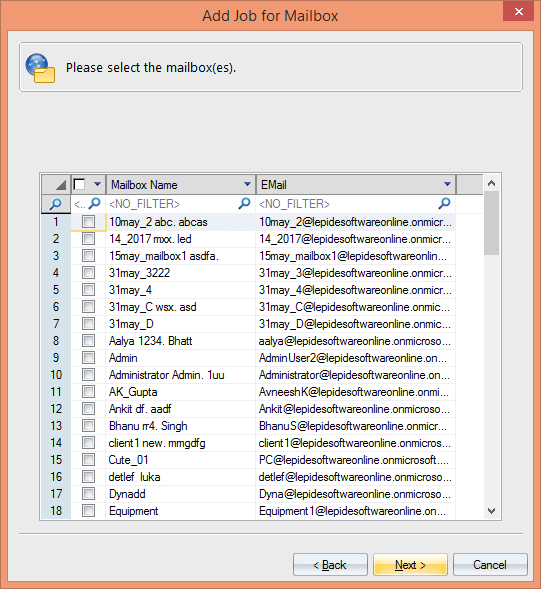
Step – 7. To select the target Office 365 account, select Office 365 from the drop down and input the username and password. Then click Next.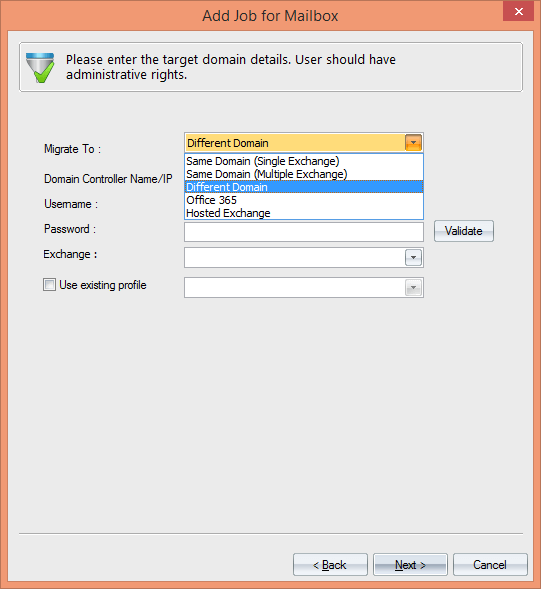
Step – 8. Apply the appropriate filters. Then click Next.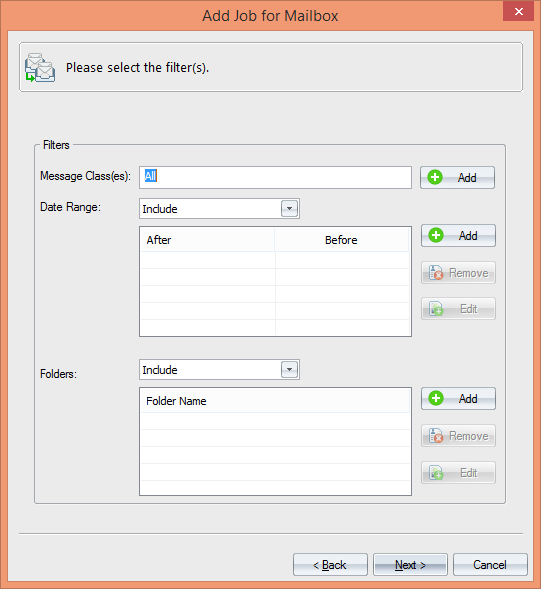
Step – 9. Map the source and target mailboxes from both Office 365 accounts, then click Next.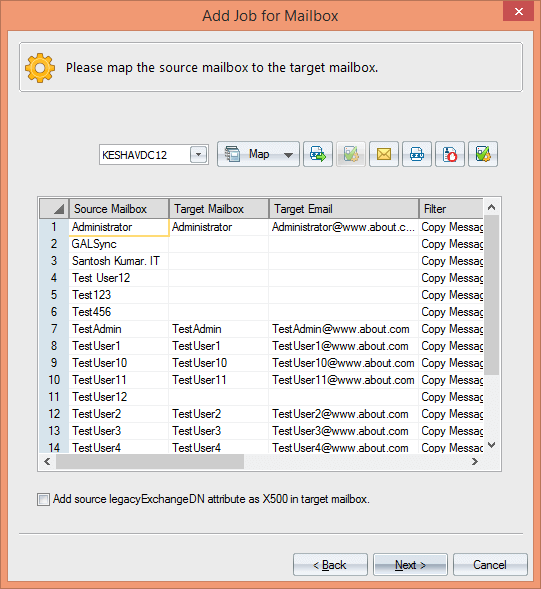
Step – 10. Provide a limit to the bad items during migration. Then click Next.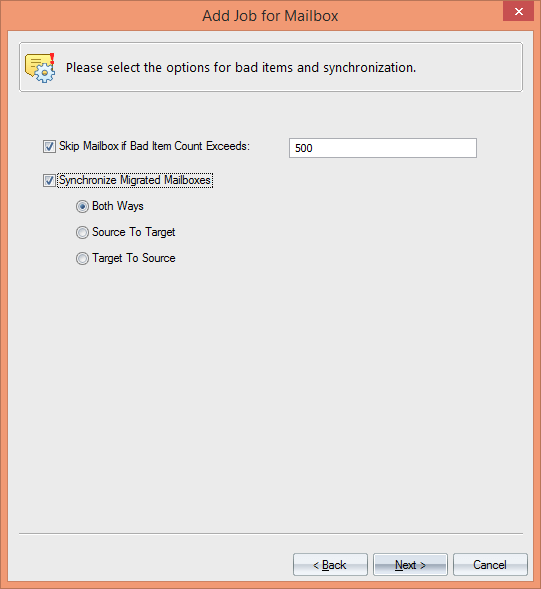
Step – 11. Input the multiple accounts to receive the notifications at multiple levels of migration. Then click Next.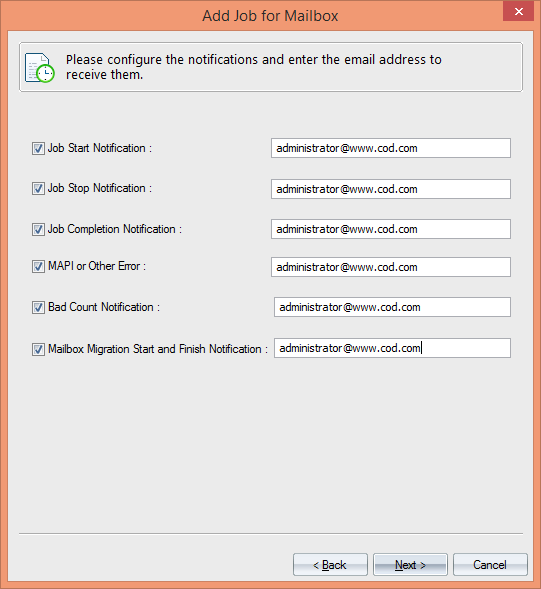
Step – 12. Choose to run the migration at a scheduled time. Then click Next.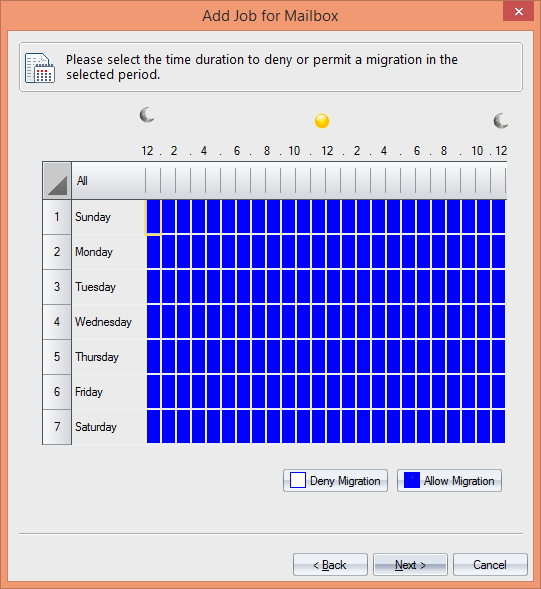
Step – 13. Input the scheduled time for migration and select the option for report console. Click Next.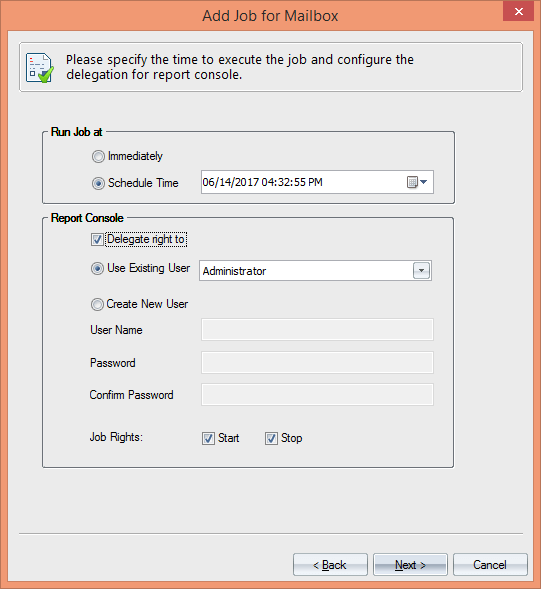
Step – 14. There will be a brief summary of the migration. Click Finish.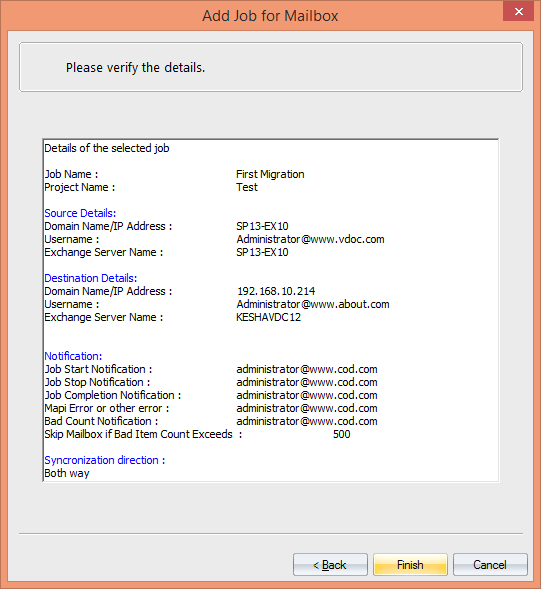
Step – 15. Now you can go to the job details page and see the status of each mailbox items for migration.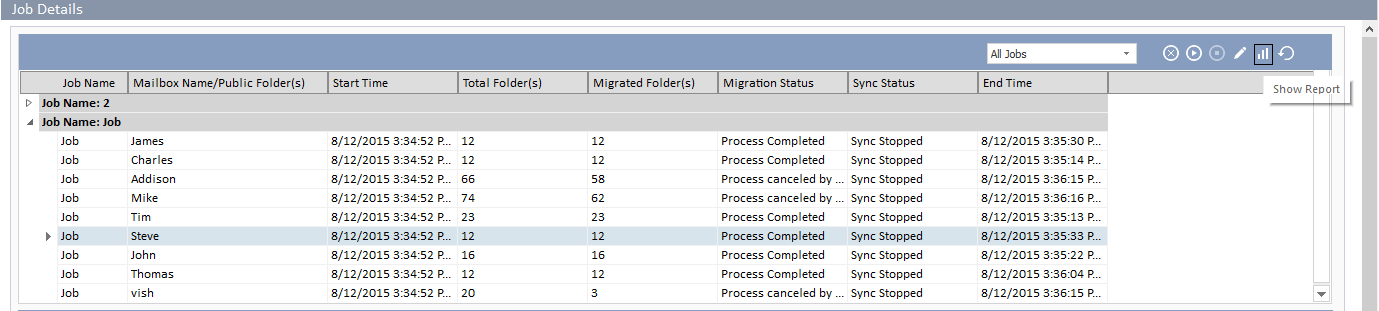
Conclusion
Kernel Migration for Exchange is a top-rated migration software that removes the need of any cutover migration and migrate complete mailbox with greater speed and accuracy. There are maximum chances that you will not require to run any incremental sync after using the software for Exchange to Office 365 migration.