Read time: 7 minutes
Exchange Server 2019 has brought a new set of features and several changes to its environment. The changes have contributed in making it safer and adaptable. Its main objective is to help businesses seeking to shift their focus from communication to collaboration. The overall price of maintaining an on-premises Exchange Server 2019 is also reduced substantially than other current versions. Instead of complex network rules and firewalls, the administration within the Exchange Server 2019 comes with the Client Access Rule.
The search features created for Exchange Online are now part of Exchange 2019, which helps in indexing larger files, provides easier management, and faster search. Outlook Web App is now known as ‘Outlook on the Web’ making Exchange available on all web browsers.
Potential requirements for Exchange Server 2019
- Operating systems supported by Exchange Server 2019
| Components | Supported Operating Systems |
|---|---|
| Mailbox and Edge Transport server roles. | Windows Server 2019 Standard or Datacenter. |
- Supported hardware configuration for Exchange Server 2019
| Disk Space | At least 30 gigabytes |
| Memory | Mailbox: 128 Gigabyte minimum.
Edge Transport: 64 Gigabyte minimum. |
| Processor | Intel processor that supports 64-bit architecture.
AMD processor that supports 64-bit architecture. |
| Paging file size | 25% of the installed memory |
| Screen resolution | 1024 x 768 pixel |
| File System | NTFS, ReFS |
- Supported email clients
Exchange 2019 support multiple email clients which include:
- Microsoft 365 Apps for the enterprise
- Outlook for Mac for Office 365,
- Outlook 2013
- Outlook 2016
- Outlook 2016 for Mac,
- Outlook 2019, and
- Outlook 2021
- Supported .NET frameworks
It is strongly recommended that the .NET framework be the latest one – either Framework 4.8.1, 4.8 or 4.7.2.
After ensuring the hardware components per the requirement for Exchange Server 2019, you can use the Microsoft Exchange Server Deployment Assistant. It is a free tool that provide customized checklists that will assist you in streamlining the installation.
Installing Exchange Server 2019
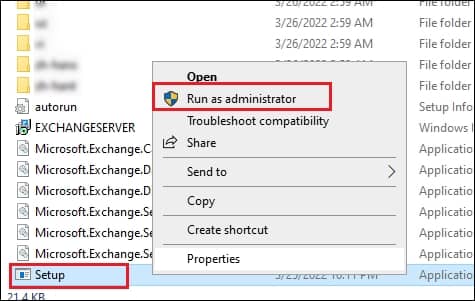
Once you’ve fulfilled all the requirements for moving to Exchange 2019, go to Microsoft’s Download Center page and download the Exchange Server 2019. After downloading the installation file, click on setup.exe to run as administrator, and the installation wizard will open.
- First, it will ask for updates. There will be two options – ‘Connect to the internet and check for updates’ and ‘Don’t check for updates right now.’ Choose an option and click Next.
- Check the relation information; click Next.
- Now, accept the license agreement and click Next.
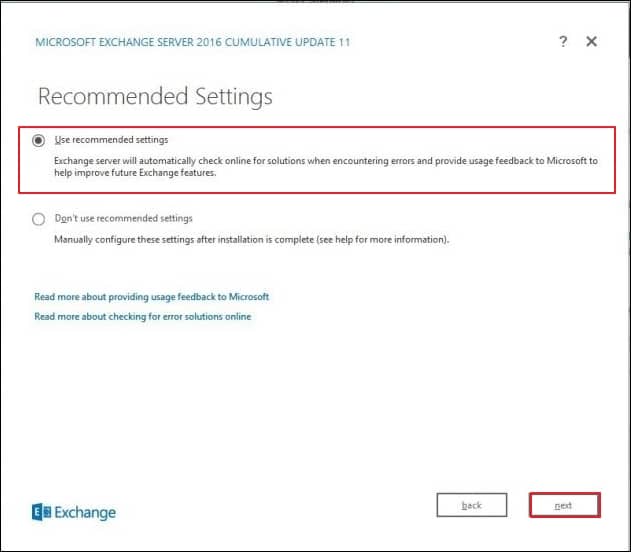
- On the Recommended Settings page, there are two options – ‘Use recommended settings’ and ‘Don’t use recommended settings.’ If you choose to use recommended settings, then Exchange Server will automatically check for solutions whenever it meets an error. Click Next.
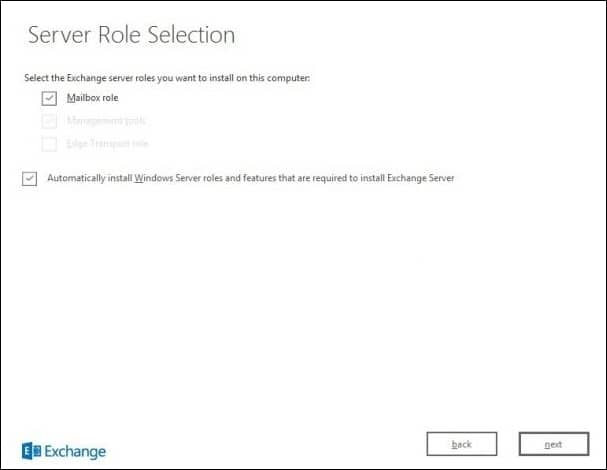
- On the Server Role Selection page, choose Mailbox Role and click Next.
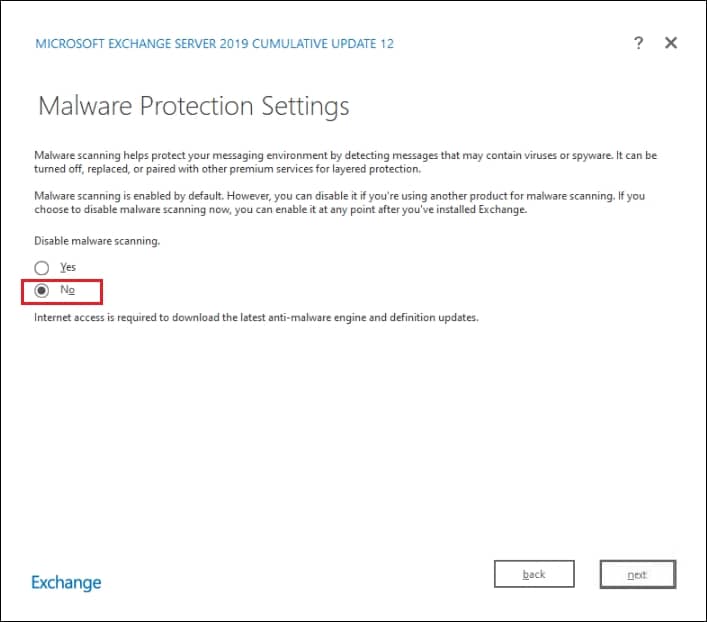
- The Malware Protection Settings shows some useful information that will assist you in fighting malware and other threats. Choose Yes or No and click Next.
- There will be a quick readiness check, and later you can click Install to install server files.
- After completion of the installation of setup, you can click Finish and restart the computer.
Migrate mailboxes from 2013 to 2019
After installing Exchange 2019, you have two servers in your environment, and your next requirement is to migrate from the older 2013 to the new 2019. You can complete the process in Exchange Admin Center by migrating the mailboxes-
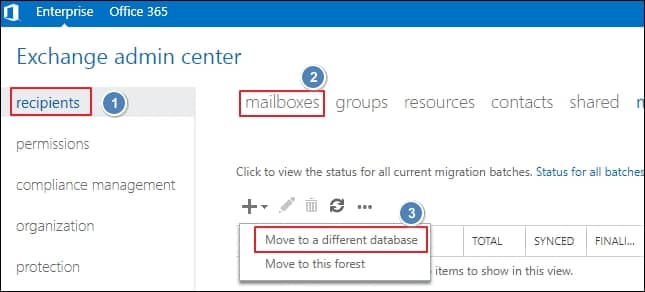
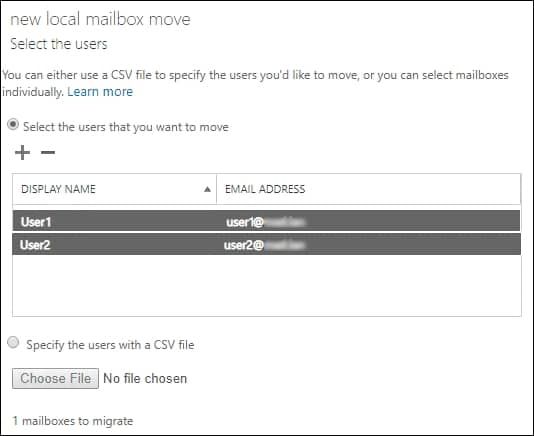
- Log in to Exchange Admin Center and go to recipients, then mailboxes. Select the mailboxes that you need to migrate to the new server.
- Click the + option and select ‘move to a different database.’
- Add more mailboxes for migration in the next window and click Next.
- Assign a new name to the batch migration and choose the database in which you want to migrate. Choose the database from Exchange Server 2019. You can opt if you want to migrate the primary mailbox, public folder, or archive mailbox. Click Next.
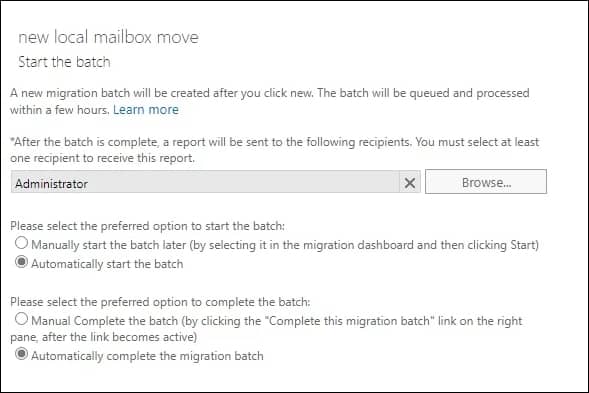
- Add a user who will receive notifications of migration stages. Click Next.
- Choose either to start the batch instantly or after a scheduled time. It gives you control to run the batch later when the when the Exchange Server has a lesser load.
- The final step of creating the migration batch is to either automatically complete the migration batch or manually complete it by clicking the ‘complete this migration batch’ link.
- As soon as a new batch is created, it will appear in the migration category. You can start it when you feel comfortable with the migration.
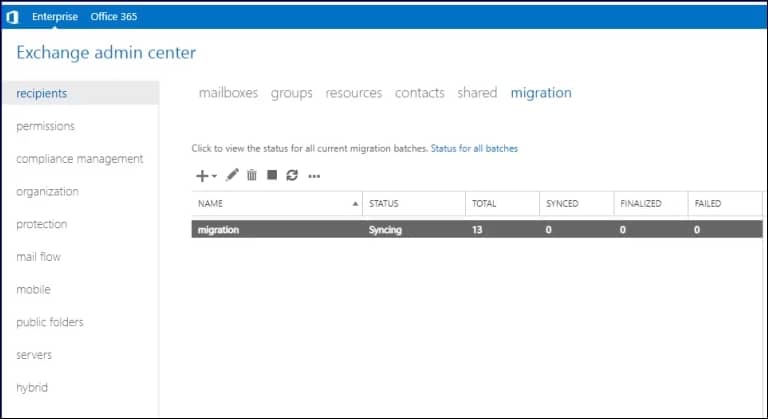
There will be a small delay in synchronization between the mailboxes as Active Directory replication may connect with their mailboxes depending on the location of the Exchange Server. After Active Directory syncs with the account completely, then you can further move mailbox in Exchange 2019 from 2013 again.
Conclusion
The manual migration from Exchange Server 2013 to 2019 may take much time to move large mailboxes and databases. Apart from the Exchange Migration methods, you can also choose from the professional software available to migrate mailboxes. Kernel Migration for Exchange is an efficient Exchange migration tool that can migrate mailboxes between any version of Exchange Server. You can apply filters and schedule the migration as per your convenience.
It also includes pre-migration analysis that will inform you about the possible outcomes of the migration procedure. It also provides a complete migration report after successful completion.
Frequently Asked Questions
What are the requirements for migrating to Exchange 2019?
When you plan to migrate from older versions of Exchange Server to Exchange 2019, there are certain hardware and software requirements that you need to follow. It includes but not limited to:
- Get a disk space of 30GB minimum.
- Need screen resolution of 1024 x 768 pixels.
- 25% of the installed memory for paging file size.
- Intel processor with 64-bit architecture.
- Latest .NET framework (4.8.1, 4.8, or 4.7.2).
What are the possible concerns if we use Exchange 2013?
Since Microsoft has ended the support for Exchange Server 2013, there will be no new feature update or bug fixes from their end. This means if due to any reason, you encounter data loss, corruption, or any other issue, one should expect no support from Microsoft’s end. This is why it’s important to move to update version of Exchange for receiving continuous support and efficiency.
What’s new in the upgraded Exchange 2019 from Exchange 2013?
There are several differences between Exchange Server 2013 and 2019. Some of them are listed below:
- The number of server roles is decreased to two: Mailbox and Edge Transport Role.
- Unified Messaging that was available in 2013 is removed from 2019.
- MAPI over HTTP is the new protocol used by Outlook to interact with Exchange.
- Allows assigning selective access to users for Exchange admin center and PowerShell.