Read time 4 minutes
Exchange Administrators always try to optimize the Exchange infrastructure. It helps them keep Exchange in good health and also to avoid unnecessary expenditure on infrastructure. For this goal, a routine activity followed by admins is to move mailbox in Exchange database. This move not only helps server to be at its 100% but also helps to reduce the Exchange database size.
You can move the mailboxes from the Exchange Admin Center (EAC). Alternatively, if you are comfortable with command line tools, you can also use the Exchange Management Shell (EMS) for the move.
How to Move Exchange Mailbox to a Different Database
Two methods are there to move Exchange mailboxes. The first one is using EAC, and the second one is using EMS. Both the processes are quite simple, and an administrator can complete them in minimum time.
Method 1: Using Exchange Admin Center
The EAC provides a centralized platform to manage all of your Exchange mailboxes. You can use the following steps to quickly move mailboxes to a different database:
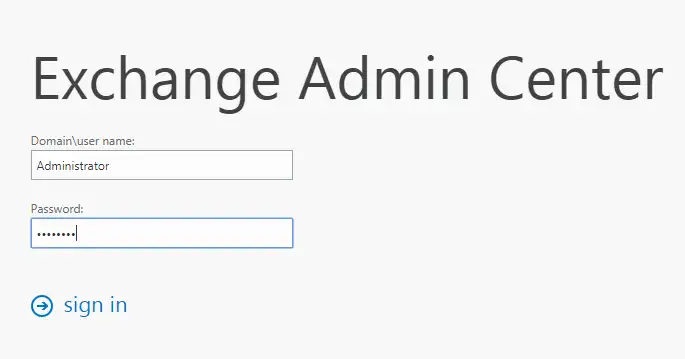
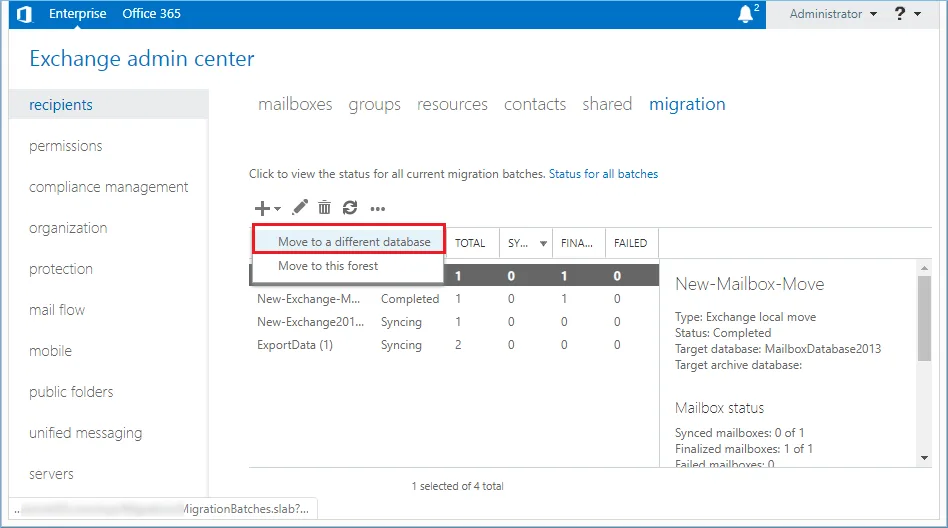
- To move the mailbox using Exchange admin center, first log in to EAC.
- Under Recipients > mailboxes, you can see all the mailboxes. To move them, click on the Migration tab.
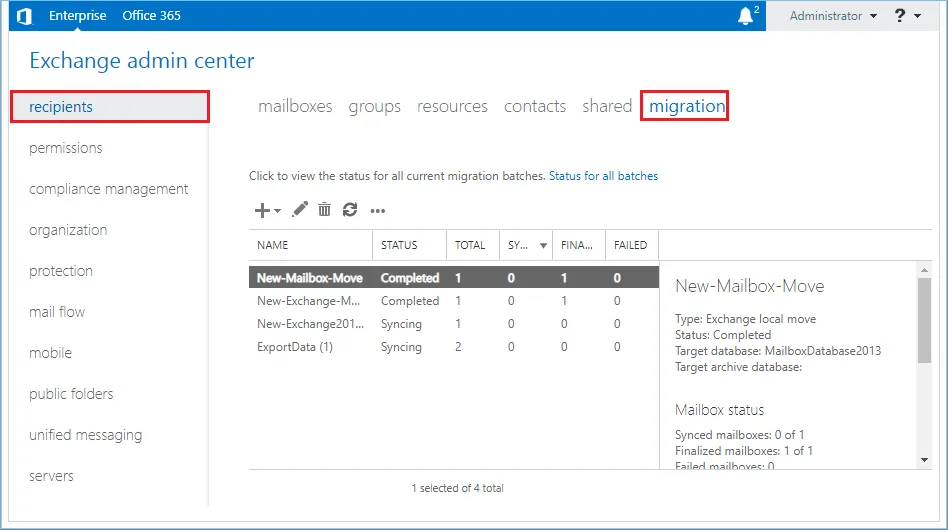
- In the migration, click the (+) icon and select the option Move to a different Database.
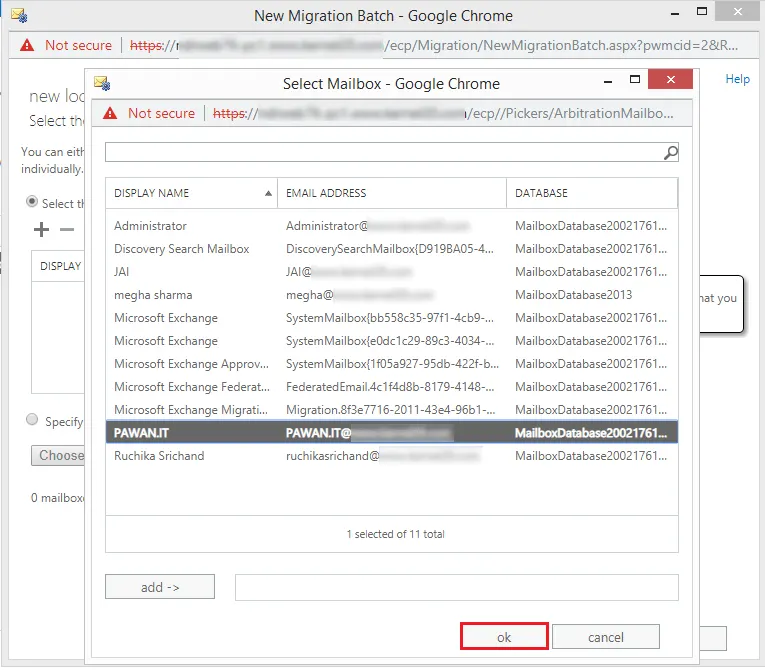
- Select the mailbox(es) which you want to move. Then click OK.
- Select the mailbox and click Next.
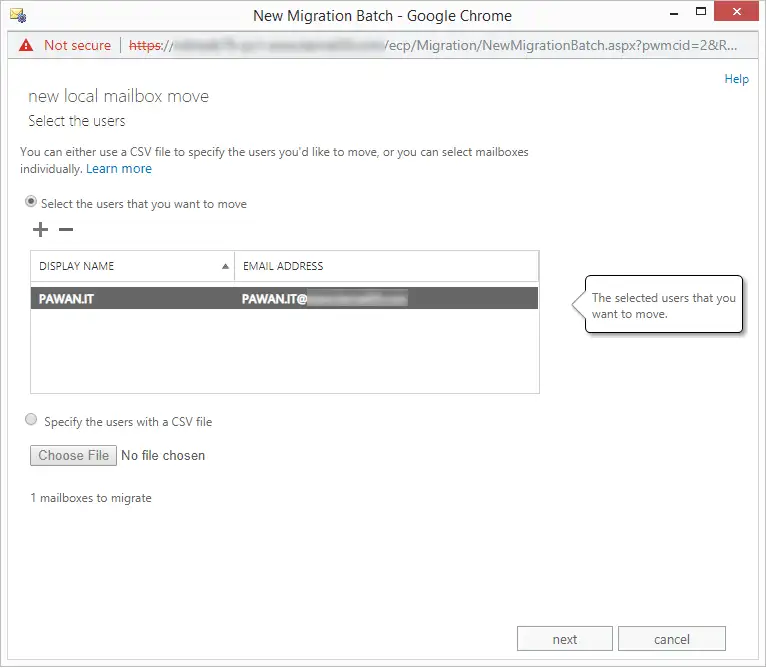 Note: You can also choose to use a CSV file to add mailboxes for migration.
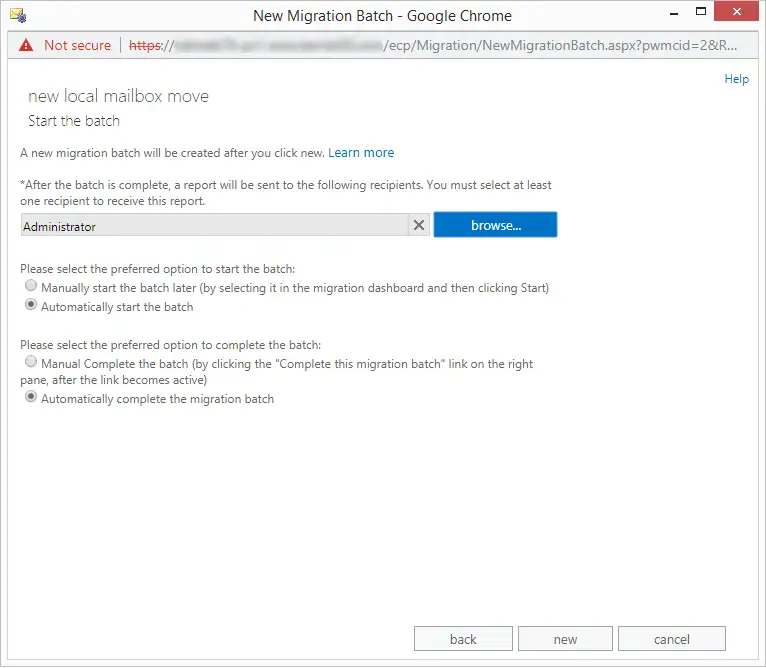
 - Now, you need to create a new batch. Provide a name to the batch and select the target database.
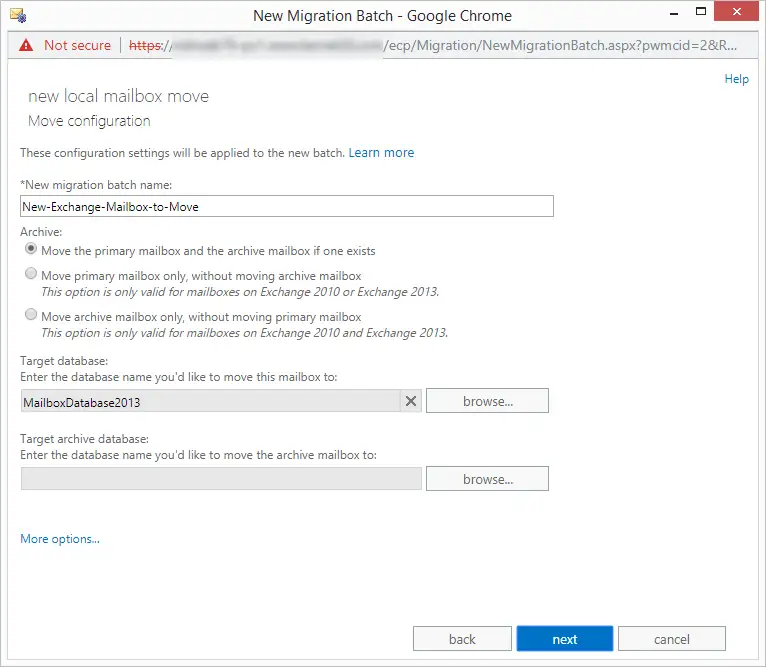 Note: If you have an archive mailbox in your account, then you can choose among various options like Move primary mailbox or archive mailbox if one exists, Move primary mailbox only, or Move archive mailbox only.
 - Select the recipient account that will get the report of the migration. You can choose more than one account. Here, you can also choose to start the migration automatically or manually.
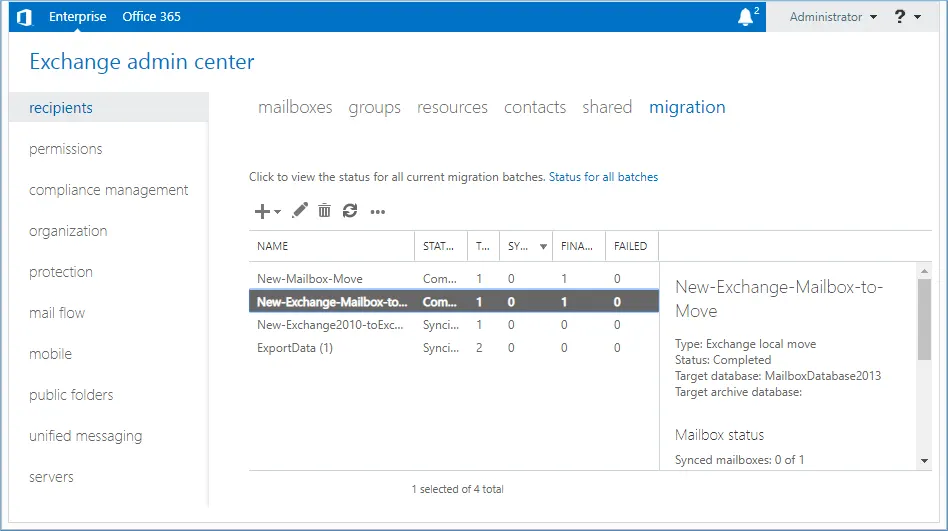
- As soon as the migration begins, you can see it listed in the migration category. And to check the migration status, you can click View details option.
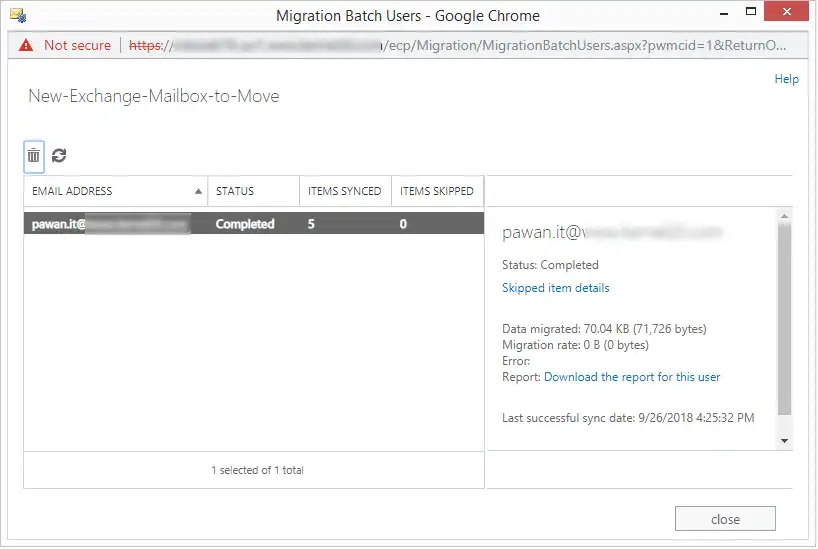
- After clicking the View Details option, you will see the status of migration; also, you can download the report for the user.
- After successful migration, the status of the migration batch will change to Completed.
Method 2: Using Exchange Management Shell (EMS)
If executing commands don’t scare you, then the fastest method to move a mailbox to a different database is to use the New-MoveRequest cmdlet in the EMS. This cmdlet allows you to move any mailbox (primary or archive) to your selected database.
The command to move mailbox is:
Replace the the “user_mailbox” with the user email address and “db_name” with the target database name. The bad item limit defines how many damaged items can be skipped without failing the migration. So, make sure not to put a high value for it. The higher the value, the more data will be lost in the migration. But why take the risk when you can do the migration without data loss.
For complete mailbox migration (single or multiple) without worrying about the skipped data items and to automate bulk mailbox migration for large data migration, you can use a professional Exchange migration tool. Kernel Migrator for Exchange is a specialized tool that is developed to move mailboxes between any Exchange version. You can use the tool to move the mailboxes to any database (on-premises or online).
Conclusion
The Exchange Admin Center and the Exchange Management Shell both provide a straightforward means to move a mailbox to the Exchange database. But these native solutions may become unreliable when you need to move more than 100 mailboxes together, or your mailboxes are damaged. The safest and quickest way to take your mailboxes to any Exchange Server database is to use the Kernel Migrator for Exchange tool. The tool even allows to move mailboxes from hosted Exchange to Office 365.
Frequently Asked Questions
Ans. When moving through EAC, you get a dedicated option to move archive mailbox only. And in EMS, you can use the -ArchiveOnly switch with the New-MoveRequest cmdlet.
Ans. Yes. The modern Exchange Server version doesn’t block users from accessing emails during migration. However, I personally suggest you not send or receive an email during the move, as the email might not move to the new database.
Ans. The server starts updating the Active Directory and other critical components. You can see visible changes, like getting a prompt to restart your Outlook or other apps. It creates a massive number of logs. Based on your mailbox configuration, the server may also start clearing the database.