Read time: 11 minutes
The process of migrating emails from one host to another is a challenging task. It’s not just moving your emails, but your contacts and calendar events too. There are a set of standard steps followed by everyone in the industry to migrate emails from one host to another. You start with picking the best email environment as per your needs, then create an account, point the DNS to your new account, and finally migrate emails.
Whether you own a large enterprise with multiple employees or a small business unit, the steps we will discuss in the upcoming section will help you with smooth email migration. Furthermore, we will see a specialized email migration tool to automate the complete process. But before everything else, let’s see a few reasons why users usually move from one email host to another.
Reasons to migrate emails from one host to another
The common triggers that compel users to switch to the new email service provider are:
- Company Requirement: Events like business mergers or the need for an email service provider that offers a robust compliance framework are among the top reasons for changing email provider.
- Enhanced Security: The rising cyber threats can make your shift to a safer option that uses advanced security mechanisms like multi-factor authentication and more.
- Modern Features: Everyone wants to try the latest on the market. If your current email doesn’t offer advanced features like AI integration, then migrating to a new email is an obvious next step.
- Enhanced Collaboration: When your business grows, you need a platform like Google Workspace or Microsoft Office 365 that provides several collaboration features, along with 99.9% server availability.
- Storage Requirement: Small-tier providers can only handle a few GB of mailbox size. If your business needs large storage, you must shift to an email provider that can fulfill your demands.
- Cost Optimization: Money is the number one factor in decision-making. Many users or businesses also move if an email provider offers the same or better services as their current email provider at lower cost.
The Pre-Migration Checklist
Moving data, especially emails, is a high-risk job. Therefore, to make sure it’s a success, administrators always perform these tasks before starting the data transfer.
- Email Backup: This is the first and most important thing to do. Make sure all your crucial emails, attachments, contacts, etc. are safely copied to a secure place. For quick and complete backup, you can use the advanced Kernel IMAP Backup tool. It allows one-click backup of multiple mailboxes simultaneously.
- Data Cleaning: You must check what data you are migrating. Analyze the complete mailbox, remove any obsolete data items to save storage and time.
- Communicate to Team: Don’t surprise your team with a random email not found error. Inform them in advance about the date and time of migrating emails from one host to another.
Admin approach to migrate emails from one host to another
To migrate your emails from one source to another, you can use the following steps:
Step 1: Create an email account with the new host
- First, choose a new email hosting provider and then purchase its account. Ensure that your selected provider supports the IMAP protocol.
- After that, set up your email address for a new hosting provider.
- Make sure you don’t use the duplicate password in your new email address.
Finally, your new email address is created successfully.
Note: These credentials must be stored securely, as they will be required while logging into the browser or setting emails in the email client.
Step 2: Re-point your DNS (Domain Name Service)
- After setting up your account with the new provider, now it’s time to update your email-related DNS records with the new provider.
- Before performing this step, you must know your DNS host. If you don’t know about it, log in to your domain registrar and find the domain’s nameservers.
- After that, check your existing DNS record by logging into the specific email hosting provider.
- Now, identify all the records and update them with the details of the new service provider where it is required. Like, you may need to change the MX records or CNAME records. This process may take some time to complete. Therefore, you need to wait for a while.
- Once you have done the above steps, you must update the required DNS records. For the new records, refer to the official website of your new email service provider. After the successful DNS update, you can easily send emails from your new account to any email address.
Step 3: Configure the email account on your premises
Now you set up your new email account on your current device. This process usually involves an email client such as Thunderbird or Apple Mail. While performing this method, you must be careful, as a single mistake can cause data loss. To use this method, follow the steps that are listed below:
- Input the login credentials that you have just created for the new mail server.
- You must ensure that the correct mail servers are used, i.e., IMAP and SMTP. If you are switching to a prominent email provider like Gmail for Business, it automatically detects the mail servers. If you do not know the name of your new mail server, you can see its Web host Documentation or contact their support team.
- Once your account has been set up, the emails can be sent or received easily.
How to move emails from your old host to the new one?
After updating the MX records, you will receive all the new emails. But to get your old emails on the new server, you have to migrate them separately. It is an optional task that depends on you whether you want to move your old emails into the new hosting provider or not. Some providers include semi-automated tools to move mail from one host to another. If your service provider doesn’t offer this, you don’t need to worry, as there are two ways (manual and automated tool) to migrate emails from one host to another. Let’s see both one by one:
Method 1: Manual method to move emails
For this, we will use an email client like Outlook, Thunderbird, etc. For the illustration purposes, I will perform the steps using the Outlook and move emails between Gmail and Office 365 account.
Step 1: Open Outlook, click File tab > Add Account.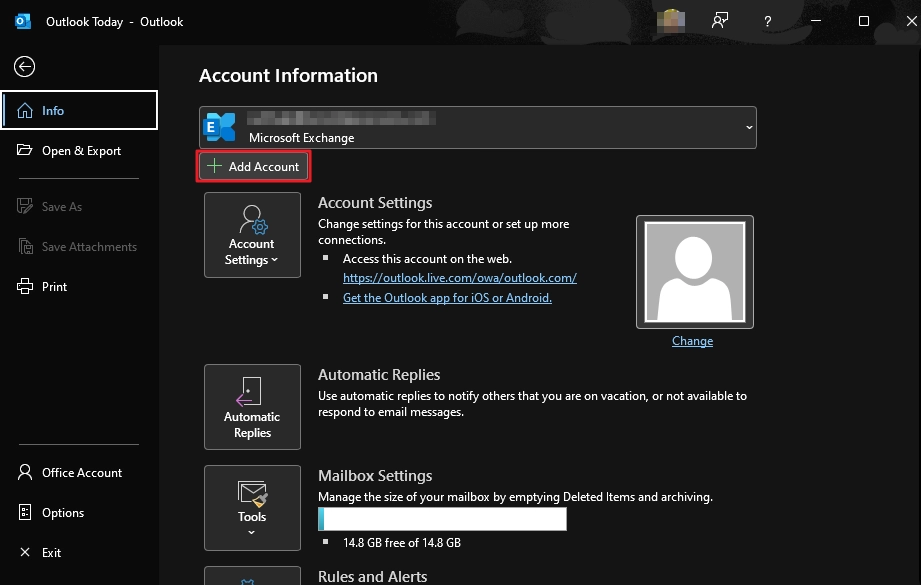
Step 2: Enter your Gmail address and click Connect.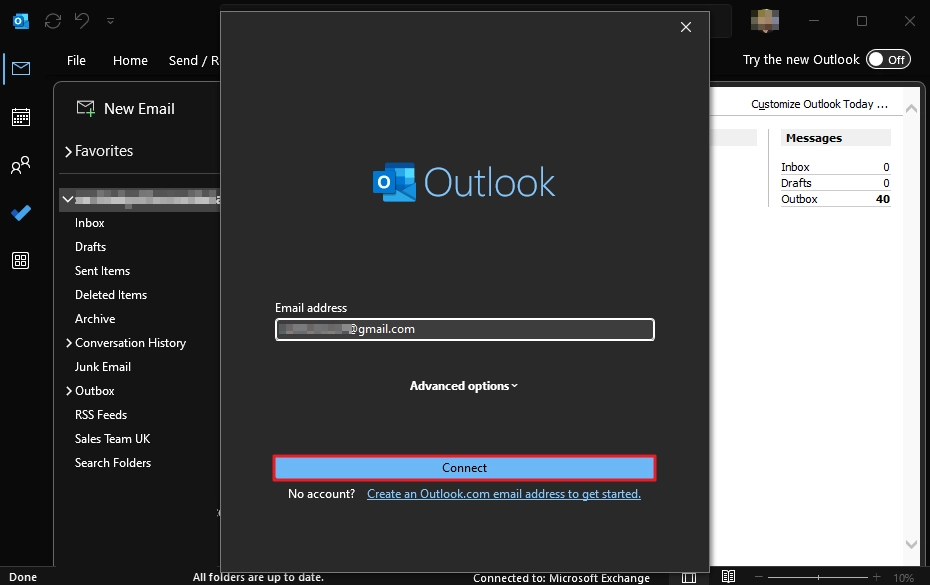
Step 3: Enter your Gmail password and continue with the setup until the account is added.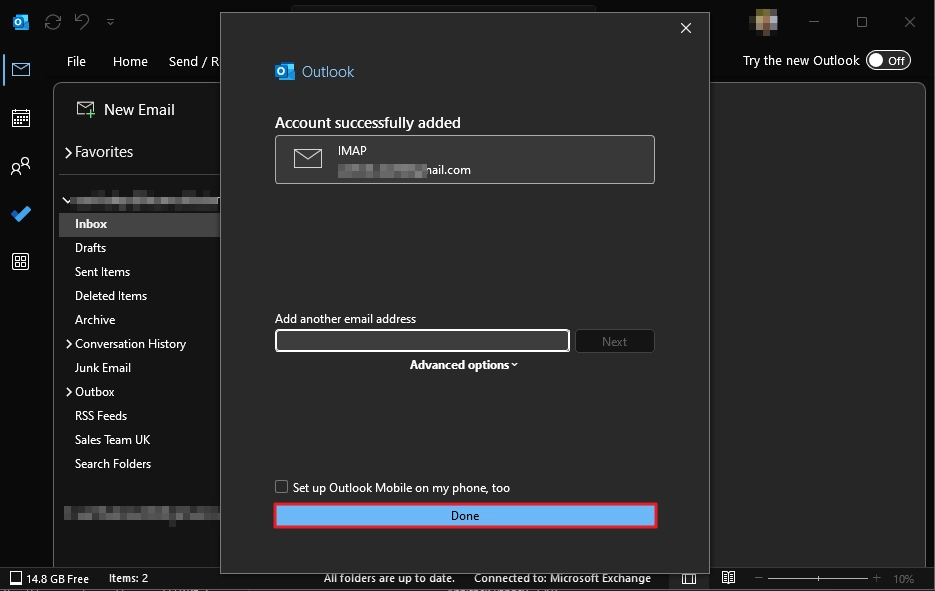
Step 4: Again, click File > Add Account and enter the Microsoft account username. Perform the process to add the Office 365 account.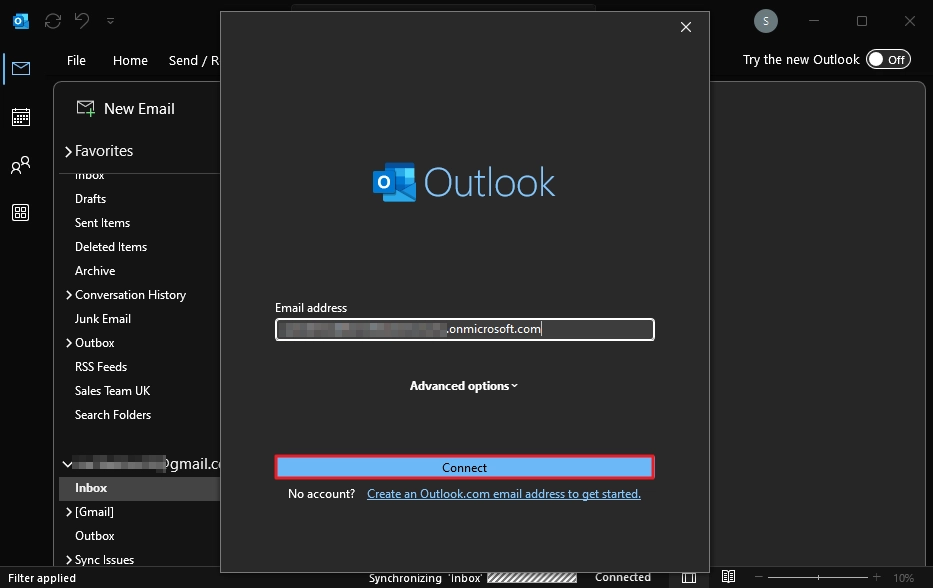
Step 5: When both the accounts are added, go to the source email folder, right-click the folder you want to move and select Copy Folder option.
Step 6: Choose the destination folder and click OK to start moving the emails.
Note: You can also select individual emails and copy them to any Office 365 account folder by doing a right-click on the message and selecting Move > Copy to Folder. Then, choose the folder to copy the message.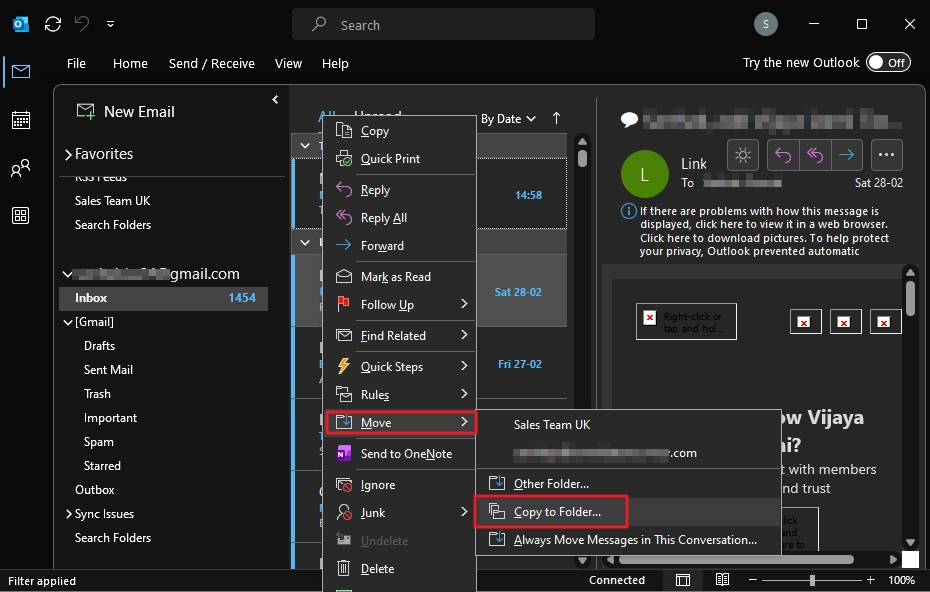
Common issues and solutions of the manual method:
- Folder structure changed: You have to manually create the folder structure and copy/paste the emails accordingly.
- Login errors in Gmail: If you use 2 factor authentication, you have to create app password for Gmail.
- Missing emails: Internet connection issues may skip a few emails, and finding the skipped email is a time-taking task. Don’t copy multiple folders at the same time. Move one at a time. Then verify and move another.
Method 2: Automated tool to move emails between any IMAP email server
To move emails while retaining the original folder structure and skipping the manual copy/pasting job, you should use a professional IMAP migration tool. Kernel Migration for IMAP is a specially designed tool to carry out email transfers between any two endpoints. It allows you to securely connect your source and destination account and initiate a complete mailbox transfer, including emails (with attachments), contacts, calendar, all your folders, etc.
Step to migrate emails from one host to another using the tool are:
Step 1: Download and open the tool. Select the IMAP to IMAP option.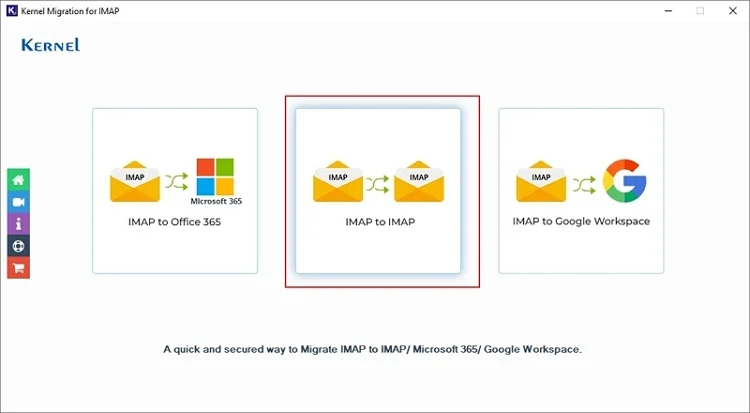
Step 2: Add the source IMAP account.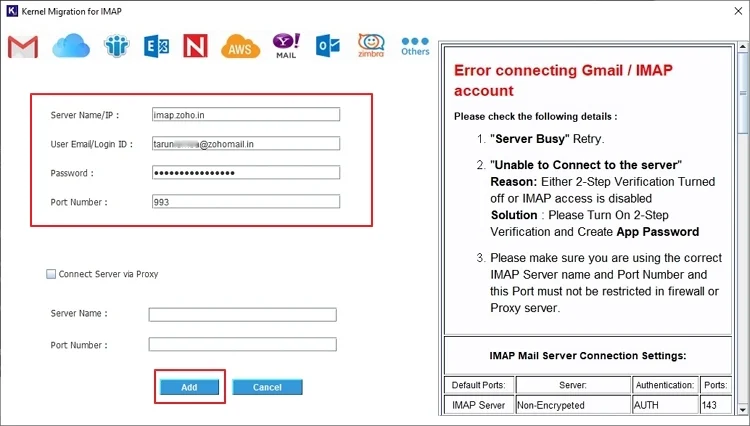
Step 3: After adding the source, click Add in the Add Destination section and add destination account.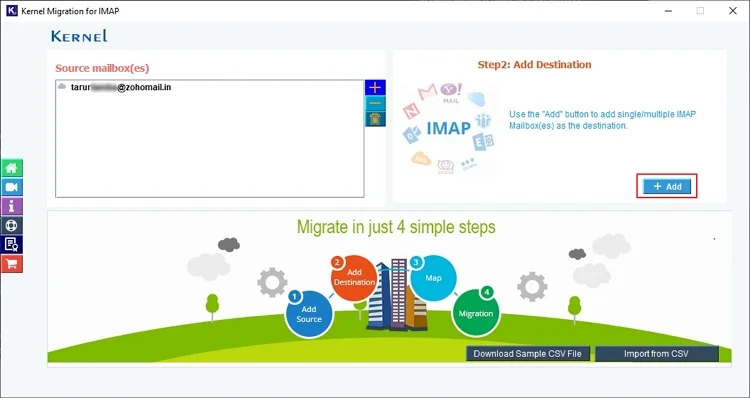
Step 4: Map the source and destination mailboxes.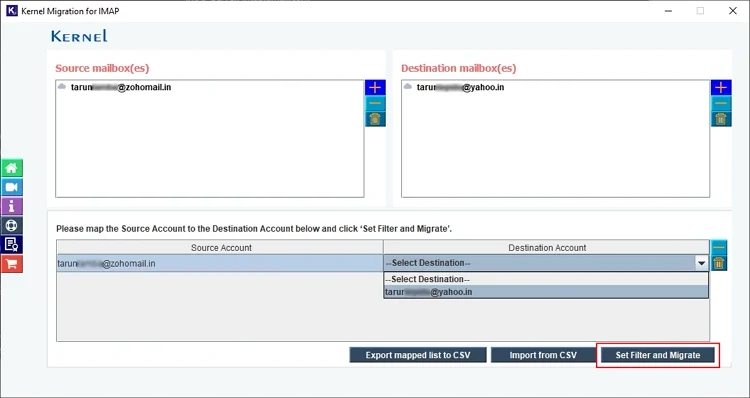
Step 5: Apply filters for selective migration and click Start Migration to begin email transfer.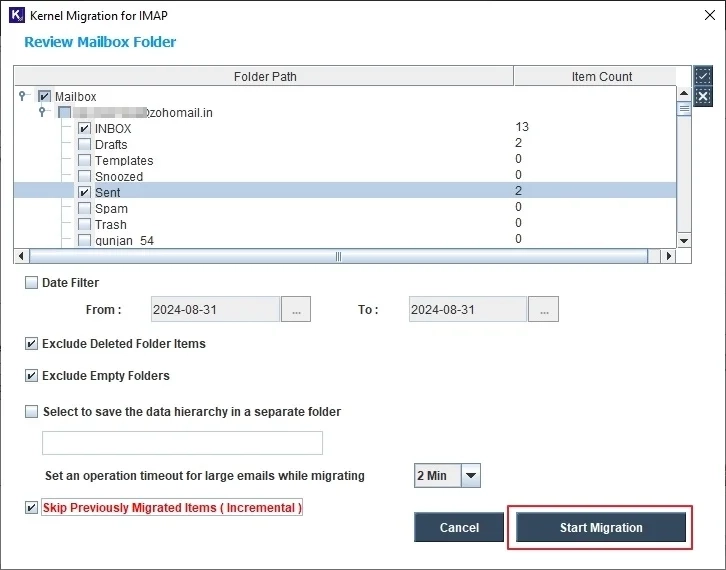
Wrapping up
This blog has discussed a step-by-step procedure to migrate emails from one host to another. From account creation to updating MX records, we discussed all critical tasks. Furthermore, if you want to move your old emails, use the manual method or the automated IMAP migration tool as per your need. Whatever approach you take, make sure to create a complete backup of all your emails before starting the email migration.
Frequently Asked Questions
A. Not necessarily. If you use the IMAP protocol for data transfer, your emails will be available at both locations, source and destinations. Moreover, even if you move emails from a POP account, make sure to tick the “keep a copy on the server option” (if present) to prevent deletion of emails.
A. There is no fixed time. Large mailboxes will take more time in comparison to small mailboxes. It all depends on your data size and bandwidth limitations.
A. When you change the MX record, you tell the DNS server to send the emails to a new server and not the old one. However, when you enable auto-forwarding, emails are still received in your old account and then forwarded to your new email account.