Estimated reading time: 7 minutes
DreamHost is a dedicated hosting platform, and if you have multiple websites hosted on DreamHost, then using their built-in email service seems like a good option. I used to think so too when I was using DreamHost email hosting. In the beginning, everything was fine, but as time passed, I began to see DreamHost limitations. It lacks several crucial features that are needed for robust and secure email communication.
Therefore, I decided to migrate Dreamhost to Office 365. Microsoft’s Exchange Server is a dedicated email service provider. It has everything that any entrepreneur or organization will need for secure emailing, while meeting other criteria like data backup and compliance. Moving forward in this blog, I will share with you the techniques I used to move my emails from DreamHost to Office 365 safely
Reasons to Migrate DreamHost to Office 365
DreamHost is fine, but the features Office 365 is offering are just too hard to say no to.
Security
Big or small, single or multiple. Security is one aspect that you just can’t negotiate on. Office 365 got you covered on that. MFA, DLP, and several other security features give you more confidence in Office 365.
Reliability
Microsoft offers high-availability email services. After the DreamHost to Office 365 email migration, you will get 99.9% uptime. So, forget about any failed email delivery. The Exchange Online server is as reliable as you want it to be.
User Interface
You may think more features mean more complexity. But no, Office 365 outshines DreamHost in the ease of access. Office 365 provides a user-friendly interface to allow users to do more with their emails with more comfort.
Office 365 Suite
DreamHost webmail to Office 365 migration gives you access to several Microsoft apps like Word, Planner, Teams, OneDrive, SharePoint, etc. Office 365 gives you the capability to do so more than just email.
Compliance
Microsoft has robust policies to implement and follow all the needed guidelines for data compliance. You also get more mailbox storage and archive storage for keeping your data available whenever it’s required.
Built for Enterprises
Unlike DreamHost, Office 365 is designed for large-scale enterprises. You can manage thousands of user’s mailboxes without a hassle. It provides the perfect environment for team’s collaboration and growth in your business.
Migrate DreamHost to Office 365
To migrate DreamHost to Microsoft 365 mailbox, you have to use the Microsoft 365 Admin Center. Steps to do it are:
Step 1: Get the DreamHost IMAP details (required for connection in Office 365).
Step 2: Create a list of all the users that you need to migrate.
Step 3: Buy an Office 365 plan to support your requirement of migration
Step 4: Create users in your Office 365 account.
Step 4: Go to Office 365 Admin Center and create a migration endpoint.
Step 5: Create a migration batch and follow the instructions to begin the migration.
Step 6: Update the MX records to redirect the emails to new Office 365 mailbox.
Step 7: Remove the batch after a successful DreamHost mailbox to O365 migration.
Manually transferring your emails is not something anyone can do. You must be technically sound to understand the working of IMAP protocols and should be able to configure and remove migration batches in Office 365. If you are not confident in doing so, then I suggest you take help from a professional IMAP migration tool.
Easy Method to Migrate DreamHost to Office 365
To simplify the migration, use a third-party tool like Kernel IMAP to Office 365 migration. This IMAP to Office 365 migration tool allows you to migrate bulk mailboxes with just a few clicks. You can directly transfer DreamHost to Microsoft 365 mailbox (primary, archive, shared).
In addition to IMAP to O365, the tool also helps users to perform IMAP to IMAP email migration. I have personally used the tool to move my emails. It was an easy, quick, and error-free email migration.
Top features of the Kernel IMAP to Office 365 migration tool:
- Migrate mailbox context from any IMAP servers to all Microsoft 365 plans.
- Migrate IMAP emails to shared mailbox or a public folder.
- User-controlled email migration with built-in filters.
- Incremental migration to avoid duplicate data.
- Migrate emails with original metadata and message structure.
Steps for DreamHost to Microsoft 365 email migration:
Step 1: Download, install, and open the IMAP to Office 365 migration tool.
Step 2: Click the Add button in the Add Source section. When asked, select the Basic Authentication as the Login Type.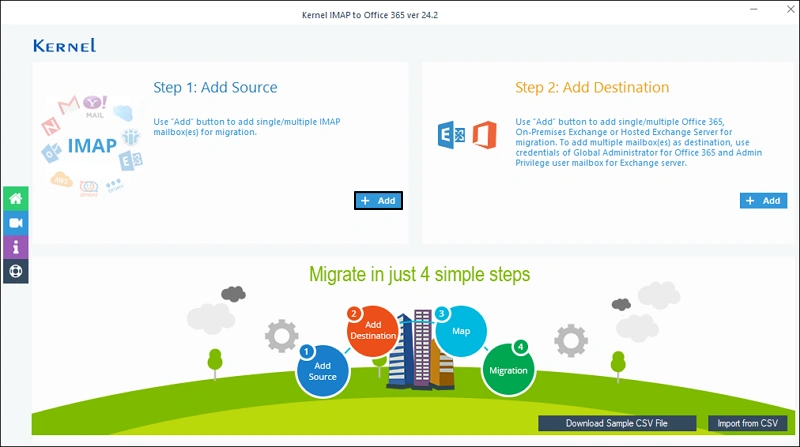
Step 3: Provide credentials for your DreamHost email account and click Add to connect.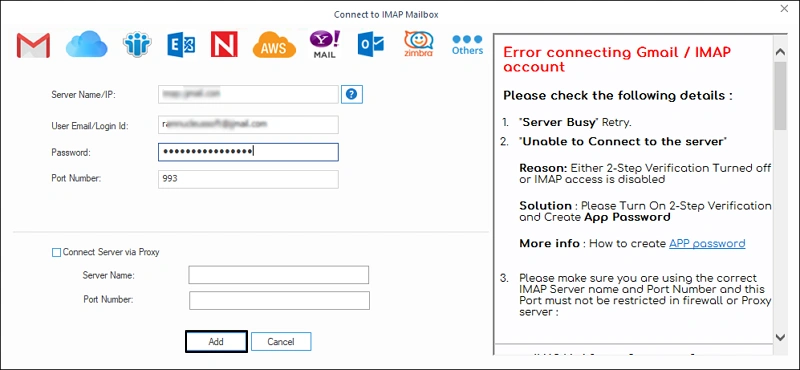
Step 4: Click Connect to configure Office 365 account in destination. A pop-up will appear, asking you for the login type. Choose the Modern Authentication method. 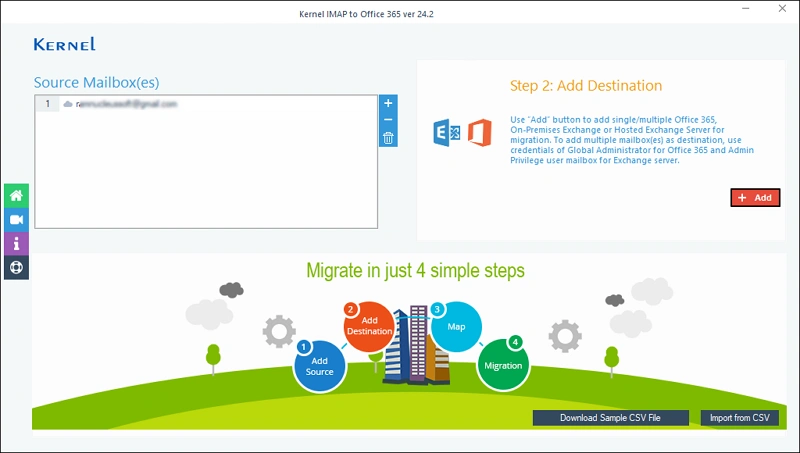
Step 5: Provide the credentials of the target Office 365 account and click on Get User Mailbox(es) button. Select the mailbox in which you wish to migrate the emails and click Add.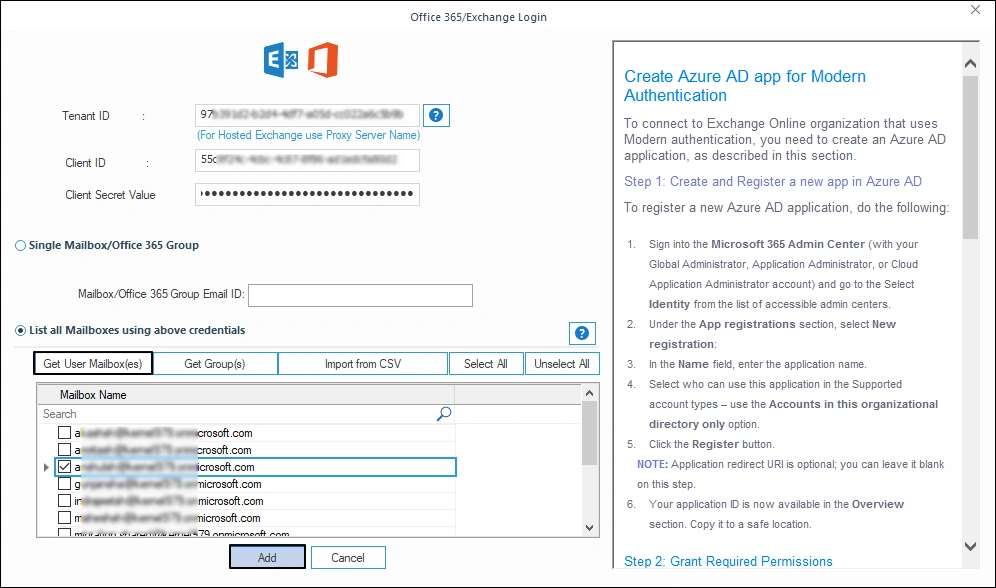
Step 6: The tool allows you to map the DreamHost mailbox with any mailbox from the Office 365 account. Map the mailbox to the destination mailbox and click on Set Filter and Migrate. 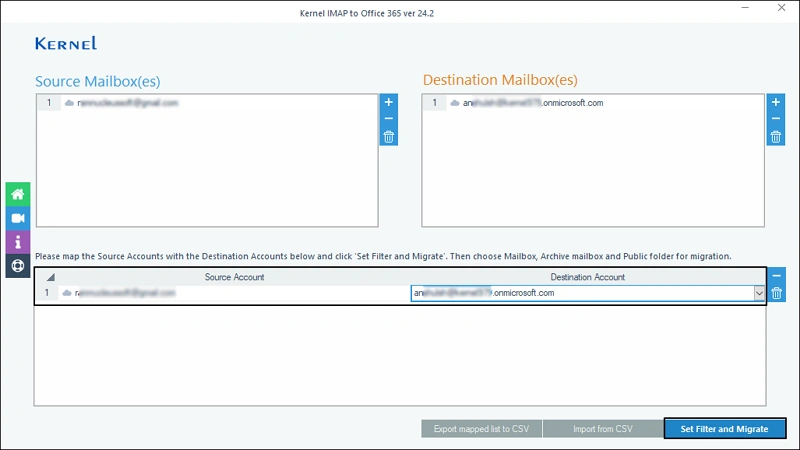
Step 7: You can migrate to 3 destinations in the Office 365 – Mailbox, Archive Mailbox, and Public Folder. Select any and click on Migrate.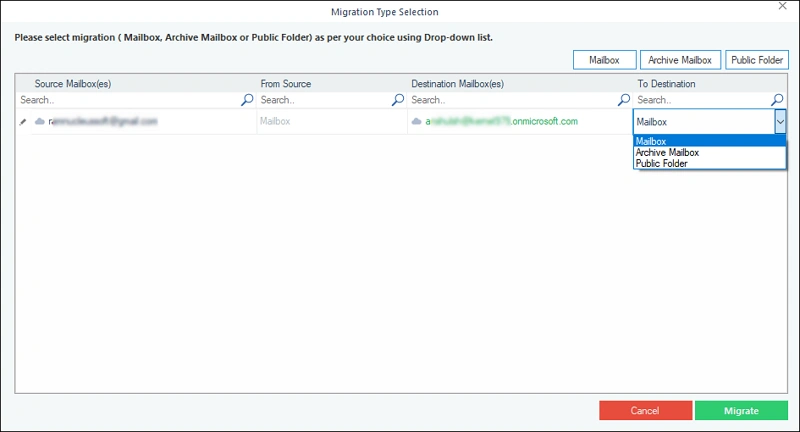
Step 8: Include/Exclude folders, select a specific date, or choose to skip folders. Apply any filters you require and then click on I am OK, Start Migration.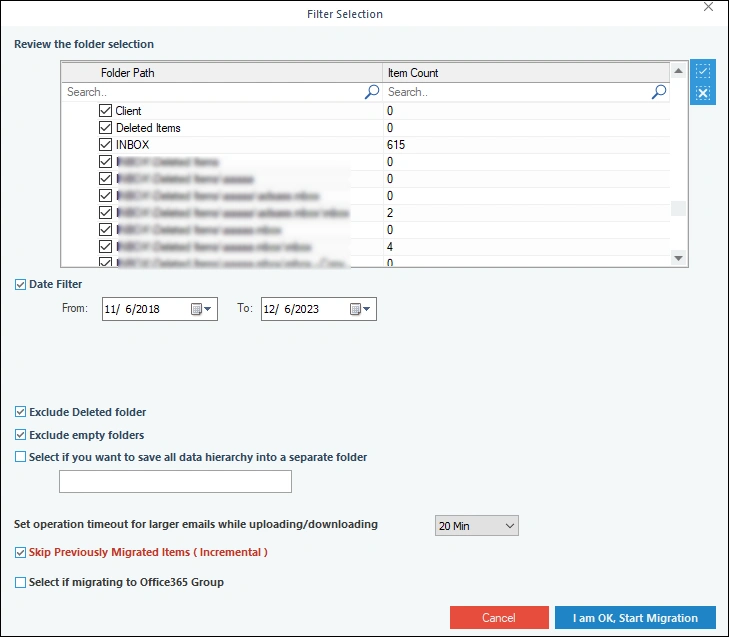
Step 9: You will receive a completion message when the mail migration finishes. 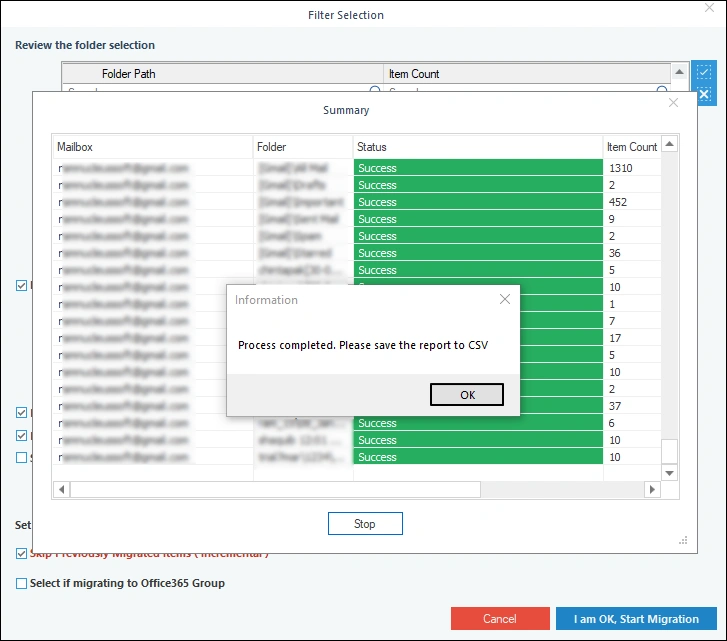
Step 10: Click Save report to CSV button and download a detailed migration report on your local system.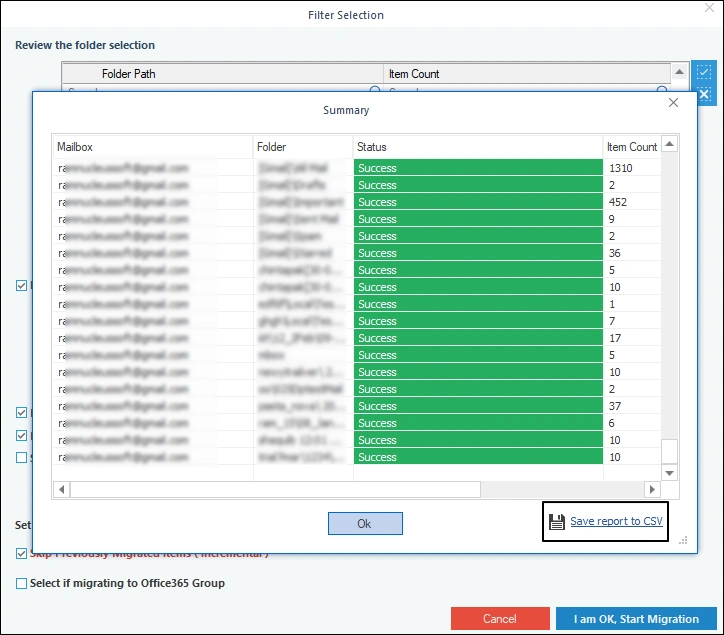
Conclusion
Migrate DreamHost to Office 365 to experience modern-day email communication. If you are comfortable with manually configuring Office 365 for migration, use the Admin Center. However, for an effortless and automatic migration, use the Kernel IMAP to Office 365 migration tool. The tool also offers a free trial version. Download the tool and migrate your DreamHost webmail data to Office 365 mailbox for free.