Read time 7 minutes
Keeping a large number of emails in mailboxes increases the database size ultimately. This forces users to look for some tricks and techniques to manage the Exchange mailbox data. One of the techniques is archiving mailbox items, which moves the old or not-so-important emails to a separate location. It generally archives that data to a new secondary mailbox, namely an archive mailbox, which is connected with the user mailbox and can be accessed anytime.
Archiving is not as simple as it sounds. To archive mailbox items in Exchange Server, a user needs proper technical skills and has expertise in Exchange Server. But do not worry! In this guide, we will cover why archiving is necessary and all reliable methods to archive mailbox items in Exchange Server.
How does archiving Exchange mailbox data help users?
Exchange users can take advantage of archiving Exchange mailbox data in the following ways:
- Reduces the Exchange mailbox size and results in improved performance of the Outlook application.
- Minimize confusion state as only important emails are available in the primary mailbox.
- Decreases the risk of data loss with non-dependence on the Outlook PST file.
- Frees up costly primary storage by moving inactive data to the archived files.
- Makes emails available all the time for any need in your local system.
Now, you know the importance of archiving old items in the Exchange Server. Let’s find out all the free manual methods to archive mailbox items in Exchange Server.
How to archive mailbox data in Exchange Server?
You can create archive mailboxes using the Exchange admin center or Exchange Management Shell. The Exchange Admin Center feature in the Exchange Server allows you to archive the user mailboxes easily. Follow the given instructions to archive the Exchange mailboxes data.
Method 1: Archive mailbox data using Exchange Admin Centre
Exchange Admin Centre allows you to archive unnecessary data in the Exchange Server. Go through the steps below to archive your old emails:
Step 1: Open the Exchange Admin Center with the administrator credentials. Navigate to Recipients > Mailboxes. Select the desired mailbox and see the details in the rightmost pane. Under In-Place Archive section, click Enable option to archive to the selected mailbox.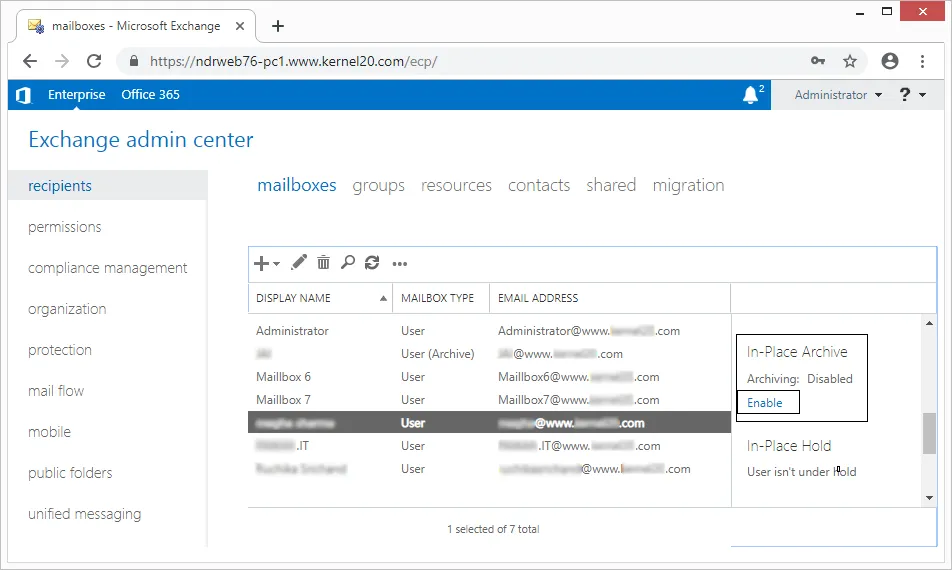 Step 2: Browse the mailbox database you want to save to this archive mailbox and click OK.
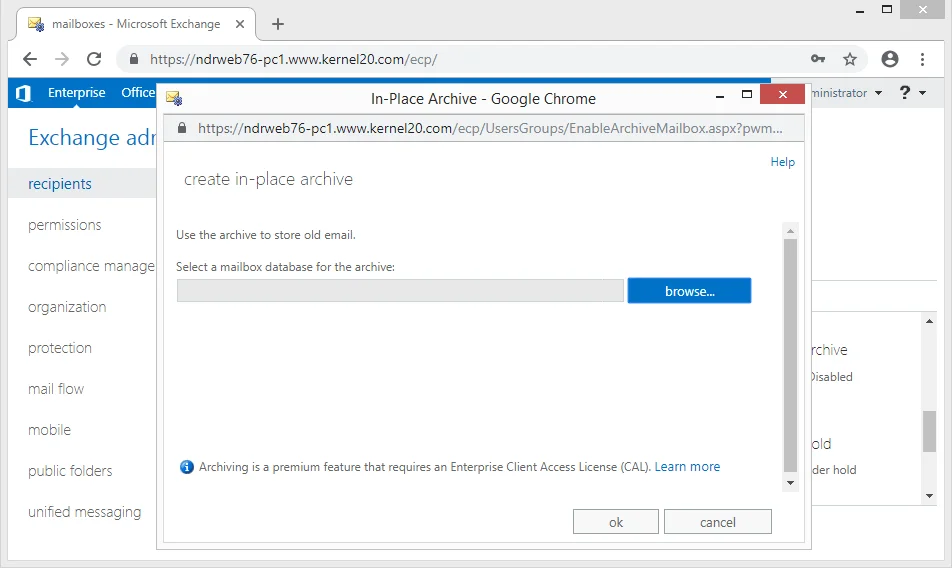
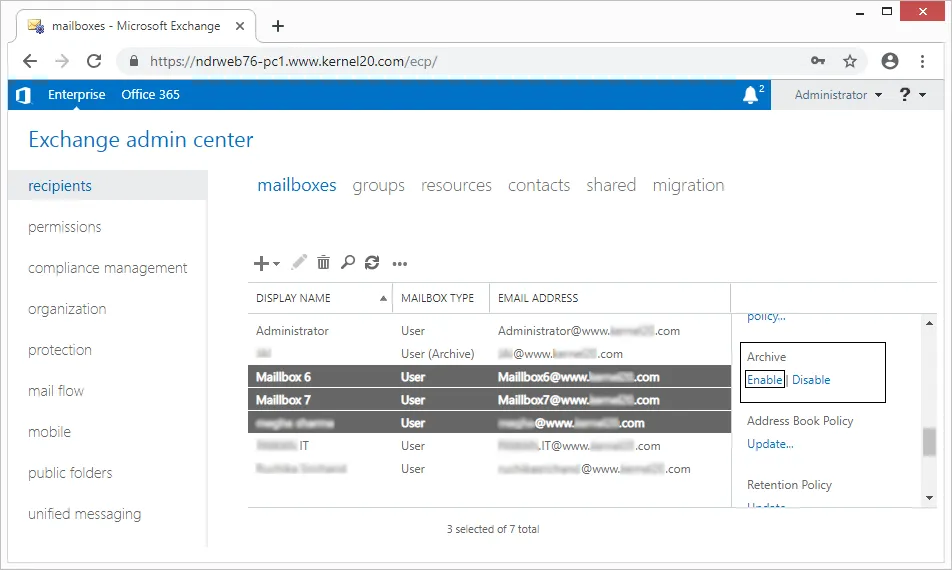
If you want to enable archive to more than one mailbox, select the multiple user mailboxes keeping CTRL key pressed and click More options on the right pane. Click the Enable option under the Archive section.
Method 2: Creating and archiving a new mailbox
You can easily create a new mailbox through Exchange Admin Centre and archive it while setting up your new mailbox. Execute all the steps below to archive your newly created mailbox in Exchange Server.
Step 1: Open the Exchange Admin Center in your Exchange Server. Go to Recipients > Mailboxes. Click the + icon to add a new mailbox.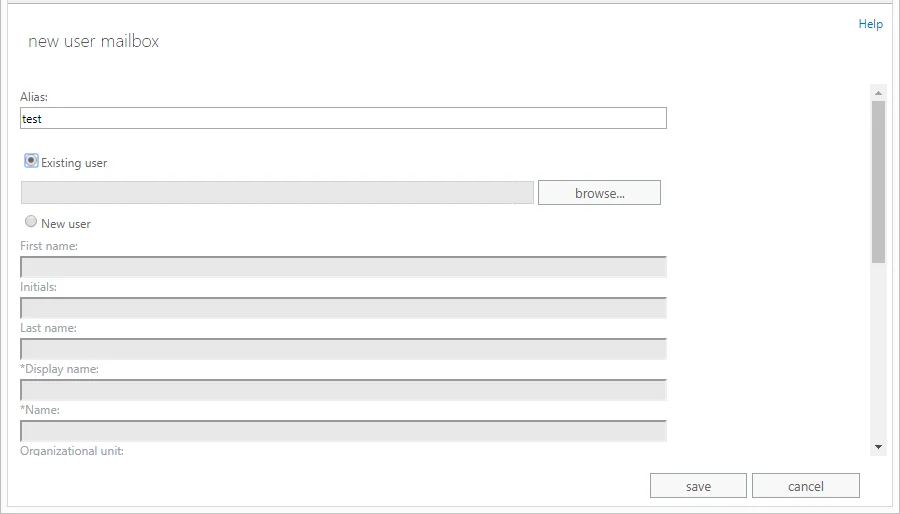
Step 2: In the opened new user mailbox page, enter the required credentials, choose the mailbox database and also select the checkbox to create an on-premises archive mailbox for this new user. Finally, save the settings.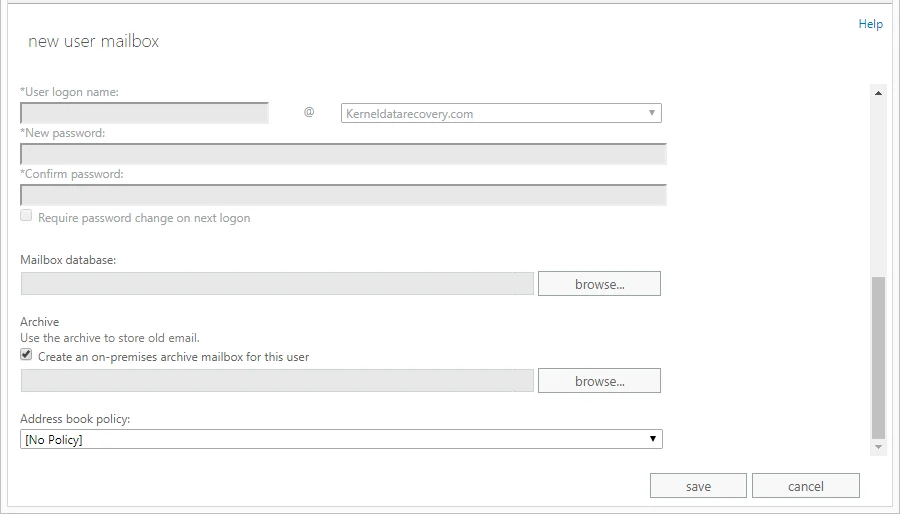
Method 3: Alternative way to archive Exchange mailbox items
Archiving data will save all the selected emails in a new mailbox and create space for new data. But if you do not require some older data, then you can also delete it. In some mailboxes, you can delete the old emails and thus create new space.
In Exchange Admin Center, you can enable the auto-archiving policy by changing the retention policy.
- In EAC, on the left-hand side, go to Recipients and choose mailboxes.
- Select the mailbox in which you need to create a new space. Double-click on it and select mailbox features.
- In the retention policy drop-down, choose the number of days that you want to keep the emails.
- Click Save and check out the changes
Method 4: Archive Exchange mailbox using Exchange Management Shell
The Exchange Management Shell (EMS) is a powerful command-line interface (CLI) for managing Microsoft Exchange, allowing administrators to automate tasks like enabling archives, applying retention policies, and configuring settings for users and mailboxes. It helps in archiving old emails by moving them from primary mailboxes to dedicated archive mailboxes based on defined rules, reducing server load and aiding compliance. Easily run this cmdlet in the Exchange Management Shell to enable archive for a particular user mailbox.
Enable-Mailbox “User mailbox name” -Archive

These methods will help you to archive mailbox items in Exchange Server. But do you know? This will make your data corrupt or lost. After that, you need to do an Exchange Database Recovery to recover your data. What a hectic process, before initiating all these methods, find out all the gaps in these manual solutions.
Drawbacks of manual methods
- Requires constant user and admin access to export, move, or archive a mailbox in Exchange Server.
- Policies (like age-based moves) aren’t enforced uniformly, leading some users to archive their mailboxes and stopping others.
- Managing archive access for users, especially with impersonation rights for admin tools, can be complex and error-prone.
- Relying on heavy, oversized mailboxes leads to corruption that throws you into a situation where you need to repair EDB files.
- Manual processes make it hard to meet legal/regulatory requirements for retention and eDiscovery, as data isn’t centrally indexed or secured.
- Users might skip archiving critical emails or accidentally delete them before archiving, creating gaps.
Now you might be scared to initiate these manual methods. Don’t worry, we have a professional solution to archive your Exchange mailbox, like EDB to PST.
Professional approach to archive mailbox items in Exchange Server
The Kernel for Exchange Server software helps you to backup of all the necessary emails from your Exchange Server. With this Exchange recovery tool, you can save your emails in multiple platforms, like PST, Live Exchange (On-Premise), Outlook Profile, Office 365, and many more. It supports corrupt Exchange databases and easily repair EDB files and recovers all your Exchange data.
How to archive mailbox from Exchange Server using this tool?
The software incorporates quite a simple user-interface to carry out the process in a few simple steps. Let us understand its process through the steps.
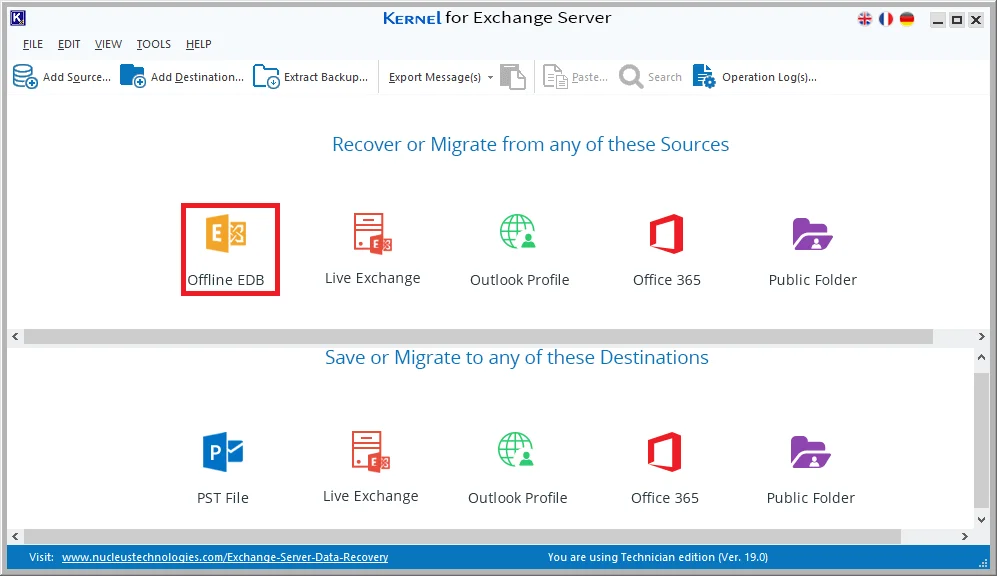
- Launch the tool and click on Offline EDB option on the software’s home screen.
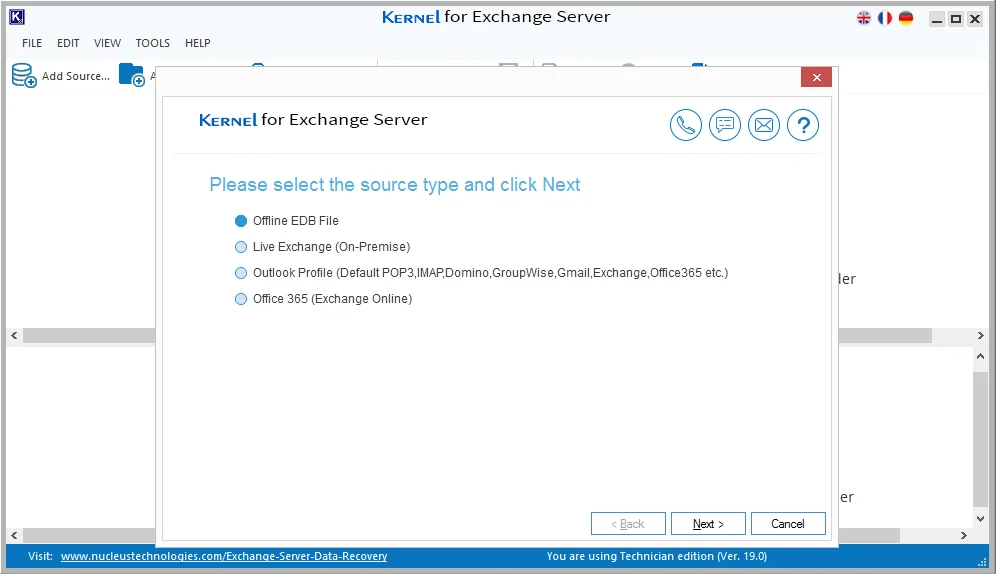
- Continue with the default Offline EDB File option and click Next
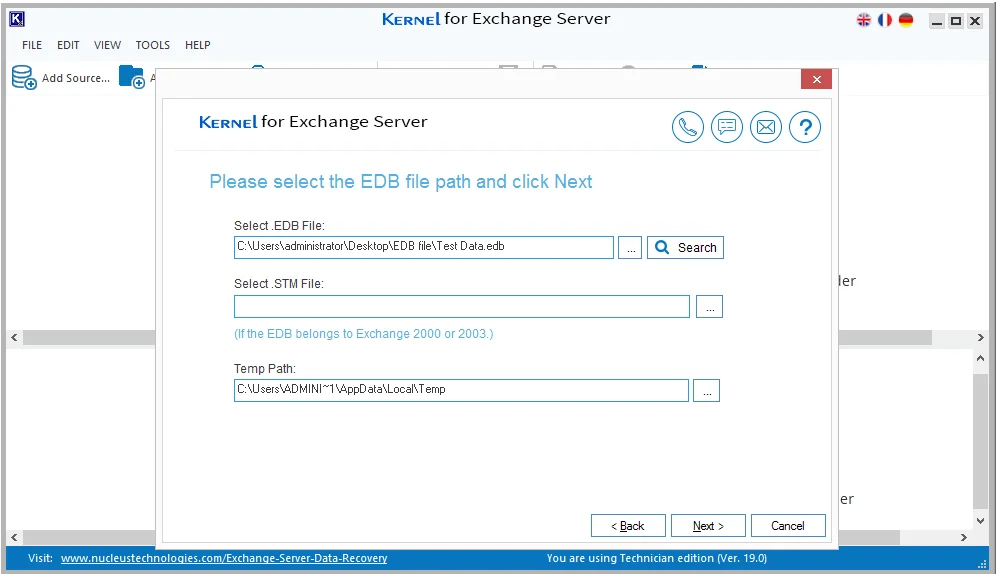
- Add the EDB file stored on your system drive and then click Next.
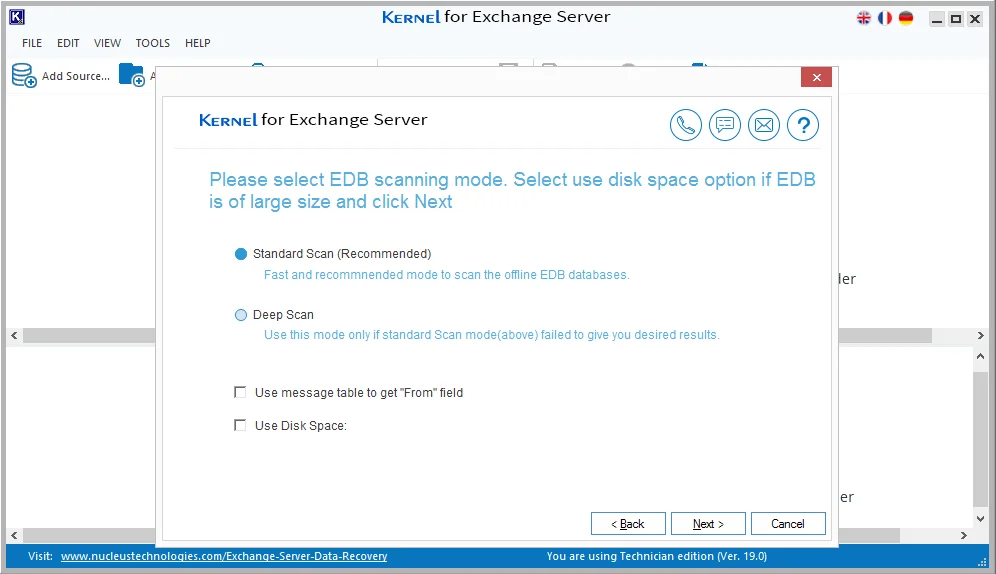
- Choose an appropriate scanning mode from Standard Scan and Deep Scan accordingly and click Next.
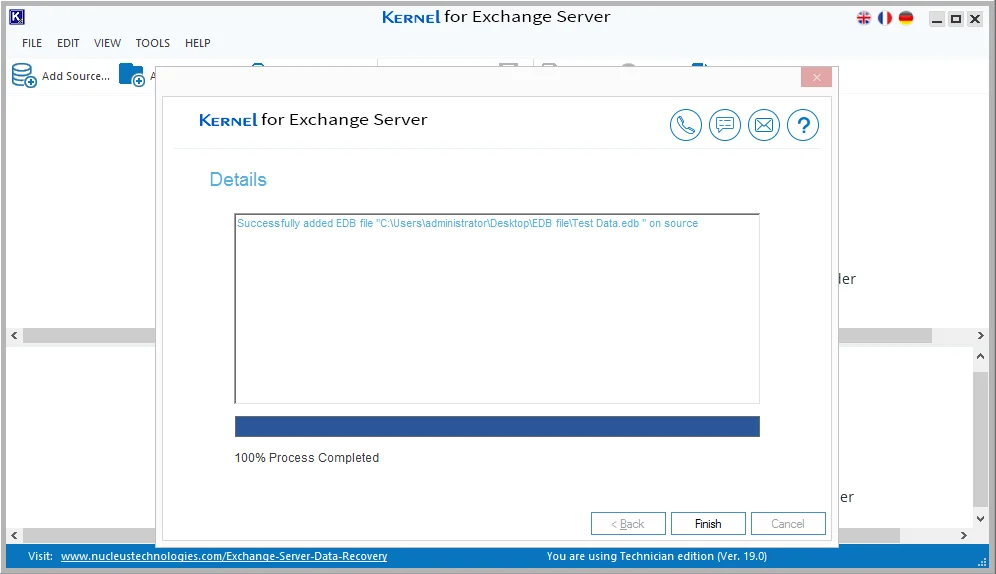
- The software will display a successful EDB file addition message, and click Finish.
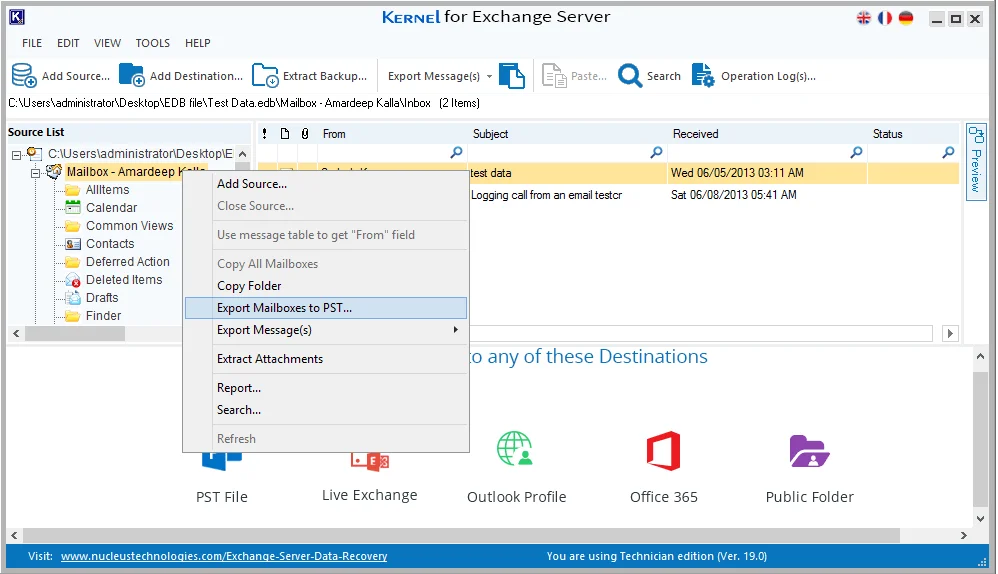
- The software will retrieve all the mailboxes from the EDB file. Select any required mailbox, right-click on it, and select Export mailboxes to PST option
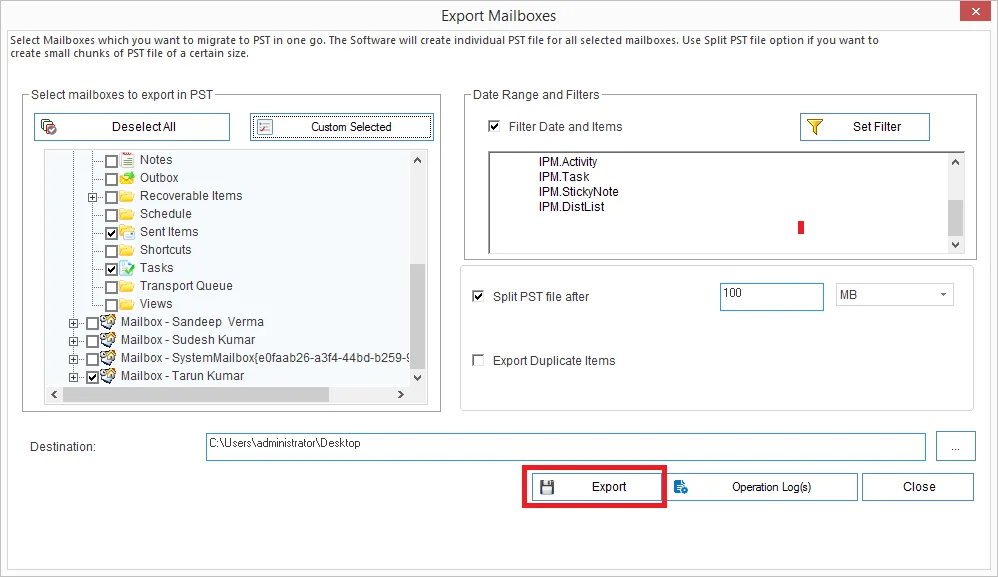
- In the Filter wizard, apply necessary filters to archive selective data, and click Export.
See, that’s easy, this archiving mailbox items in Exchange Server was. You don’t need any tech skills or a professional guide to initiate a hassle-free export process. However, if you feel stuck at any point, connect with us and get solutions at your fingertips.
Conclusion
Therefore, you have understood how simple it is to back up mailboxes and emails from Exchange databases to PST files with the recommended EDB to PST Converter. The software is also capable to repair corrupt Exchange database as well. Download the tool and quickly backup corrupt or healthy EDB data into an existing or a new PST file.