Read time: 7 minutes
Microsoft 365 offers incredible working capabilities to organizations working online through its advanced features. Due to many unique and useful facilities like distribution list which have proved to be quite fruitful for the users in Microsoft 365. It initiates easy email communications between users working in the same workplace often collaborate with each other to work on the same projects. While having a well configured distributed list or groups, you can add specific groups of users in your Microsoft 365 environment by which you don’t need to send any message individually.
This is not the only facility in Microsoft 365, but it also features advanced amenities like Groups, Distribution Lists, Shared Mailboxes, Teams etc. which allows multiple users to collaborate and communicate easily. To take the discussion regarding Distribution Lists forward, let us understand about its features and the right method to create Distribution List in Office 365.
Why to create distribution lists in Microsoft 365
Distribution Groups, also known as Distribution Lists, are a convenient method for sending bulk emails to numerous users. It eliminates the unproductive task of adding each recipient separately. All the members of the distribution list will receive the emails sent to created list/group. This feature is useful for those who work on a common project and don’t want to share emails in the public space of the organization and still want specific users to get updated with all the information. Also, it can be used to send emails related to a common topic to a specific distribution list created with users authorized for that topic.
Here are the peculiarities of a Distribution List mentioned below:
- Can be managed through EAC as well as PowerShell cmdlets.
- Allows any user (external or internal) to send emails to the members of the group only if the external email receiving permission is assigned to the group.
- Dynamic membership is available through Dynamic Distribution Groups.
- Free or Paid AAD subscription works as a license.
So, the Distribution List helps to create a central communication platform for multiple users to share their work, ideas, crucial information, urgent messages, etc. A Microsoft 365 user with global administrator rights can easily create Distribution List in Office 365.
Benefits of a distribution list
Creating distribution lists helps to enhance the workflow while keeping data secure from being shared in the entire network. But before we proceed on how to create distribution list in Office 365, it is necessary to know the need it serves:
- It saves time and effort by sending emails to multiple users all at once.
- The sender can avoid the situation of reaching the maximum limit of recipients which each message has.
- External users can also communicate smoothly.
How to create Microsoft 365 distribution list
To configure a distribution list, you will need to choose the right methods so it can get wrongly created. A Microsoft 365 administrator can create distribution list in Office 365 by performing the following procedure:
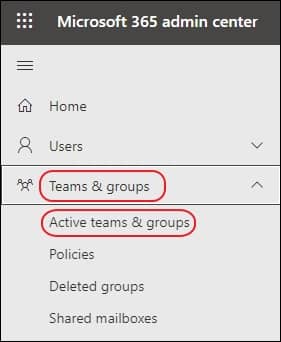
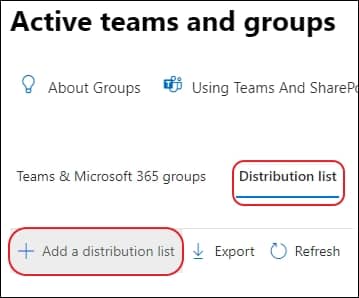
- Open Microsoft 365 admin center and then navigate to Teams & groups>Active teams & groups.
- Then, click on Add a distribution list option to create a distribution list.
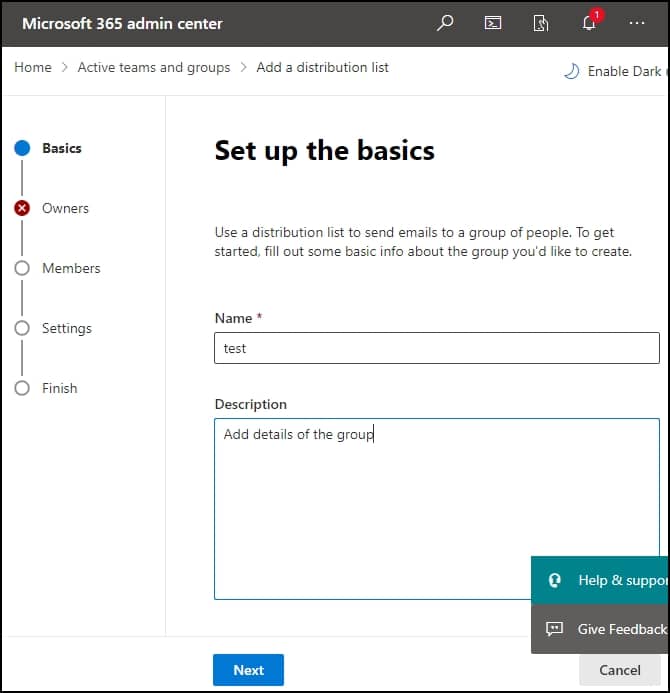
- Now, on the Basic page fill in the information like group Name & Description, then click Next.
- On the Owners page, click on Assign owners who will manage the distribution list from the users list.
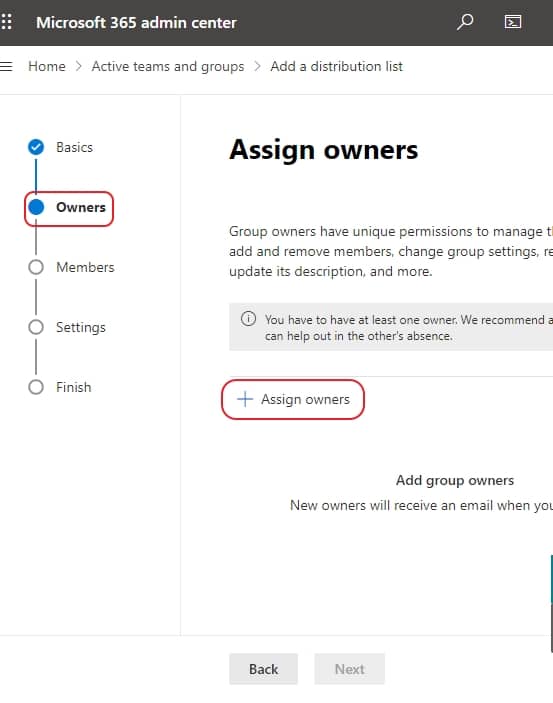
- Now, choose the preferred users from the list or search them accordingly. After that click on Next.

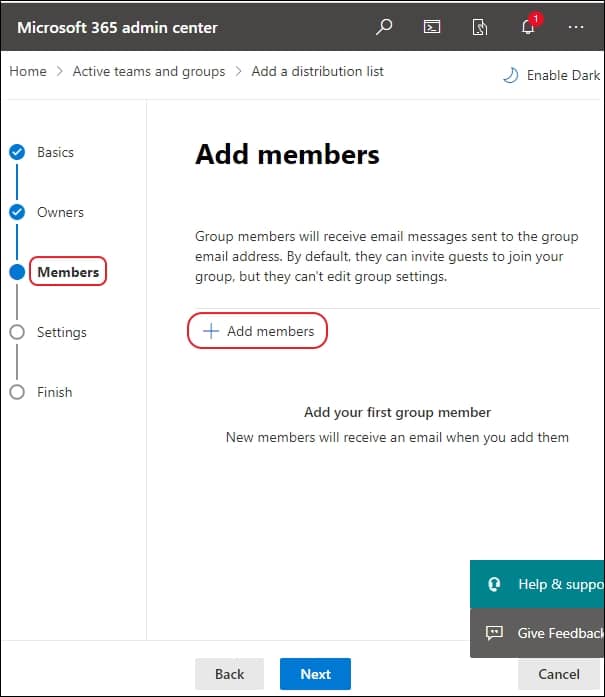
- Next is the Members page, choose individual users from the list who you want to add to this distribution list and click Next.
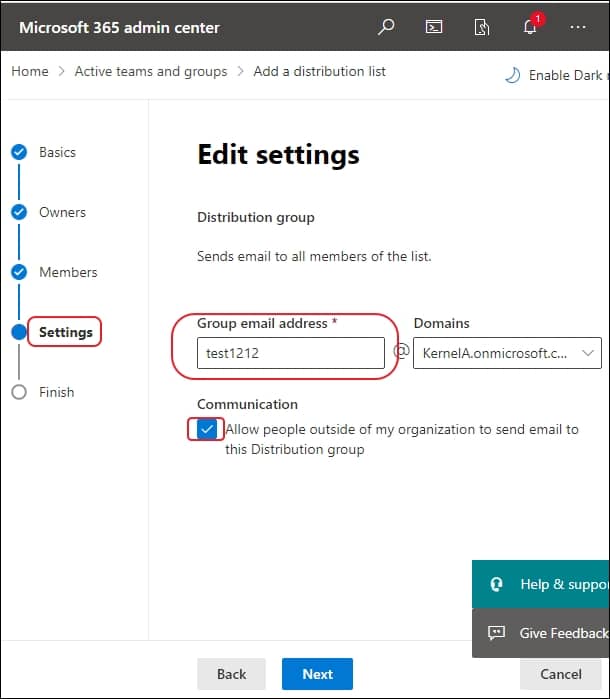
- On the Setting page, provide the email address of your distribution group which will be used to send or receive emails and click on Next.
- Now the last is Finish page, check all the details of your group and then click on Create group.
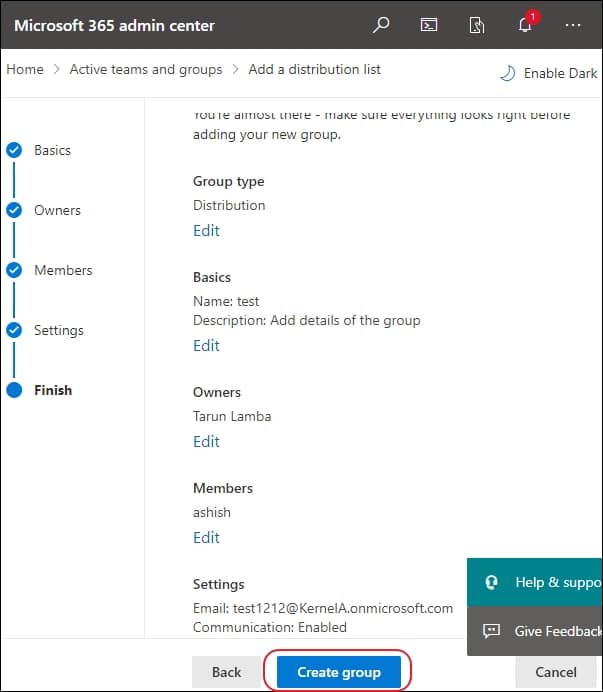
- Now, your distributed group has been created, which you can find in the Distribution list section.
Therefore, the distribution lists group in Office 365 is successfully created along with desired members and settings. Before users create an office 365 group you should know about office 365 groups.
How to add a user or contact to a distribution list?
Office 365 distribution list also allows you to include any specific user or contact that is required to be part of an ongoing project or team. Follow the below steps to add user & contact:
- Login to Office 365 admin center, using a work/school account.
- Now go to Teams & groups>Active teams & groups>Distribution lists.
- Click on the Distribution group you have created from the group page.
- Under the Members section, click on View all and manage members option.
- Now, click on Add members option after which you can see the users list so search & add your specific user or contact from that list.
Steps to send an email as a distribution list
The following steps can be performed only if you are part of the Microsoft 365 distribution list management that has the ‘Send as permission’ option.
- Access Outlook on the web & select inbox.
- Open a received message from the distribution list & choose to reply.
- Under More, click Show from at the message’s bottom.
- Right-click on the From address & select Remove.
- Type in the distribution list on the same field & hit Send to broadcast your email to the list.
Modifications in a list
The admins have the flexibility to make some changes to the existing Distribution Lists if required. The major modifications are:
- Add and remove members and admins from the group
- Editing the group name, email addresses and certain properties
- Allowing external users to send emails to the members
- Deletion of a Distribution List
Protecting data from worst case scenarios
Some users need to backup Microsoft 365 data to retrive it during the time of data corruption, server failures or internal/external breach. Organizations often adapt an ultimate solution which can minimize their effort & perform quick Microsoft 365 data backup with complete integrity. For such users, we recommend Kernel Office 365 Backup and Restore software which swiftly backups the complete Office data including mailboxes, groups, distribution lists, etc. to PST format which can be opened within the Outlook application later on. This software can restore or import the PST files to Office 365 too.
Conclusion
In the above blog, we have discussed that it beneficial to create distribution lists in Office 365 that helps to communicate through a single email address to multiple members. It ensures a strong collaboration among professionals working towards the same goal. We have also mentioned the procedure to create distribution lists as well as how to add a user or contact it. However, users can try the automated Kernel Export Office 365 to PST software if they need to backup their crucial data in PST file format.
FAQs
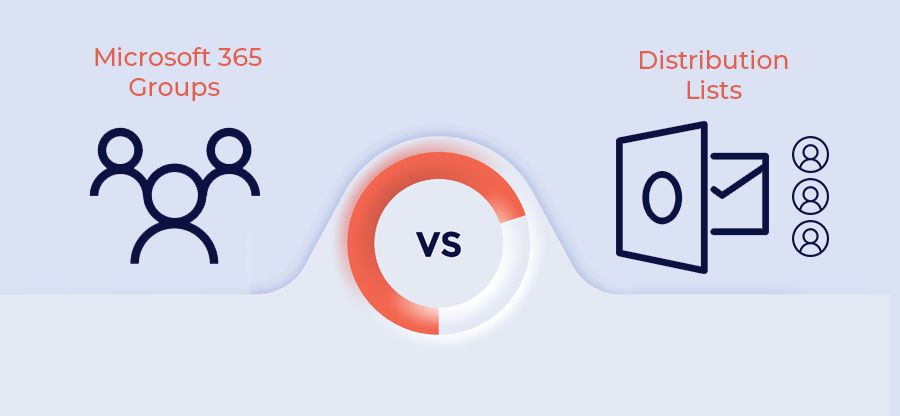
A– Microsoft 365 Group is a powerful tool for collaboration, allowing users to work together on projects & share files both inside & outside of your organization. These groups come equipped with a range of services, including SharePoint & Planner for seamless team collaboration. On the other hand, distribution lists are designed primarily for sending email notifications to a group of people.
A- You can have a total of 1000 recipients, which includes your own address. A recipient can be an individual email address, or an address that is part of a distribution list you’ve created, an Active Directory Group address, or even a Class List.
A- Establishing a distribution list makes communication with a group of individuals simpler and more efficient. Through this approach, you can add the email addresses of individuals who are interested in receiving regular updates from you. The benefit of this is that it allows you to send out emails to your entire email list based on a predetermined schedule. Furthermore, list segmentation is possible, which means you can send targeted emails to specific members of your email list.