Read time 10 minutes
MS Outlook is a powerful email management tool used by countless individuals and organizations worldwide. It simplifies daily communication with anyone in the world, making it an essential tool for those who want to stay on top of their emails. Shared mailbox is a particularly useful feature, facilitating collaboration among colleagues or in a team.
Adding a shared mailbox in MS Outlook is not difficult, but it can be confusing for those not familiar with the process. In this article, we’ll guide you through every step needed on how to add shared mailbox to MS Outlook and get started using this important feature.
What is a shared mailbox?
A shared mailbox allows a group of people to receive, view, monitor and send emails from a common email address. It ensures up-to-date communication due to a quick response rate. When a member replies to a message, the sender’s email is that of the Shared Mailbox, not the individual’s. This mailbox is commonly used by a team interacting with a massive customer base on the same topic, like sales, marketing, or customer service.
What is the need for a shared mailbox?
You might be wondering what the need is for another mailbox. But to your surprise, there are multiple reasons behind professionals preferring Shared mailboxes apart from their own.
- A single point of contact for all the individuals who are outside the company.
- They also bring along a Shared contact list and Shared Calendar which have their benefits.
- It is easier to track all the conversations in a single email thread and divide work accordingly.
- A single email copy is stored, unlike in Distribution Lists.
- A separate mailbox ensures less confusion and extra storage space and multiplies productivity.
- The response time of the concerned team reduces, ensuring better customer support.
- These mailboxes promote collaboration and transparency among the members.
- They diminish duplicate and missed emails. Also, there is no need to Cc or use the Forward option.
- Confidentiality of personal login credentials and inboxes is maintained throughout.
Prerequisites of a shared mailbox in Outlook
These are a few basic requirements that must be fulfilled as we move on to how to add shared mailbox in Outlook 2013, 2016, or 2019:
- It must be set up and available in Microsoft 365
- MS Outlook has to be configured with your Microsoft 365 account
- The administrator has already given you access to the shared mailbox
- Only a configured shared mailbox can allow external access.
- It must have an email address and display name associated with it.
Once these prerequisites are met, you can add a shared mailbox in Outlook.
Ask the admin to add you to the shared mailbox in Microsoft 365, then you need to close and start MS Outlook again. After restarting Outlook, it might appear in your folder pane below the primary mailbox. However, if this doesn’t happen, you can add a shared mailbox in Outlook manually.
Manually adding shared mailbox to Outlook
Shared mailboxes take some time to appear in the Outlook folder pane. However, if it doesn’t work for you, then you can add it manually by following the below steps:
- Start MS Outlook and go to the File tab.
- Click Account Settings, and then select Account Settings from the menu.
- Click the Email tab to ensure that the correct account is highlighted.
- In the Email tab, click Change at the bottom.
- A new tab will appear on the screen; click More Settings > Advanced > Add.
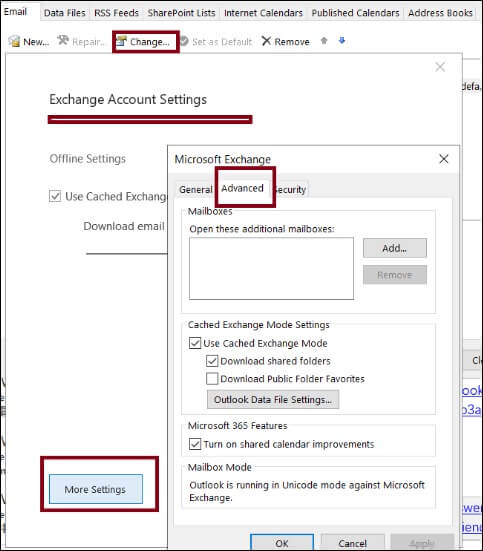
- Now, provide the shared email address to which the admin has added you, and then click Ok.
- After that, click Next > Finish > Close.
The shared mailbox will now appear in your MS Outlook below the primary mailbox. Now, you can send or receive emails using this mailbox.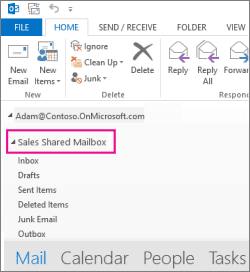
For Mac users
- Access Outlook and tap on Tools.
- Choose Accounts and select your email address.
- Tap on Advanced and navigate to the Delegates tab.
- Under the Open these additional mailboxes section, tap on the + icon.
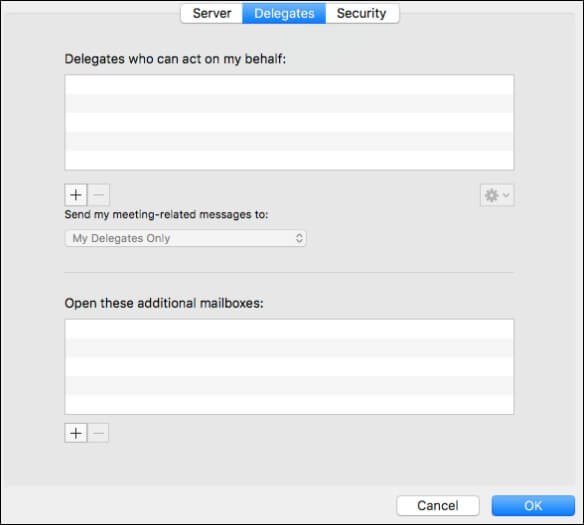
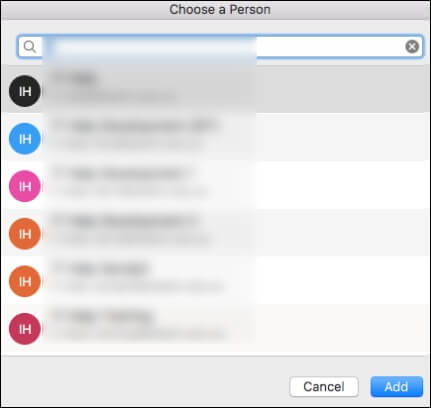
- Put in the email address associated with your shared mailbox.
- Choose the option Add and hit OK.
- Exit the Accounts window and in case you receive any message related to Outlook redirected to the server, Click on Allow.
Using a shared mailbox in MS Outlook
Once it is added successfully, let’s look at how to send emails from Shared Mailbox-
- Open MS Outlook and click New Email above the folder list. A new message window will appear on the screen.
- Click the ‘…’ icon at the top of the message, and then select Show From.
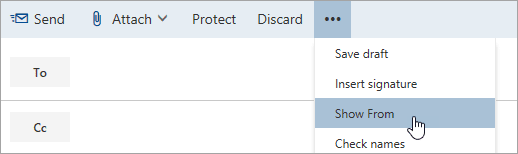
Note: The ‘Show From’ option shows that the receivers will receive the email from a shared mailbox address. - If you’re using the shared mailbox for the first time, then you will have to add the email address in the From section drop-down list:
- Right-click on the ‘From’ option and click Remove.
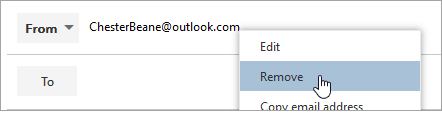
- Enter the shared mailbox address, so the next time you send an email from the shared mailbox, it will appear as an option in the ‘From’ drop-down menu.
- Right-click on the ‘From’ option and click Remove.
- To add recipients, type the email, name of the person in your contact list or the organization’s address list.
- Enter the subject related to the email, and then type the message that you want to send.
- After typing the message, click Send.
The email will be sent from the Shared Mailbox address.
Let us also learn how to reply to the email received in the Shared Mailbox. Follow the steps given under to do so:
-
- Open Outlook.
- Open the email message you wish to send a reply to.
- See the name of your shared mailbox in From at the top of your message. If you do not find the name, you should find your shared mailbox name in the From drop-down menu.
- Type your reply/message and press Send.
- To find the address to which you wish to send a message, you will find that address in the From drop-down list.
Note that when you send a message from your shared mailbox, your shared mailbox address will only be shown to the recipient.
Save sent emails from a shared mailbox
When you send an email from the shared mailbox, then the copy of the same is stored in the Sent Items folder and not in the shared mailbox. To make sent items be stored in the shared mailbox, you need to edit the settings of the shared mailbox. Let us learn how to do so:
- Log into Microsoft 365 admin center.
- Select Groups.
- Select shared mailboxes.
- Select your shared mailbox.
- Select Edit next to Sent Items.
- Set On the following:
- Copy items sent as this mailbox
- Copy items sent on behalf of this mailbox
- Select Save.
Now the sent items of the shared mailbox will be copied into the shared mailbox.
Add shared mailbox to Outlook under primary mailbox
You can use this method if you wish to monitor emails from your primary mailbox and a shared mailbox simultaneously. In Outlook on the web, you can access the shared mailbox and its folders every time you open the left navigation pane.
- Log in to your Outlook web account.
- Select Add shared folder from the left navigation pane of Exchange Online mailboxes. To add a shared folder to an Exchange on-premises mailbox, right-click the name of the mailbox.
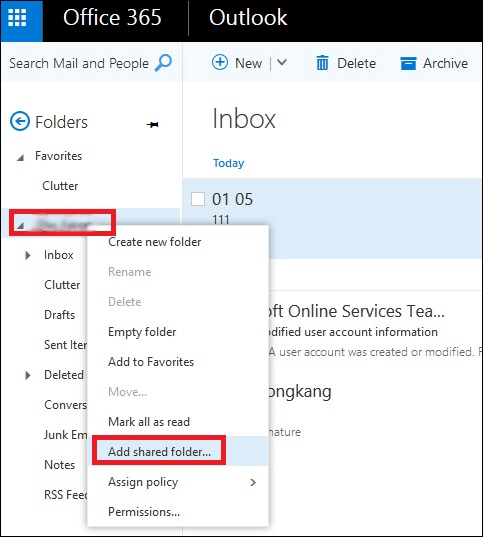
- If you share a mailbox with someone, click Add shared folder and type their name or their email address. You can also type the name of the shared mailbox you belong to, for example, info@contoso.com.
Using the shared mailbox calendar
A shared mailbox calendar is shared with the members of the shared mailbox. As a member, you can create, edit, and delete events in the Calendar. However, if you don’t have access to the shared mailbox calendar, you can easily access it with the following steps. The steps are given for Outlook on the web.
- Use Outlook on the web to sign into your account and then select Calendar.
- Right-click on the Other Calendar option from the Calendar menu and select Open Calendar.
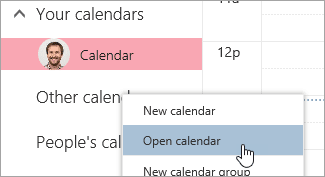
- In the ‘From Directory’ look for the shared Calendar, you want to open, select the Shared mailbox linked with the Calendar, and then click Open.
- The Shared Calendar will appear in your Calendar list.
Using a shared contact list
Once the admin has added you as a member of the shared mailbox, restart Outlook. The shared mailbox’s contact list will be automatically added to the My Contacts list. To use contacts of the shared mailbox, follow the steps given below:
- Open Outlook and choose People.
- Under My Contacts, choose the folder of the shared contacts list.
You can view the shared contacts now.
Adding and using Microsoft 365 Shared mailboxes with MS Outlook is one thing, but if you want to backup your shared mailboxes, then it’s necessary to have a backup plan in place, or you can also opt for an automated solution like Kernel Office 365 Backup and Restore to backup and restore Office 365 mailboxes automatically. Besides, if you want to import Outlook PST files to Office 365, then this software can be convenient. So, this is an essential tool for all Office 365 users.
With the help of this software, you can backup and restore your emails, contacts, calendars, tasks, notes, etc. from your Exchange Online account. The software provides an easy-to-use graphical user interface that makes it easy to use for all users. Moreover, the software supports all versions of Microsoft Exchange Server and Microsoft Outlook. So, if you are using any of these versions, then you can use this software to backup and restore your data easily.
Conclusion
Adding a Shared Mailbox in MS Outlook is a simple process that can be accomplished with just a few clicks. However, it is important to remember that backing up your mailboxes should be a top priority to prevent any unexpected data loss.
With the use of the Office 365 Cloud Backup tool, managing Shared Mailboxes becomes an effortless task. This tool restores Shared Mailboxes to their former state without any data corruption. By using this tool, you can save time and the headaches that come with data loss concerns.
FAQs: Shared Mailbox in MS Outlook
A- To locate a shared mailbox, head to User Configuration & navigate to Administrative Templates, then select your version of Microsoft Outlook. From there, locate the Account Settings & Exchange options to easily find the Cached Exchange Mode. Once you’ve located the shared mailbox file, managing your emails & keeping your inbox organized will be much simpler.
A- The main difference lies in the fact that a shared mailbox is associated with a disabled user account, whereas a user mailbox is associated with an active user account. Shared mailboxes are intended to be used by multiple users who need access to the same information, but for security or permission reasons, do not require their own user accounts. A shared mailbox functions in the same way as a user mailbox, but it is designed with the explicit purpose of allowing multiple people to login & access its contents.
A- One reason for this may be that it can take a short time for the shared mailbox to automatically appear in your Outlook profile after your administrator has provided you access. If this is the case, patience will be necessary while you wait for the mailbox to display. Alternatively, if the shared mailbox fails to automatically show up in Outlook, a simple solution may be to restart the program.