Related Posts
IMAP migration in Office 365 admin center

Written By
Himanshu Goyal
Updated On
March 23, 2026
Read time 6 minutes
You can easily migrate user’s emails from their IMAP-enabled email servers to Office 365 using the Internet Message Access Protocol. But, before starting the migration process, there are some limitations that you need to know of.
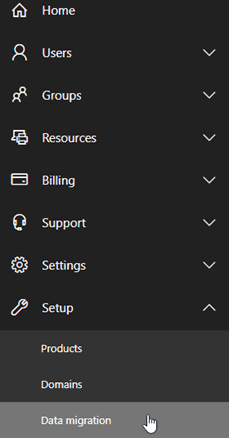
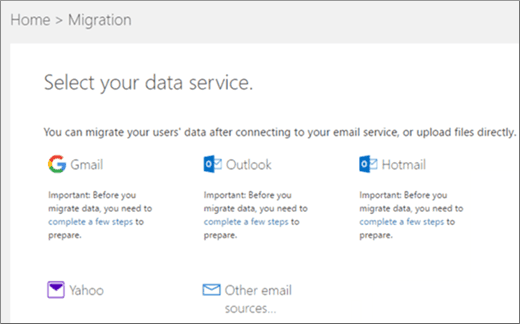
To migrate user’s mailboxes with IMAP in Office 365 admin, go to Setup and select Data Migration to start migrating IMAP-enabled emails. The email migration page in Office 365 admin center is pre-configured to migrate emails from Gmail, Outlook, Hotmail, and Yahoo.
Note: Before starting the migration, make sure that you have added the users to your Office 365 account. To know about adding users to Office 365 account, visit Add users to Office 365 for business

Download automated tool Kernel IMAP to Office 365 to migrate IMAP email servers data to Office 365 without any data loss or interruption.
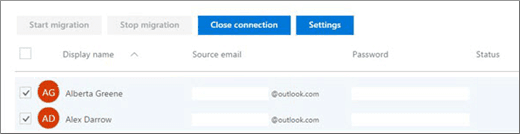
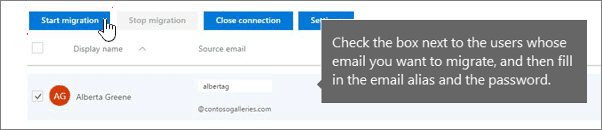
Now, let us see how to migrate IMAP mailboxes from Office 365 admin center. Follow the below steps:
Using the same technique, you can also migrate from other IMAP email servers.
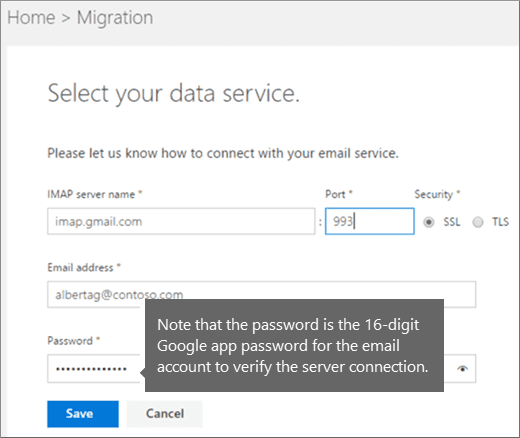
Migrating from IMAP to Office 365 with listed providers is easy. But, if the email provider is not listed, then the process becomes a little complex. Follow the below steps for non-listed email providers.
However, if you’re migrating from Google apps with your own domain, then you need to create DNS records at Google Domains for Office 365 once the migration is complete. This is necessary to send the emails to Office 365 mailboxes rather than Google apps. If you migrate from other IMAP email providers where you own the domain, then check specified instructions to find the domain provider.
As you can see, migrating IMAP mailboxes to Office 365 with Admin Center is not an easy option. Also, this process is not viable for non-technical users. So, you should use a third-party tool that allows to migrate IMAP to Office 365 mailboxes efficiently. Kernel IMAP to Office 365 is an advanced software that is specially designed to migrate mailboxes from different IMAP servers to Office 365. It has some advanced features that make the migration process convenient and simple.
Using this software, anyone can migrate IMAP mailboxes to Office 365 without any data loss or interruption. This tool can also be used to migrate IMAP mailboxes to Exchange Online and On-premises.
In this blog, you have seen the manual process to migrate IMAP mailboxes to Office 365 that included the use of the Exchange Admin Center to perform the migration with different procedures for listed and non-listed emails providers. But the method seems time-consuming, complicated, and holds limitations like support to only email migration, a limited number of mailbox items (max. 50000), email size (max. 35 MB), etc. So, we have provided an alternative solution – Kernel IMAP to Office 365 tool that makes the migration process easier with its automated process, minimal steps, easy GUI, and more amazing features.