Related Posts
How to Migrate Emails from Open Xchange to Office 365?

Written By
Sarthak Poswal
Published On
August 13, 2025
Read time: 8 minutes
Open Xchange offers email services such as email, calendar, and contacts, along with collaborative capabilities. However, it lacks the performance, range of collaborative features, reliability, and security that you get with Microsoft 365. Therefore, many Open Xchange users migrate to an Office 365 account to make their email-related tasks simpler.
Attempting to transfer Open Xchange emails to Office 365 without a clear strategy can cause data loss, folder hierarchy issues, and downtime. To avoid any such issue that may disrupt your daily operations, we will do this challenging migration task with a reliable IMAP migration tool. The need for a dedicated migration tool increases when you have multiple user accounts and a large amount of data to transfer across different platforms.
More & more businesses are moving to Microsoft 365 for its reliability and productivity tools. But before beginning the Open Xchange to Office 365 data transfer, make sure to take care of certain things:
Backup: Take a complete backup of your Open Xchange account. Migrating or moving mailbox data might cause incomplete transfers or modified metadata. To restore data and prevent data loss, IMAP server backup is a must.
Open Xchange Account Details: To transfer Open Xchange emails to Office 365 account, you need to have the following information ready:
Prepare Destination Environment: Do the following tasks to avoid any issues when moving Open Xchange users to Office 365:
To make the email migration as easy as possible, we will use the Kernel IMAP to Office 365 tool. It’s a feature-rich data migration tool for moving a complete user mailbox from one email server to another. The reasons to trust IMAP to Office 365 migration tool are:
Step 1: Open the software and select IMAP to Office 365 option.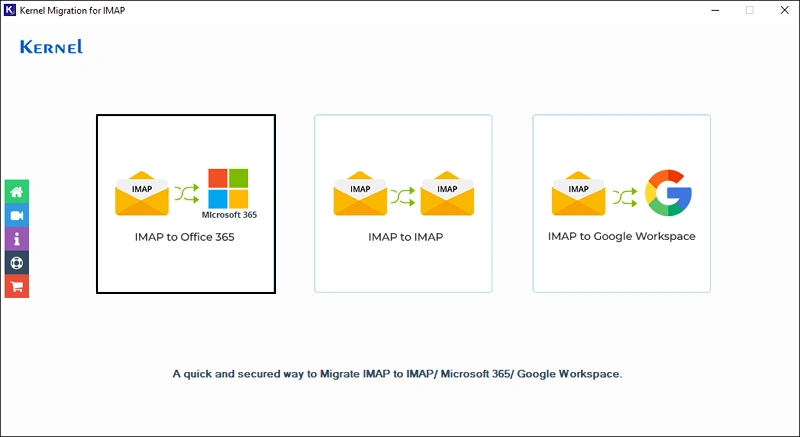
Step 2: Add the source Open Xchange account by clicking the Add button in the Add Source section. Choose the Login Type as Basic Authentication.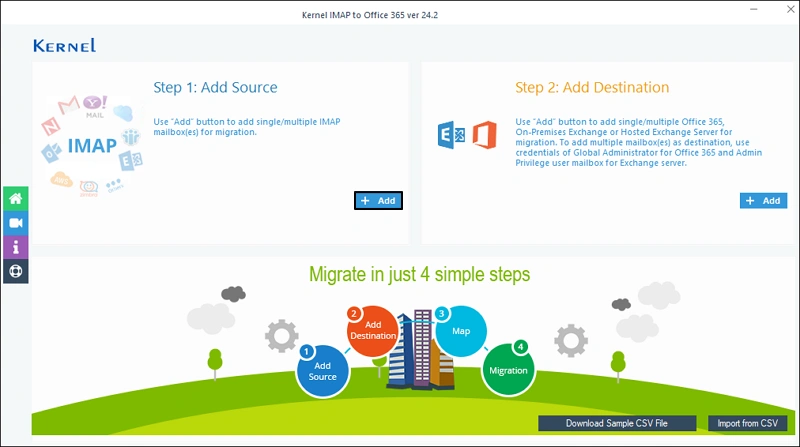
Step 3: Enter the Open Xchange server name, port, and credentials (user email address and password). Then, click Add to connect.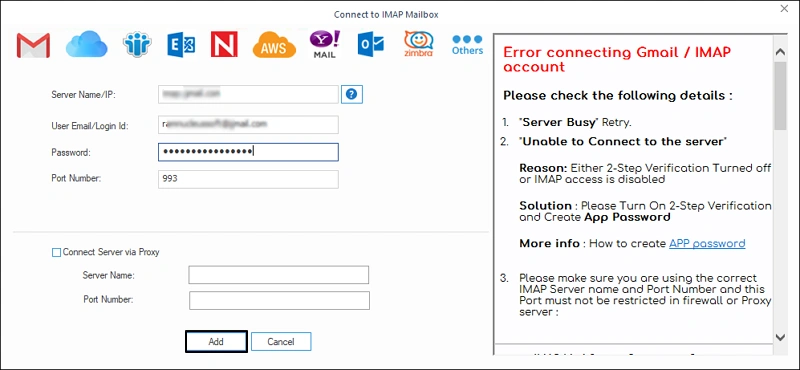
Step 4: After you have successfully added the source account, click Connect to add the destination Office 365 account. The tool will ask for Login Type, choose Modern Authentication. 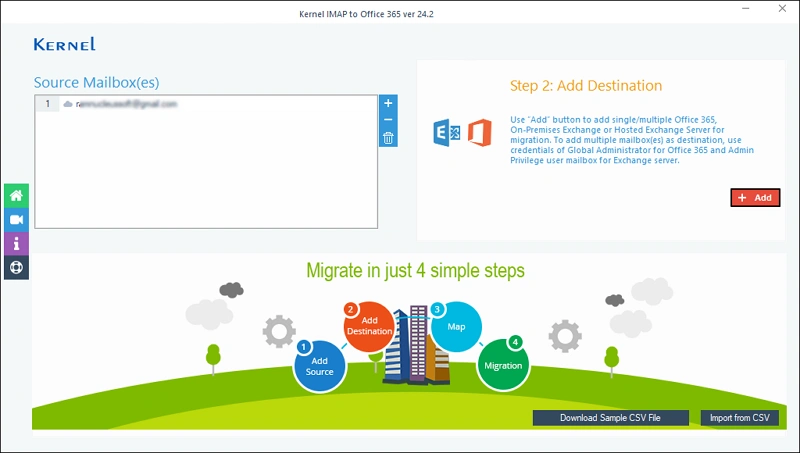
Step 5: Enter Tenant ID, Client ID, and Client Secret Value for the Office 365 account that you want to add as a target. To migrate data to a single mailbox, select the Single Mailbox option and enter the email address. For multiple user migration, select the List all mailboxes option, and click on Get User Mailbox(es) button. Select the mailboxes in which you wish to migrate the data and click Add. 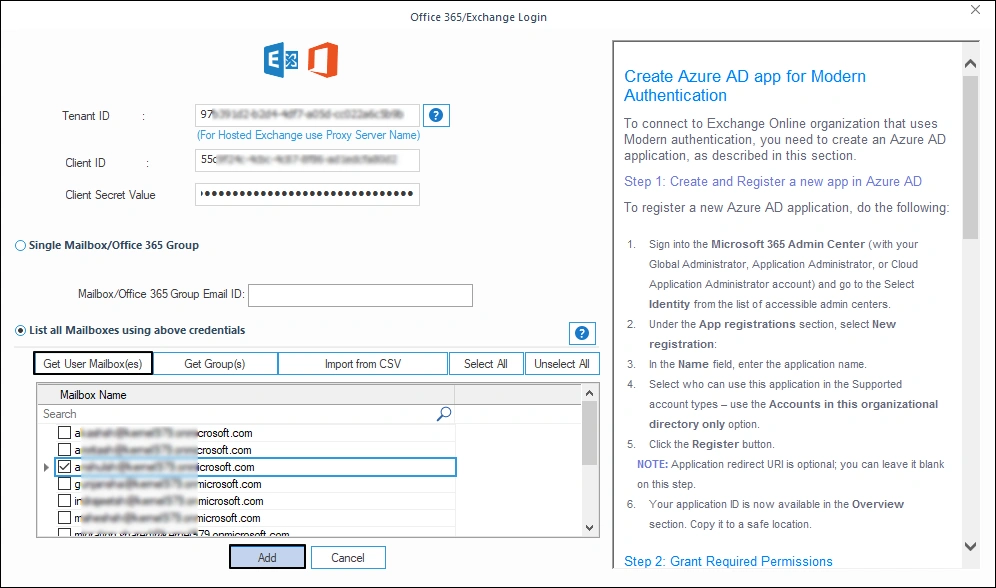
Step 6: For correct mailbox transfer, the tool allows you to map the Open Xchange account to any mailbox present in the Office 365 account. Choose the Office 365 mailbox and click on the Set Filter and Migrate button. 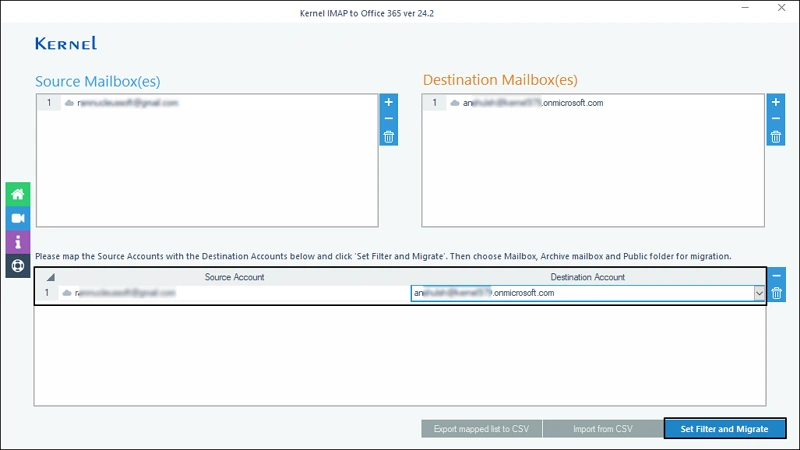
Step 7: You can migrate Open Xchange emails to Office 365 account’s three destinations – Mailbox, Archive Mailbox, and Public Folder. Select any and click on Migrate. 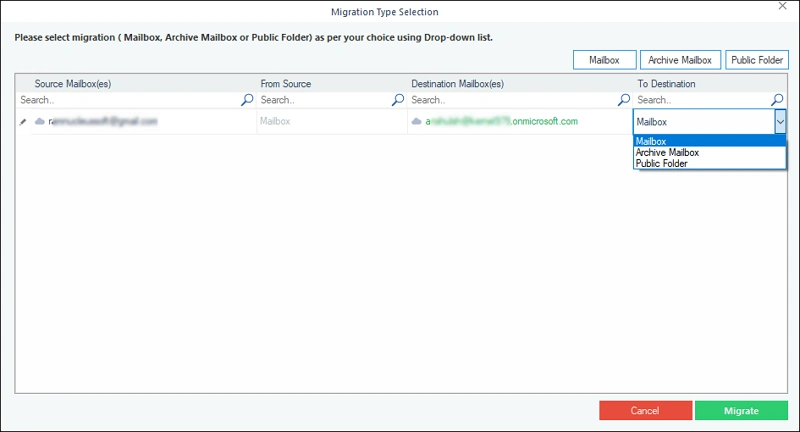
Step 8: Apply any necessary filter for selective data transfer, you can include/exclude folders, perform date-specific migration, and more. Once done applying filters, click on I am OK, Start Migration. 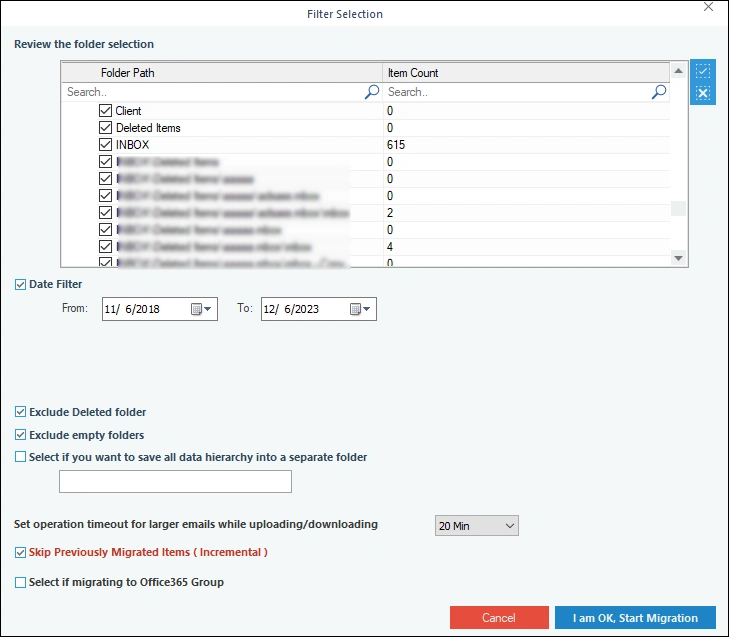
Step 9: The IMAP to Office 365 tool will show live migration status. When the migration is over, you will get a success message. 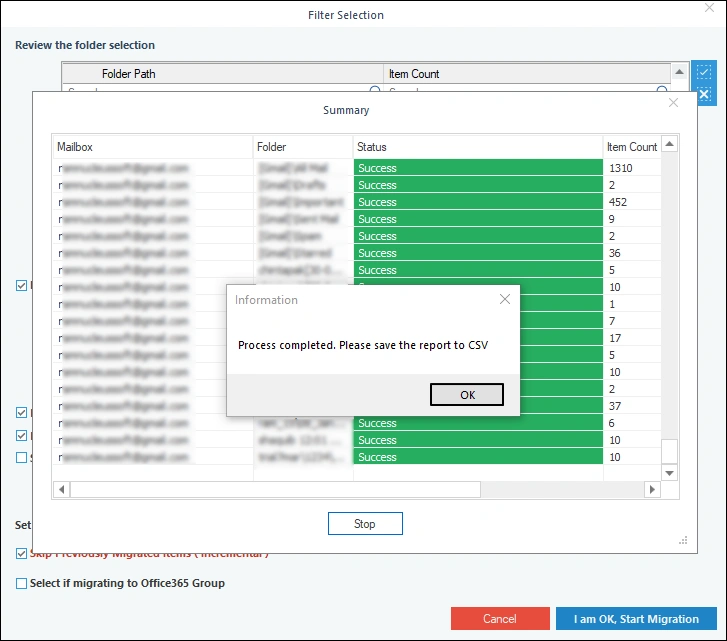
Step 10: The tool automatically generates a detailed migration report. To download it, click Save report to CSV button. 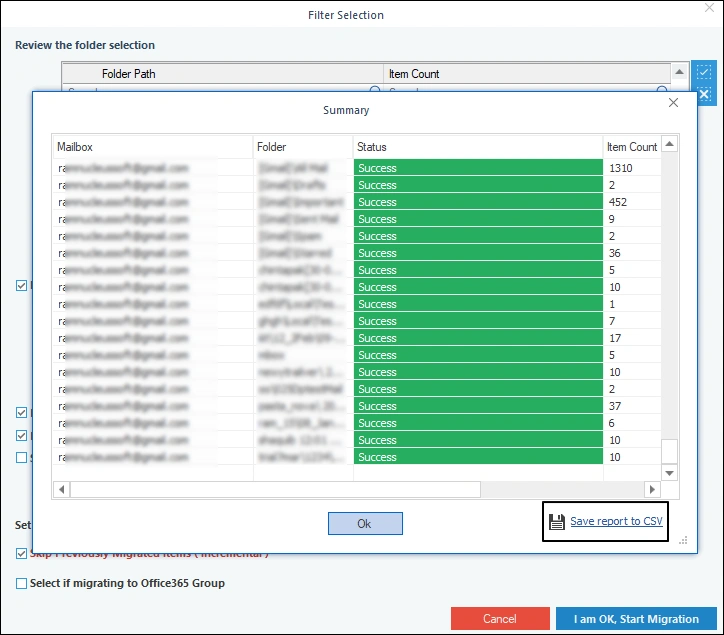
Many users want to migrate Open Xchange to Office 365 account for high scalability, robust security, and reliable performance. The best method to transfer your emails with complete data integrity and original folder structure is to use an automated tool like Kernel IMAP to Office 365. You can even migrate your IMAP mailboxes to Exchange On-premises with the tool. If you have doubts, you can try the free trial version of the tool & migrate 10 items per folder for free.
Ans: For an error-free migration process from a hosted Open Xchange account to Office 365, you have to use an automated IMAP to Office 365 tool. There are no manual methods that guarantee a migration without data loss. With software like Kernel IMAP to Office 365 migration tool, you can even migrate Open Xchange On-Premise to Office 365 in addition to hosted Open Xchange.
Ans: The Kernel IMAP to Office 365 software is compatible with all Windows operating systems, including the server editions. The tool is fast, easy to follow, and supports all IMAP servers. If required, the tool can migrate IMAP to Office 365 shared mailbox.
Ans: To transfer Open Xchange emails to Office 365 account, you must do the following pre-migration things:
Backup your Open Xchange email data.
Buy a suitable Office 365 subscription plan.
Setup the account and create users in the new Office 365 account.