Read time 5 minutes
Multiple emails are sent and received to/from clients, senior officials, and fellow colleagues within an organization. Emails, when sent without attachments, may not take much space. But when email messages are attached with attachments like PDF files, documents, images, etc., they consume a lot of storage space. The number of heavy attachments in emails is one of the reasons for the large size of the Exchange database.
If more and more messages are sent and received with large attachments, the Exchange Database becomes large in size and these attachments can raise the database size to many Gigabytes. It would eventually affect the performance of Exchange Server and lead to corruption in the Exchange database files.
How to deal with large email attachments?
Large email attachments can accommodate huge storage unnecessarily and waste the resources of the organizations. To reduce the size of Exchange database files, the first step should be move or export email attachments to other location from the Exchange database. This action would free some space from the Exchange database. Some manual methods to remove attachments in different Exchange versions are:
- Using ExMerge utility
- Using Exchange Management Shell
Extract attachments from Live Exchange using ExMerge utility
Microsoft offers a free utility, ExMerge, to extract Exchange mailbox data along with the attachments. This tool can be downloaded from the Microsoft website itself. Generally, you can use ExMerge utility with Exchange Server 2000, 2003, and 2007 versions.
How to use ExMerge utility?
Before running this utility, Exchange user account must be assigned full mailbox rights over the user mailboxes. Now, download the ExMerge utility from the Microsoft website, install it on your system and launch it. You can just follow the on-screen instructions to complete the process.
- Launch the ExMerge utility and click Next till Procedure Selection wizard is displayed. Now select Extract or Import (Two Step Procedure) and click Next.
- In this wizard, specify your Exchange Server name, and click Options.
- In the Data tab, select the checkbox User messages and folders and click OK.
- In the Import Procedure tab, select Archive data to target store.
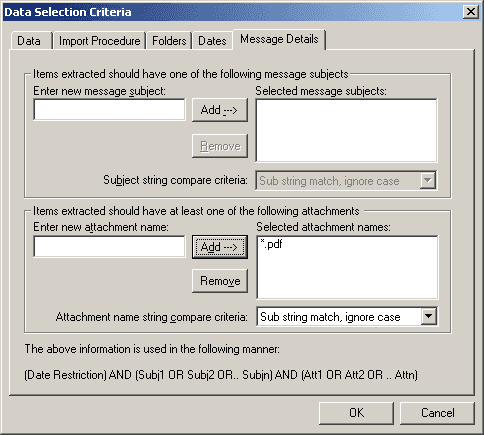
- Click on the Message Details tab and specify the document format (.doc. .pdf. .xls, etc.) to extract from emails. Then click OK. Click Next to continue.
- Now click Select All to select all the items and again click Next.
- In the opened window, select the desired locale.
- In the next dialogue box, provide the destination PST file location and click Next.
- Click Save Settings button to save the settings of the export process and finally click Next.
The export process will begin and gets completed soon depending on the amount of the data exported.
Definitely ExMerge utility comes free, but has many limitations on data, i.e. target PST file size is limited to 2 GB and the entire message is exported along with the attachments (attachments are not exported separately) with this process. In addition to exporting attachments, you can also try to export archived emails from the database with an EDB to PST converter tool.
Extract attachments using Exchange Management Shell
Another way to extract EDB mailbox attachments is using Exchange Management Shell cmdlets. For this, Export-Mailbox PowerShell commands can be used with Exchange 2007. To use these cmdlets, the user must have full access permissions on user mailboxes. The user account should be assigned with the Exchange Administrator role and should be a member of the local Administrators group.
Run the following command to extract the messages with attachments:
Get-Mailbox | Export-Mailbox -AttachmentFilenames “*.DOC” -PSTFolderPath C:\Attachments.pst –DeleteContent
When you execute this command, all the messages containing .doc files will be moved to the specified location C:\Attach.pst and removed from its earlier location.
For later versions like Exchange 2010, 2013, 2016, users can use a different set of cmdlets. Use this command to assign the rights:
New-ManagementRoleAssignment –Role “Mailbox Import Export” –User Administrator
Now, export the attachments using the following command:
Get-Mailbox | New-MailboxExportRequest -ContentFilter {Attachment -like “*.DOC”} -FilePath “\\SERVER01\PSTShare\Attachments.pst
All the messages with attachments having a .doc extension are now saved to Attachments.pst file located in the shared folder named PSTShare. The exported messages are not deleted from the source location though. However, this method only works if your EDB file is healthy. In case your database file is corrupted, you must repair EDB files before using this method.
Need an easier solution to extract attachments from Exchange emails?
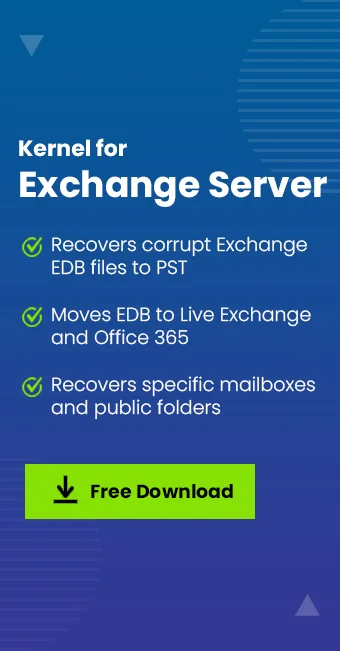
After going through these manual solutions, you must have learnt how to extract attachments from Live Exchange mailbox, but the methods are not at all handy to use. They definitely require technical know-how about how to use PowerShell commands and ExMerge utility. To avoid these issues, users can go for another option using an advanced Kernel for Exchange Server. With this powerful Exchange Server recovery software, users can extract attachments from Exchange mailbox to the desired location in PST format.
You can take benefit from the two scanning modes (Standard and Deep Scan) to resolve corruption in any version of Exchange Server. Simply add EDB files containing mailbox data, preview contents, apply filters, and extract/migrate to the desired destination. In addition to repairing large EDB files, the tool can also migrate EDB to Live Exchange or Office 365.
Conclusion
ExMerge utility and PowerShell commands can help you remove or extract attachments from Live Exchange mailbox. However, these two methods demand technical expertise and a lot of time. You can use Kernel for Exchange Server recovery software for a foolproof extraction of mailbox attachments. This EDB converter allows extracting attachments to PST within your local storage and access them whenever required without any issues.