Read time: 4 minutes
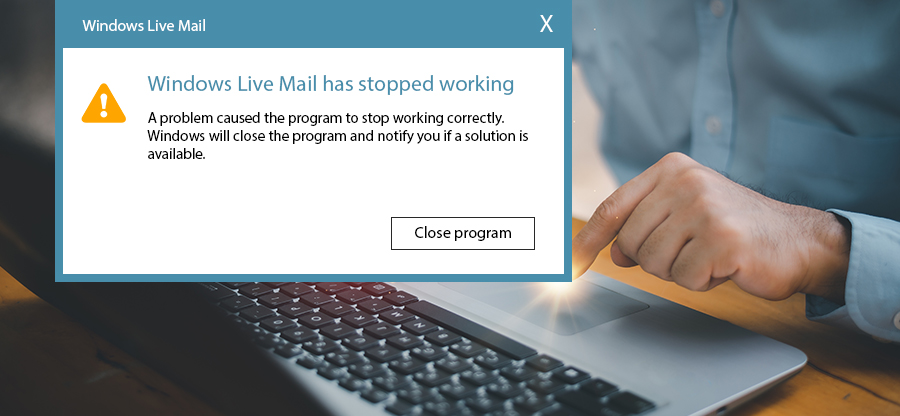
It has been more than nine years since Microsoft stopped supporting Windows Live Mail. But still, many are using it for daily email communication. This legacy email client can stop working anytime, and once it does, you will immediately lose access to your contacts and emails. To prevent permanent data loss, you must immediately backup Windows Live Mail to external drive or local storage.
Reasons to Backup Windows Live Mail to External Hard Drive
Every email client has a limit to which they can hold emails. It is nothing new that the data on your email client is always vulnerable to loss. There are many situations in which you can lose your essential emails, a few of which are:
- Virus attacks
- Hard disk failures
- Unfortunate accidental deletions
- System formatting
- Corruption
In some of these situations, you may lose your data permanently. So, having a backup of Windows Live Mail data on an external drive is the wisest choice as it makes the data available in multiple locations. Similarly, saving backup in different formats works magic as you have your data safe almost forever.
How to Save Windows Live Mail to External Hard Drive Manually
You can easily copy Windows Live Mail emails on your system or an external drive by following the below-mentioned steps:
Step 1. Start with creating an empty folder wherever you want to save the backup.
Step 2. Now, open Windows Live Mail and log in to your account.
Step 3. As the program opens, click on the Windows Live Mail icon, select Export email, and then Email messages.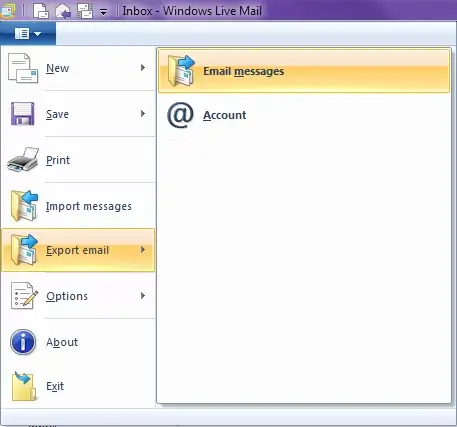
Step 4. Choose the Microsoft Windows Live Mail option and click Next. Then, click on Browse and select the folder you have made for backup on the external hard. Click on the Next button to proceed.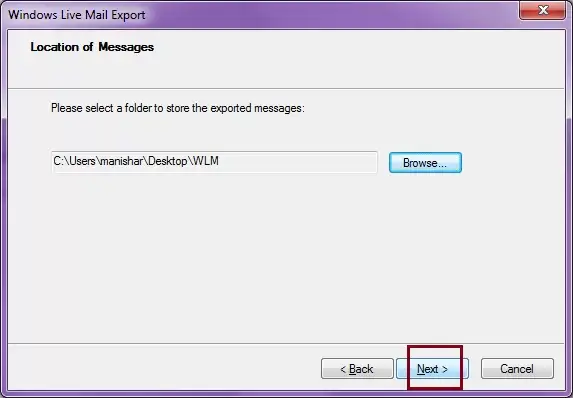
Step 5. Select the required folders to export or select All folders and click on Next.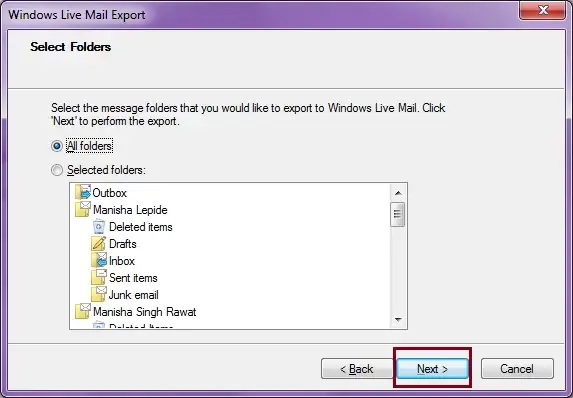
Step 6. Wait for the process to finish.
Step 7. Once the export is done, click on the Finish button.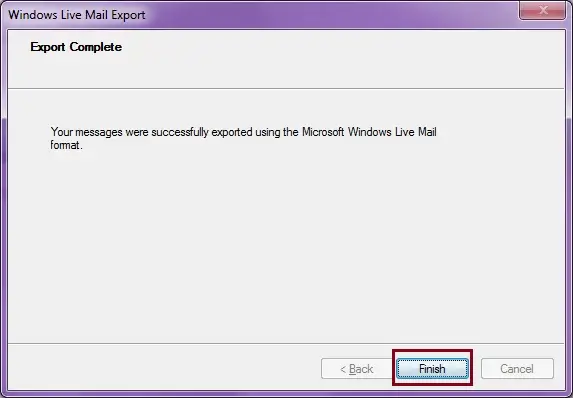
Once you perform all the steps successfully, you can check the exported data in your new folder on your external hard drive. All the emails will be saved in the EML format.
Why Saving the Emails as EML Not Enough?
After finishing the manual method, you will get the loose EML files. Searching, storing, and moving them, when you have thousands of individual email files distributed in 100 or more folders can become difficult and time-consuming. Moreover, with the EML files, you will find it challenging to import them to Outlook or Office 365. If you prefer to keep your backup in a format that is easy to manage, you can convert EML files into PST. This process can be completed using an EML to PST Converter.
Conclusion
You can lose access to your WLM email client with any new Windows update. Backup Windows Live Mail to external hard drive as soon as possible with the method discussed above. After saving the emails to EML files, you may need to convert multiple EML files to a single PST file for easy mailbox management and data migration. Lastly, check the external drive where you saved the file. This is how you can backup Windows Live Mail to external hard drive in PST format.
Frequently Asked Questions
A. Technically, it is possible, but we will not recommend it. Using WLM in Windows 11 will give registry errors, constant sign-in issues, and application crashes.
A. No, all your EML files will stay as they were. You can also use an EML Converter tool which works on a read-only model (for source files) and do not modify or delete any EML files.
A. To back up Outlook.com, do this:
1) Add your account to classic Outlook.
2) Export the mailbox data in PST format.
A. To export contacts from WLM:
1) Click Export > Comma separated values (.CSV).
2) Browse to where to save the .csv file.
3) Select the fields to save and download the CSV file.
![Best Windows Live Mail Alternatives [Updated 2026]](https://www.nucleustechnologies.com/blog/wp-content/uploads/2020/04/windows-livemail-alternative.jpg)