Read time: 6 minutes
If you work in big firms or MNCs, you better know the meaning of teamwork and collaboration. Sometimes, we have to arrange a meeting with teammates working remotely or with some outsiders for information sharing. And now, for all these tasks, we have Microsoft Teams. It is a collaborative tool we put our faith in. Microsoft Teams has been the fastest-growing app in Microsoft 365 since its launch. Millions of enterprises are globally using it. Using Microsoft Teams, it is easy to connect and share data and information with team members and people outside the organization.
To provide access to users outside the team, Microsoft Team has two options – External Sharing and Guest Access. With external sharing, SharePoint Online makes all kinds of data and information accessible to specific users. With guest access in Microsoft Teams, the owner can allow an outsider to join by granting permission to access the team.
Guest Access
A team is a group of people working together to achieve a target. When an outsider joins the team for any help or suggestion, that user is described as a guest. A guest can be anyone outside the group or organization, like an ex-colleague, business partner, vendor, or supplier.
Guest access in Microsoft Teams is helpful when you want an outsider to join the team for meetings or idea sharing with limited access to data (to avoid security breaches). Guest access can be allowed for chats, video, and voice calls.
Guest Access Licensing
No additional subscription is required for guest access. All Microsoft 365 plans, such as Business Standard, Enterprise, and Education, support the Guest access feature.
In Microsoft Teams, some permissions are applied to every member according to their position:
Owners- If you are an owner who is organizing and managing these team meetings, then you have permission to add or remove members, add guests, change team settings, and handle all administrative-level tasks. In a team meeting, there can be multiple owners, too.
Members- The team members have permission to interact with other members and can view, upload, and change files.
Guests- If you are a guest outside the team, you have fewer capabilities than members and owners. You can only enter and use the permissions allowed to you by the owner.
How to allow guest access?
To allow guest access using the admin center, you need to login into your Microsoft 365 admin page. Here are the steps to allow Guest access:
Step 1- Login into your Microsoft 365 Admin center.
Step 2- Now go to Teams (under Admin centers).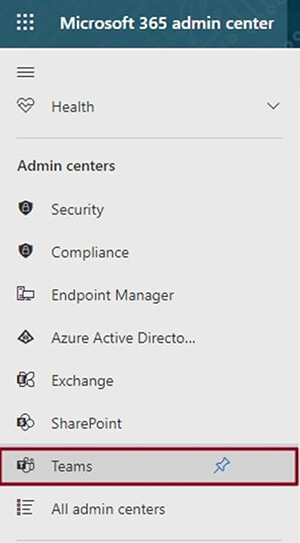
Step 3- Now go to Users on the left pane.
Step 4- Select Guest Access under Users.
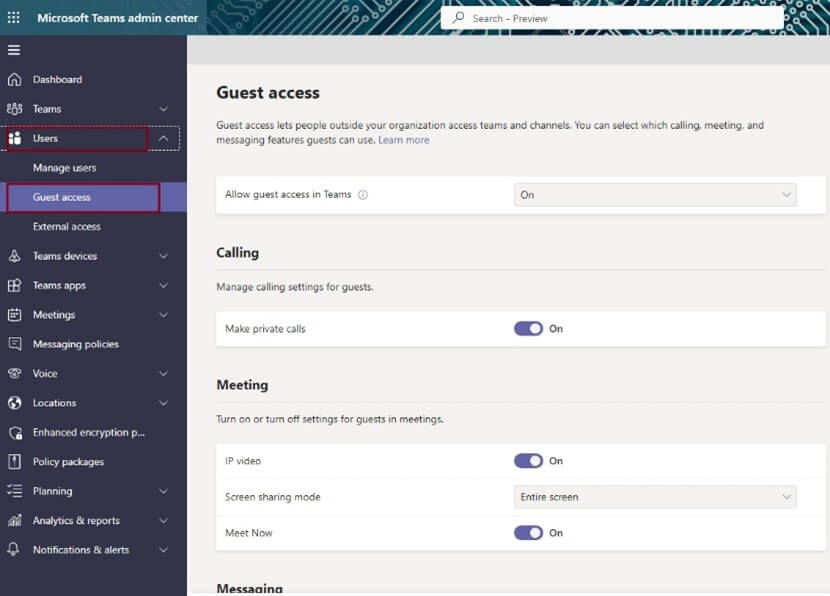
Step 5- Enable the tab Allow Guest Access in Teams in the Guest Access window.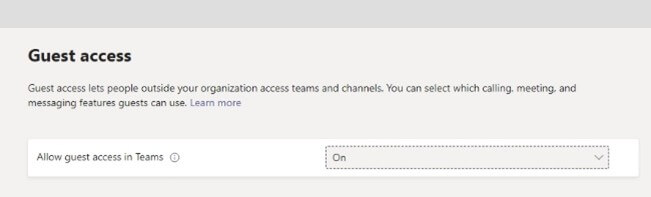
How to set guest permission?
When a guest gets added to the team, then team owners can opt to configure guest permissions. Here are the steps to set guest permissions-
Step 1- Go to Teams on the left pane.
Step 2- In the Teams window, go to the team name.
Step 3- Now select More options and go to Manage Team.
Step 4- Select Settings and go to Guest permissions.
Now select the permissions you want to allow to the guest.
Note: The Owner has full authority to change or modify permissions of members and guests.
How to add a guest?
After enabling guest access in Microsoft Teams and setting the required permission, let us add the guest to the Team. Follow the steps mentioned below to do so:
Step 1- Click on the Teams icon on the left.
Step 2- Now select a team and click on the three-horizontal dot.
Step 3- Click on Add member from the drop-down list.
Step 4- A new window will appear; enter the guest’s email address here.
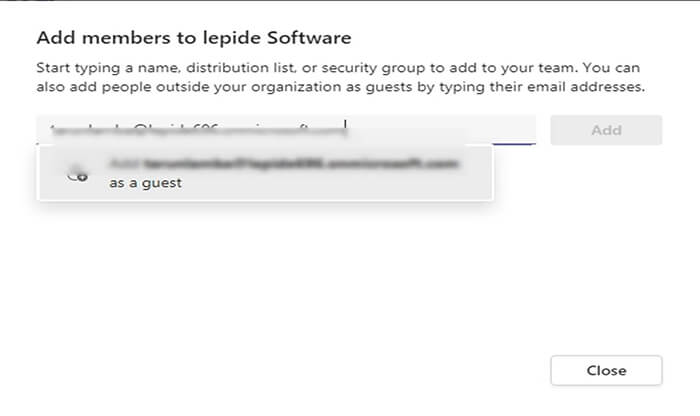
A guest can be anyone from outside the organization. One can add the guest using an email account of Outlook or Gmail, to join the team as a guest.
Step 5- Now, finally, click on the Add button.
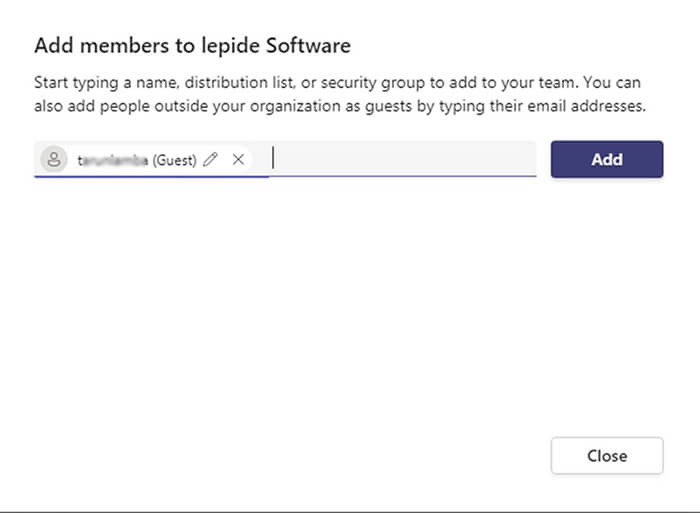
After this, the guests will receive a welcome email invitation about joining Teams.
How to manage settings and permissions in Microsoft Teams?
The admin can control & configure permissions from the Teams app to define access levels for the Team members. To alter Team assigned permissions, do the following:
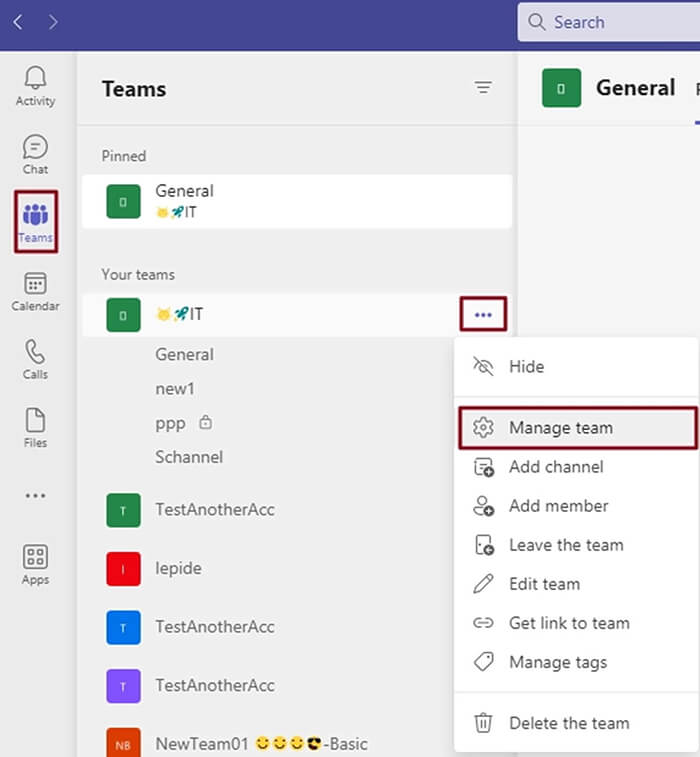
Step 1. Launch Microsoft Teams & navigate to Team section.
Step 2. Click the Teams icon, select any team name, and click on the three-horizontal line.
Step 3. Now click on the Manage team from the drop-down list.
Step 4. In this window, the owner or admin can manage members and channels, check or uncheck the options in settings, can check analytics, and even more.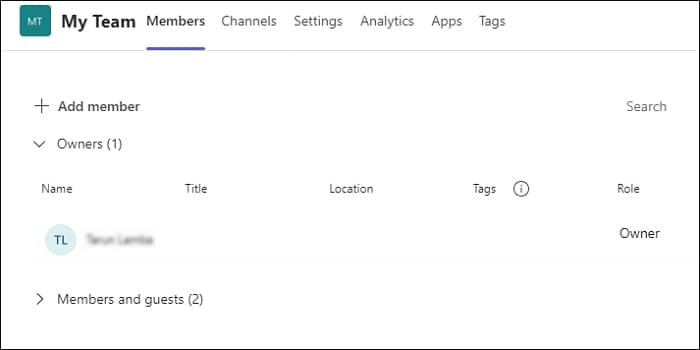
Safeguard Teams data with Kernel Microsoft Teams Backup tool
Altering user access permission requires the admin to be cautious. If, by mistake, admin grants higher-level access to the guest user, then it could easily result in a data disaster. The guest user can willingly or unwillingly delete some important files, chats, or other objects in Teams.
To prevent such a situation, it’s important to meticulously assign permissions. Additionally, the admin must always have a data backup to revert any data loss scenario. However, there is no feasible manual method to save entire Teams data effectively. Therefore, you must rely on a third-party professional tool for Teams data backup.
Kernel Microsoft Teams Backup is an automated tool embedded with powerful and optimized algorithms that deeply scan and save entire Teams data to your machine. The Microsoft Teams Backup tool can effortlessly backup Teams 1:1 chat, group chat, channels (Private, Standard, Shared), files, notes, and more.
Features offered by the tool:
- Backup complete or selected data with smart filters.
- Preserves files/folder original structure & hierarchy.
- Enables users to preview Teams scanned data.
- User-friendly interface for quick and easy tool navigation.
- Compatible with all Windows OS versions.
Conclusion
Guest access in Microsoft Teams is an essential feature. It helps to collaborate with outside users with restricted participation access without compromising data security. However, access to permissions like Delete chat enables guests to delete an entire conversation. To secure your chat & channel data along with other Teams components, we recommend you create data backup with the Kernel Microsoft Teams Backup tool. I hope you find this blog informative. For more such Microsoft Teams-related blogs, stay tuned to our page. We are coming up with more such blogs and looking forward to your response in the comments section below.