Read time 7 minutes
VLC media player is considered as the most trusted and reliable media player app across different platforms. It is so popular that after getting an overwhelming response for its desktop version in different operating systems, it is now available for mobile devices too. However, even after being such a top-notch media player, it may come across some video playback issues. Sometimes, you may experience low resolution or choppy videos while trying to play them. These issues may stop you from working efficiently and will directly lead to lower productivity. In this article, we will dig deeper and find out how to fix scrambled video playback in VLC Player.
Reasons behind scrambled video playback in VLC player
Even after being this perfect, it’s just a piece of technology and it can always behave abnormally in some situations. Following is some of the most common reasons listed that are causing this issue:
- Corrupted video file: If your video file is damaged or corrupted, then it can be the reason behind issues in the video.
- Incorrect codecs: If you have downloaded incorrect or incompatible codecs, then they may give rise to such issues.
- Obsolete VLC version: If you are using an outdated or obsolete version of VLC media player, then it can encounter issues while playing videos.
- Incorrect settings: If you have applied incorrect settings in VLC media player, then they may cause video playback issues.
Methods to fix scrambled video playback in VLC media player
Here we are going to mention a few methods which will help you fix the scrambled video playback error in VLC Player. Follow the step-by-step carefully to achieve success:
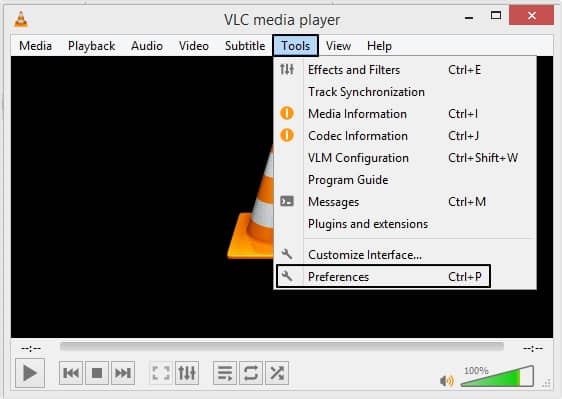
Method 1. Disable accelerated video output (overlay) if enabled
It is the very first measure you should take if you are experiencing scrambled video in VLC. Enabled Accelerated video output (Overlay) can interfere with some video formats leading to scrambled video playback. So, to disable this feature in VLC, follow the below-mentioned steps:
- Launch VLC in your system and click on the Tools option, then select Preferences.
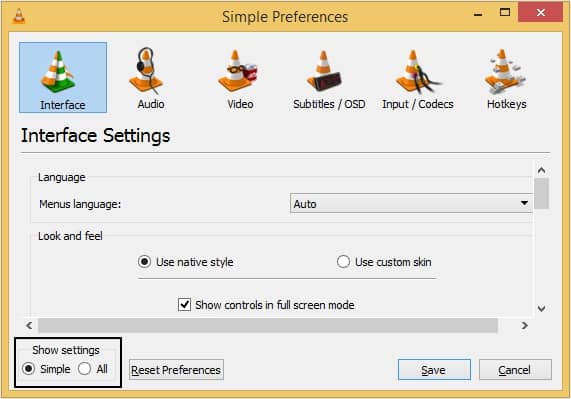
- In Simple Preferences window, select the Video category.
- Now, in the Display category, look for the Accelerated video output (Overlay) option and uncheck the box next to it.
- Finally, click on Save to finalize the changes.
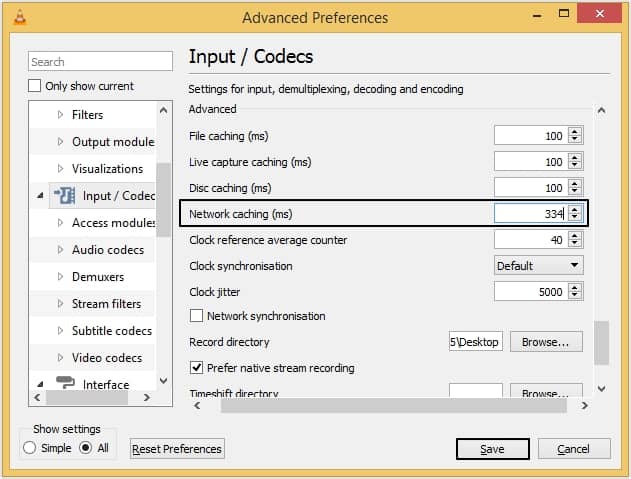
Method 2. Change VLC’s network caching rate
Another way that can fix the scrambled video is changing its network caching rate. To do that follow the steps:
- In VLC, go to the Tools option and select Preferences from the menu.
- In the Simple Preferences window, go to the Interface Settings and in the Show settings category, check the box next to All option.
- Moving ahead, an Advanced Preferences window will be displayed on your screen, locate Input/Codecs and click on it.
- There, look for the Advanced category, and trace the Network Caching (ms) option, and increase the value of the caching.
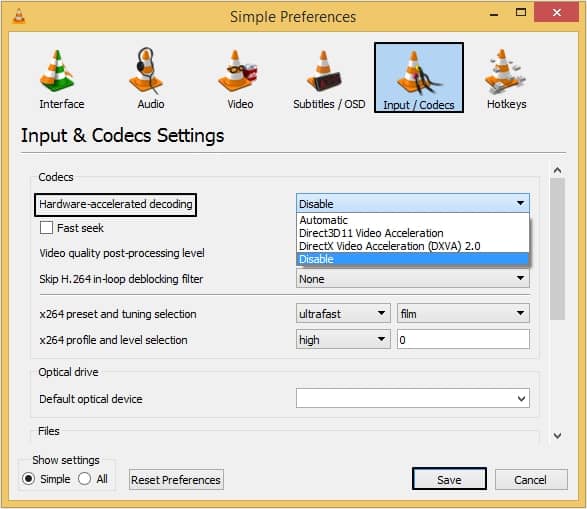
Method 3. Turn-off hardware-accelerated decoding
Sometimes, hardware-accelerated decoding causes video playback issues in VLC media player. Turning it off is a wise choice in that case. Follow the below outlined steps to do so:
- Open VLC media player and click on Tools, then Preferences option.
- Now, tap on Input/Codecs and select Disable from the drop-down list next to Hardware-accelerated decoding, and click on Save.
Method 4. Try to transfer video file to your system’s internal drive
There are chances that the video is behaving like this because it is being played directly from the external drive. Playing video in such a way can make your drive go into sleep mode and hence it interferes with functioning of VLC media player. So, it is suggested that you copy and paste the video file on your local drive properly and completely. Once done. Try to play the video again.
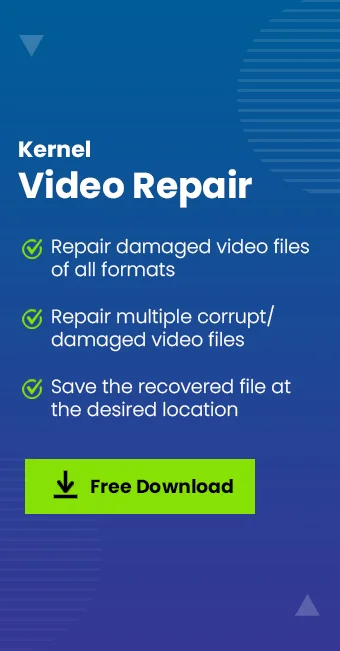
Use Software to Repair Corrupt Videos
There can be chances that the video file you are trying to play is corrupted, and this is the reason why it is encountering issues. It is always preferable to use a professional tool to fix corruption from video files. Use Kernel Video Repair tool to fix corruption issues in a video file, including scrambled video playback error. This tool has amazing features and advanced technology that makes it stand out. It has the option to save the repaired video at your desired location, be it an internal or external storage device. It has no file size or duration limitation. Save up to 30 seconds of video free with its trial version.
Conclusion
VLC is quite a popular media player among users and a lot of users had experienced issues while using it. Through this blog, we have tried to include every possible measure to fix this issue. However, manual method may lead to video not playing issue. So, in case of a corrupt video file or any video-related errors, we recommend using Kernel Video Repair software to get the best results without taking much time.