Read time: 7 minutes
SharePoint is a cloud-based platform where the facility of ‘collaboration’ is taken a notch higher. It helps teams work smarter by enabling them to create and share content, from a single document to the entire website. To manage your users and their access permissions to the site in an efficient manner, you can create a SharePoint group. This is primarily done to assign a set of permissions to a group of users within the organization who have similar business needs.
This article will be your guide to create a group in SharePoint. It also explains how you can add users to the group without disrupting its functioning.
What is a SharePoint Group?
The process of sharing the same document with every user is not at all time efficient, and the user wastes all their energy on this irrelevant work. Instead, you can form a custom group where a set of users are granted the same permissions to access specific content on the site. Rather than following a default group, it will allow the site owner to customize things according to their business needs and requirements.
How does a SharePoint group help?
Scroll down the section to learn what is the role of groups in SharePoint environment and what are their benefits:
- Assign group permissions and eliminate manual efforts required to grant permissions to individual users.
- Makes sure that only authorized users can access specific site content, such as sensitive documents.
- Supports team-based collaboration, such that group members can access shared resources of an organization.
Things to remember when you create group in SharePoint
Here are a few considerations that you must keep in mind when you create a SharePoint group:
- When naming groups, use names that are descriptive and define the purpose of the group and the type of users.
- Assign users with appropriate permission levels as: Read, Edit, Contribute, Design, and Full Control.
- Create customized groups only when required and use the default Owner, Member, and Visitor groups first.
- SharePoint groups are different from Office 365 groups and can only monitor the access to SharePoint content.
- Assign a user with the Owner rights to manage the requests and memberships to manage groups, even when a user exits.
- Configure settings for the users to manage viewers, and editor of the group membership and see if users can make requests to enter or exit a group.
Method to create group in SharePoint
Before we proceed with the method, make sure you do have an existing site in SharePoint. In addition, the following process can only be conducted by a Site owner or an individual who has been granted full permission by the owner.
These steps will guide you in making a group in SharePoint and adding users to it-
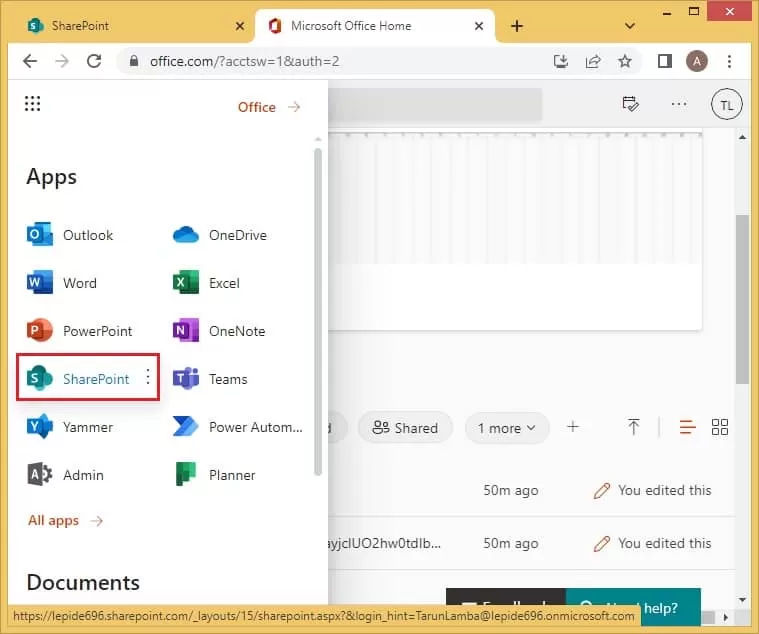
- Navigate to Microsoft 365 and open SharePoint as the admin.
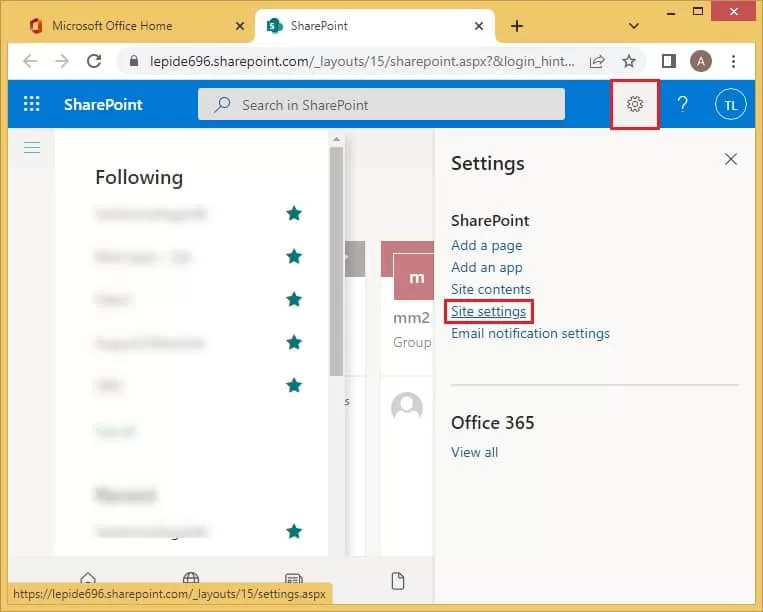
- On the Home page, click Settings symbol in the top right corner. A drop-down menu will appear; select Site settings.
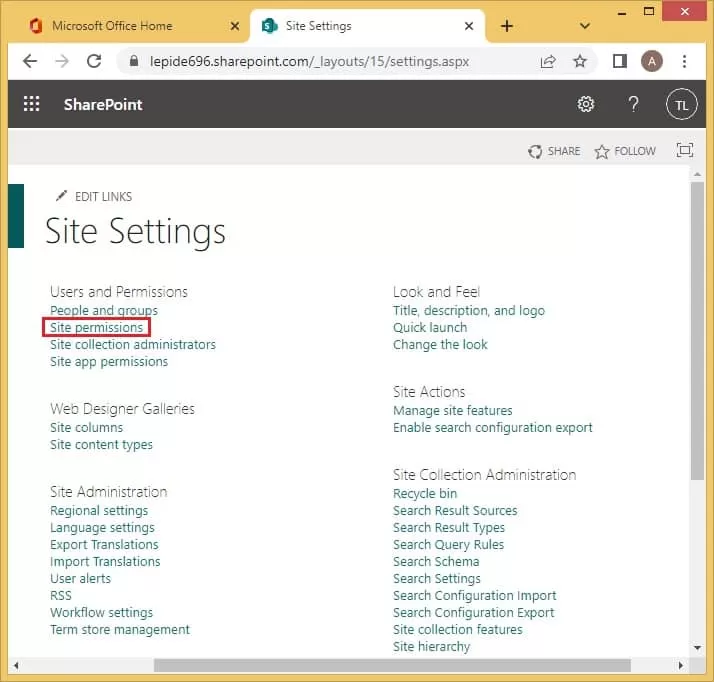
- Under the Users and Permissions, click on Site permissions.
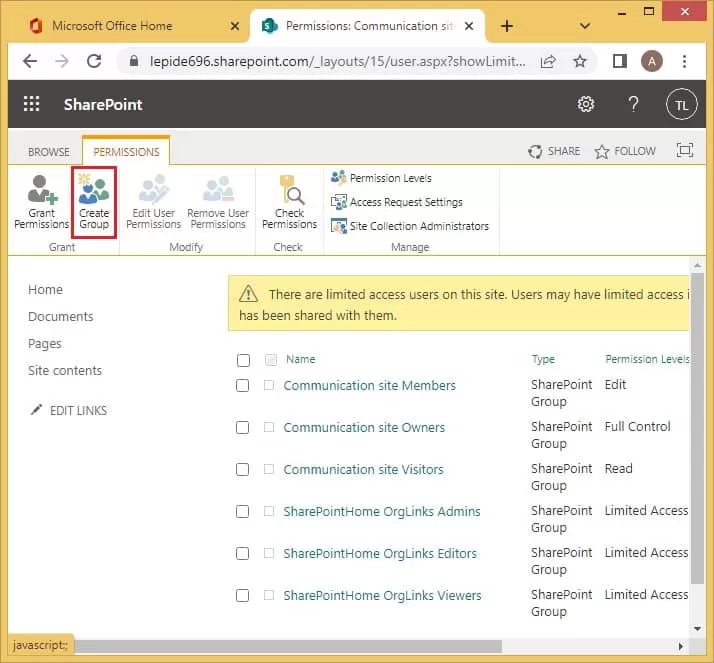
- Click on Create Group.
- Mention the name and description of the group. Add the group owner as well.
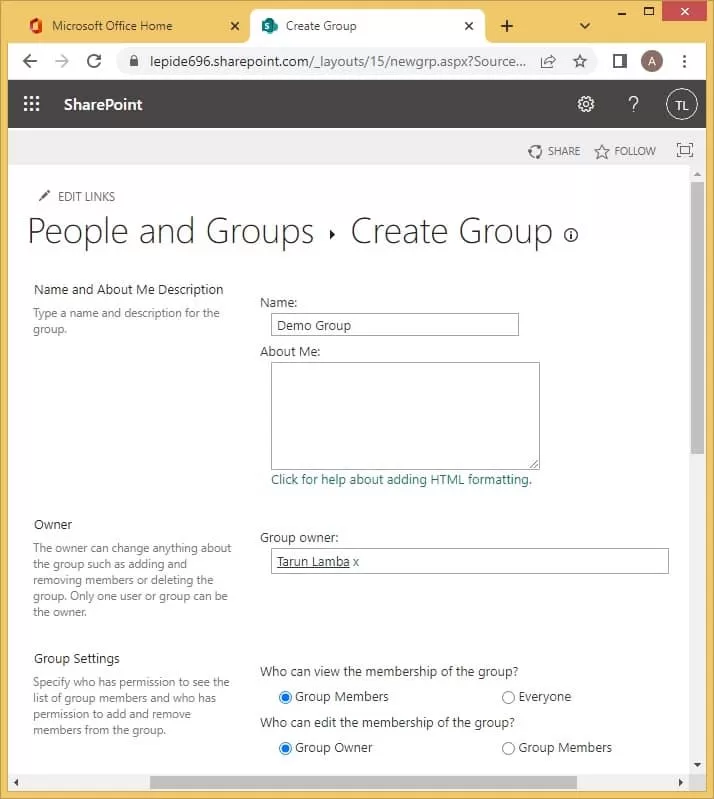
Note: The users added to the group are divided into three major categories:
- Group Owner- They have control over the group and are responsible for assigning permissions and tasks to the other members.
- Group Members- Depending upon the permission they have been given, they are eligible to modify, edit and add items.
- Group Visit- These members only have permission to view certain items on the site.
- According to your requirement, assign permissions to the other members of the group. Click on Create.
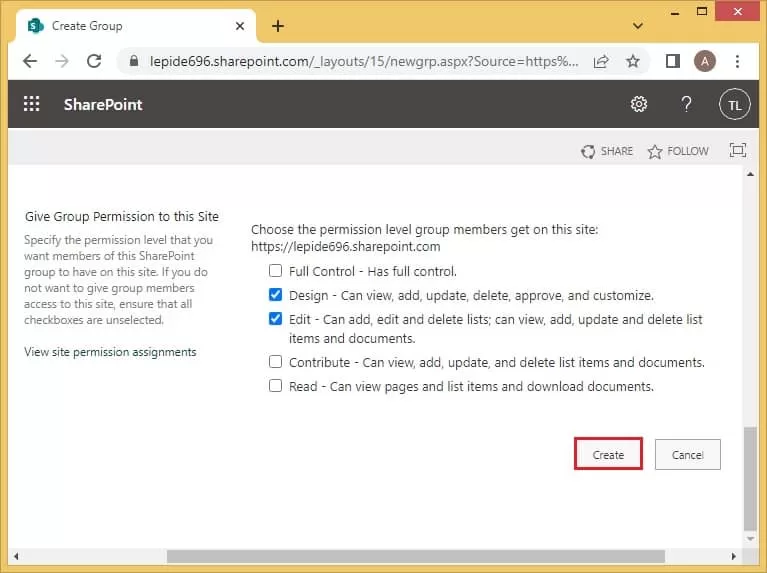
Note: To use SharePoint to its full potential, you should know about customize permission in the SharePoint group. These are the various levels of permissions that you can assign:
- View: Only able to view certain pages and list certain documents.
- Read: Able to read all the pages present on the site.
- Contribute: Users can add or change content on the site.
- Edit: Permits them to view, add, edit, and delete documents and other items.
- Design: Able to view, add, edit, change, or delete the page’s layout.
- Full: Allowed all the permissions.
- SharePoint Limited access: This is a customizable permit level.
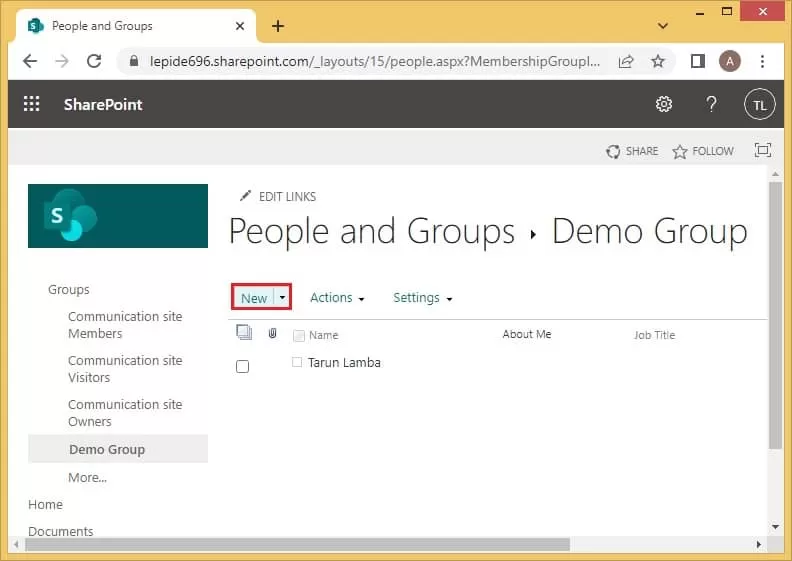
- Within a few seconds, the group will be created; click on New to add users to it.
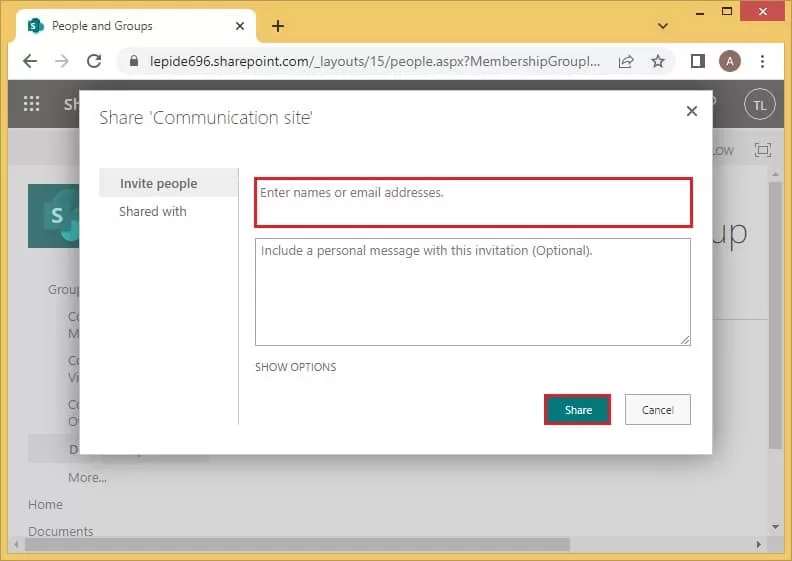
- Mention the name or email address of all the people you want to add to the group. Select Share to send them the invite for the same.
Kernel Migration for SharePoint- A professional tool
Efficiently planned SharePoint migration is the one that takes care of all site copy options. When transferring content, users often worry about migrate SharePoint permissions easily. If you are planning to migrate data, then no need to look any further.
Kernel Migration for SharePoint is a professional all-in-one tool that effortlessly migrates all the SharePoint site content into any destination, including SharePoint, Public folders, Microsoft Teams, OneDrive, and Google Drive. It even helps by performing a complex migration in a much-simplified manner. With this SharePoint migration tool, you can migrate site columns, site content, web parts, features, lists, libraries, site groups, permissions, etc.
Conclusion
A SharePoint group is created to assign the same set of permissions to a team of individuals working on the same goal. This saves time and promotes productivity in the organization. The site owner is responsible for customizing all the settings for the rest of the group members. First, create a group. It is an effortless process which has been explained in detail above. Later, the users can be added to the group and assigned permissions accordingly. If you are looking for a SharePoint Migration tool, a Kernel Migration for SharePoint tool is also recommended to make things easier.