Quick Answer: To configure Outlook on Mac, access Outlook, go to Preferences, tap on Accounts, choose Add Email Account, put your credentials, complete MFA, and wait for some time. For IMAP or POP accounts, manually enter the mail server settings of your email provider.
When you set up Outlook on your MacBook, it helps to manage emails, calendars, contacts, tasks, etc., from a single application. Organizations as well as professionals usually use different account types and protocols, such as a Microsoft 365 account, Outlook.com, Gmail, Exchange, or a custom IMAP/POP email account. So you might wonder how the Mac Outlook configuration process would be.
However, Outlook for Mac offers a simple and secure setup process. Here, in this guide, you’ll learn how to configure Outlook on MacBook, along with troubleshooting tips regarding setup issues.
Requirements to Configure Outlook on MacBook
Make sure you have the following things before you begin to configure Outlook on your MacBook:
- An updated MacBook with Microsoft Outlook installed
- A stable internet connection (physical or wireless)
- Your account email address and password
- Multi-factor authentication (MFA) code, if enabled
- IMAP, POP, or SMTP server settings for manual email configuration
- Microsoft 365 or Exchange credentials for work or school accounts
After having these, let’s now move to the process to configure Outlook in MacBook.
Step-by-Step Process to Configure Outlook on a MacBook
The complete guidance to configure Outlook in Mac is here. Follow this stepwise process for the same:
- Download and install Microsoft Outlook from the Mac App Store or a Microsoft 365 account.
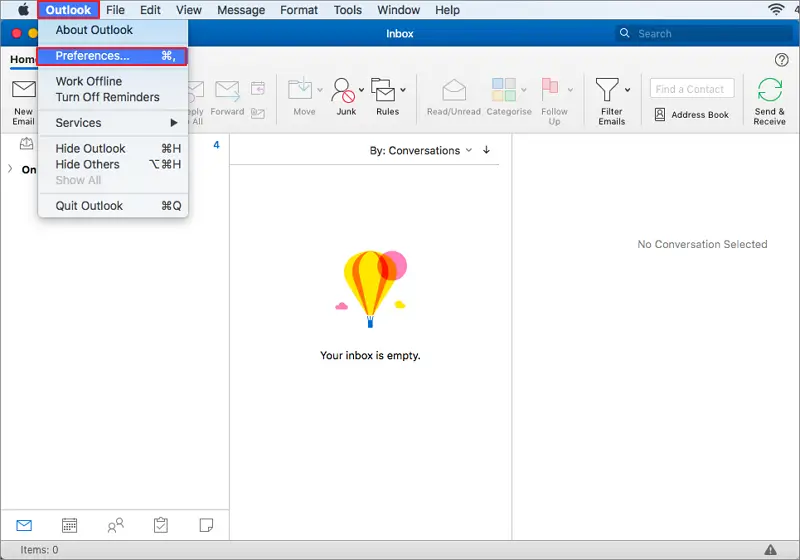
- To get started, launch it, then go to the Outlook tab and select Preferences (or Settings).
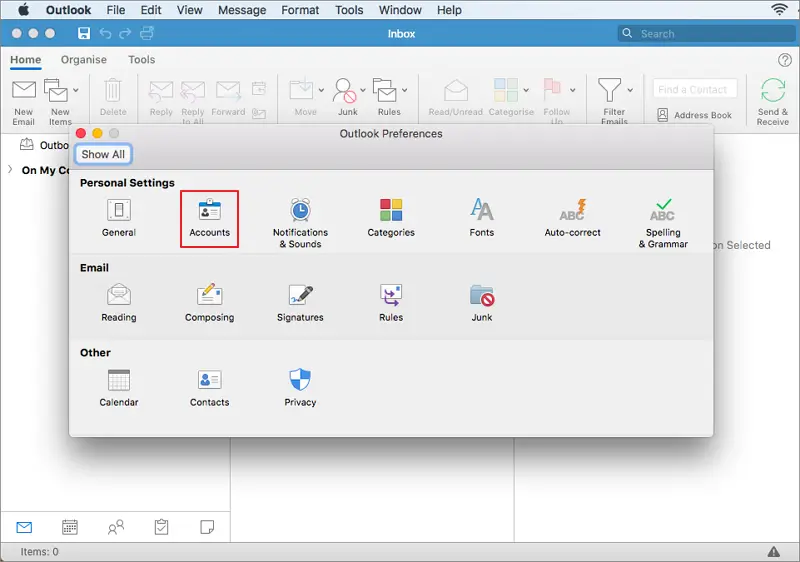
- In the Outlook Preference window, select Accounts under Personal Settings.
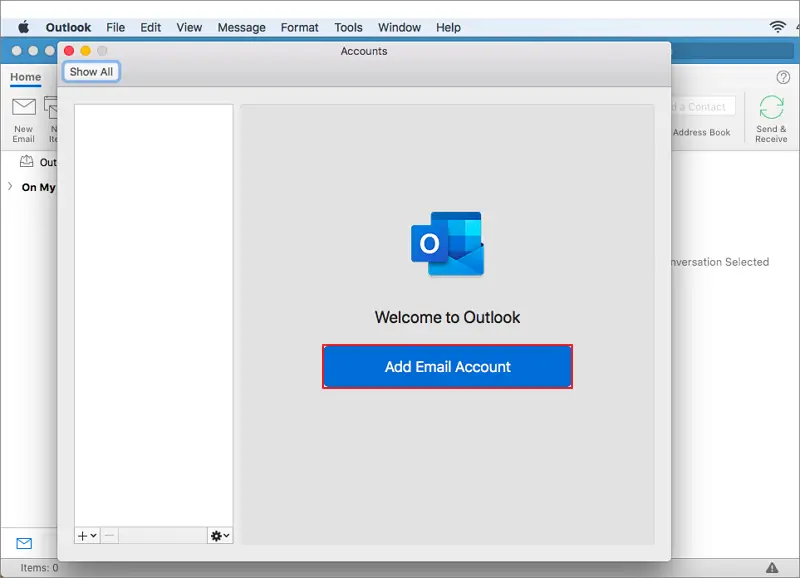
- Click on Add Email Account to proceed further.
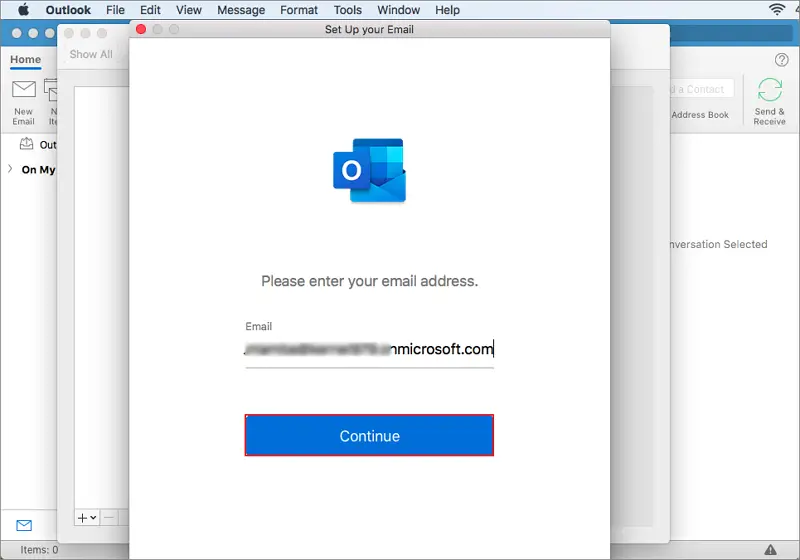
- Enter your email address and click Continue.
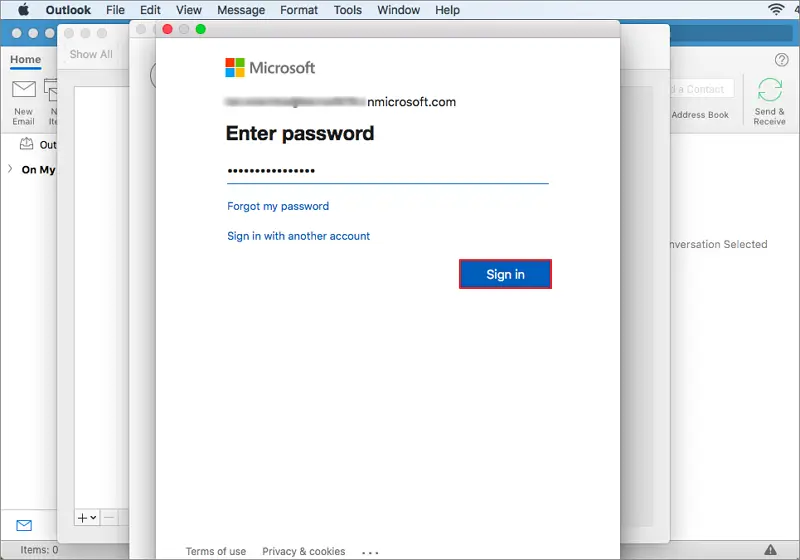
- Outlook for Mac will automatically fetch your email provider. Enter account password.
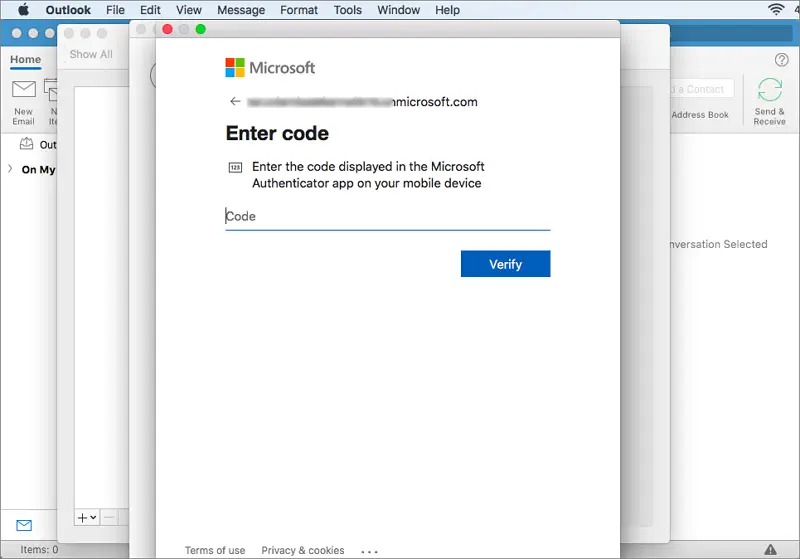
- Verify multi-factor authentication (MFA) if prompted and allow required permissions.
- Wait for a few minutes; Outlook will be configured and will automatically sync your emails, contacts, calendar, and tasks.
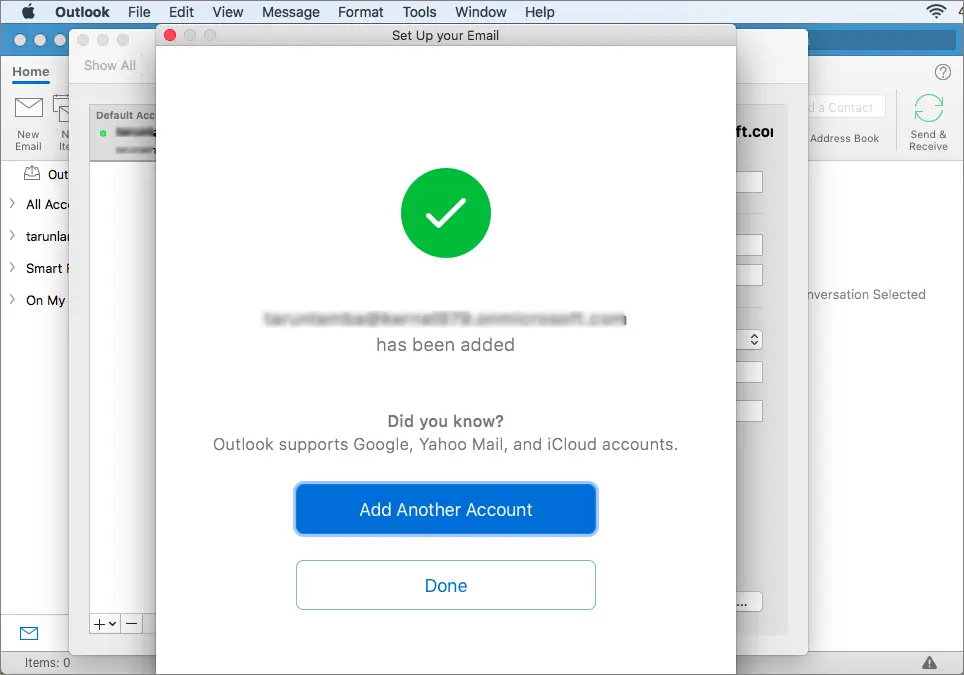
- Click on Done if you don’t want to add another account and start managing your mailbox items.
How to Add Another Email Account: Stepwise Guide
You can also add more than one email account and even manage all of them from a single Mac Outlook application. Here are the steps to follow to add another account in Mac Outlook:
- In the Outlook application, go to the Outlook tab, then choose Preferences.
- Tap on Accounts under Personal Settings.
- From the bottom left, tap on + and choose New Account.
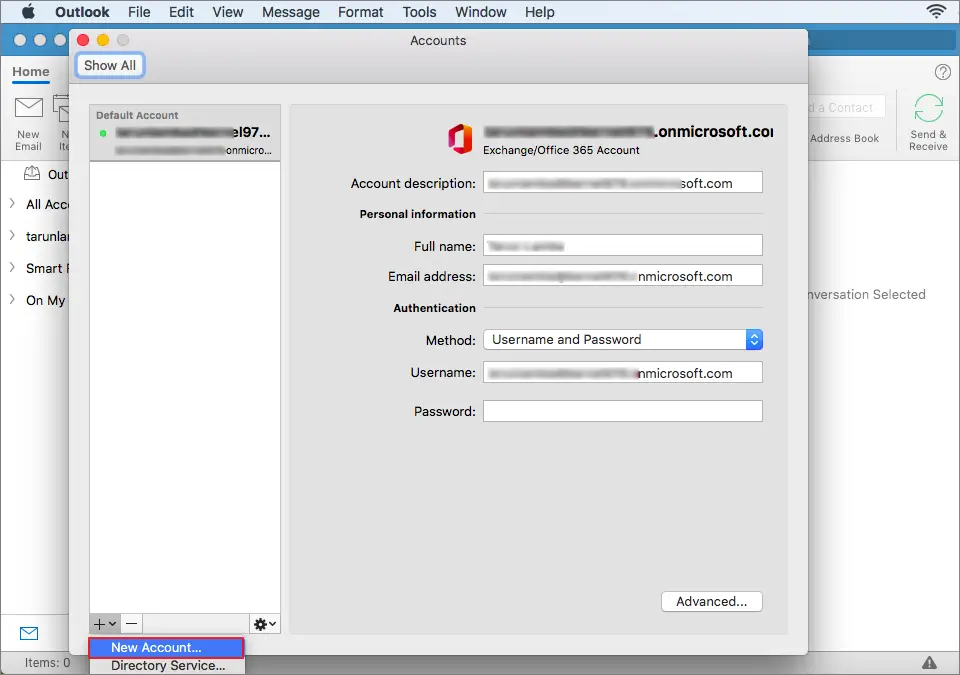
- Do follow the account setup process every time as guided above.
With these steps, you can add Microsoft 365, Gmail, Outlook.com, Yahoo, iCloud, Exchange, IMAP, and POP accounts on Outlook for Mac. Still, you’ve doubts on IMAP, POP, or SMTP settings while configuring Outlook for Mac, ask the email provider or IT administrator for a better understanding.
How to Diagnose Outlook Setup Issues in a MacBook?
If Outlook for Mac fails to connect to your email account while configuring on your MacBook, try these fixes:
- Check your account email address and password twice.
- Assess your internet connection, and make it stable.
- Remove and re-add the email account if synchronization fails in one time.
- Restart Outlook and your MacBook, and also keep them up to date to the latest version.
What If You Need to Move Outlook for Mac Data to Windows?
While Outlook for MacBook is now configured and ready to use, but in future you may need to migrate your mailbox especially:
- If you’re moving from macOS to a Windows-based Outlook environment
- Need to share your Outlook data with a Windows user.
Outlook for Mac stores mailbox data in the OLM format, while Outlook for Windows imports PST files. They are completely different and don’t get imported directly without converting to the appropriate format. Kernel Mac OLM Converter can help there. It converts Outlook for Mac OLM files into PST format. After conversion, you can open Outlook for Windows and use the Import/Export wizard to import the resultant PST file smoothly.
Note: Convert OLM file to PST only if you’re switching from macOS to Windows Outlook or taking backup in PST file. Instead, keep working with the OLM file as usual.
Final Thoughts
The process to configure Outlook on a MacBook should be hassle-free. With the above stepwise guidance, you can now effectively configure Outlook in MacBook. Be it a Microsoft 365 account, Gmail, Exchange, or a custom IMAP account, Outlook helps to simplify email management with an automatic sync feature, along with others. You can access your messages, calendars, contacts, and tasks and stay productive as well as organized across all your devices.