Read time 9 minutes
When a new Exchange Server account is configured in MS Outlook mail client, then the application creates a data file with OST file extension. Due to the professional importance of an Exchange account, the OST file also become a crucial file and it is beneficial to take its back up in another file. There is basic inbuilt backup methodology in Outlook to save the account in an offline PST file, but it has certain limitations. Kernel for OST to PST Converter utility increases the backup efficiency through its interactive features.

Try an automated tool Kernel for OST to PST Converter to get back all OST data and save to Outlook PST file.
An OST (Offline Storage Table) file is the synchronized copy of a mailbox and keeps the similar mailbox information on the local computer. There is a defaultpath set for new data files in Outlook.
The offline Outlook Data File (.ost) resides at drive:\Users\user\AppData\Local\Microsoft\Outlooklocation. You can also change the location of the OST file in Outlook if there is a requirement.
Now, let us head on to situations where the user has to take the backup of the Exchange OST file.
Now that common reasons to backup OST files are clear to users, it is time to understand what challenges or limitations are linked with the manual ways to backup OST files before actually trying them.
After checking out all the limitations of the native methods to back up OST file, if you still want to give it a try, we are describing each method with the required details to back up the OST file.
In this method, users are required to create a new PST file in Outlook. Once the file is created, and the connection between Exchange Server and Outlook is established, users can easily drag and drop OST data to the newly created PST file.
But, this method is quite slow, unsuitable for bulk data backup, and requires the Exchange Server connection.
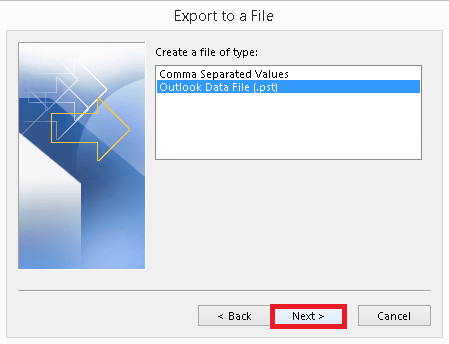
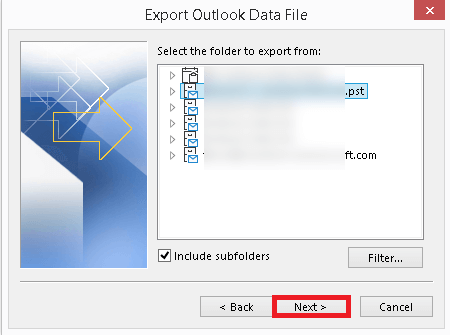
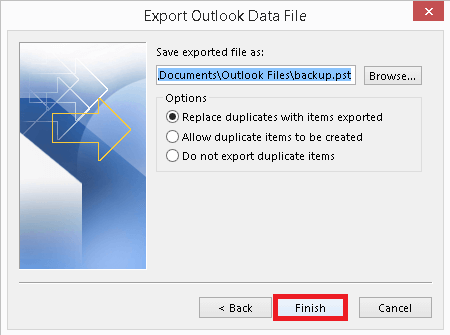
Outlook Import/Export feature offers to backup Exchange OST file to PST file format via the Export feature but here also, connection with Exchange Server and healthy OST file is required. Here is the completed backup process.
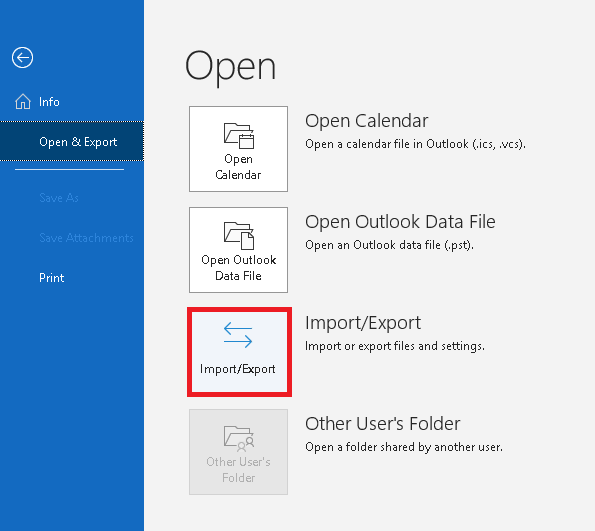 Note: In Outlook 2007, go to File>Import and Export and in Outlook 2010, go to File>Open>Import.
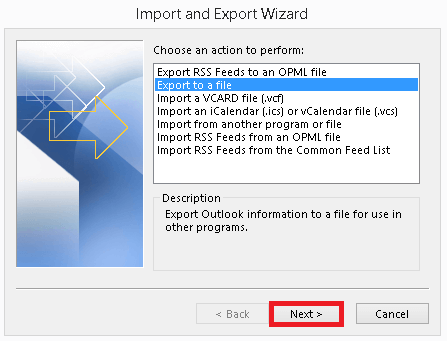
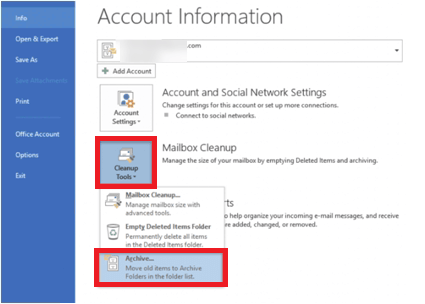
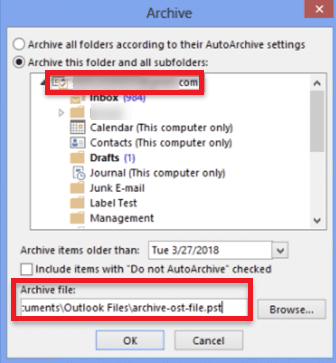
Outlook offers its users to archive its files, including OST files, to PST at the specified saving path location via the Archive feature within the Cleanup Tools. Let us check out the archiving process with the given steps to backup Outlook OST file easily.
As we have already discussed, it is impossible to backup orphaned, corrupted, inaccessible OST files with deleted items. Let us know about a professional tool that can be helpful in this scenario to back up OST file.
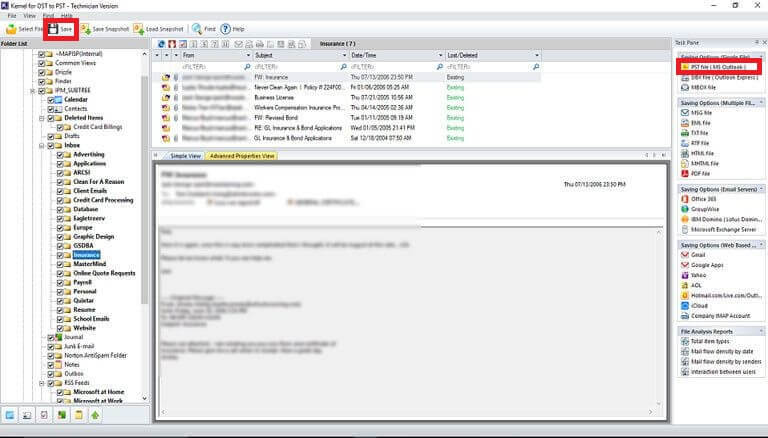
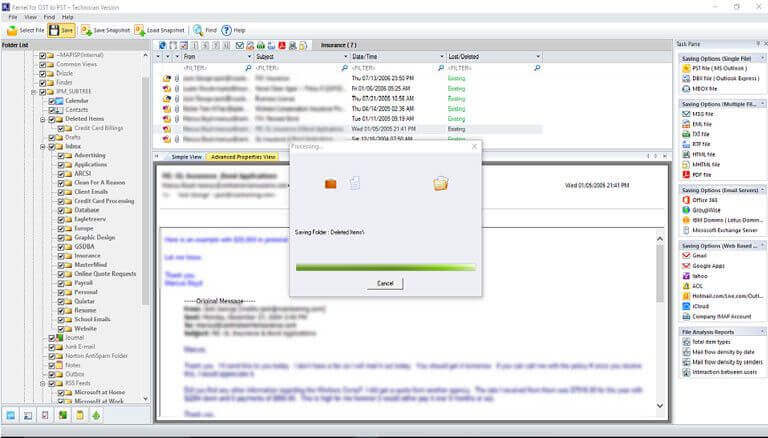
The tool is an advanced tool to recover content from corrupt, orphaned, inaccessible OST files and save selective mailbox data to PST and more locations. It supports bulk OST files recovery with deleted items, offers a detailed preview of selected mailbox items, and restores to PST, Exchange, Microsoft 365, and file formats like MSG, EML, PDF, DBX, MBOX, etc. Check all features of the OST to PST converter tool on its official website.
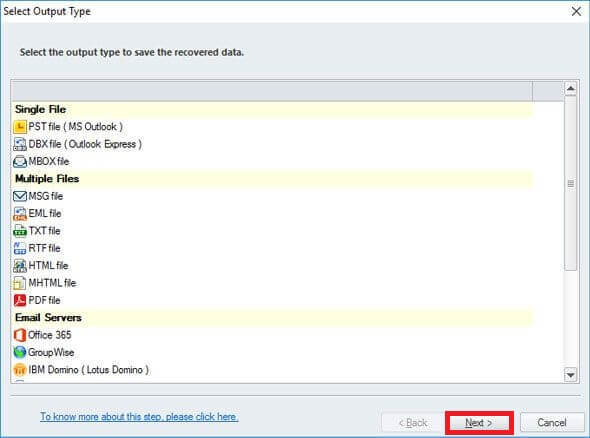
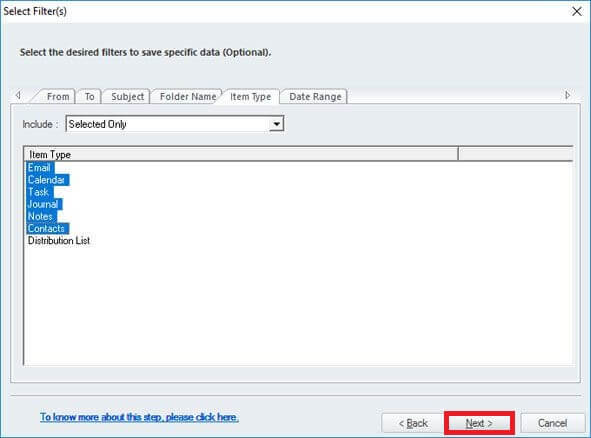
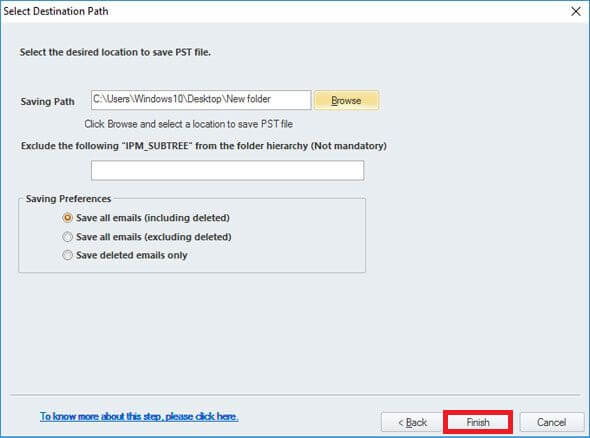
So, how to backup Outlook OST file, follow these below steps and use this professional tool with ease.
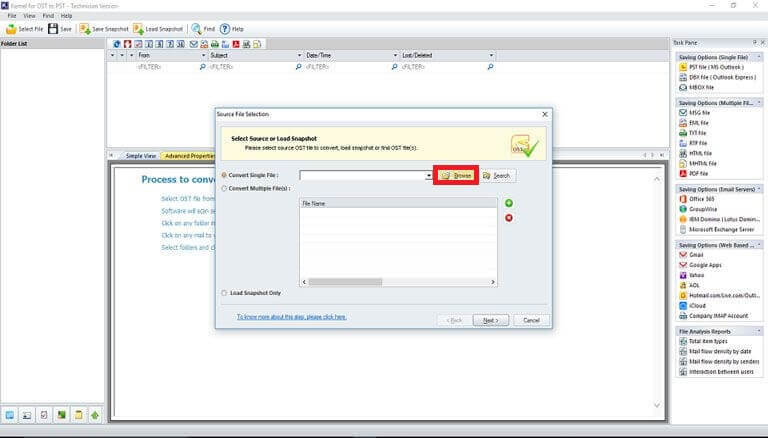 Note: You can add multiple OST files also using the second option.
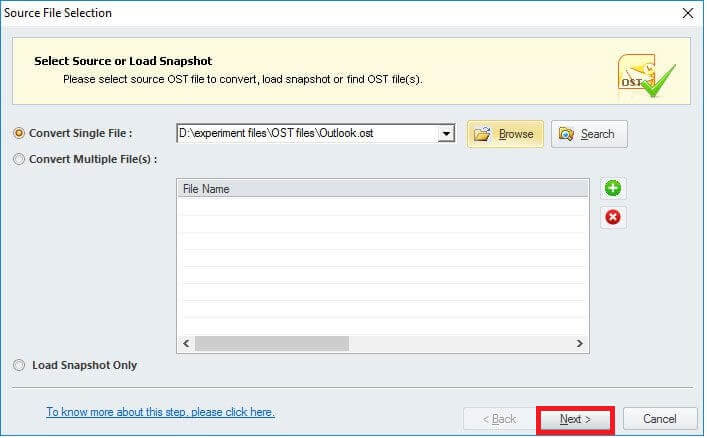

OST backup is essential when Exchange is unavailable, synchronization issues occur, OST data needs to be exported, etc. We can deal with this requirement either by adopting manual tricks or using the OST to PST conversion tool. The manual methods have many limitations, but professional OST conversion tool doesn’t have any such shortcomings.


I found this article very informative to backup OST files. I also tried above mentioned tool to fix OST corruption issues and pleased to inform you that it worked. Thanks!