

Read time 9 minutes
Outlook is the most versatile email client application popular among users. It saves data in two file formats: PST and OST. Users always get confused about what is an OST file. OST files are stored offline on your device and work like Exchange Server. The changes that you make offline get synchronized automatically when connected to the server. The default location of the OST files are- C:\Users\your_name\AppData\Local\Microsoft\Outlook
However, creating a backup of the OST file data is essential. Let’s discuss some methods to backup OST files.
Why Backup OST Files? Real Scenarios
Now, let us head on to situations where the user has to take the backup of the Exchange OST file.
- OST synchronization issues like data deletion from Exchange Servers would reflect on the OST file data and in this scenario, users need to resolve synchronization issues with Exchange mailbox.
- Configuring an Exchange account in Outlook requires complex settings and authentications, which calls for a backup for data security and accessibility.
- Corruption in OST files due to abrupt shutdown, malware, virus intrusions, hardware issues, bad sectors, software infections,
- Unavailability of Exchange Server as it is down, crashed, or under maintenance.
- Need to move OST mailboxes to Outlook application on another system.
Manual Ways to Backup OST Files – Best 3 Methods
There are a few ways available to backup OST files and they are mentioned below:
Method 1. Drag and Drop from OST file to PST
In this method, users are required to create a new PST file in Outlook. Once the file is created and the connection between Exchange Server and Outlook is established, users can easily drag and drop OST data to the newly created PST file.
However, this method is quite slow, unsuitable for bulk data backup, and requires the Exchange Server connection.
Method 2. Backup with the Import/Export Feature
Outlook Import/Export feature offers to backup OST files to PST file format via the Export feature. However, connection with Exchange Server and a healthy OST file is required. Here is the complete backup process:
-
- Launch the Microsoft Outlook application.
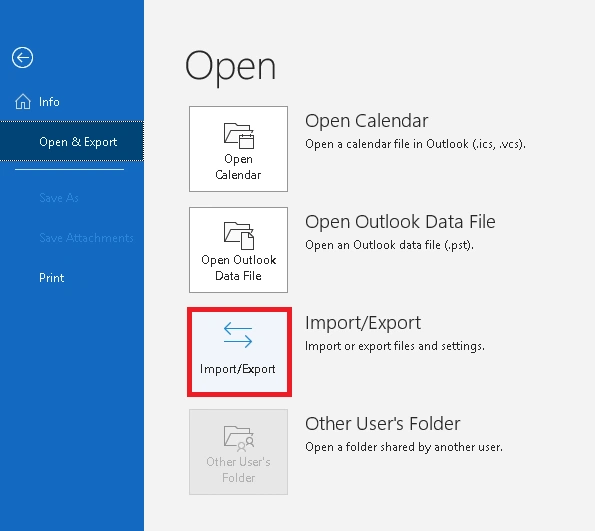
- Go to File>Open & Export>Import/Export for Outlook 2013 and later versions.
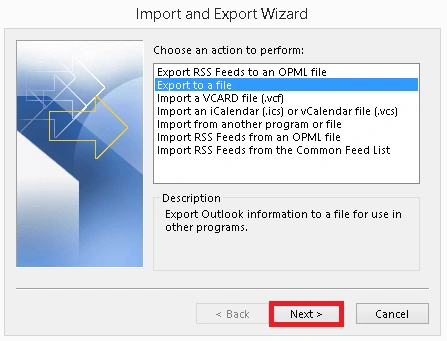
- From the opened Import and Export Wizard, select Export to a file option and click on the Next button.
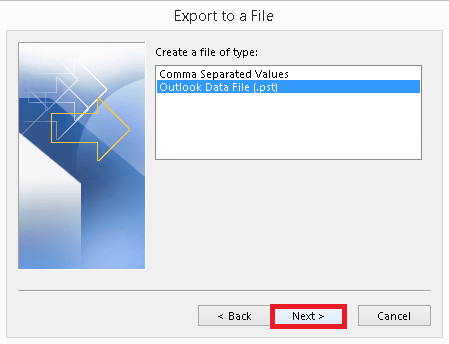
- Now, select Outlook Data File (.pst) option and click Next.
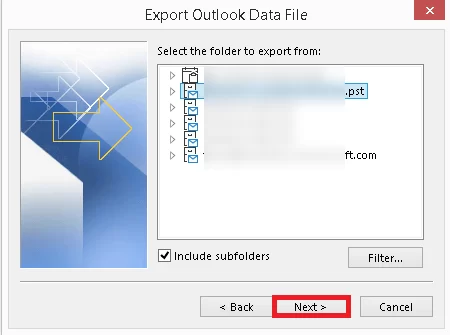
- Moving ahead, select the OST file root folder, select the Include subfolders checkbox and click Next.
- Click Browse to change the default saving location, choose any of the three options according to your preference to manage duplicate items, and then click Finish.
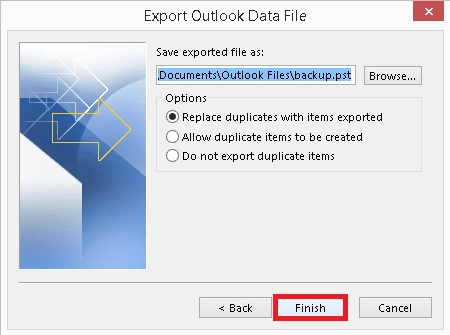
- Wait for the export to get completed; after some time, the OST file will be backed up to PST file format on the system.
Note: In Outlook 2007, go to File>Import and Export and in Outlook 2010, go to File>Open>Import.
Method 3. Backup OST files with the Archive Feature
Outlook allows users to archive their files, including OST files, to PST at the specified saving path location via the Archive feature. Let us check out the archiving process with the given steps to backup OST files easily.
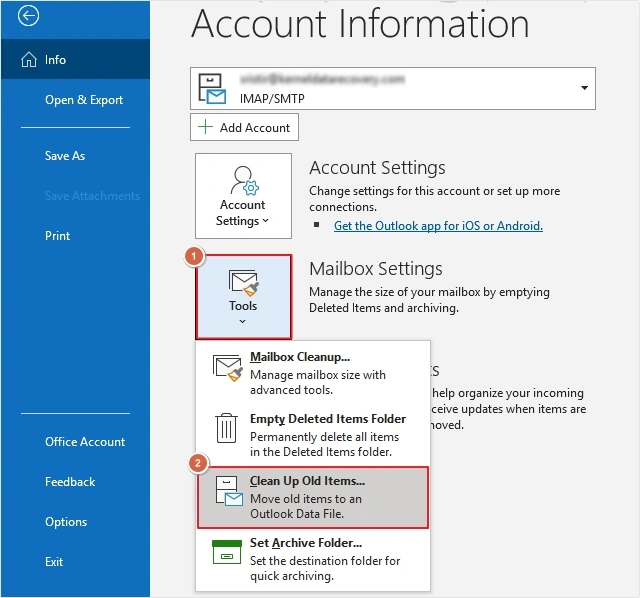
- Open your Outlook application. Click on the File menu and select the Archive option from the Cleanup Tools.
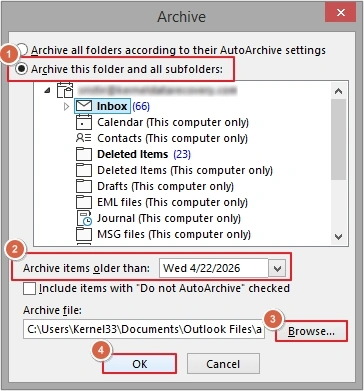
- From the Archive wizard, select Archive this folder and all subfolders, select the root folder of the OST file. Add the date range if needed, select the checkbox as per the need and click on Browse option to provide the saving path for the archived PST file. Click OK.
- The OST file archiving process will start, and the file will get saved at the specified location.
Why do Manual Methods to Backup OST Files Fall Short?
Manual methods are free but come with some limitations. Challenges with manual methods are discussed below:
- Cannot backup deleted, corrupted, damaged and orphaned OST mailbox items.
- Chances of incomplete backup with IMAP profile.
- Time-consuming methods.
- Need to be performed carefully without errors.
- Compromise with data security and integrity.
Backup OST Files without Exchange Connectivity
If you don’t have active Exchange Server connectivity with your Outlook or your OST file is corrupted, you cannot back up OST files in those scenarios. You will need to use specialized software that can handle corrupted OST files without issues.
The Kernel OST to PST converter is an advanced tool to recover content from corrupt, orphaned, inaccessible OST files and save selective mailbox data to PST and more locations. This tool provides various features for seamless backup and recovery of data. Some features are listed below:
- It supports recovery of bulk OST files with deleted items at once.
- It offers a detailed preview of selected mailbox items before saving.
- Restore your data to PST, Exchange, Microsoft 365, and other file formats like MSG, EML, PDF, MBOX, etc.
- Offers multiple filtering options like date filter, item type filter, split PST, etc.
Ending Lines
OST backup is essential when Exchange is unavailable, not synced properly, and OST data needs to be exported. We can backup OST files either by adopting manual tricks or using the recommended tool. The manual methods have many limitations, but professional OST converter tools don’t have any such shortcomings.


![How to Convert OST to PST Without Outlook? [Expert Guide]](https://www.nucleustechnologies.com/blog/wp-content/uploads/2026/04/ost-to-pst-without-outlook.webp)