Microsoft Exchange Server is amongst majorly preferred email servers, all because of the supported advanced features and security. However, just like other servers, it is also vulnerable to corruption or damage, making the server inaccessible. There are several solutions available to repair EDB files, and a professional Exchange Recovery software is the most preferred choice to handle corruption.
To repair EDB files, the software provides two different scanning modes, such as:
- Standard Scan (Recommended): We recommend you use this scanning mode to repair EDB files with minor corruption.
- Deep Scan: In case the standard scan doesn’t give the desired result and your EDB files are highly corrupted, then use Deep Scan mode to recover EDB files with ease.
How can Kernel for Exchange Server help you?
With the help of software’s multiple advanced features, users can easily recover EDB files and overcome various issues related to Exchange database. It includes:
- Repair corrupt EDB files instantly and restore them to PST, Exchange, and Office 365.
- Recover deleted mailboxes with their entire components (files) in PST.
- Recover missing or corrupt transaction logs from Exchange Server.
- Repair your database fails to mount, JET ESE, and other errors in just a few steps.
- Restore Exchange Server data to Exchange on-premises, Outlook Profile, and Office 365.
- Perform efficient EDB data recovery while maintaining the original file integrity.
Here is how you can repair EDB files using this tool
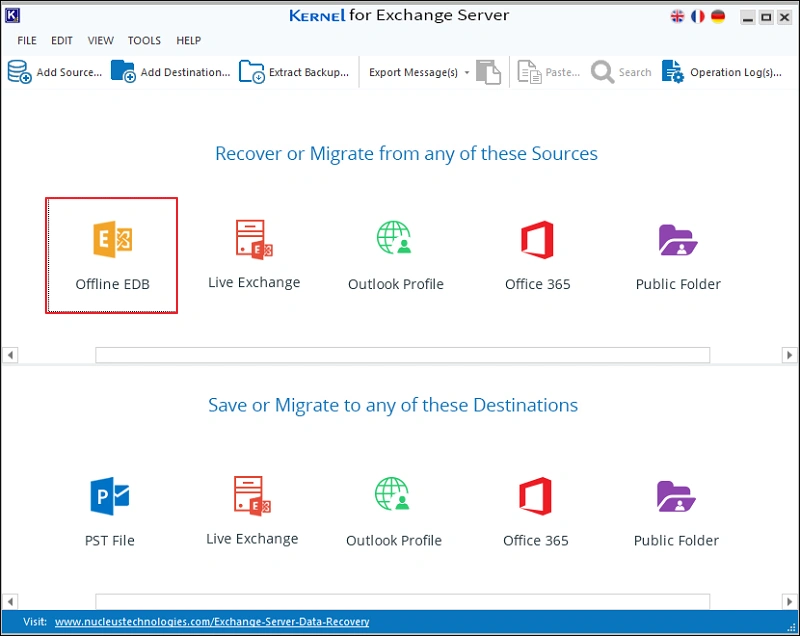
Step 1: Open the tool and select the Offline EDB option from the source section.
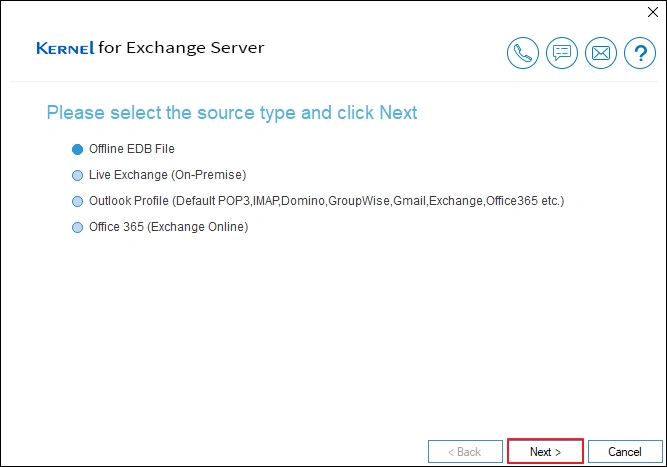
Step 2: Choose the Offline EDB File option and select Next.
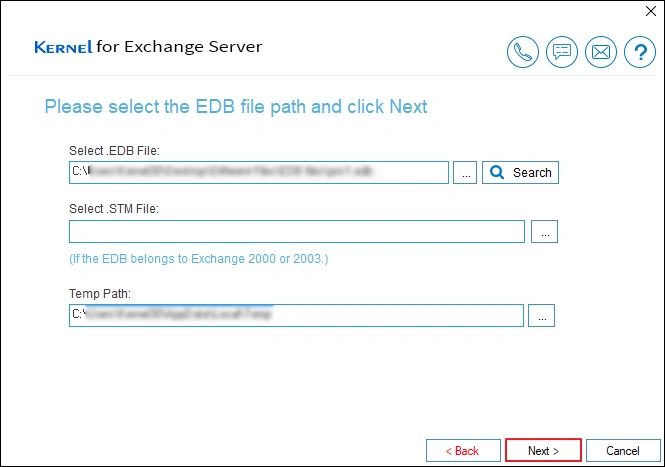
Step 3: Select the EDB file from your local drive. Use the (...) button to browse the file.
Step 4: There are two scan modes: Standard Scan and Deep Scan. Standard Scan is recommended first, and if it does not repair EDB files, then you can use Deep scan mode. The Deep Scan mode lets you repair highly corrupt EDB files, too. Click Next.

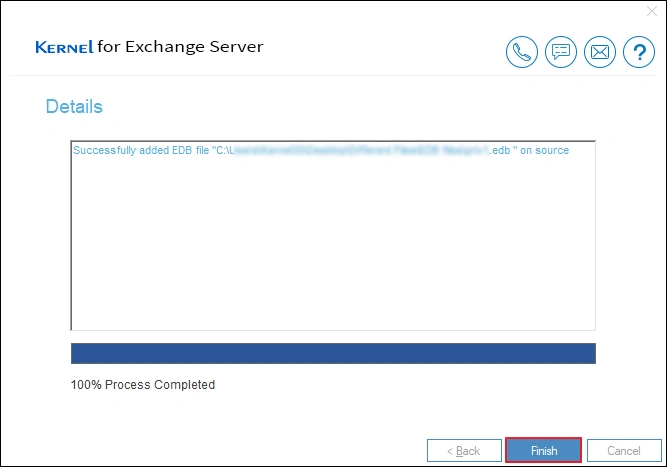
Step 5: The tool instantly works toward scanning the corrupt EDB file. Click Finish when the process is complete.
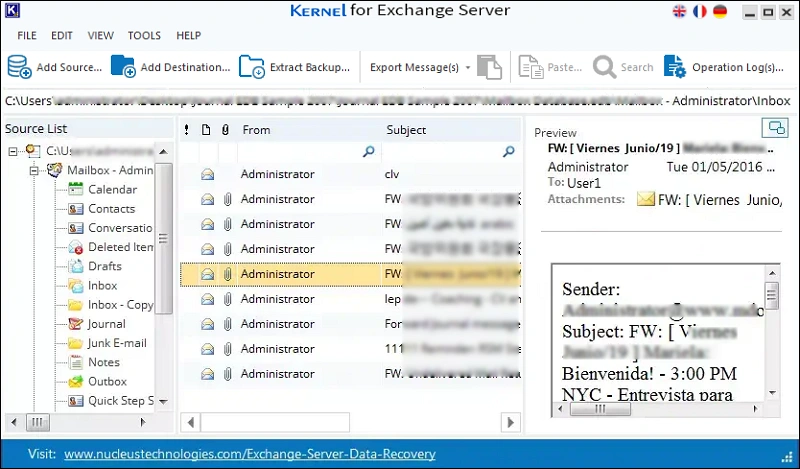
Step 6: You can view all the mailboxes and their content in the Source List panel. To view data items, select the folder and click on any email.
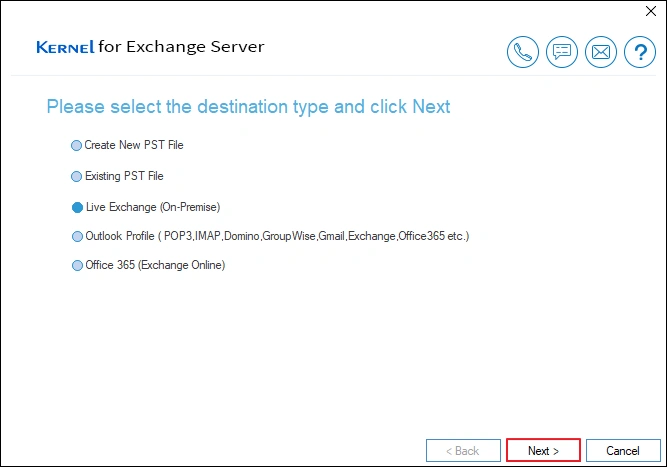
Step 7: The tool also allows users to save the repaired EDB file in multiple formats like:
- Create New PST File: Save entire mailbox data in a new Outlook PST file in your local system.
- Existing PST File: Choose any existing PST file from your system and save the emails in it.
- Live Exchange (On-Premise): Connect and transfer mailbox data to any Exchange on-premises account.
- Outlook Profile (Default POP3, IMAP, Domino, GroupWise, Gmail, Exchange, Office365 etc.): Use your Outlook profile to move emails to various IMAP/POP email servers.
- Office 365 (Exchange Online):
- Select this option to migrate EDB to Office 365.
Select any of these destinations as per your business requirements and click Next to save the repaired EDB data.
Final Thoughts
Kernel for Exchange Server is a reliable and accurate tool to repair EDB files of all versions. Its user-friendly interface, various output options, and step-by-step recovery process make it an ideal choice for users seeking to recover EDB files with ease.
This EDB repair tool provides all the necessary functionalities to configure Outlook profiles and save data as PST files. Moreover, it allows users to transfer EDB files to Exchange on-premises, Office 365 (Exchange Online) or Public folders.
With features like deep scanning and a user-friendly interface, EDB to PST converter simplifies the recover EDB files process, making it a valuable solution for Exchange database recovery.
Frequently Asked Questions
Q: Is it possible to repair corrupt EDB file using manual methods?
Ans: You can repair EDB files using Microsoft's built-in Eseutil tool. However, this tool isn’t enough for highly corrupted EDB files. In that scenario, use the trusted Exchange recovery tool.
Q: Does the software repair corrupt EDB files?
Ans: Yes, the Kernel for Exchange Server Recovery software allows users to repair EDB files, even of high corruption. After recovery, you can save the mailbox data to multiple destinations.
Q: Can I repair corrupt EDB files and all their deleted data?
Ans: Kernel for Exchange Server Recovery software utilizes advanced algorithms to repair EDB files and recover all the deleted data from the Exchange Server mailboxes.
Q: Can I recover EDB files without Exchange Server?
Ans: Yes, you can easily perform EDB data recovery without accessing Exchange Server through a reliable EDB repair tool. This tool permits you to recover EDB files with complete accuracy.

