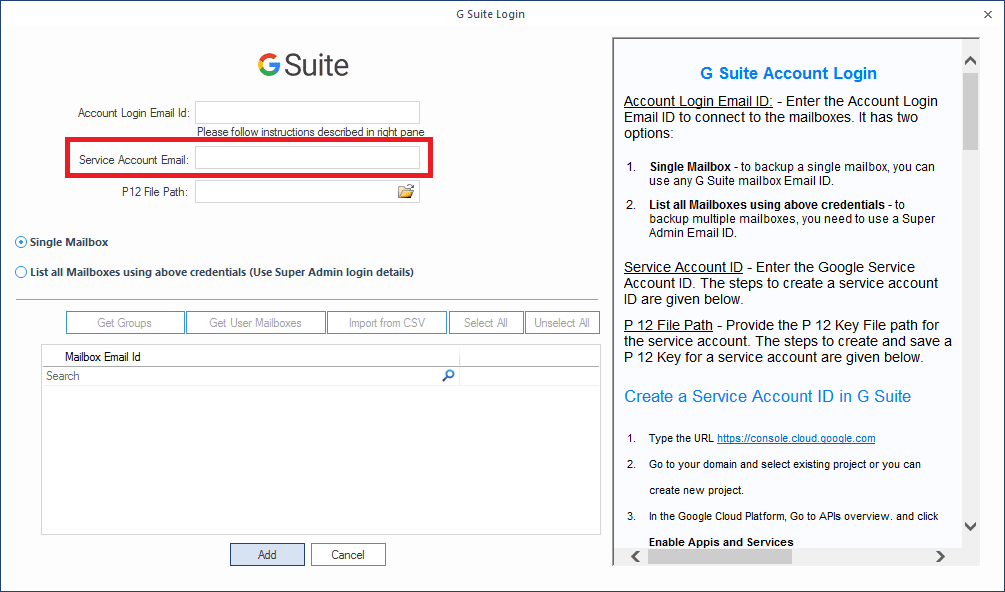
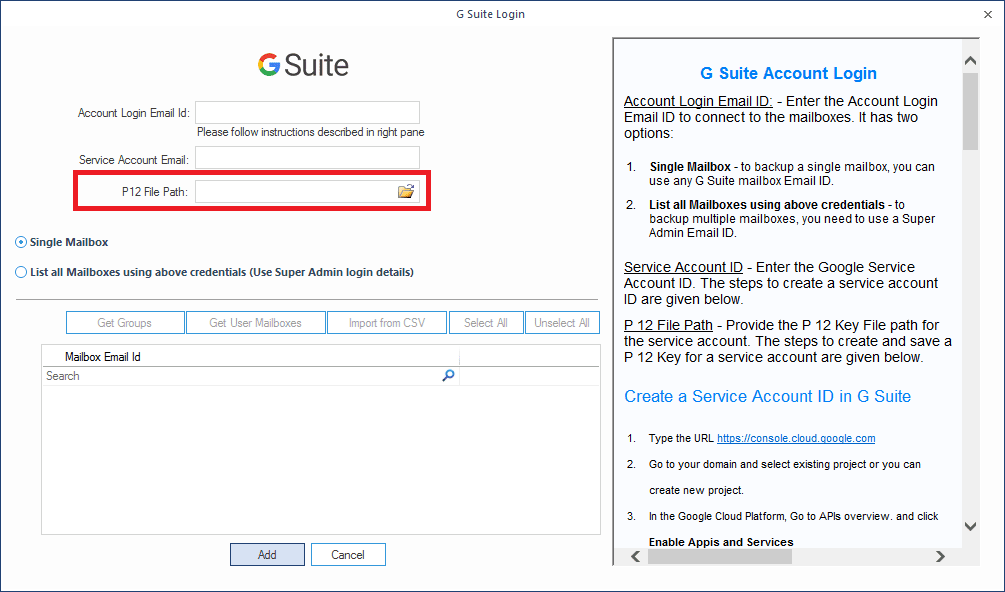
A simple guide to login to a G suite account
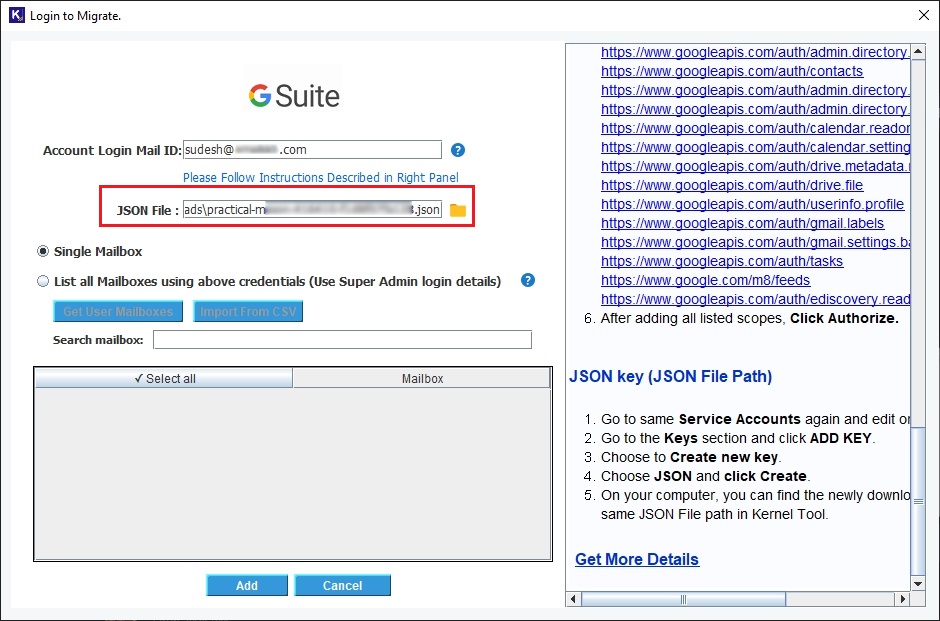
Account Login Email ID: Enter the Account Login Email ID to connect to the mailboxes. It has two options:
- Single Mailbox - to backup a single mailbox, you can use any G Suite mailbox Email ID.
- List all Mailboxes using above credentials - to back up multiple mailboxes, you need to use a Super Admin Email ID.
Service Account Email - Enter the Google Service Account Email. The steps to create a service account are given below.
P 12 File Path - Provide the P 12 Key File path for the service account. The steps to create and save a P 12 Key for a service account are given below.
JSON Key - It is another encrypted key useful in accessing G Suite account during restore process. The steps to create and utilize a JSON key are given below.
Create a Service Account in G Suite
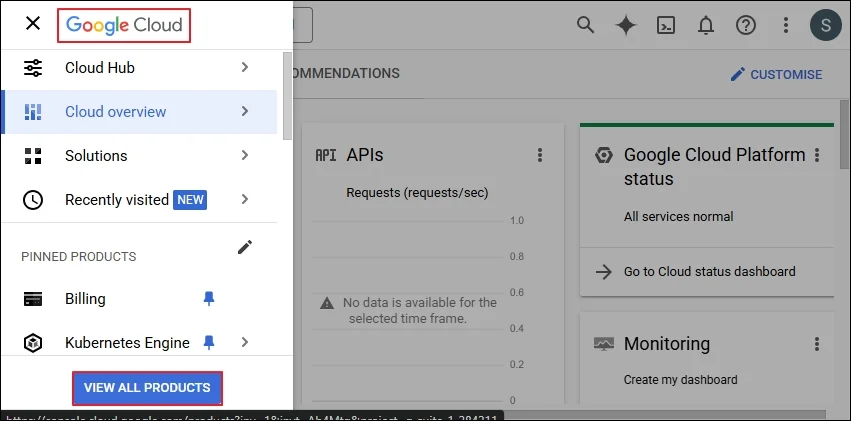
Step 1: Type the URL https://console.cloud.google.com/
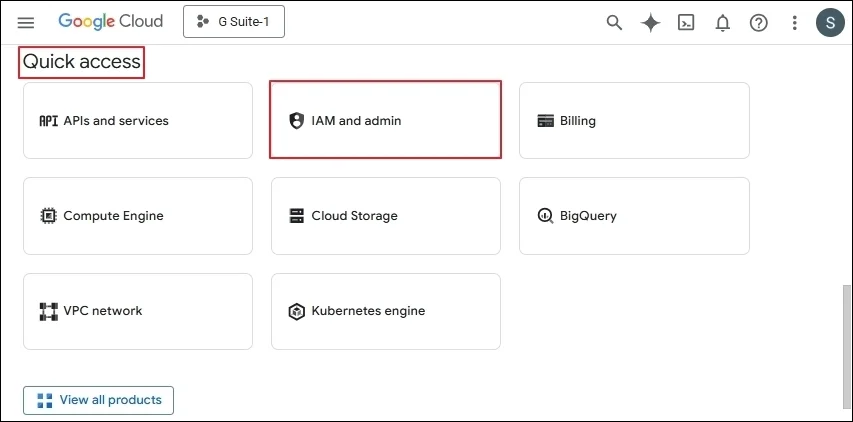
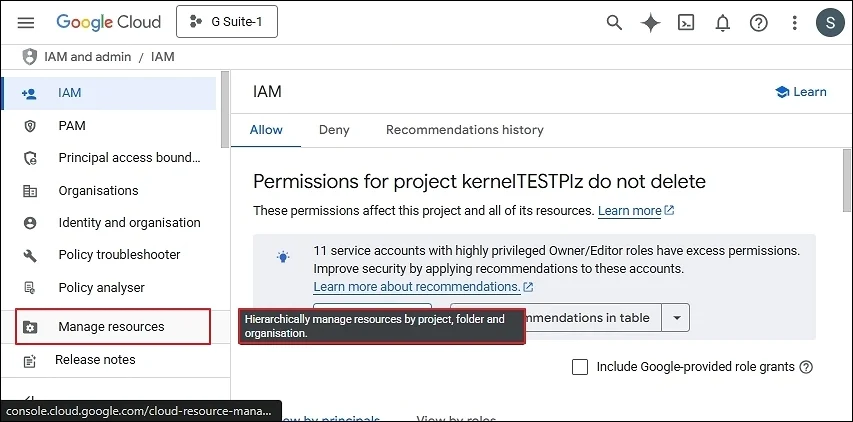
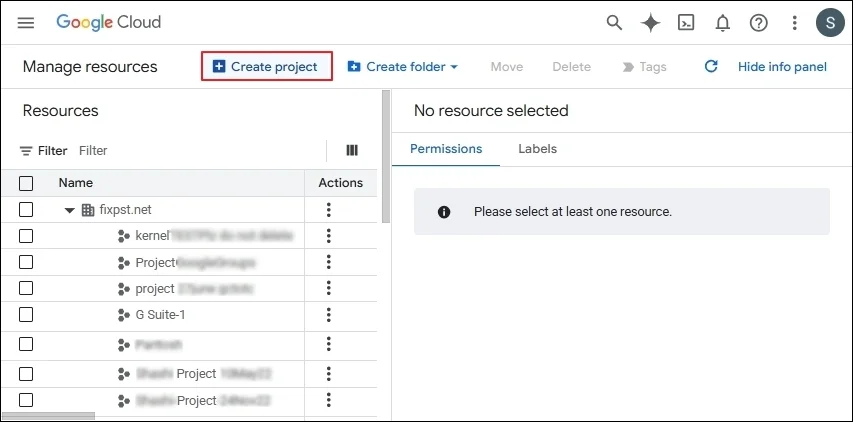
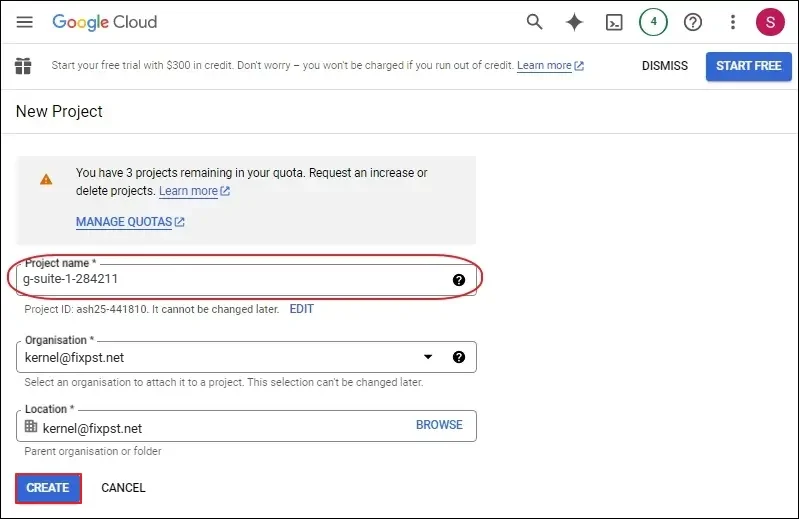
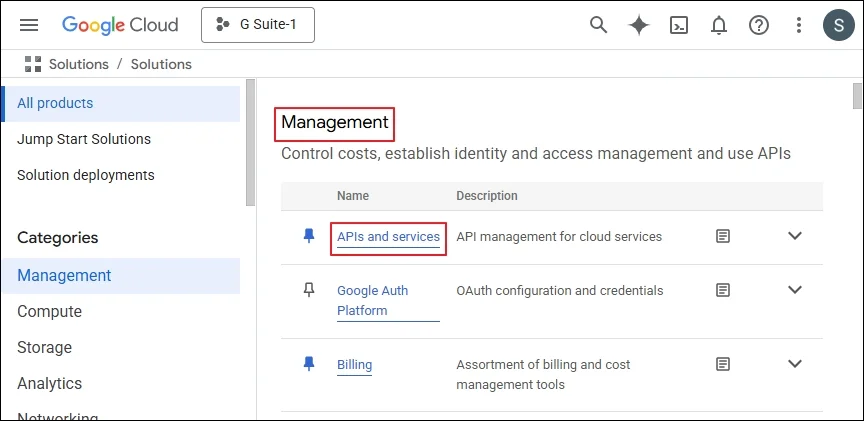
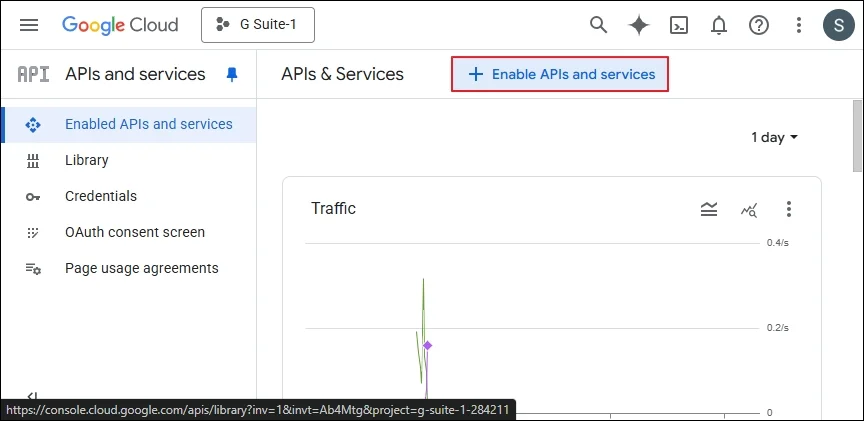
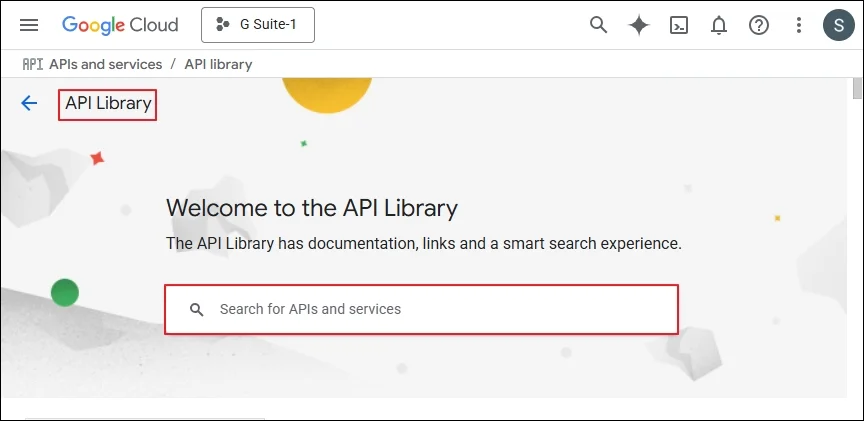
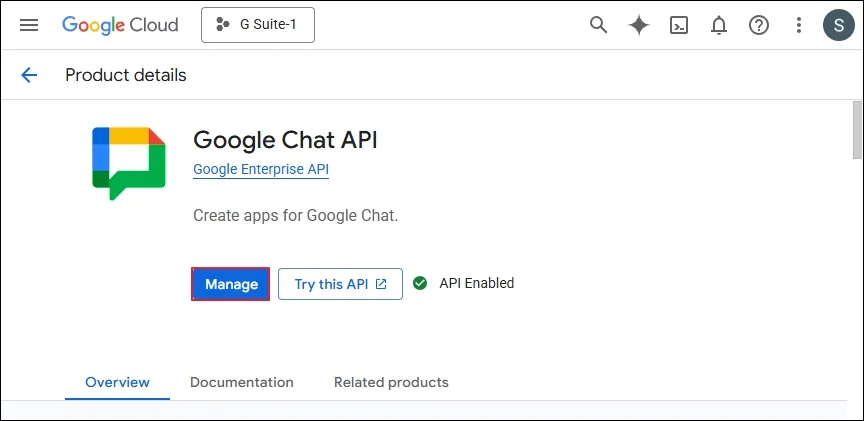
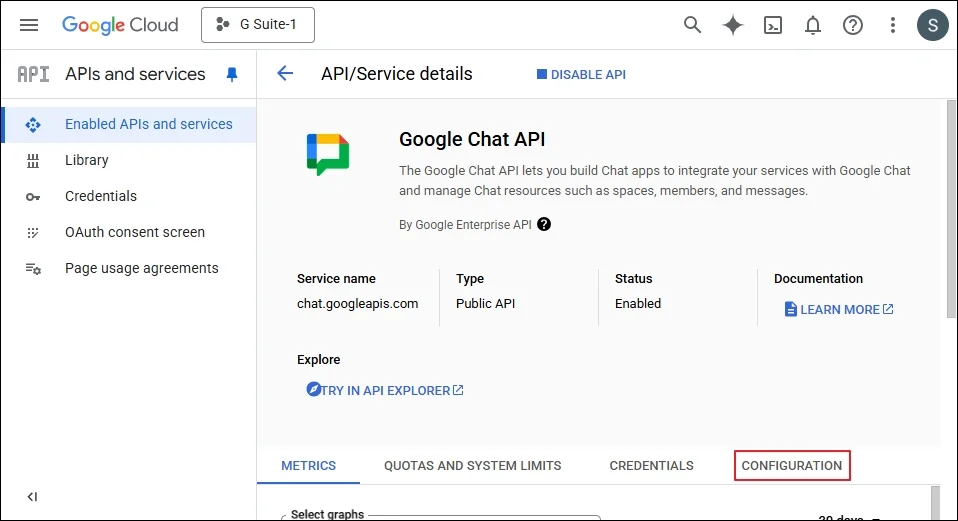
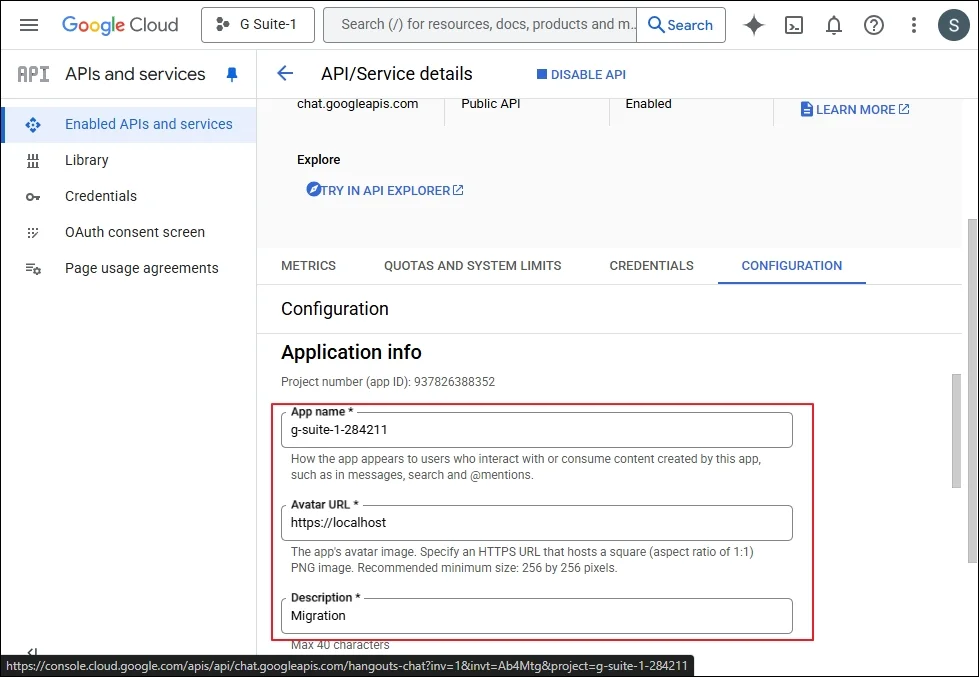
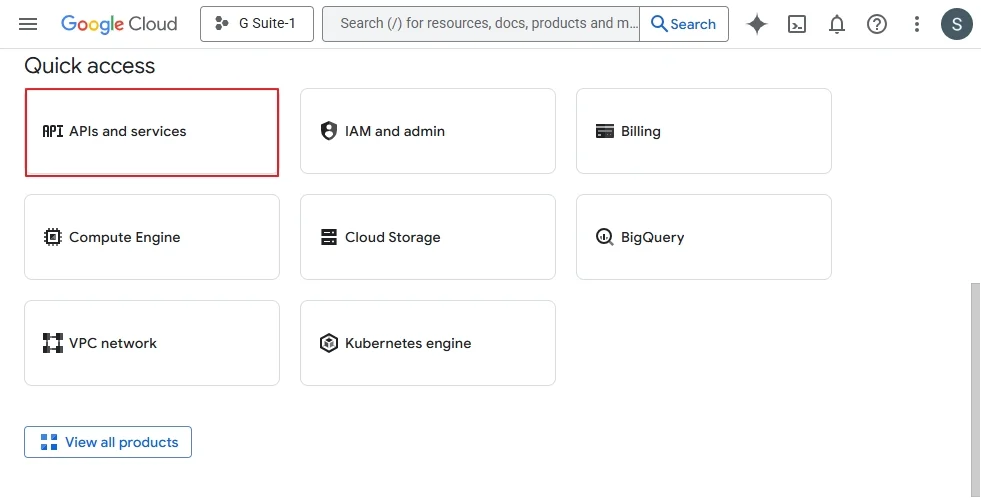
Step 2: Go to your domain and select an existing project, or create a new project. (In the Google cloud platform, go to APIs and services, and click Enable APIs and Services. In the API Library, Please search and enable required API, Gmail API, Admin SDK API, Google Drive API, Contacts API, Google People API, Google Calendar API, Google Chat API.)
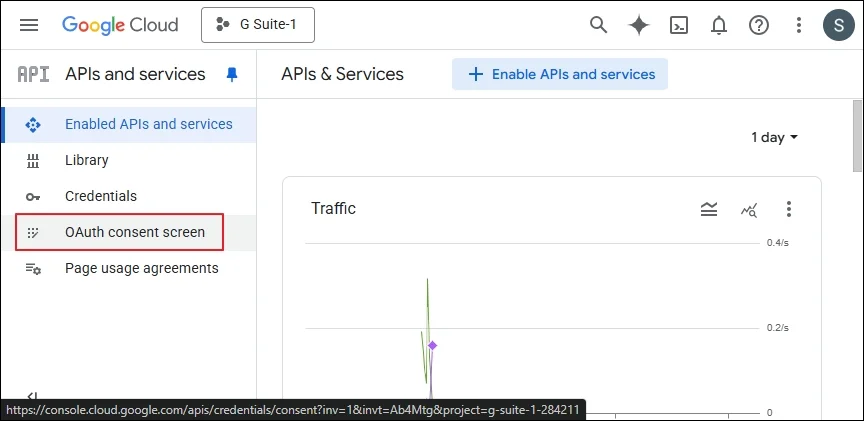
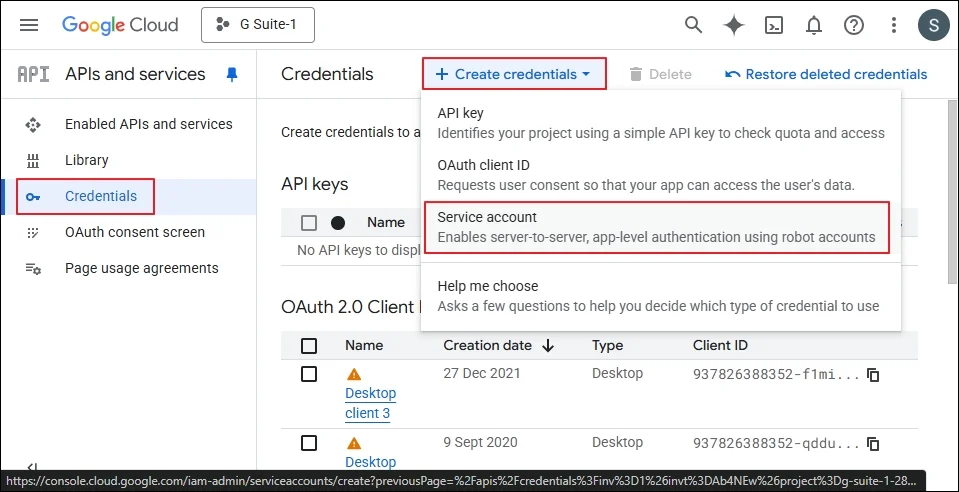
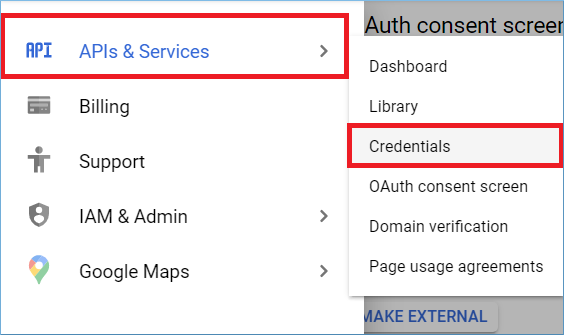
Step 3: Go to APIs & Services, then choose Credentials.
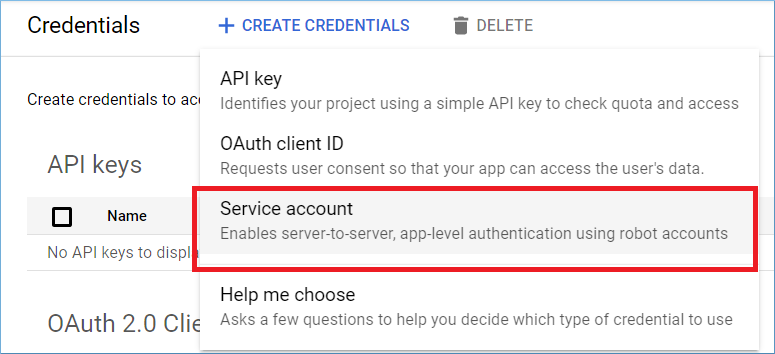
Step 4: In the new window, click Create Credentials.

Step 5: In the drop-down, choose Service account.
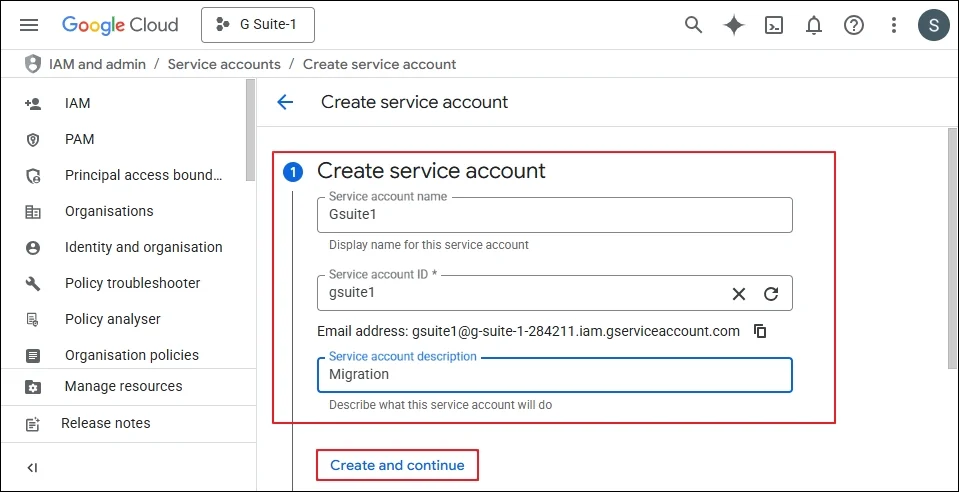
Step 6: Enter the name of the new Service account. The Service Account ID will be filled automatically as per your given name. Click Create.

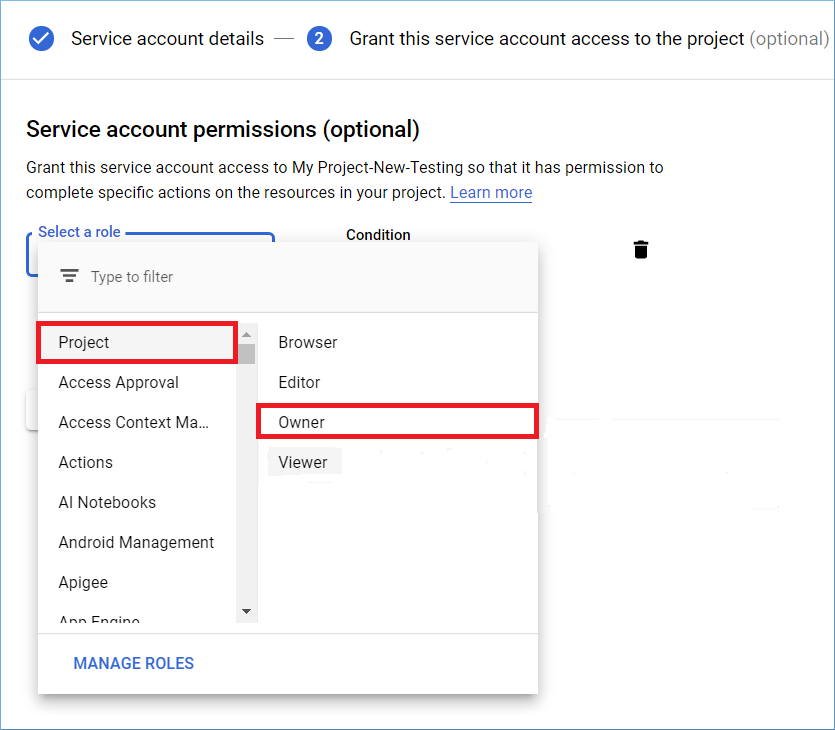
Step 7: To Provide a Role to the Service account, you can choose Project and select the role, for example, Owner.
Step 8: Click Continue. A new Service Account has been created. Now double click on the service account.

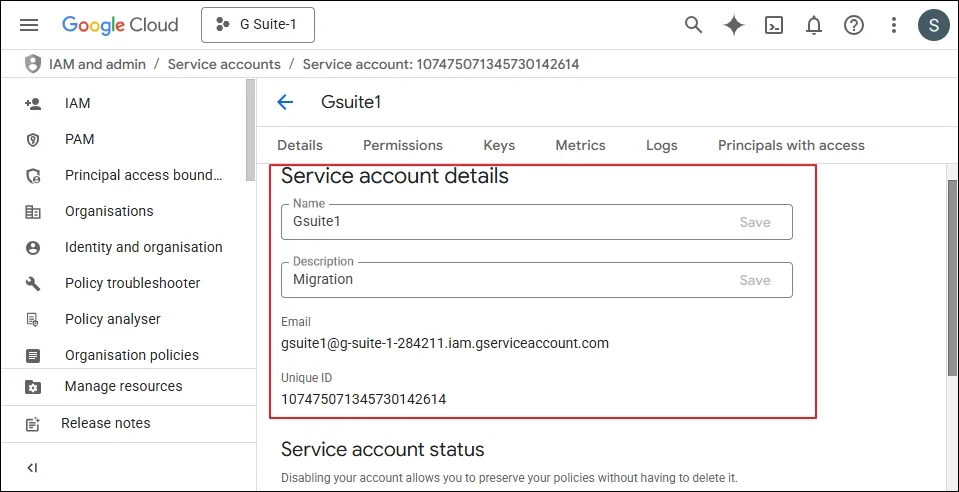
- Service Account is needed to log in to the software.
- The Unique ID of the service account is needed to assign domain-wide delegation as given below.
Now we have to assign Domain Wide Delegation to Service Account
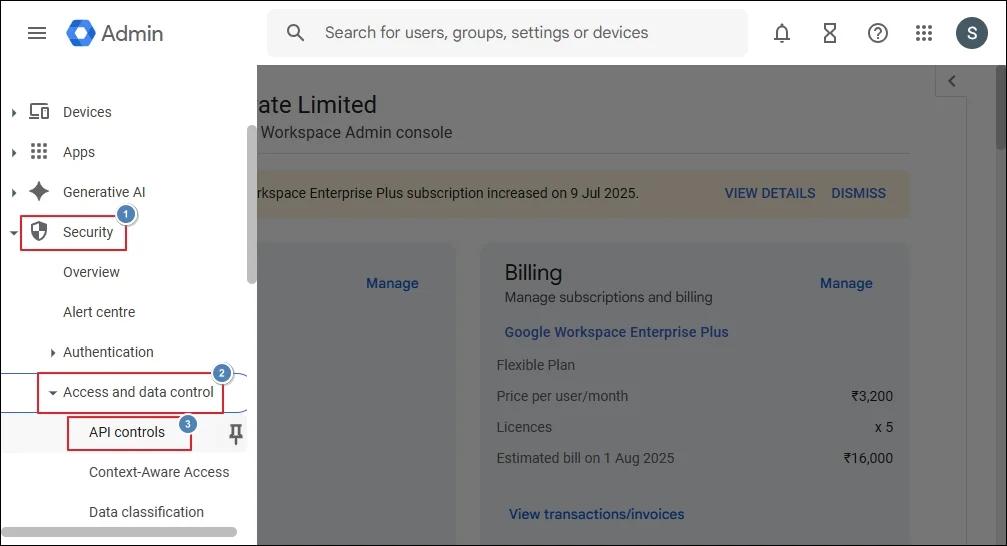
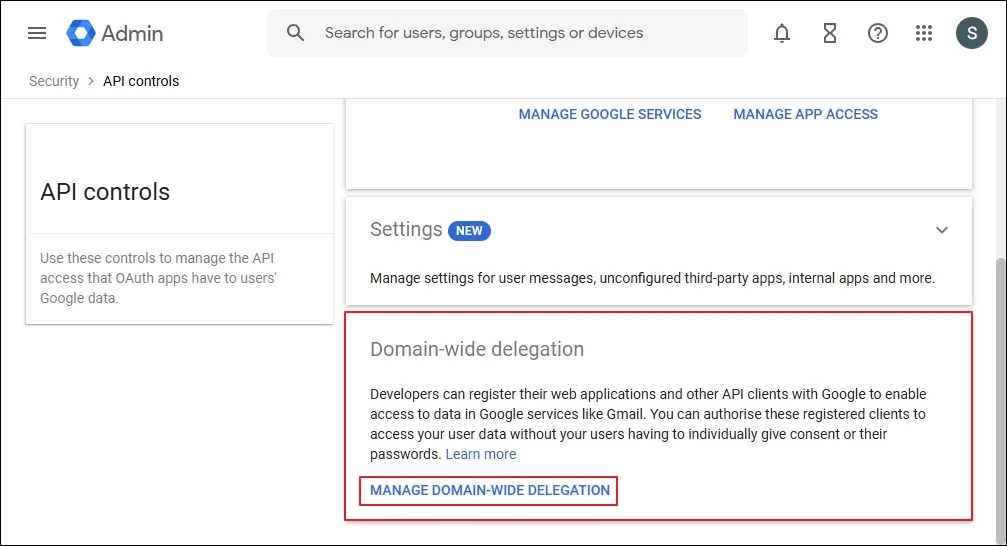
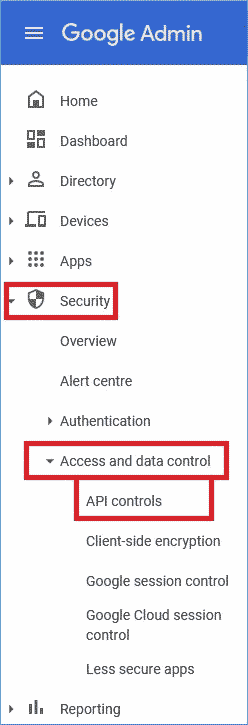
Step 1: Type https://admin.google.com/ac/home in the web browser. After opening the Admin Console, click Security It will open several categories where you should open Access and data control and select APIs controls there.
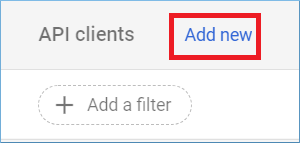
Step 2: In the App Access Control page, click Manage domain-wide delegation option under Domain-wide delegation.

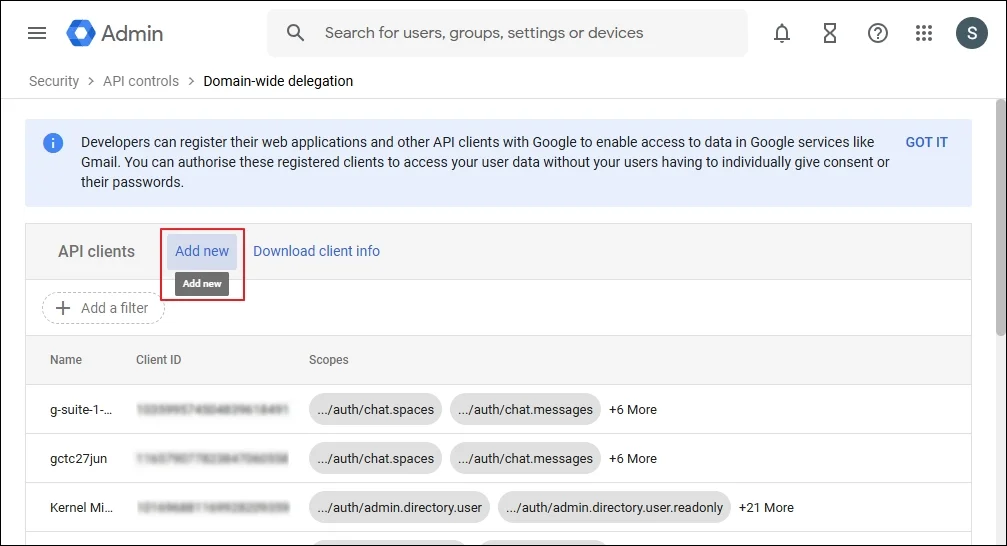
Step 3: Click Add New.
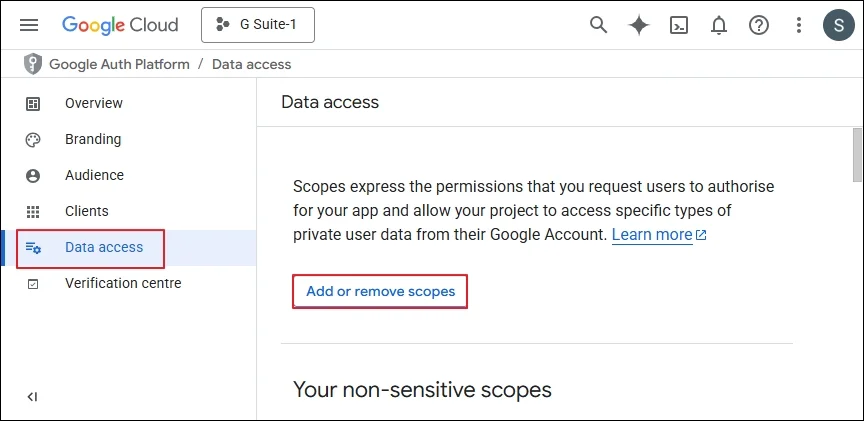
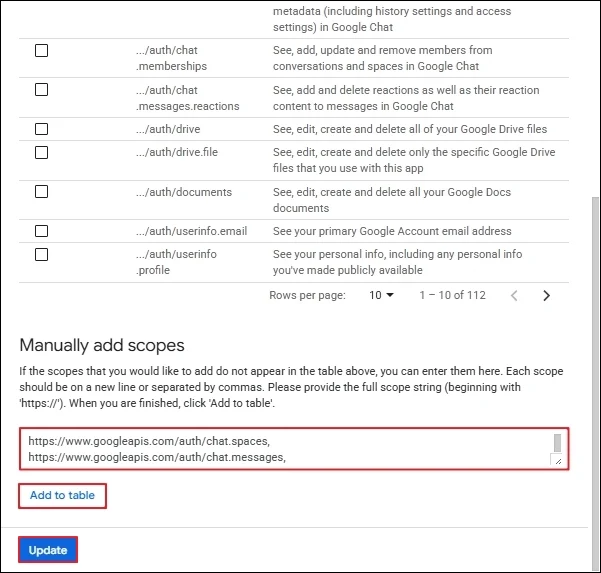
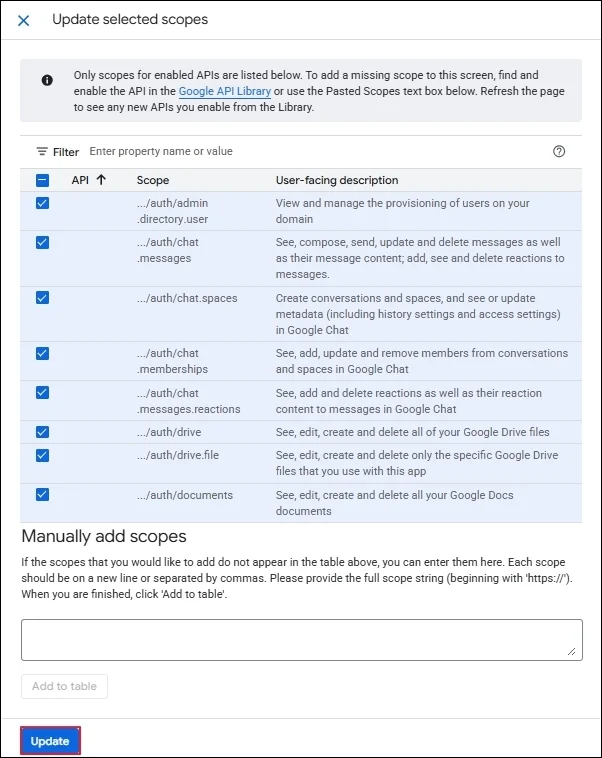
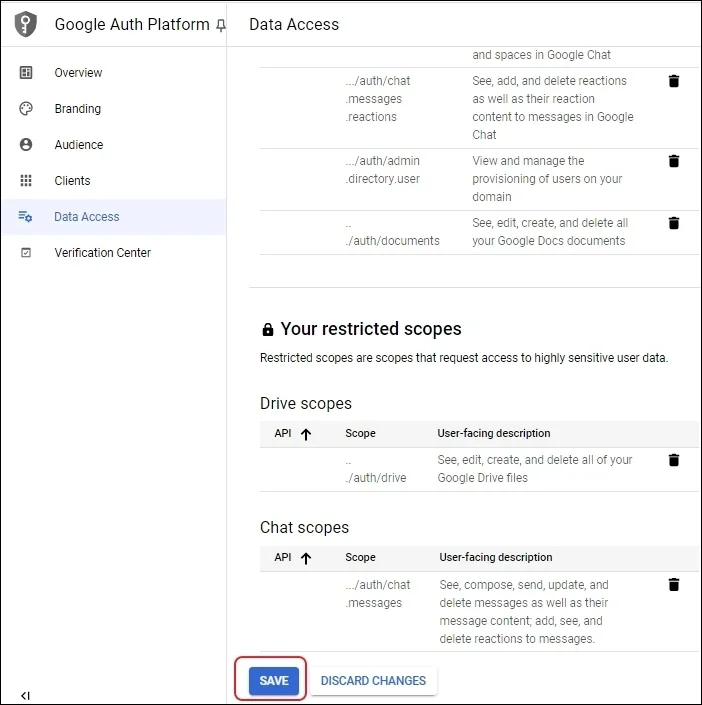
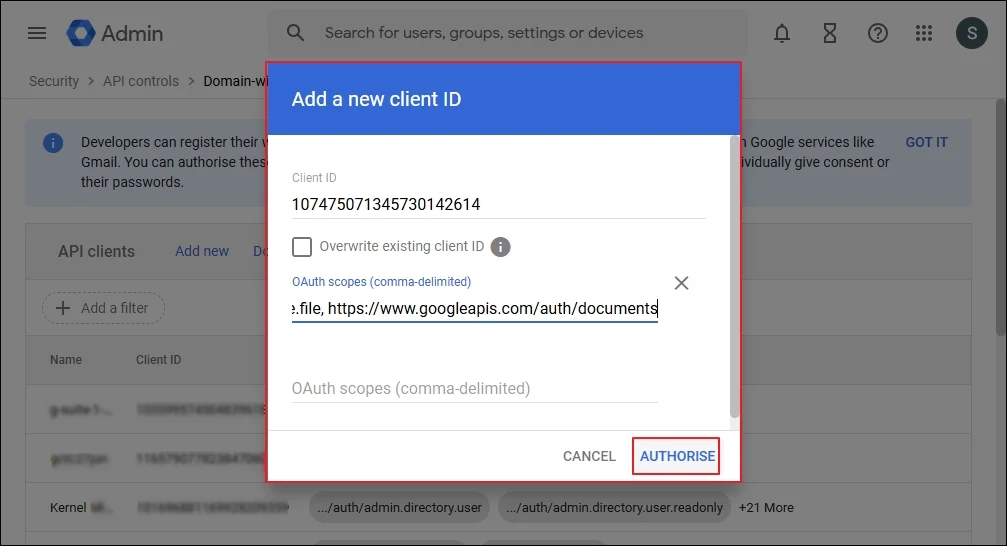
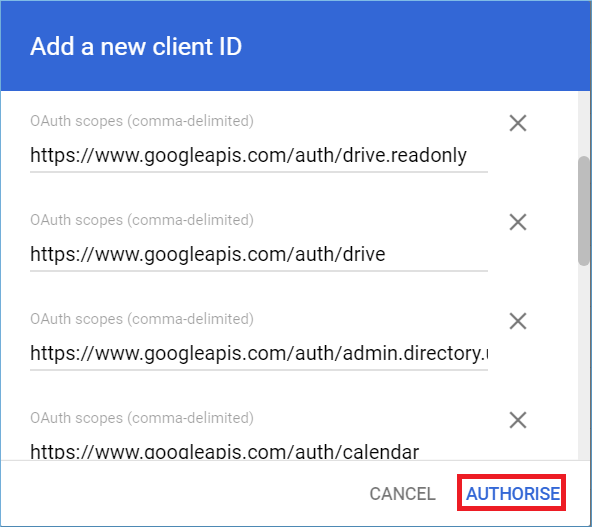
Step 4: Input the Unique ID of the Service account, and in the OAuth scopes, you need to input the URL of scopes are given below.
Step 5: You can add above multiple Google APIs in the list. Click Authorize.
Create P12 key (P12 File Path)
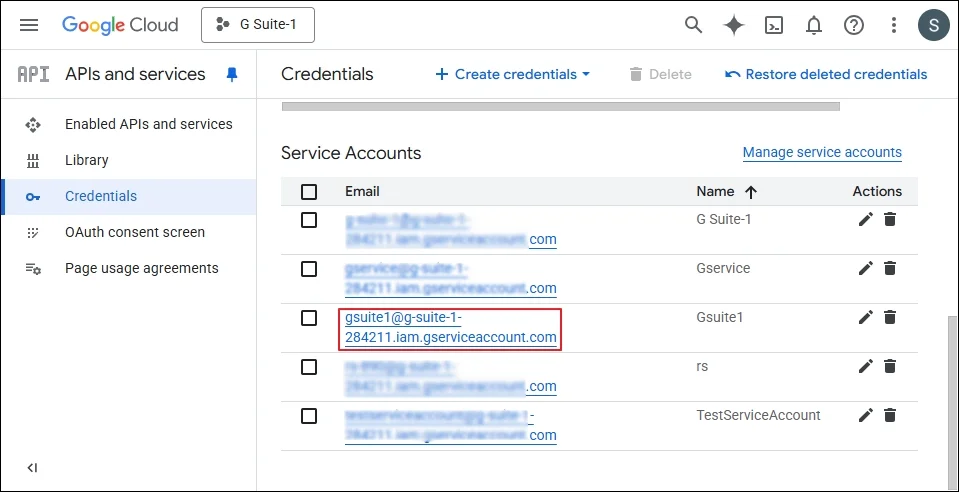
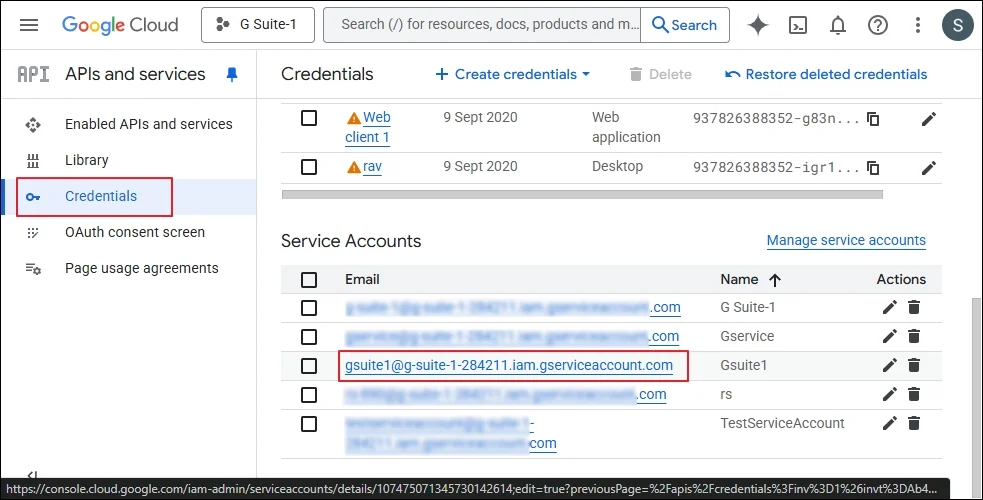
Step 1: Go to the same Service Accounts again and edit or double click.
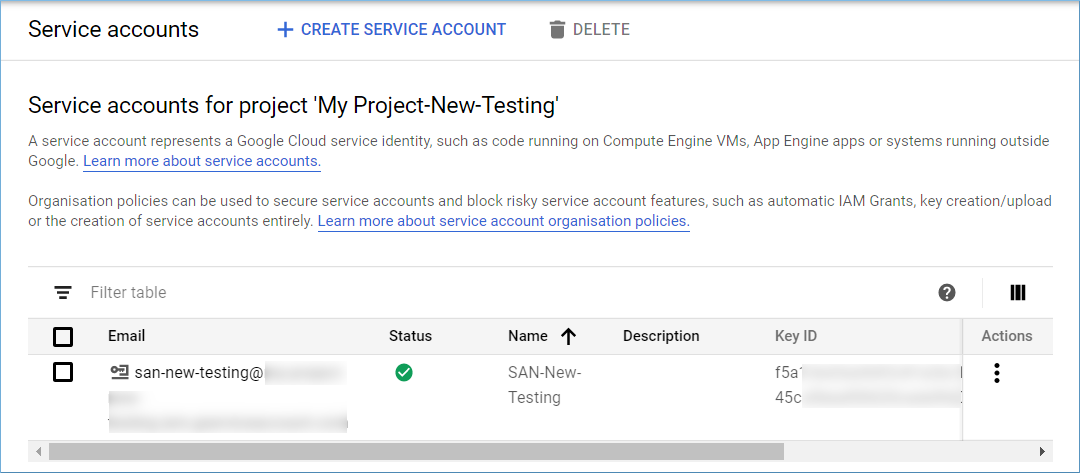
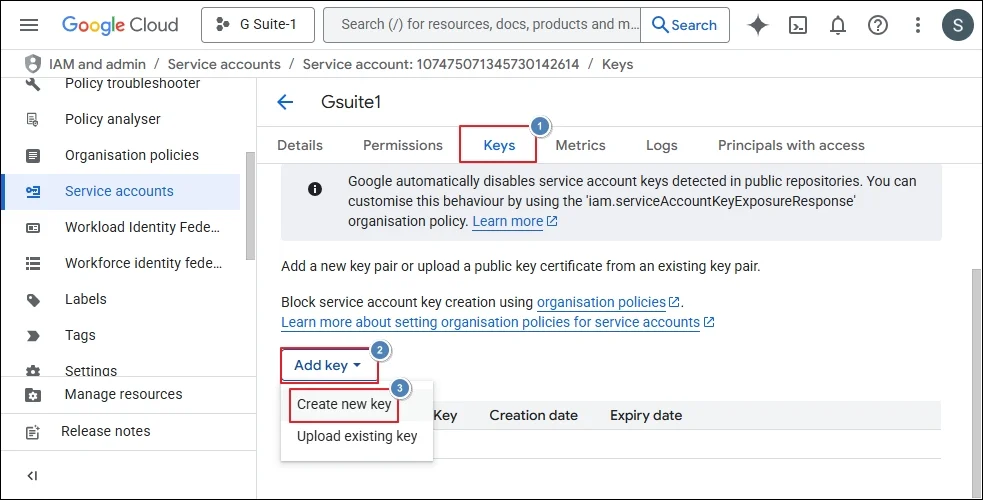
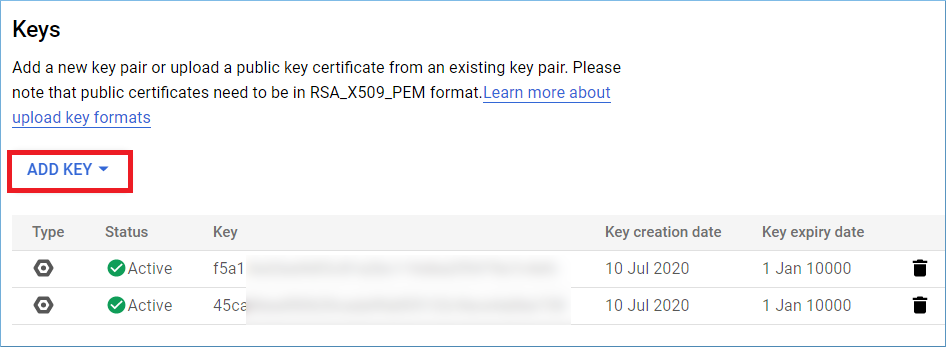
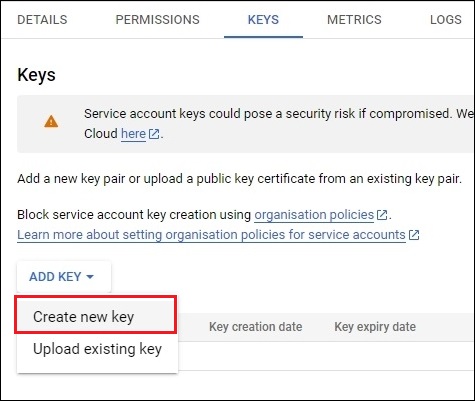
Step 2: Go to the Keys section and click ADD KEY.
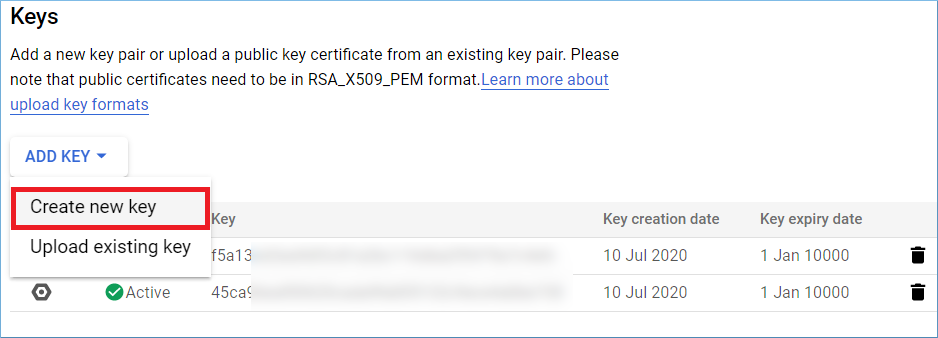
Step 3: Choose to Create new key.
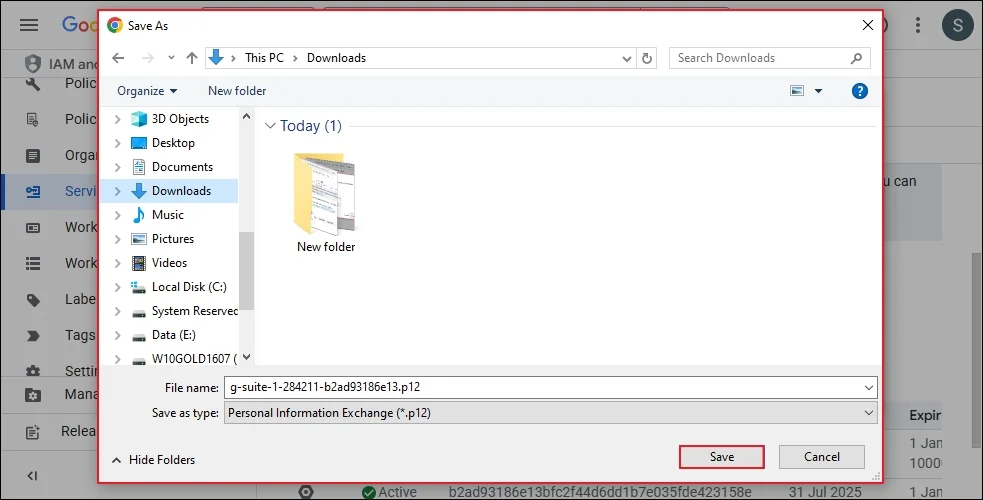
Step 4: Choose P12 and click Create.
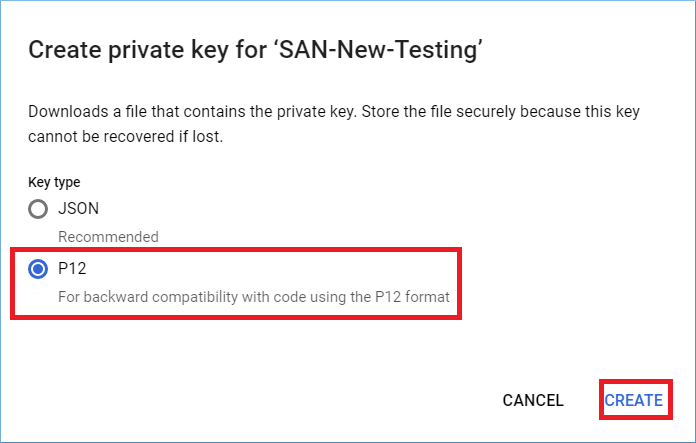
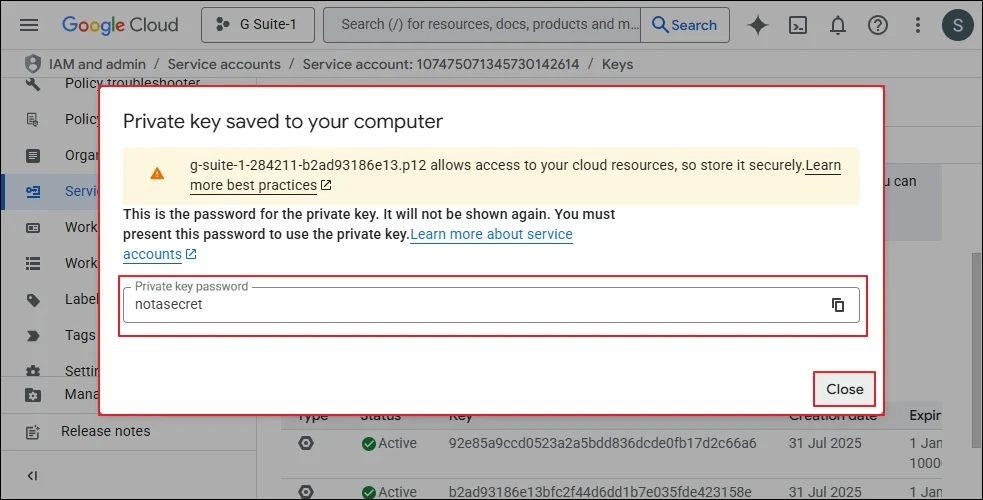
Step 5: A message will appear to show that the Private key is saved to your computer.

Step 6: On your computer, you can find the newly downloaded key. And add the same P12 File path in the tool.
Only for Restore process
You need to create JSON key to initiate a hassle-free Google Workspace Restore process.
Create JSON key
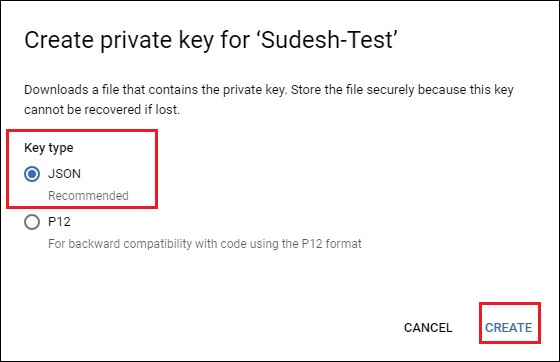
Step 1: Go to the service account and double-click on it or choose edit. Under key tab, choose ADD KEY, then select Create new key.
Step 2: Choose JSON key as the recommended key format. Then, click Create.
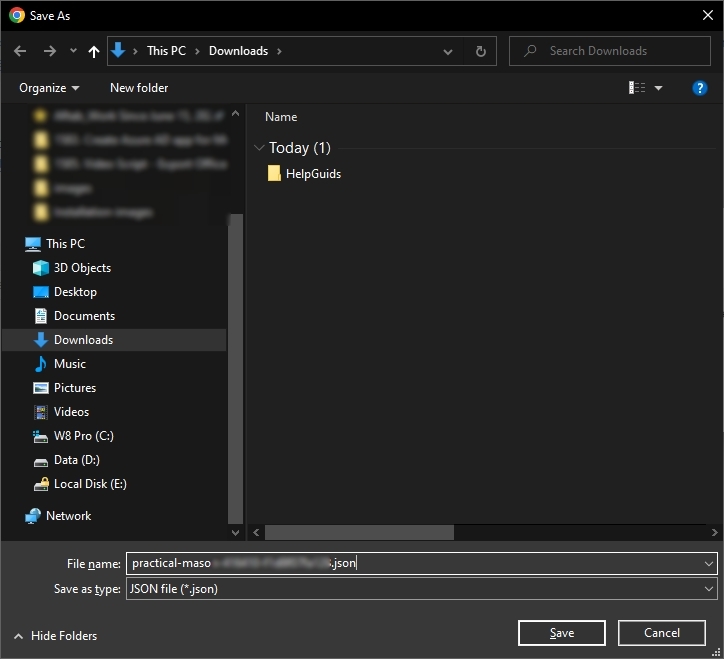
Step 3: Select the folder to save JSON key and click Save for saving the key.
Step 4: In the tool’s login page, browse the JSON file through its location. Then, you go ahead in the restore procedure.