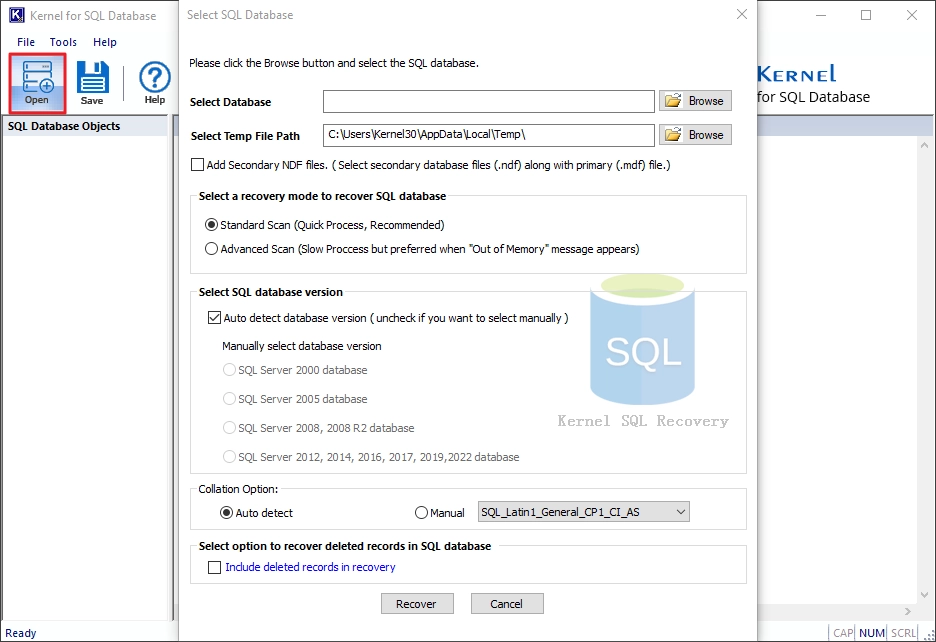
Step 1: Run the Kernel for SQL Database Recovery software in your system. Click Open to add the database file.
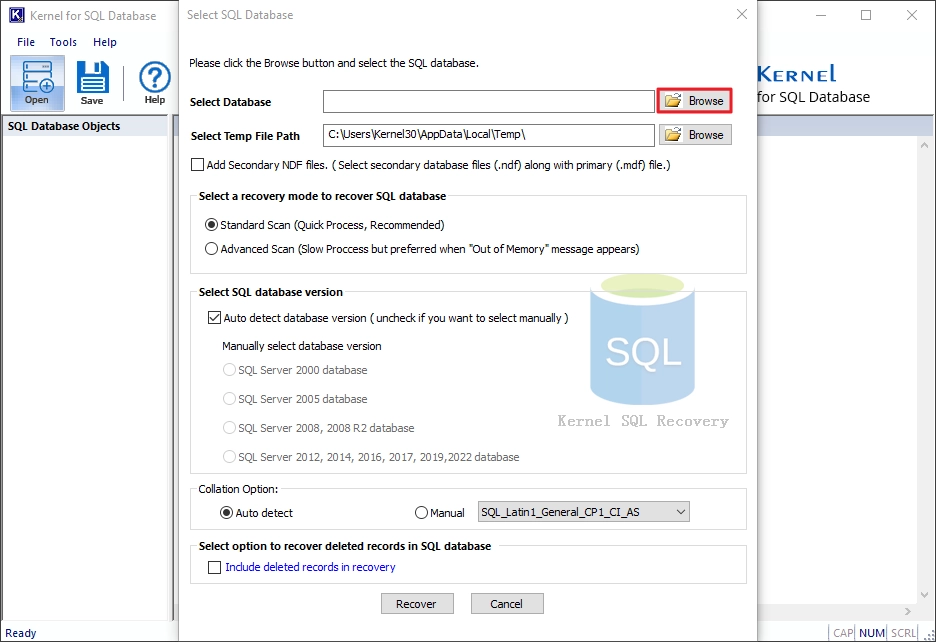
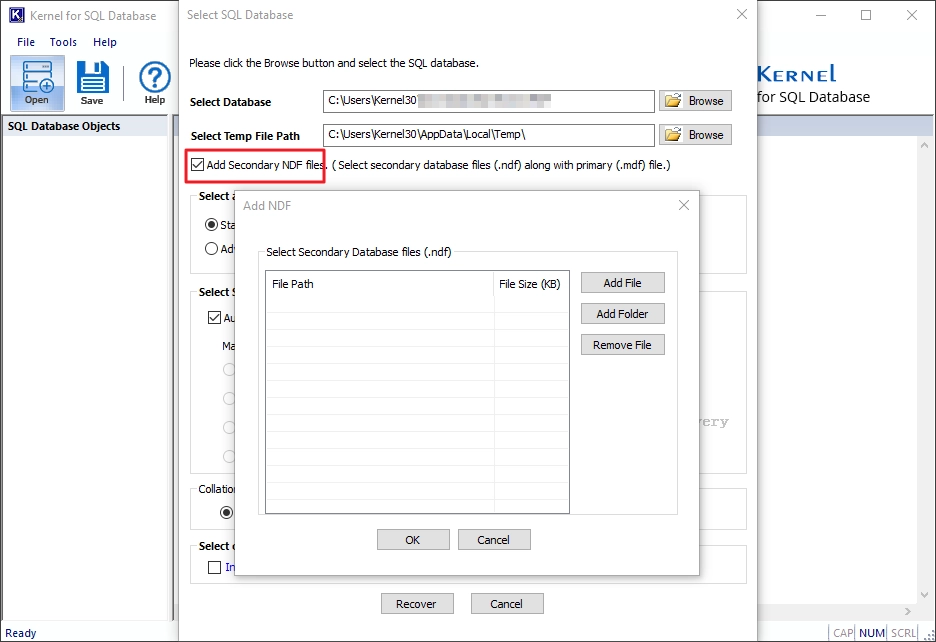
Step 2: Click Browse, choose the MDF file for recovery, and add the file to the tool. After that:
- Select a recovery mode as Standard or Advanced.
- Select database version or allow the tool to detect it automatically.
- Enable auto-detection of the Collation Type of the database or set it manually.
- Select Include deleted records in recovery to retrieve deleted database objects.
Finally, click Recover.
Step 3: Expand the database folder from the left pane to preview its data.
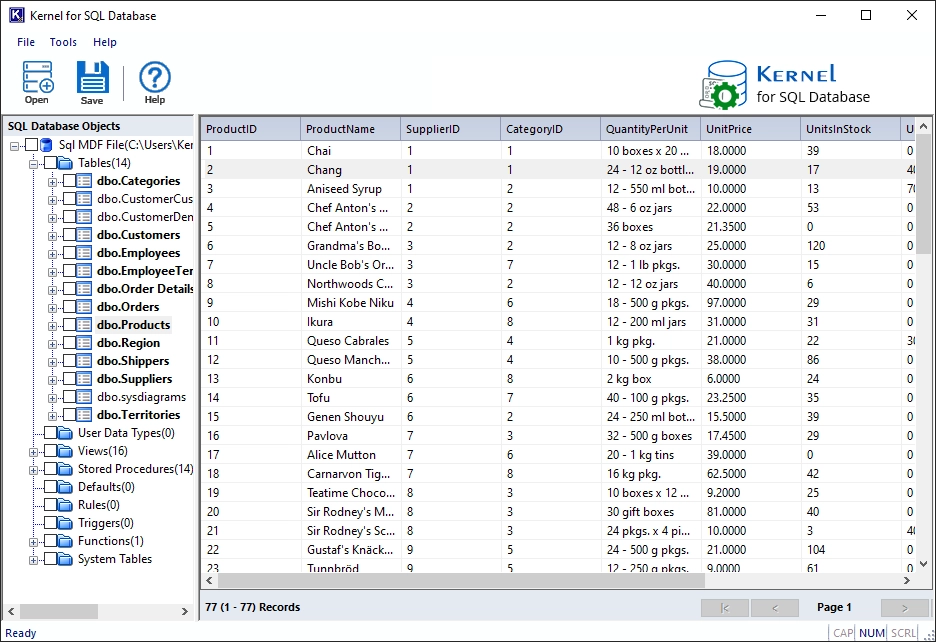
Step 4: Select the tables to save and click on Save button.
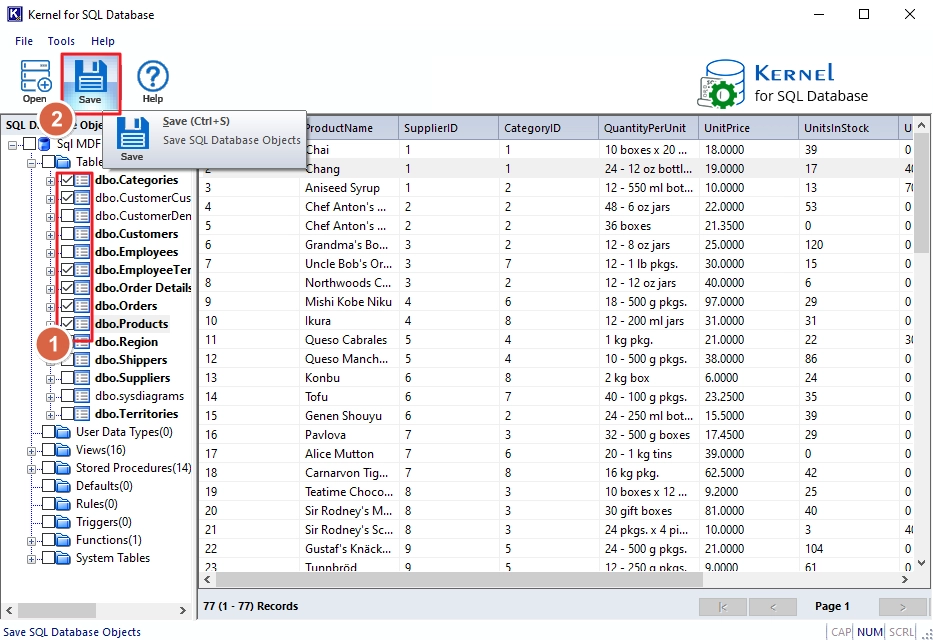
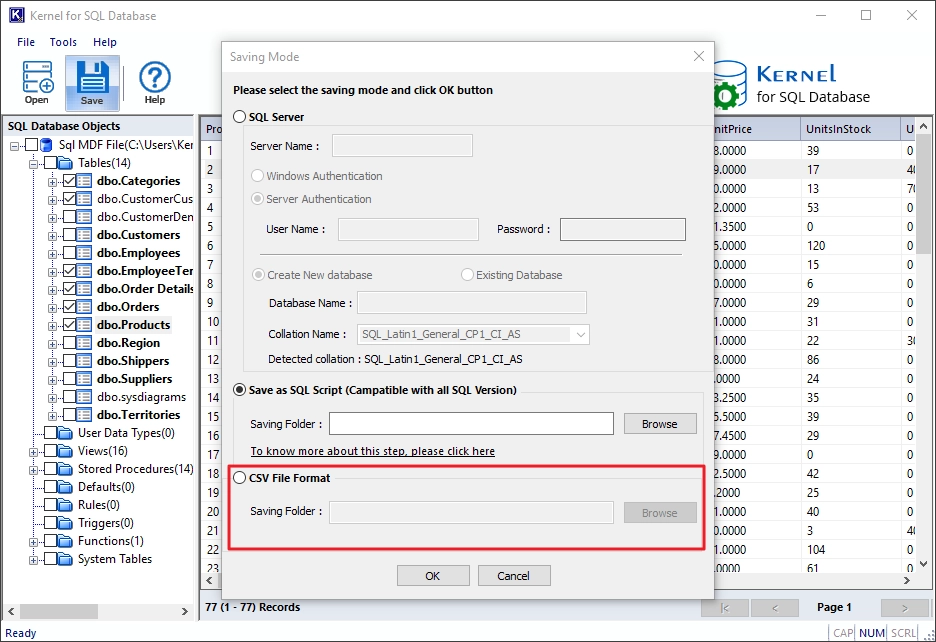
Step 5: The tool provides three destinations to save the data.
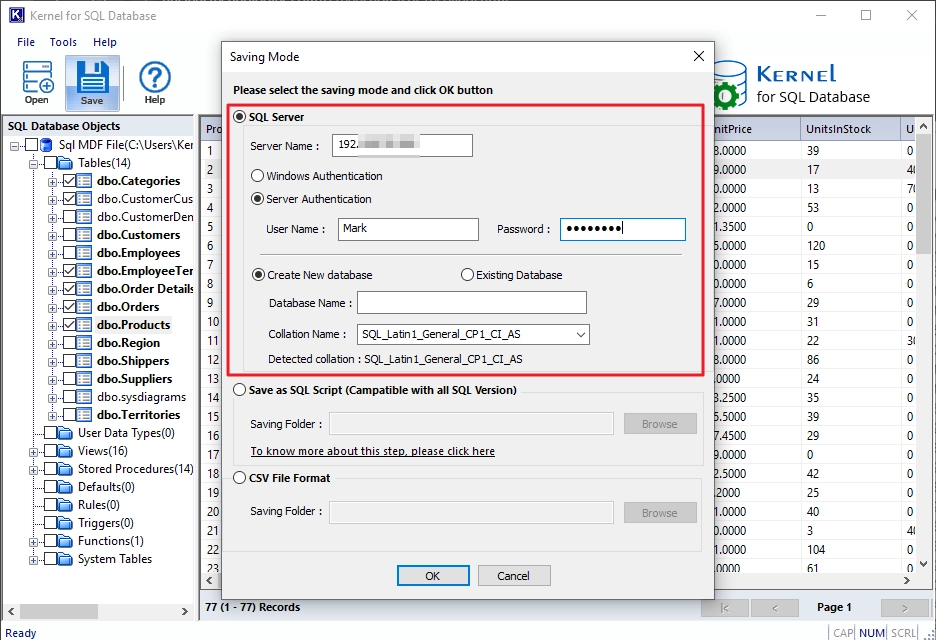
- Enter the SQL Server name or address.
- Select the authentication method:
- Windows Authentication: Uses Windows credentials.
- Server Authentication: Uses the SQL Server username and password.
- Select one of the following options:
- Create New Database: Enter a unique name for the new database.
- Existing Database: Select an existing database to save the recovered data.
- Click OK to start saving the recovered data.
- Open SQL Server Management Studio (SSMS).
- Create a new database.
- Go to the folder where you saved the SQL scripts and the commit.bat file.
- Double-click the commit.bat file.
- Command Prompt will open.
- Run the following command:
commit.bat <server-name> <new-database-name> <sql-server-username> <sql-server-password>
A. Select SQL Server as the saving mode to restore the recovered database directly to a live SQL Server instance. Make sure the destination server is running before executing the steps below:
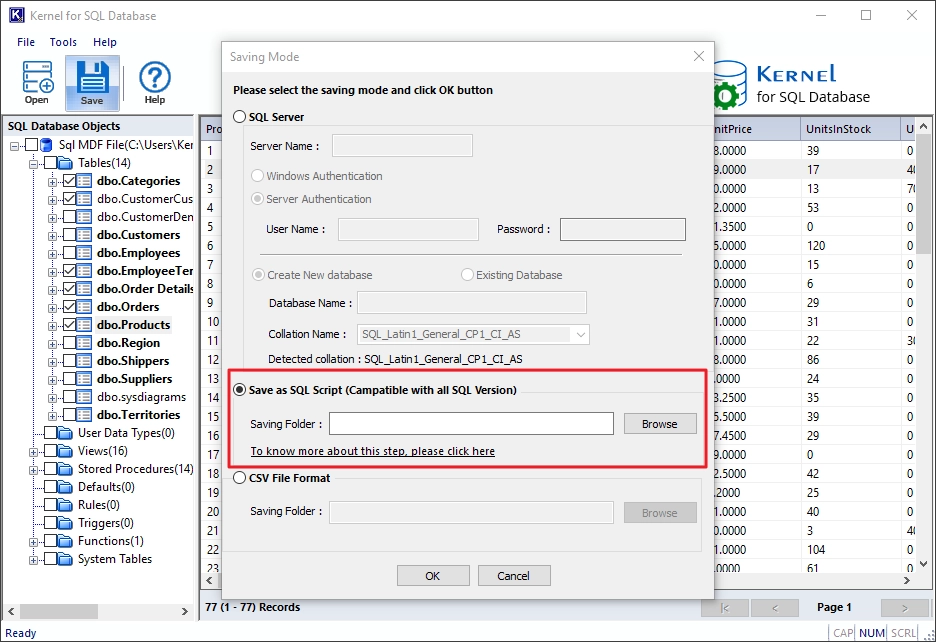
B. Select Save as SQL Script and choose a location to save the SQL scripts and commit.bat file. Use this option if the destination SQL Server is currently unavailable. After saving the files, follow the steps below to insert the recovered data into a live SQL Server database.
C. Select CSV File Format to save the recovered tables in CSV format. Click Browse and provide a location to save the CSV file. Then, click OK.
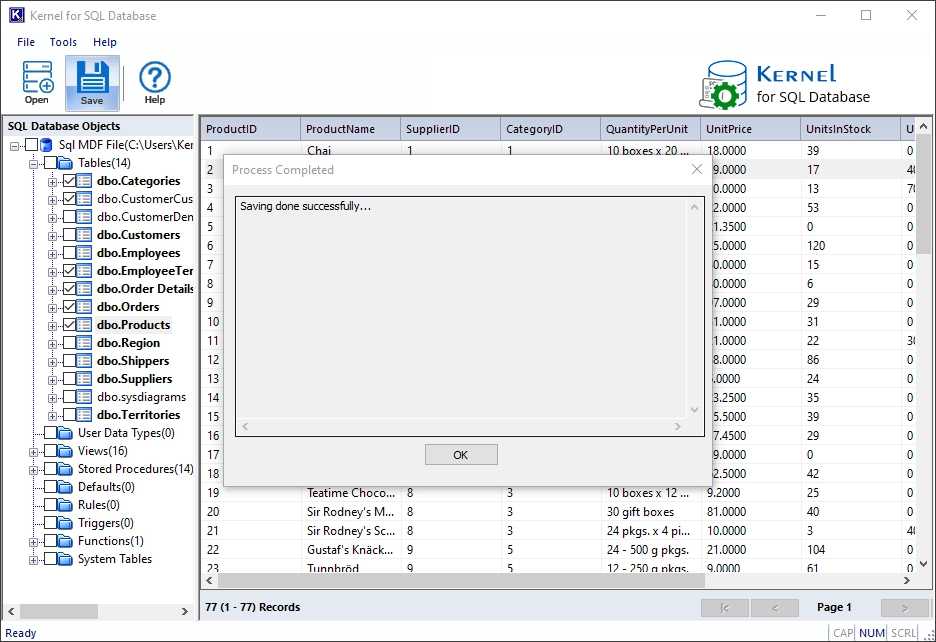
Step 6: You will receive a confirmation message when the data is saved successfully.