Here are the detailed steps to repair and recover damaged PDF files using Kernel for PDF Repair tool:
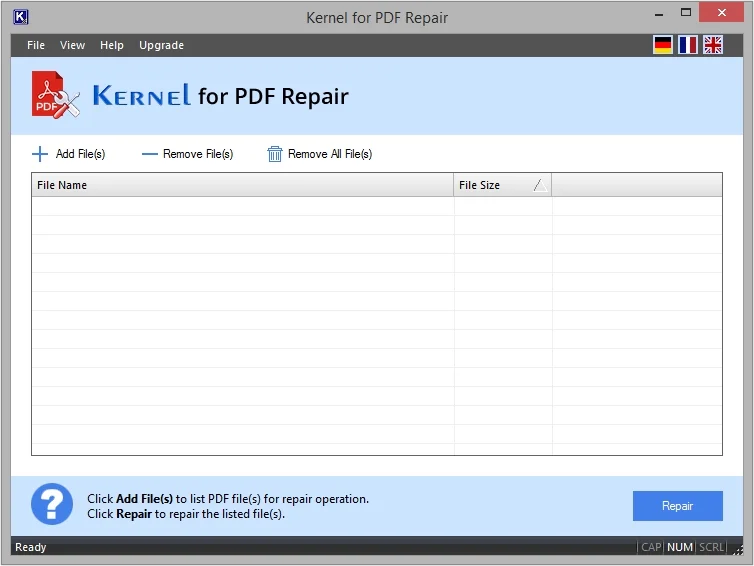
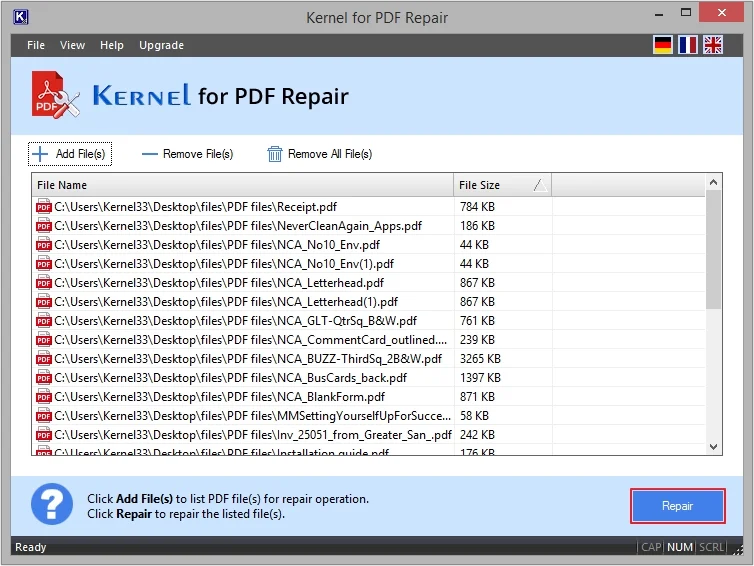
Step 1. Download and install the Kernel for PDF Repair tool. Here’s the home screen of the tool.
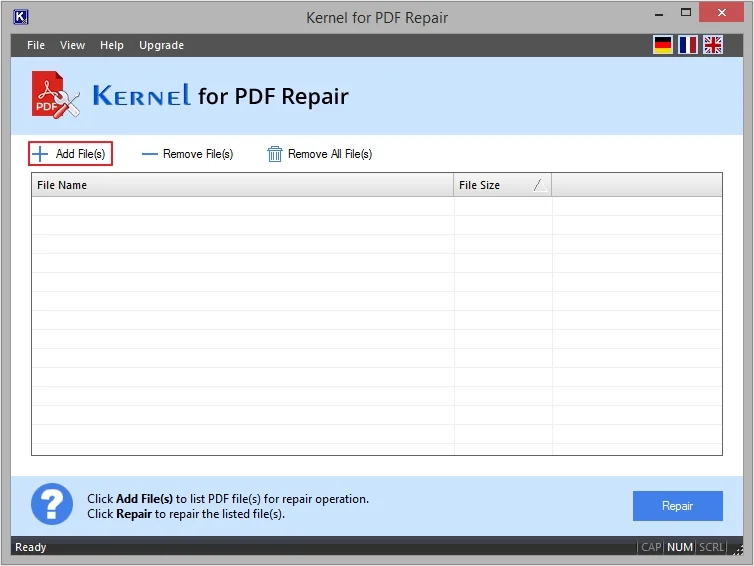
Step 2. Click on the Add File(s) button to upload PDF files.
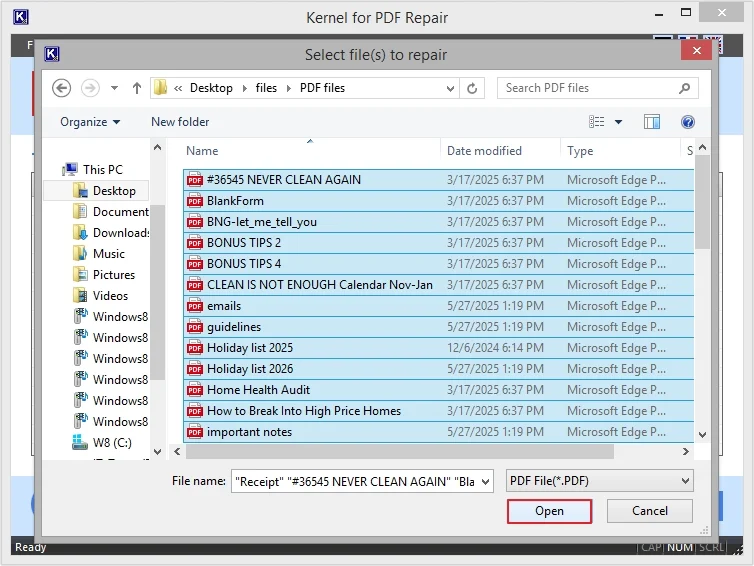
Step 3. Select required PDF files and click Open.
Note: You can select single or multiple PDF files as per your requirements.
Step 4. Once the files are added, then click on the Repair button to proceed.
Note: The software allows you to preview File Name and File Size before initiating the repair process. You can even Remove File(s) from the given list.
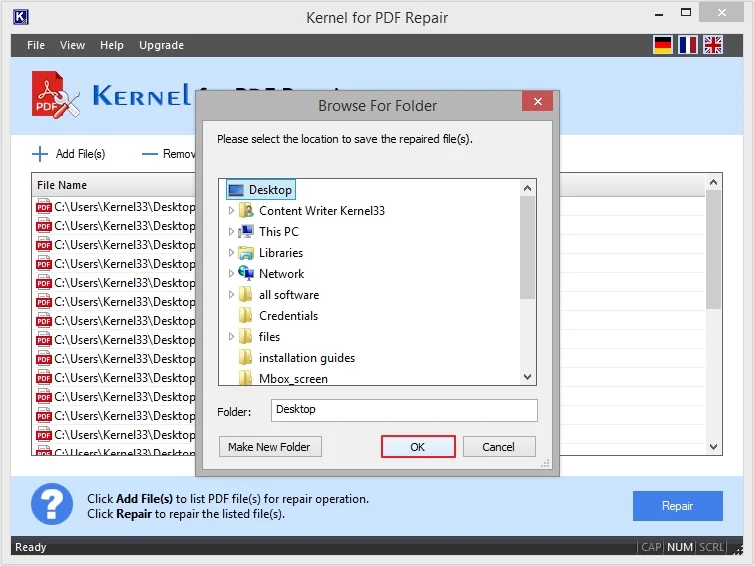
Step 5. Provide the saving location to save the repaired files and click OK.
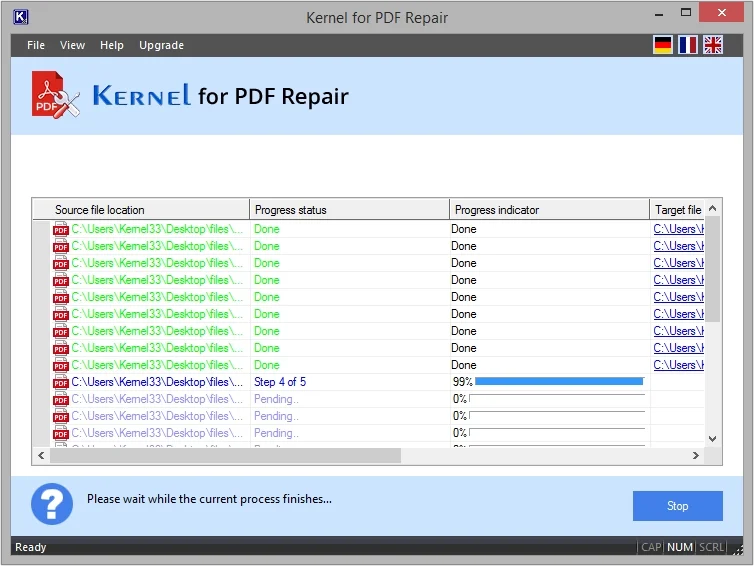
Step 6. Now, the software will begin the PDF repair process.
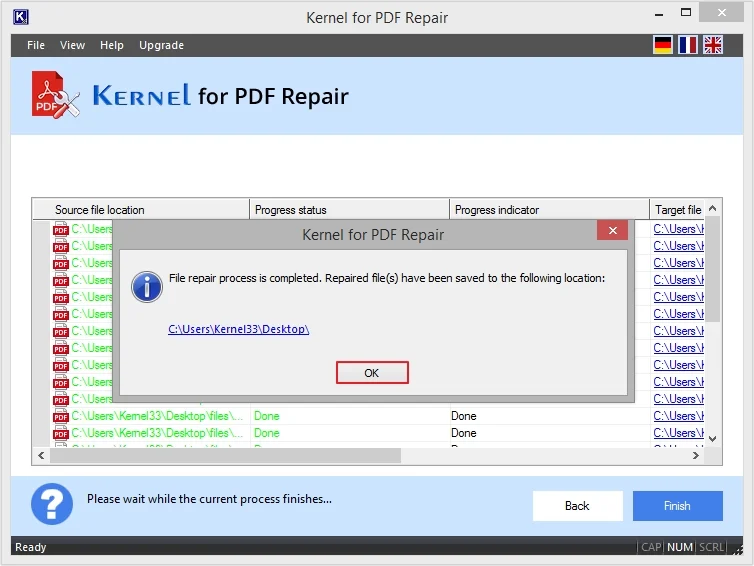
Note: The software displays the live progress with details, like Source File Location, Progress Status, Progress Indicator, and Target File Name.
Step 7. After a successful PDF file recovery process, you will get a link to directly access the repaired files. Click OK to end the process.