Step 1: Welcome Screen to perform the required OLM File Migration
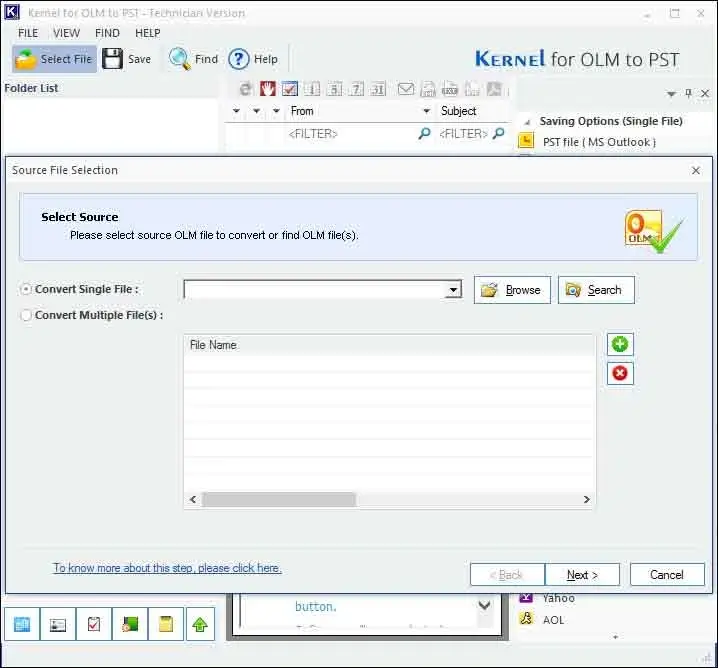
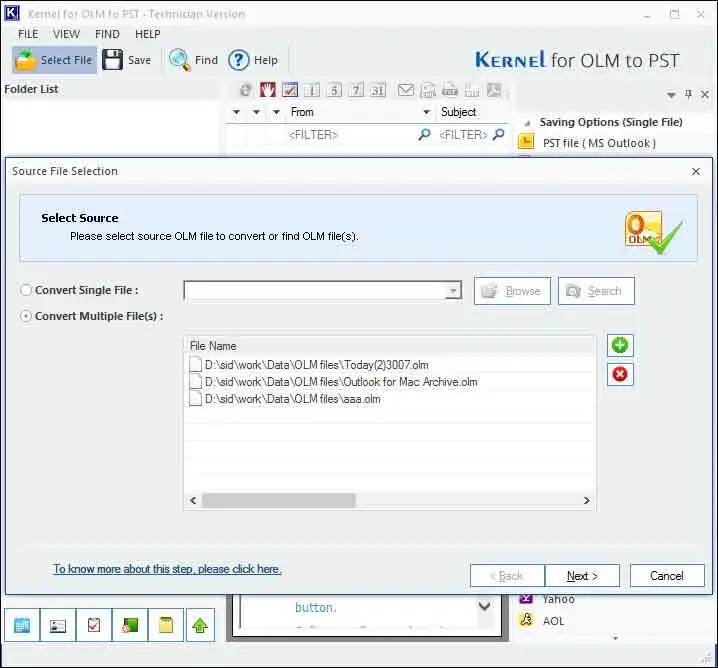
Step 2: Select single/multiple OLM file(s) as per your convenience, for the conversion
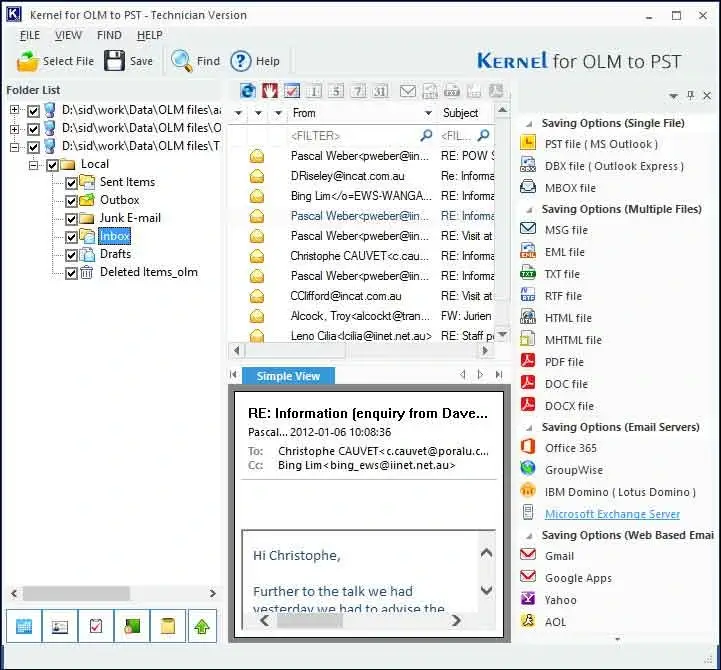
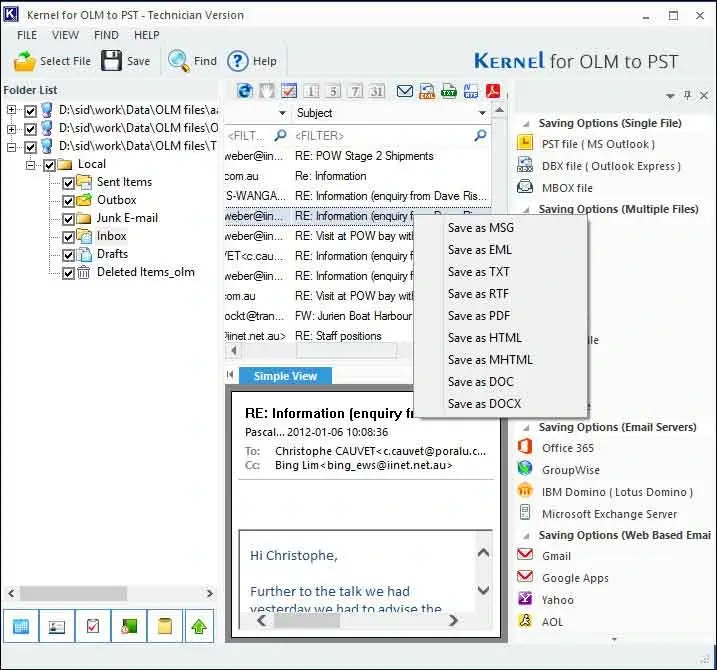
Step 3: Full preview of OLM file data, before the conversion.
Step 4: Save individual email item (OLM file) in MSG, PDF, HTML, MHTML, and similar formats.
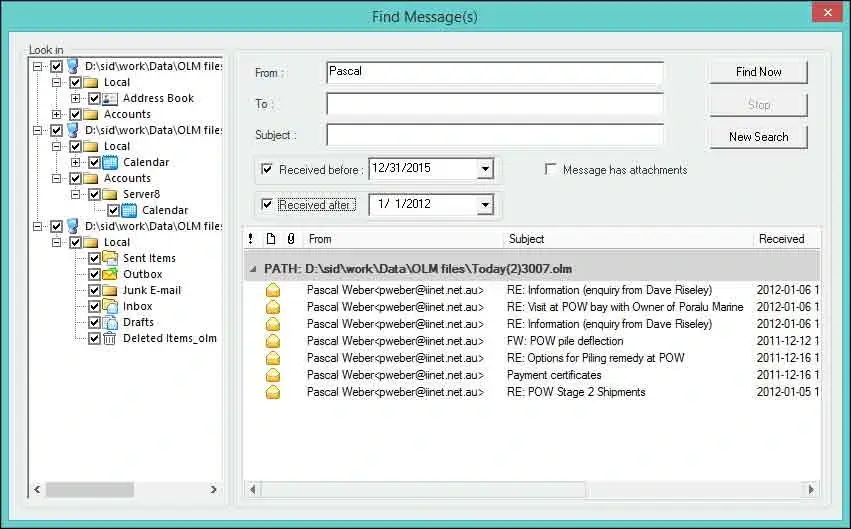
Step 5: Use ‘Find Now’ button to quickly search specific item of OLM file based on: subject, from, to, message has attachment.
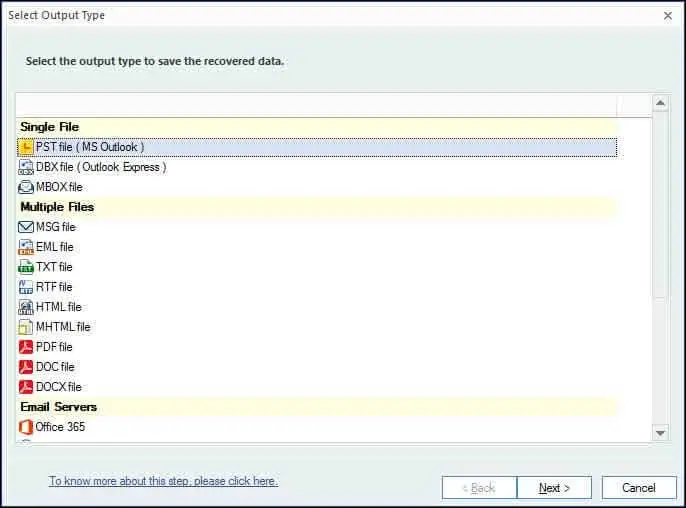
Step 6: Select any of the output types to migrate OLM data in the desired format or platform.
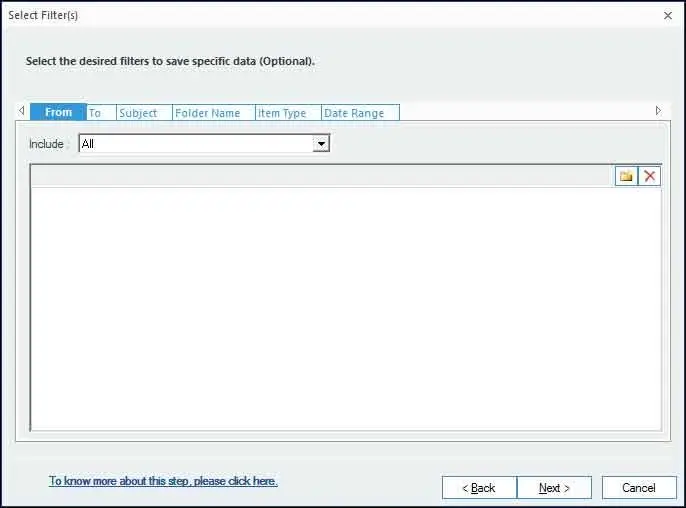
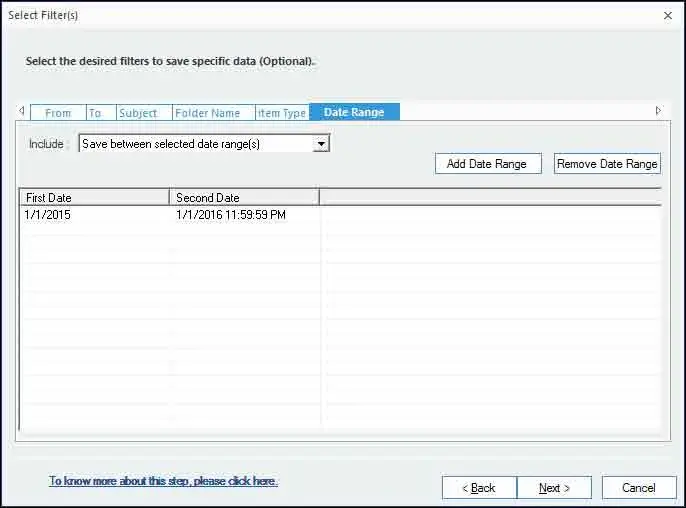
Step 7: Select Filter(s) to save specific data items from OLM file to targeted location.
Step 8: Filtration of data items as per diverse item types.
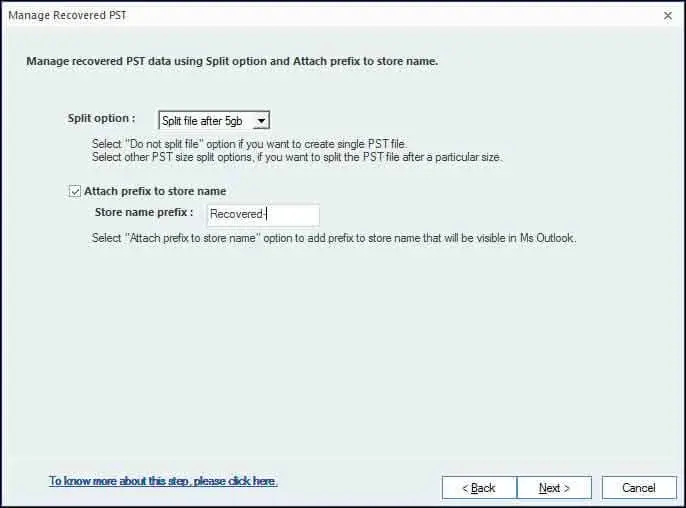
Step 9: Manage your output file (PST) by defining split option, and attach prefix to store name
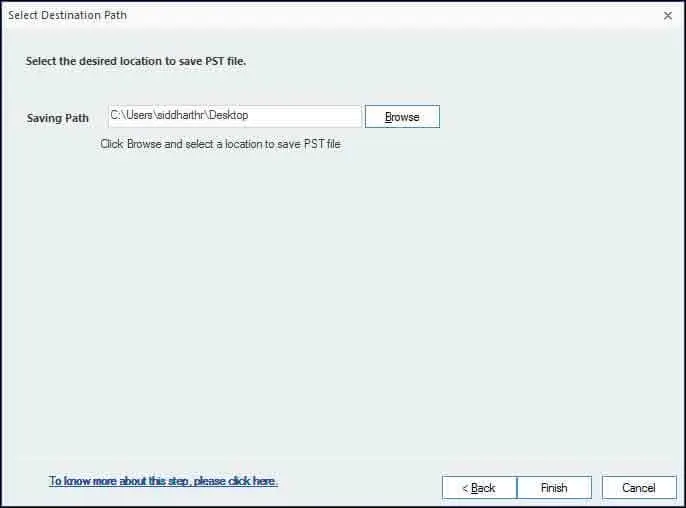
Step 10: Define location to migrate data into PST File.
Step 11: Provide the location to migrate the data into DBX File.
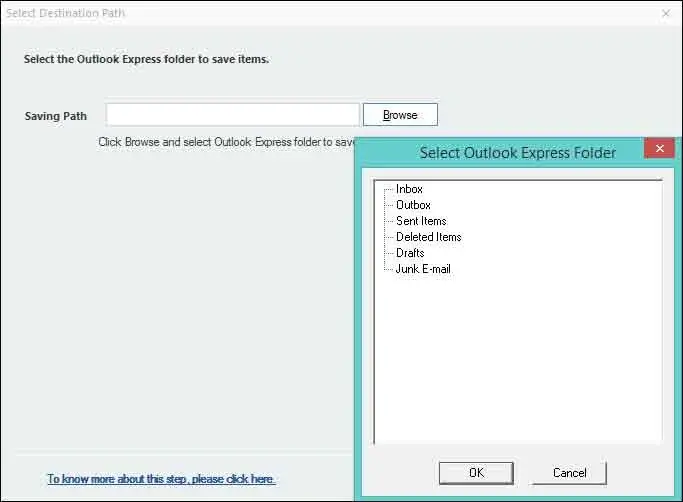
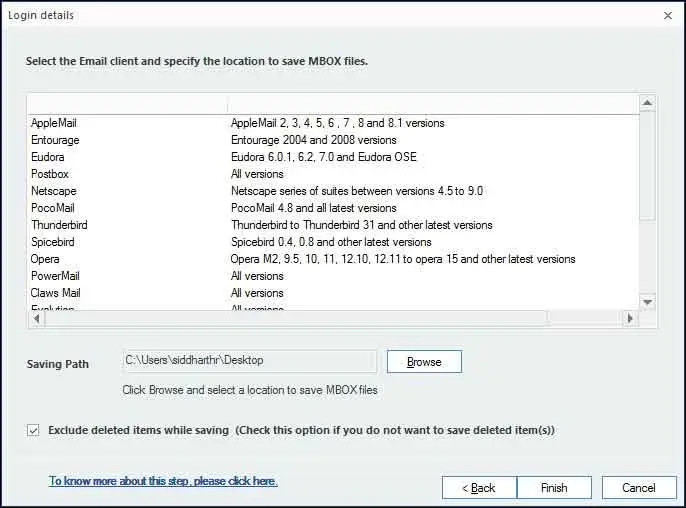
Step 12: To save OLM in MBOX File: Select the desired MBOX-supported Email Client, and specify the location to save the output file.
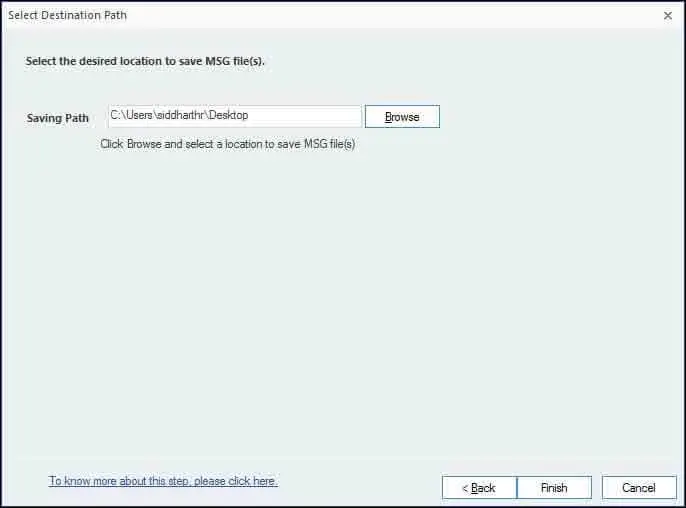
Step 13: Specify the location to migrate data into MSG File.
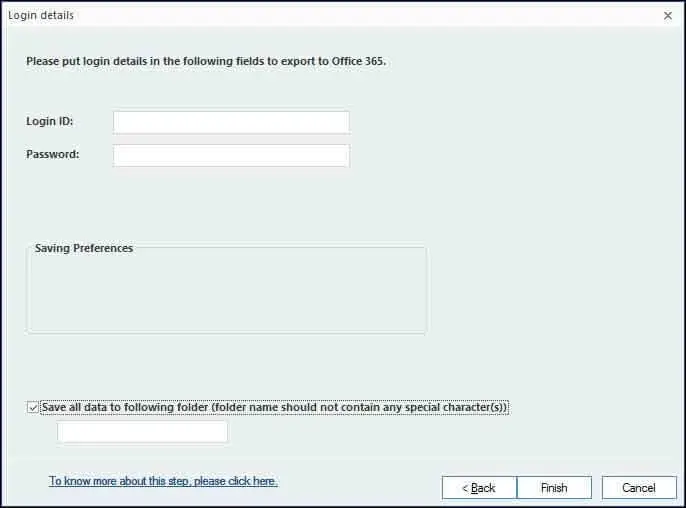
Step 14: Provide login credentials for saving data to Office 365 mailbox.