File and Folder
Select and shred single/multiple files or folders from anywhere on your system. Erase specific data items without affecting any other stored files with the following steps.
Step 1: Open the tool and set a password. This password is crucial to prevent unauthorized access & protect your data. You can edit or remove this password from the Settings option.
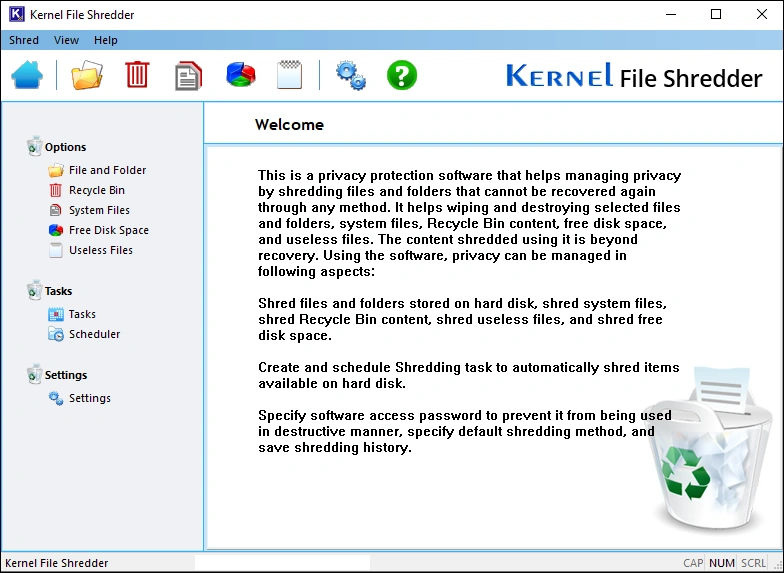
Step 2: After securing the tool, a Welcome page will be displayed. On the left-side pane, you will find options for data shredding
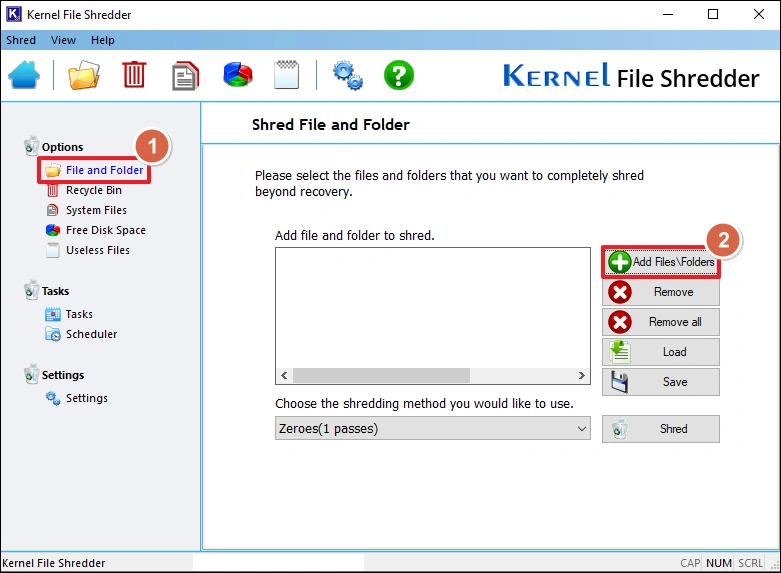
Step 3: Click on the File and Folder options in the left-side pane. This will open the Shred File and Folder module. Now, click on the Add Files/Folders button to browse and select data for shredding.
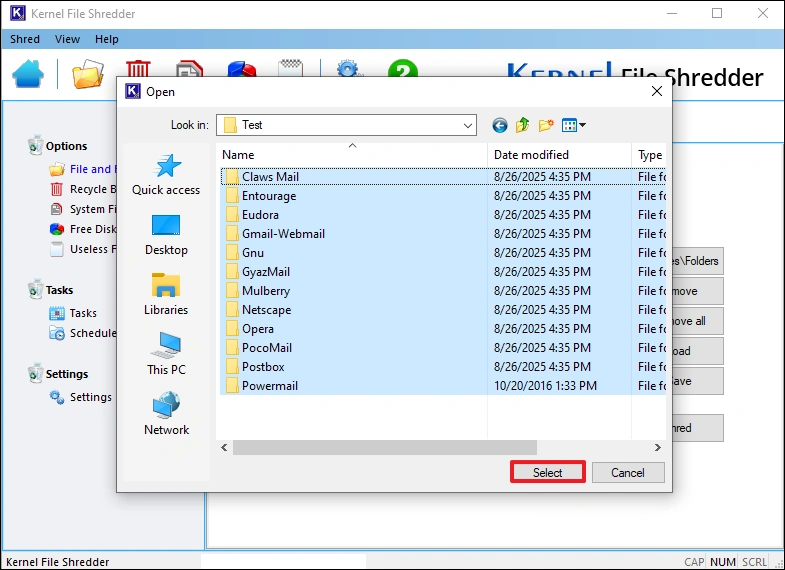
Step 4: You can select individual files or folders for shredding. When you select folders, all the data inside the folder will be shredded, including any nested folders and data. Click Select to add the selected file/folder.
Step 5: Now, select the file shredding method using the dropdown as per your requirements. Then, click Shred to start the process.
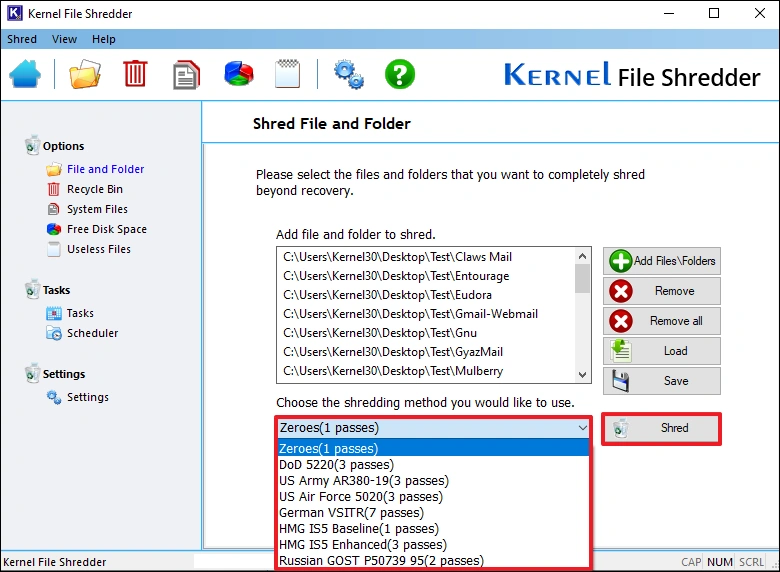
Note: You can remove any file from the list using the Remove button or empty the list using the Remove All button.
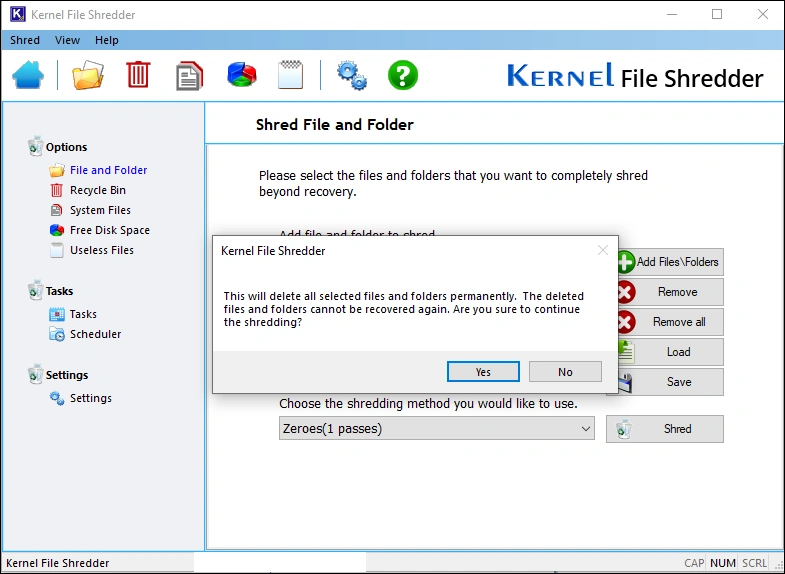
Step 6: The tool will give you a warning about the permanent deletion process. To confirm the data shredding and continue the process, click Yes.
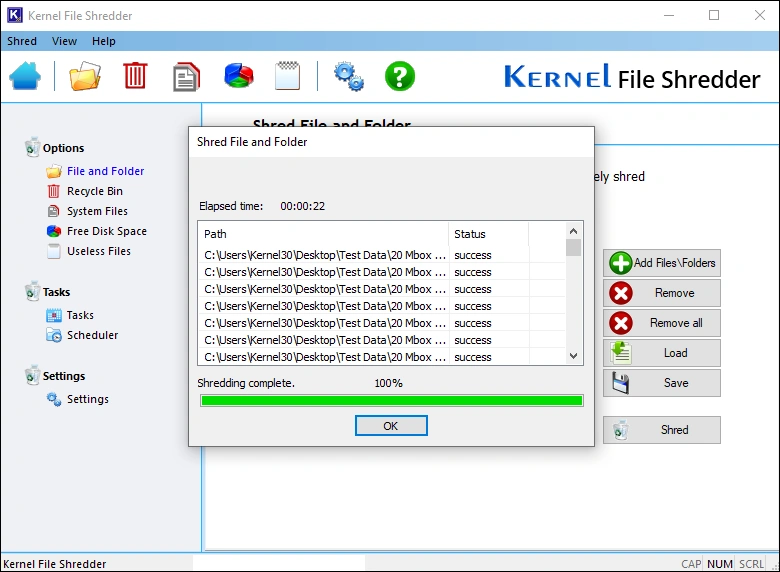
Step 7: File shredding will begin. After the file is shredded, its status is displayed as Success. When the process is 100% finished, you will get the Shredding complete message.
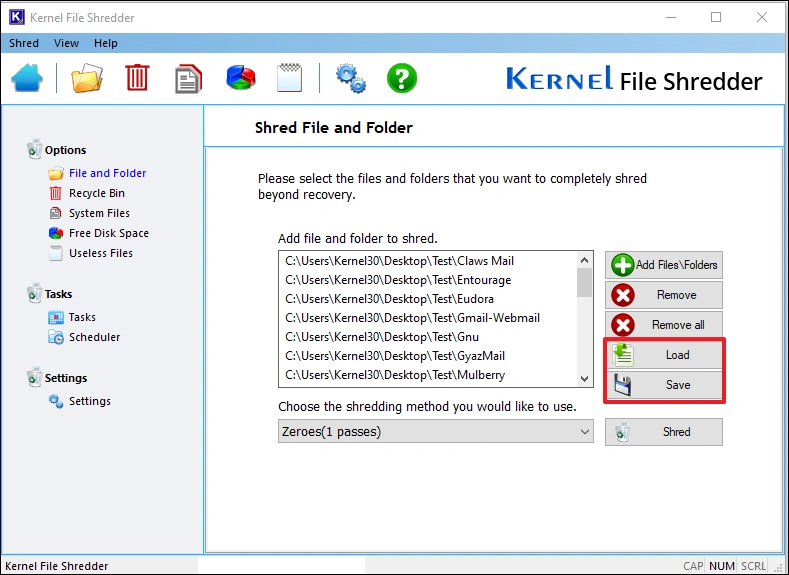
Note: You can also save a shredding job using the Save button. Then, you can run it later whenever you want using the Load button.
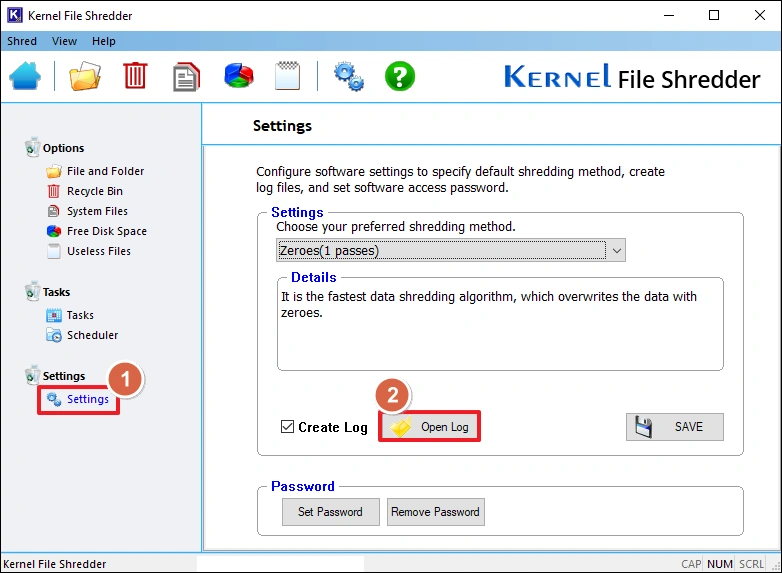
Step 8: To open the log file and view the file shredding history, click the Settings option. Then, click on the Open Log button.
Option 2: Recycle Bin
Empty your recycle bin with just a single click and make it impossible for anyone to access this data again. Erase all of your private files completely and permanently.
Step 1: Click on the Recycle Bin option.
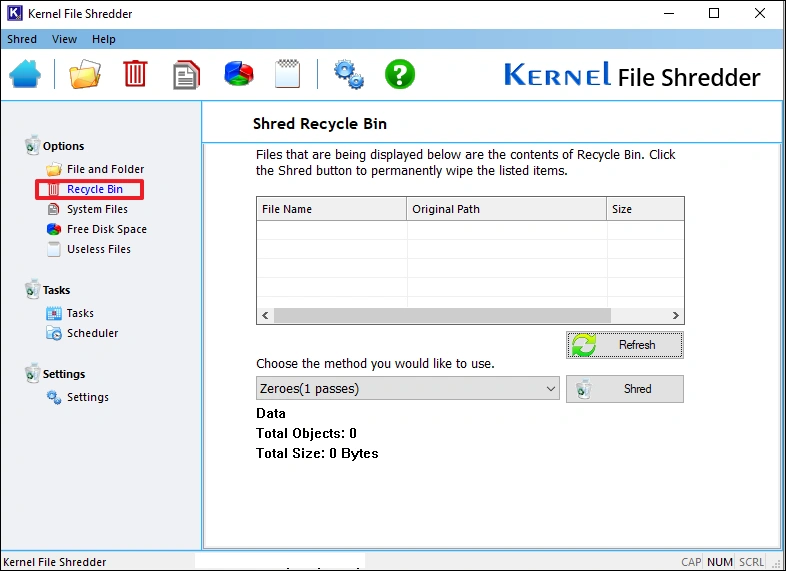
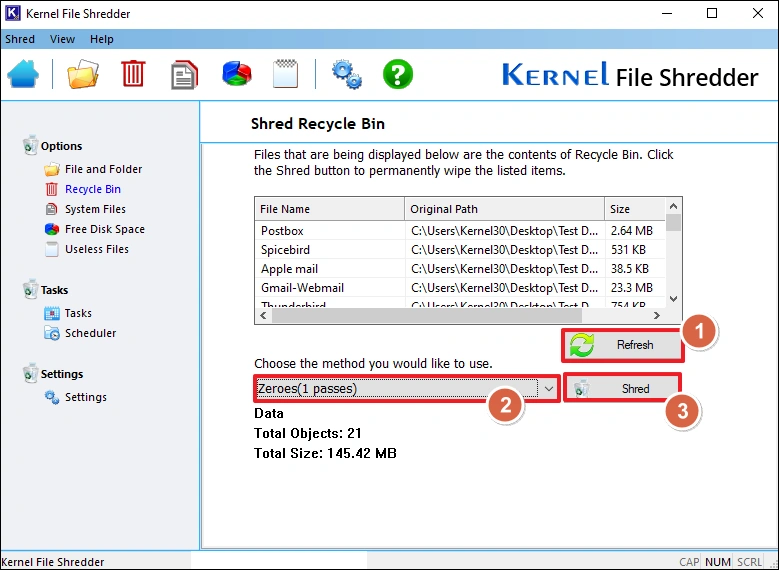
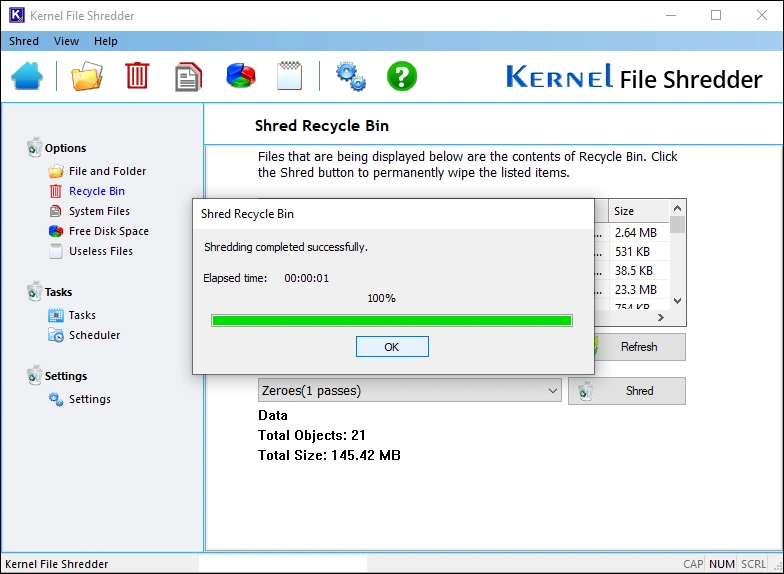
Step 2: Click Refresh to get all the data from the Recycle Bin. Then select a shredding option and click Shred.
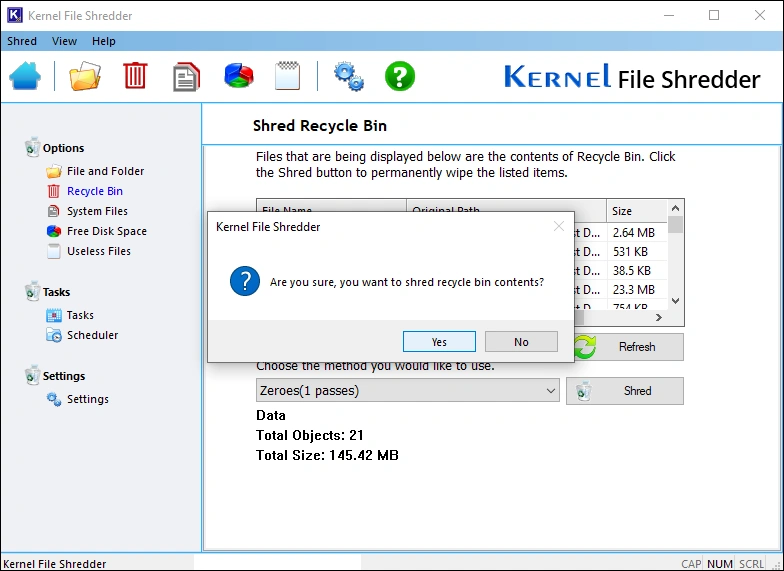
Step 3: When asked for confirmation, select Yes.
Step 4: Recycle Bin shredding is complete.
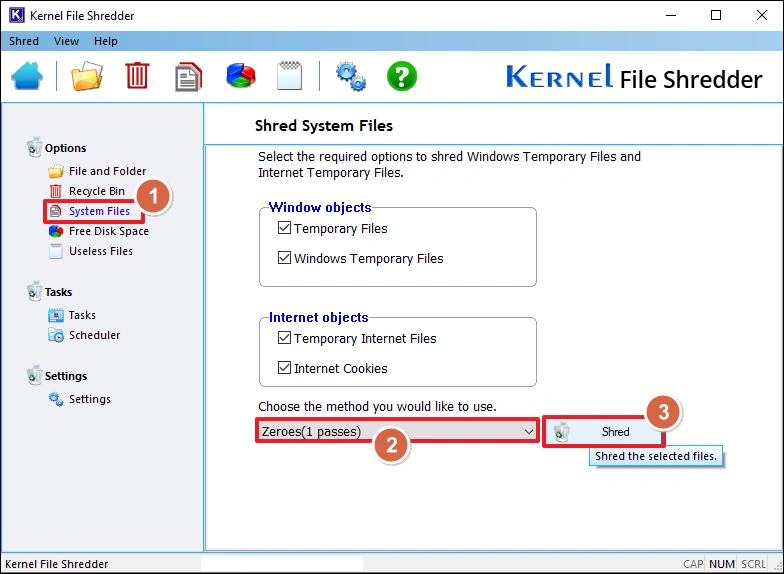
Option 3: System Files
Permanently delete the Windows and Internet temporary object or data saved over time in your system and optimize your device storage space for better performance.
Step 1: Click on the System Files option. Select the objects to shred, then choose a shredding method and click Shred.
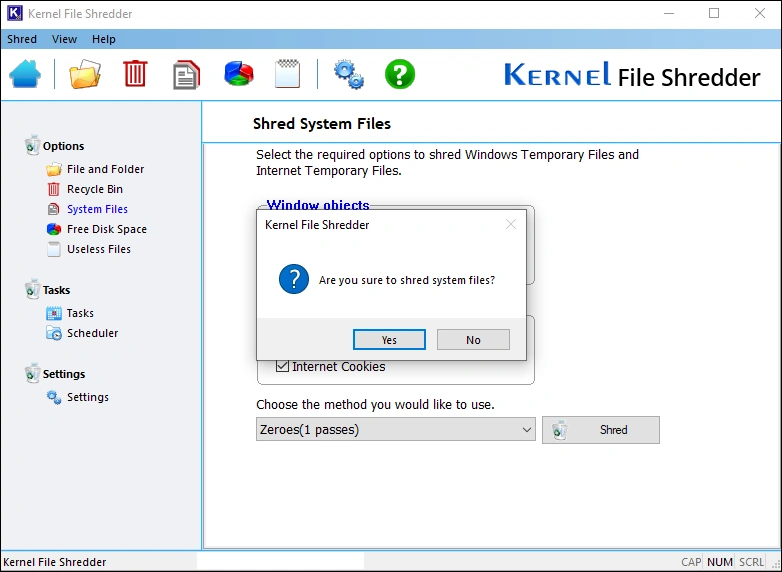
Step 2: Click Yes when asked for confirmation.
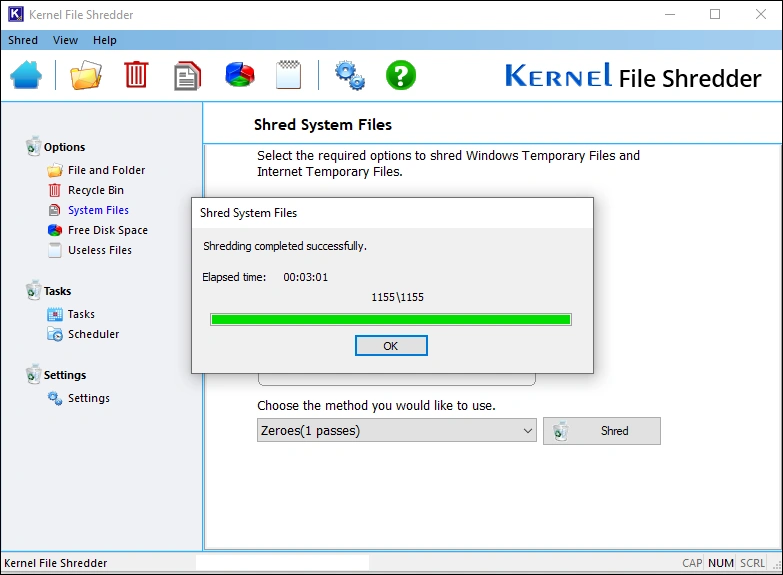
Step 3: The shredding process is completed.
Option 4: Free Disk Space
Completely wipe data from your system's hard disk partitions or any connected storage device. Erase data safely before you sell or recycle your device.
Step 1: Click on the Free Disk Space option and select the drive you want to shred. Choose the shredding method and click Shred.
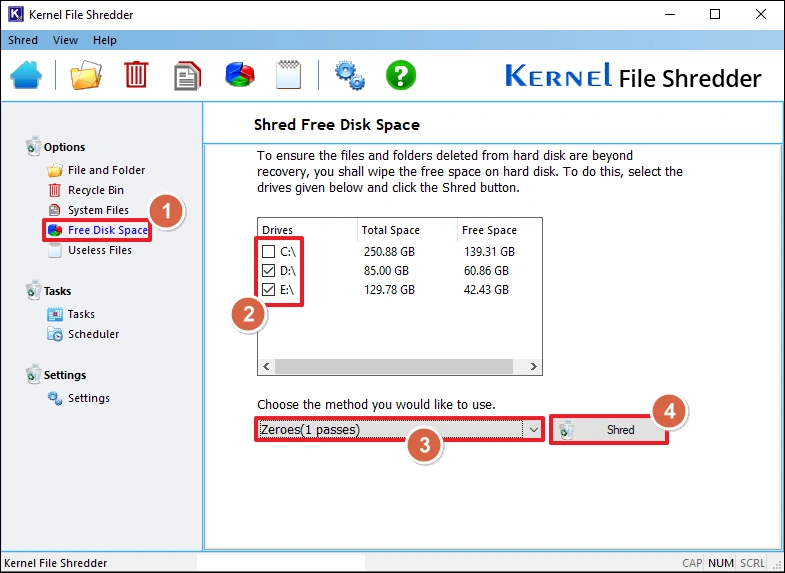
Step 2: Confirm the shredding job and continue.
Note: This option allows you to shred the complete system hard drive partition. Be careful when selecting the drives. Once the data is shredded, it cannot be recovered.
Option 5: Useless Files
Scan and remove any unnecessary data from anywhere on your drive or system. The feature allows you to delete all obsolete files in one go and skip manual file deletion.
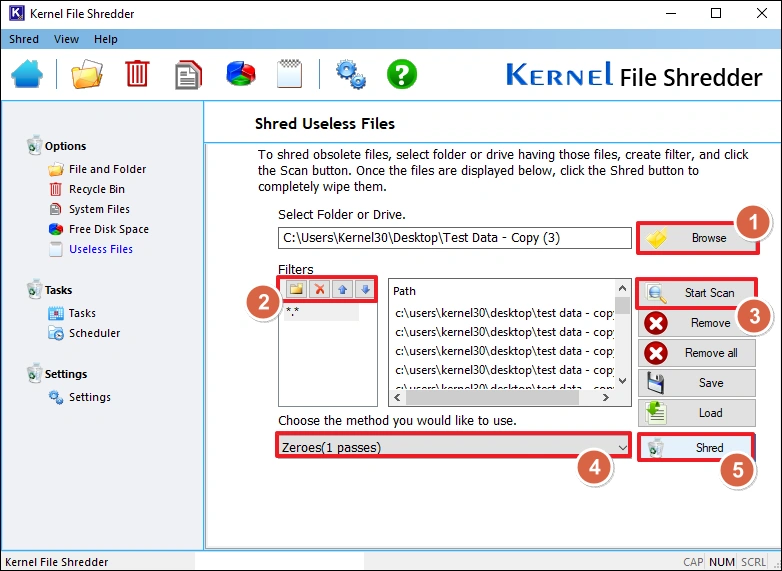
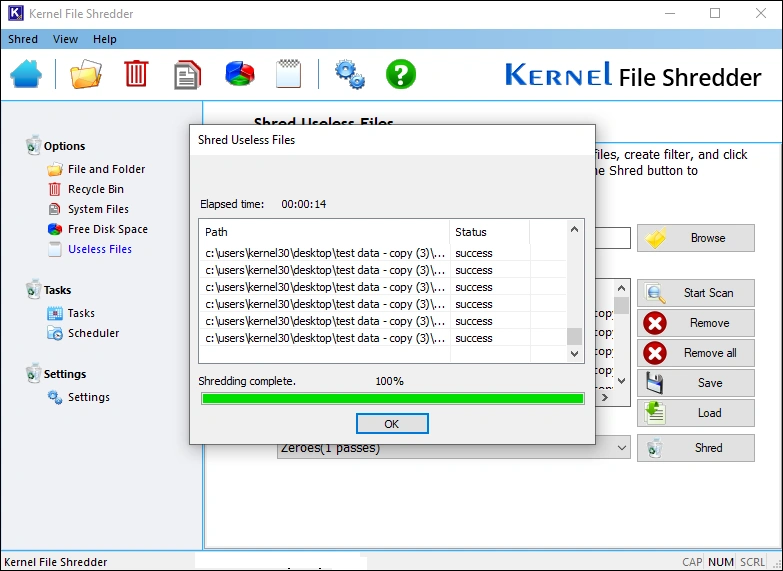
Step 1: Click the Useless Files option.
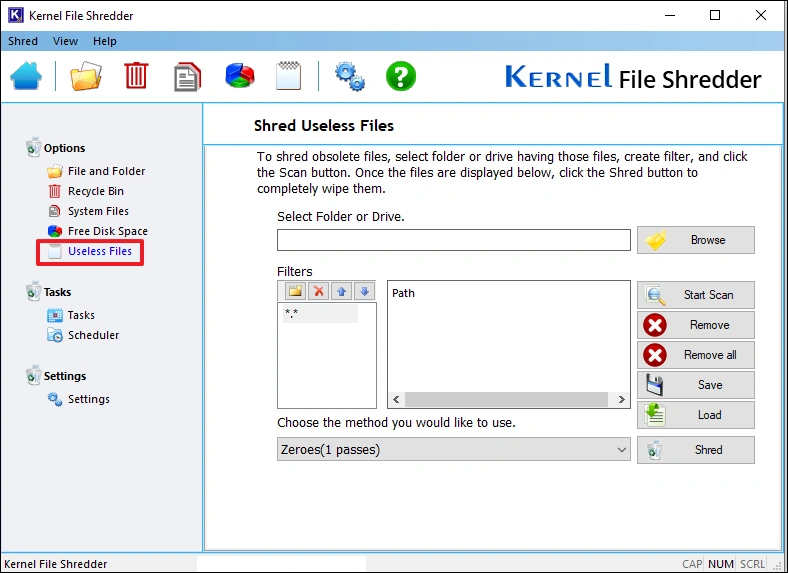
Step 2: Click Browse and specify the location of the data. Then, create filters as per need and click Start Scan. Finally, choose a shredding method and click Shred.
Step 3: Select Yes when asked for confirmation.
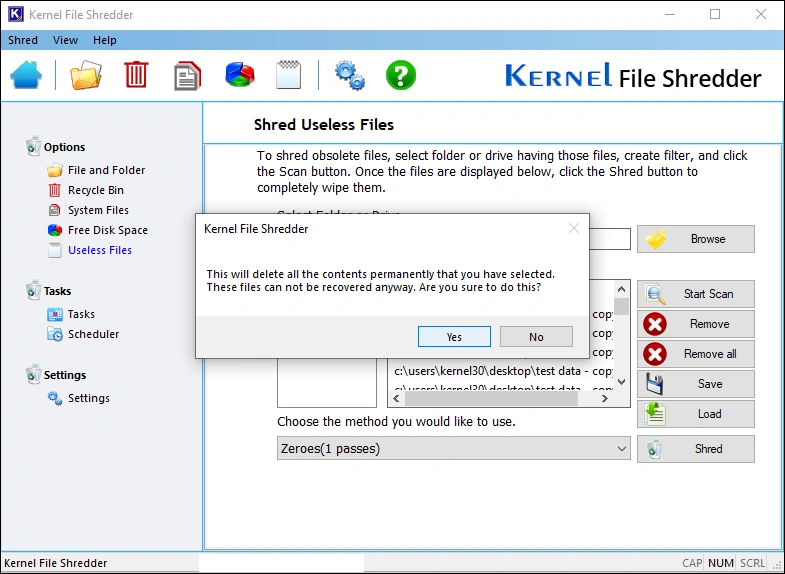
Step 4: Useless file shredding task completed.
Create File Shredding Tasks
Simplify the file shredding with the ability to create data shredding tasks. Create & save data deletion tasks for files/ folders, recycle bin, system files, hard drive, etc., data items.
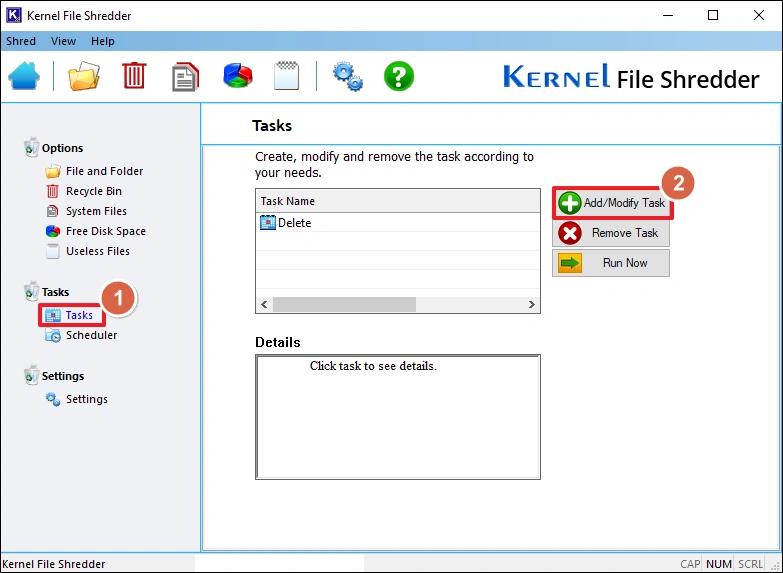
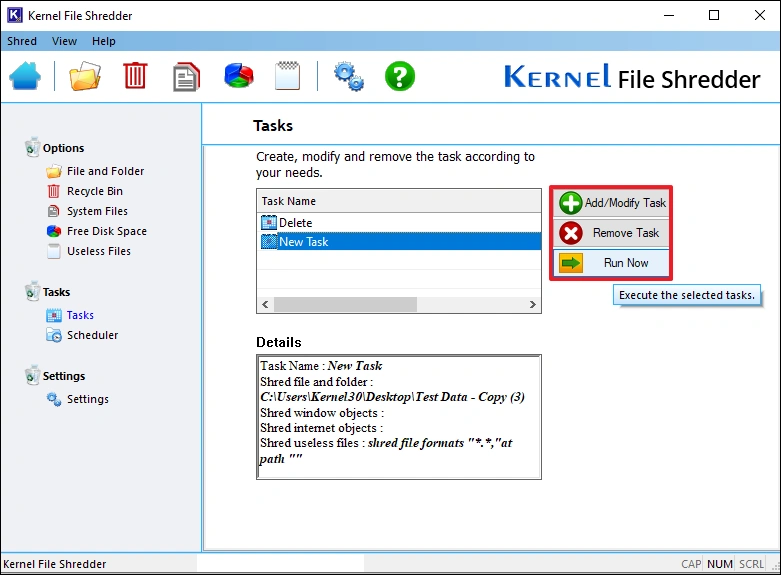
Step 1: To create a task, select the Tasks option from the left-side pane and click the Add/Modify Task button
Step 2: Provide a name for the task and click Next.
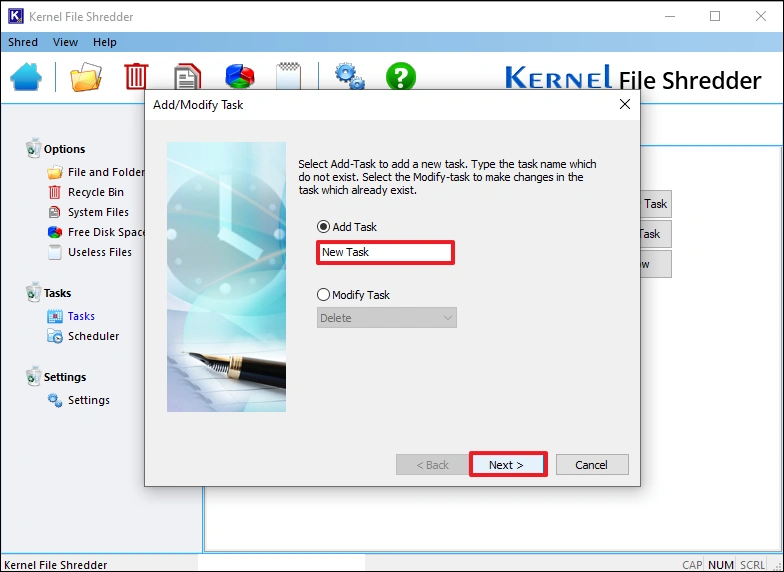
Note: You can modify an existing task with the Modify Task option.
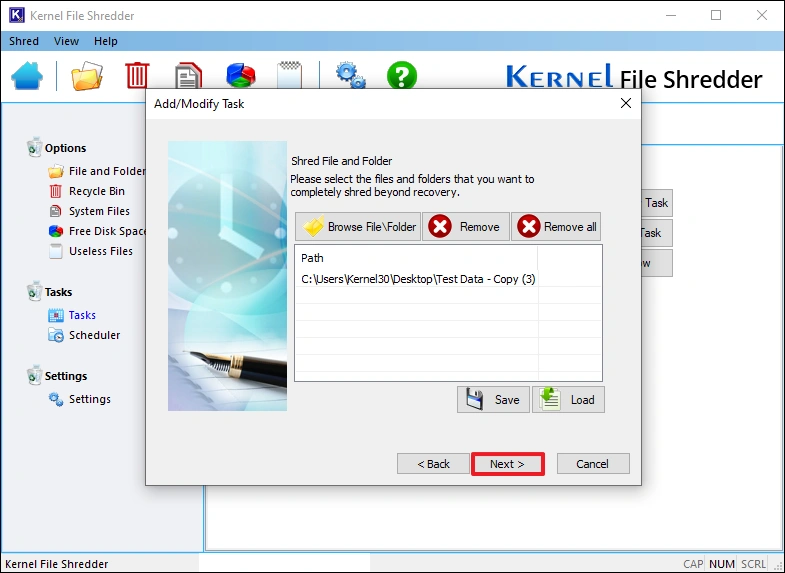
Step 3: Specify the files or folders to shred and click Next.
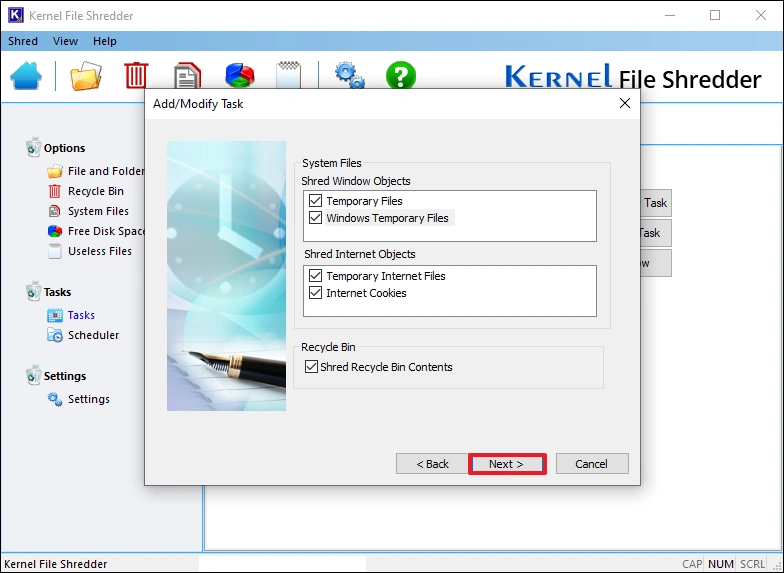
Step 4: Select to choose to shred System Files and Recycle Bin data. Then, click Next to proceed.
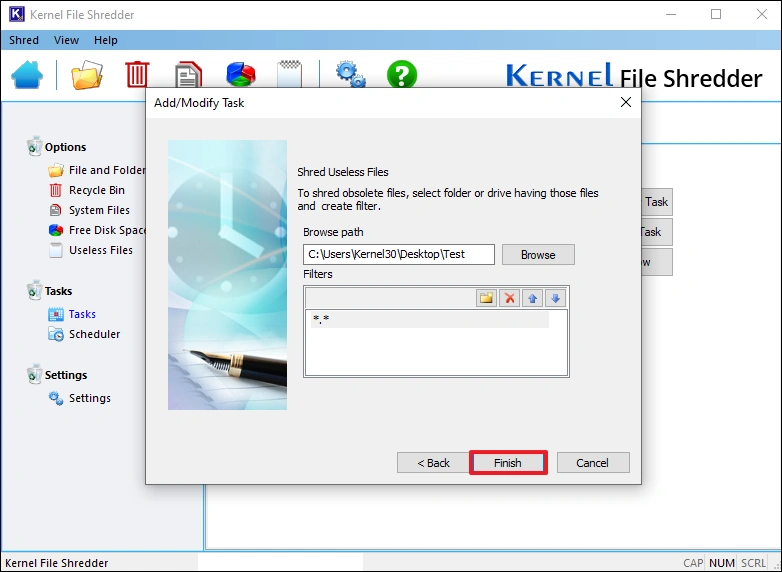
Step 5: Click Browse to select the Useless files for shredding and click Finish.
Note: To run the task, select it and click Run Now. You can also modify or remove the task. Additionally, if you want, you can schedule it to run at a later time using the Scheduler.
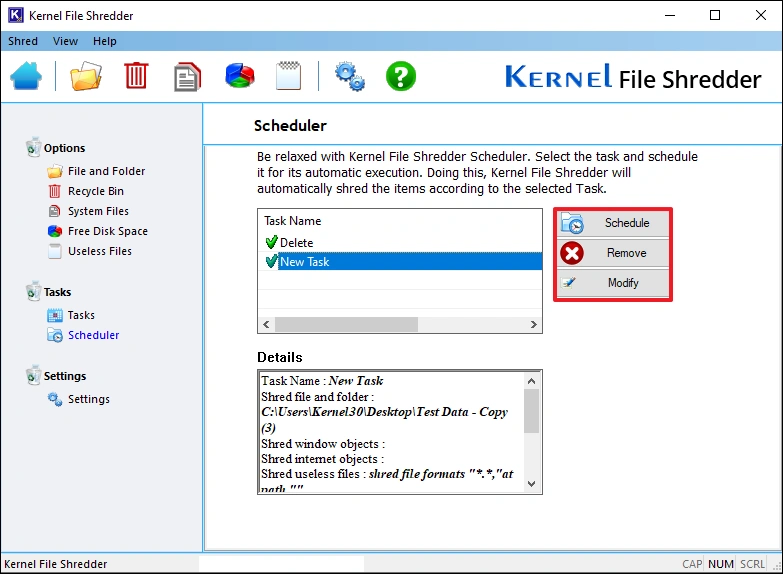
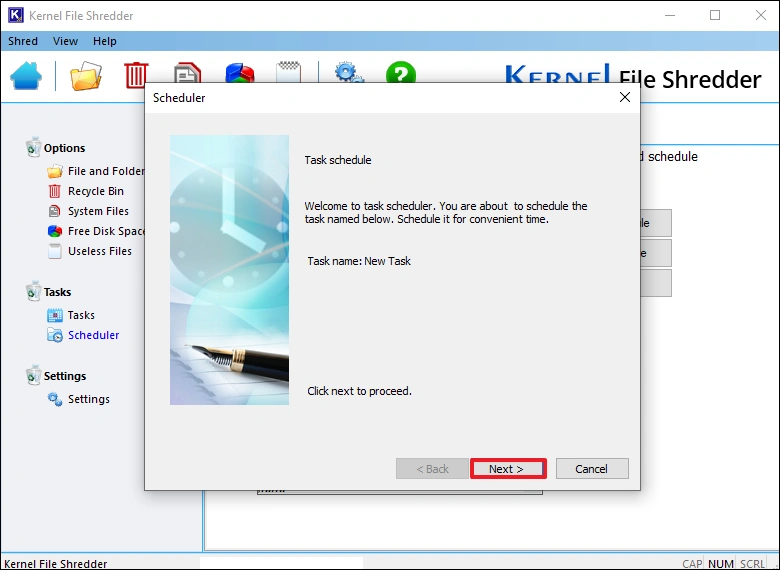
Schedule Task
Run a file shredding job at your preferred date and time. Schedule a pre-existing task to run automatically every day, week, or month to clear your data permanently.
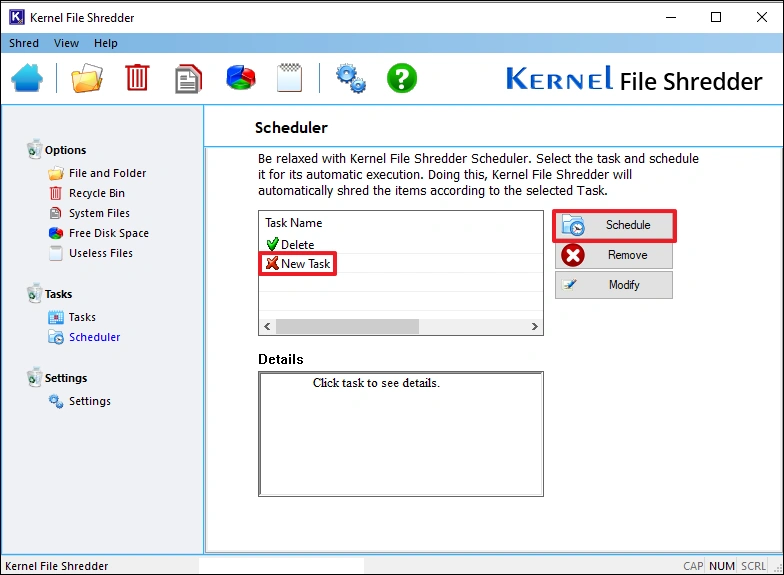
Step 1: To schedule a task, click on the Scheduler option. Select the task name and click on the Schedule button.
Step 2: Click Next to proceed.
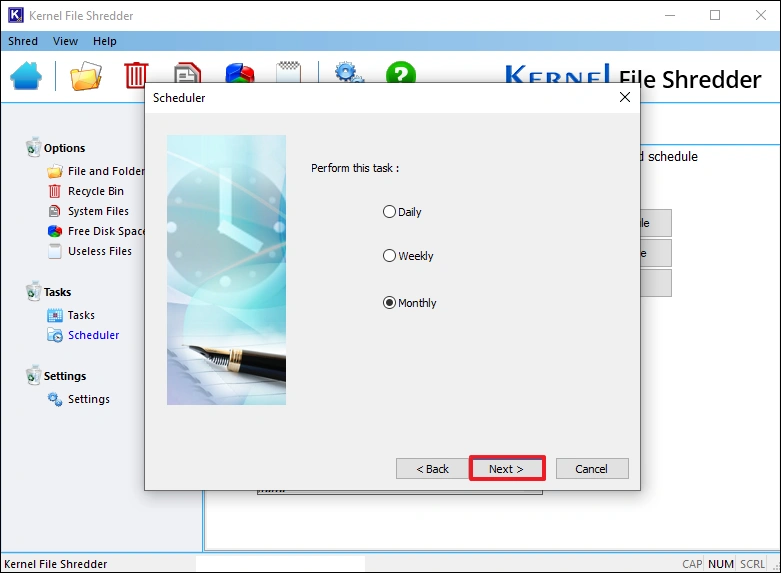
Step 3: Choose to run the task Daily, Weekly, or Monthly and click Next.
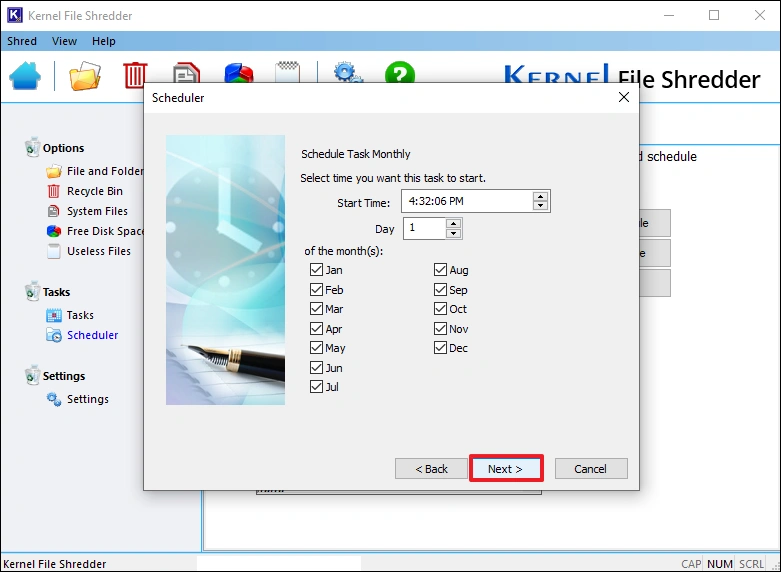
Step 4: Specify the time and other details and click Next.
Step 5: Finally, select a shredding option and click Finish.

Note: Use the Modify button to modify the schedule or the Remove button to delete the schedule.