Exchange Mailbox migration
Migrate complete Exchange mailbox data from Office 365 to Google Workspace. Be it inbox, calendars, contacts, or tasks. Go through the following steps to run the tool:
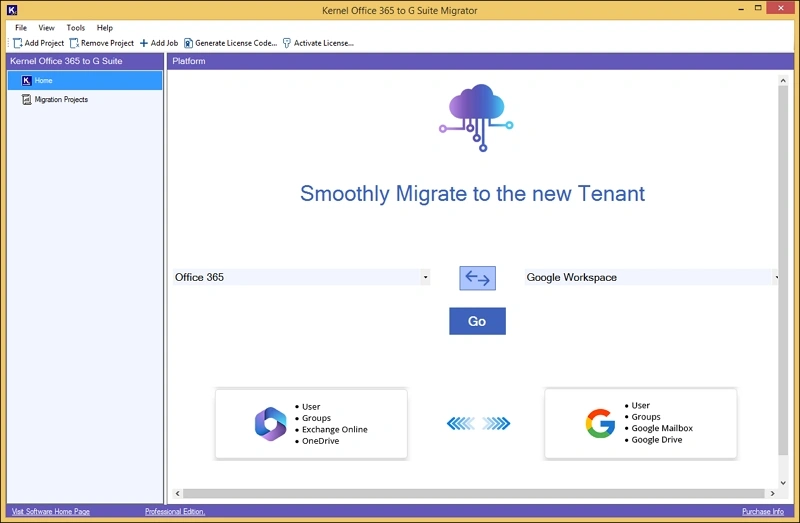
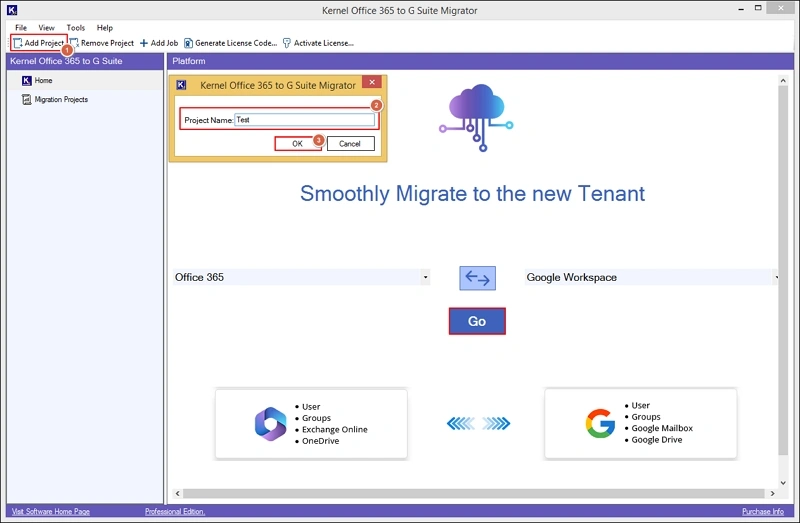
Step 1: Launch the tool. The home page will be displayed.
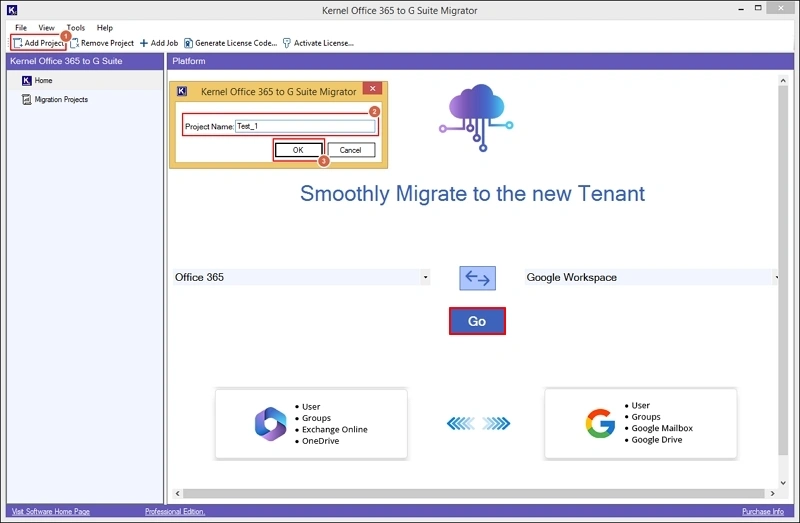
Step 2: Tap on Add Project, provide a name & click OK.
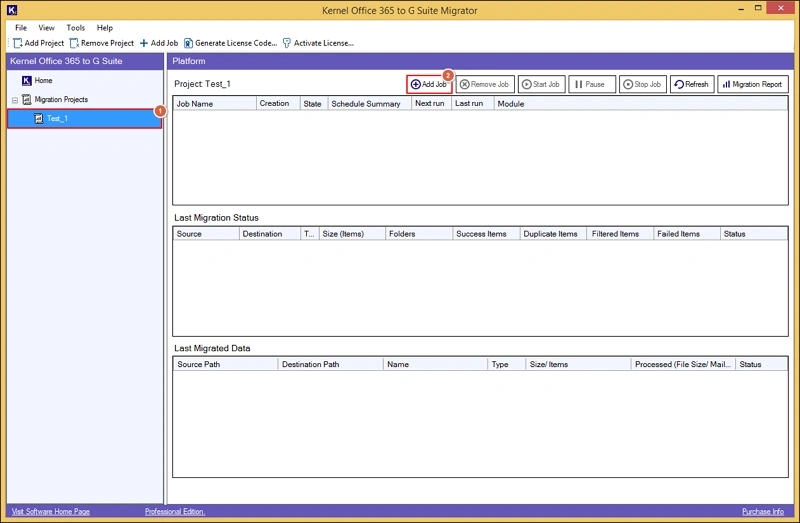
Step 3: Select Add Job in the following wizard.
After entering essential credentials, click on Add.
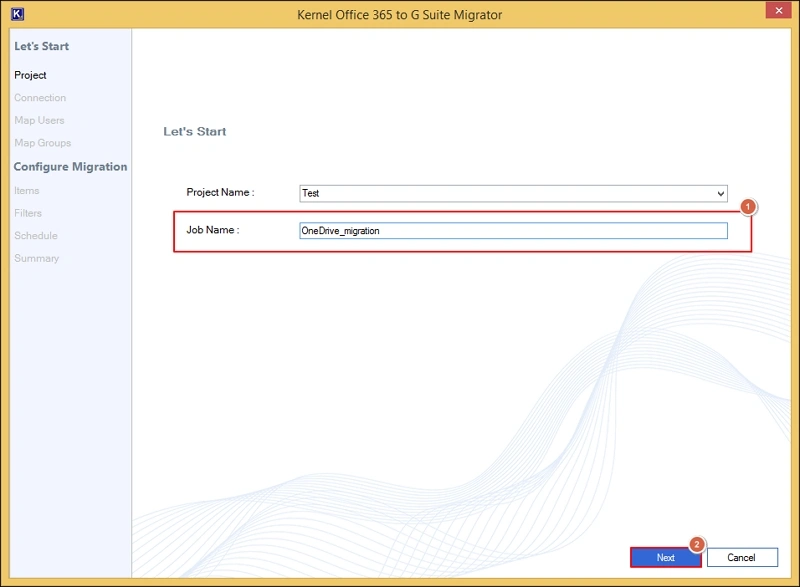
Step 4: Provide Job Name & hit the Next Option.

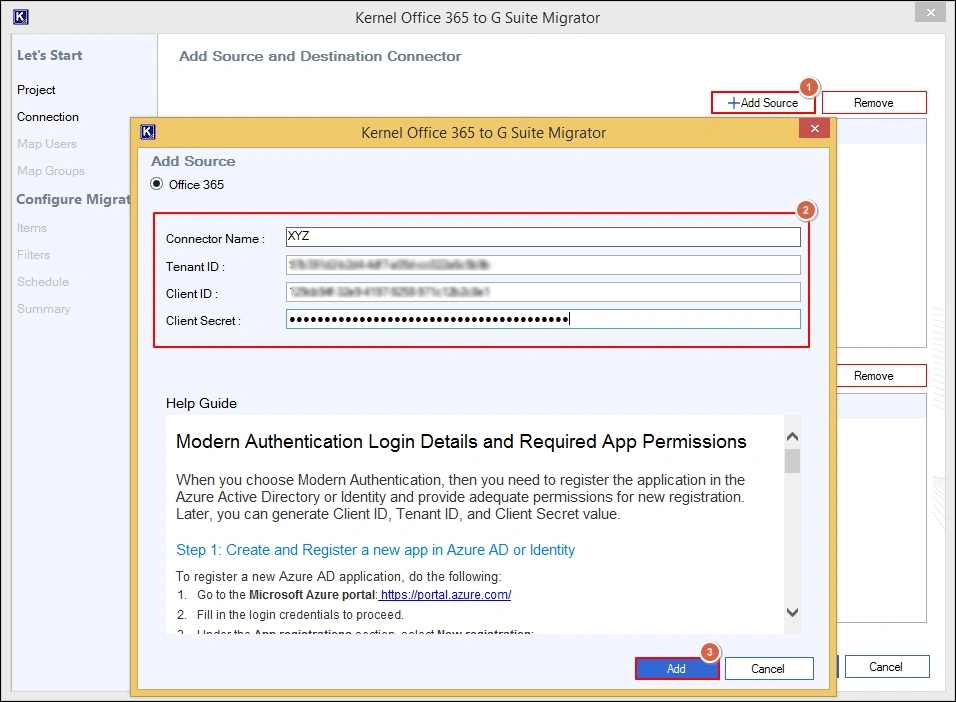
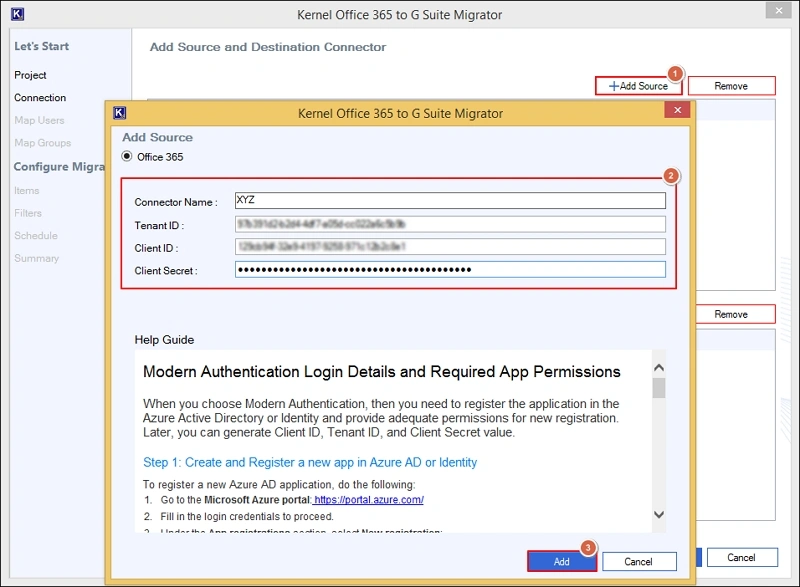
Step 5: Add Source details such as Connector Name, Tenant ID, Client ID, Client Secret. Click Add.
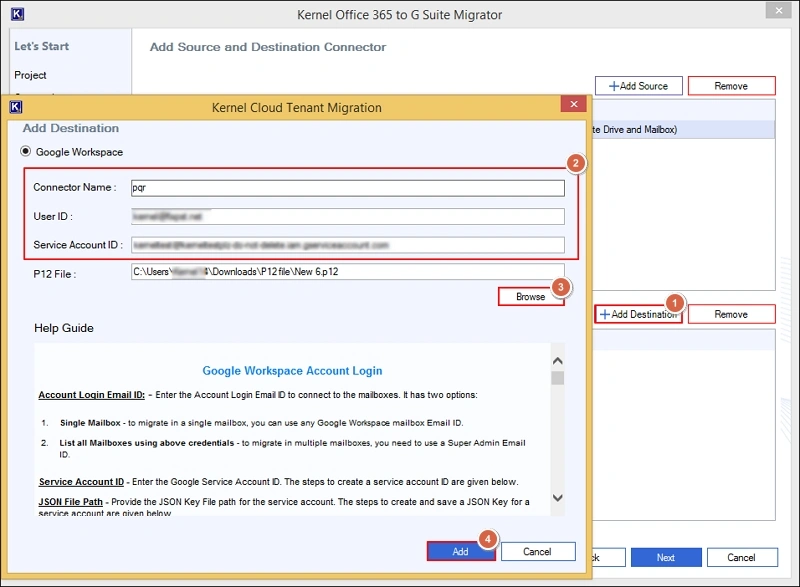
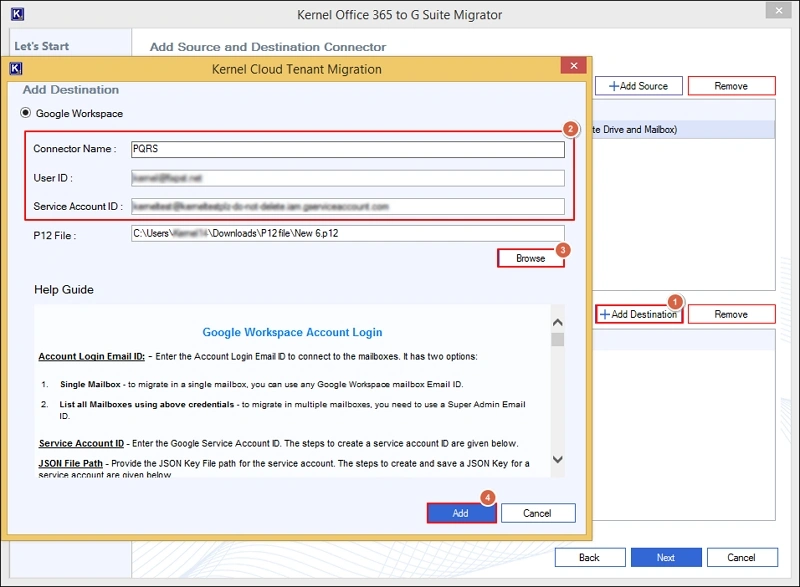
Step 6: Add Destination such as Connector Name, User ID, Service Account ID, & Browse the P12 file from the local system. Hit Add.
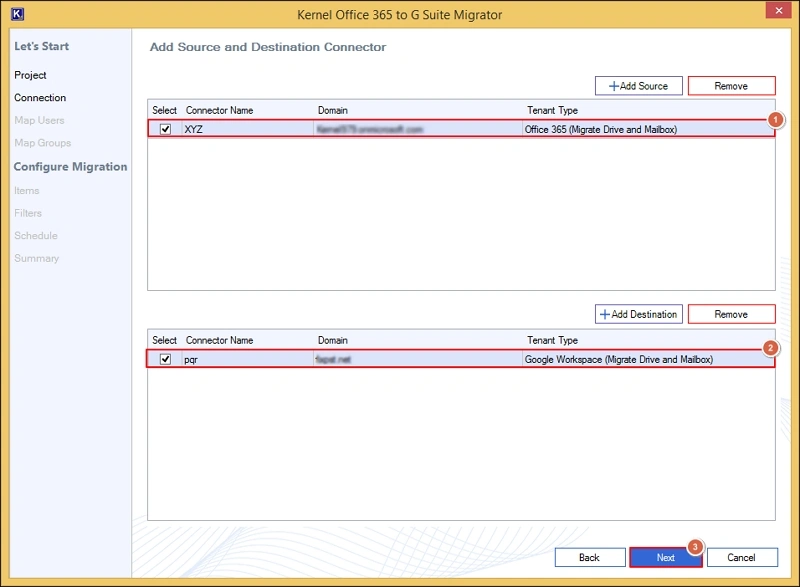
Step 7: Select the added source & destination. Then, hit the Next option.
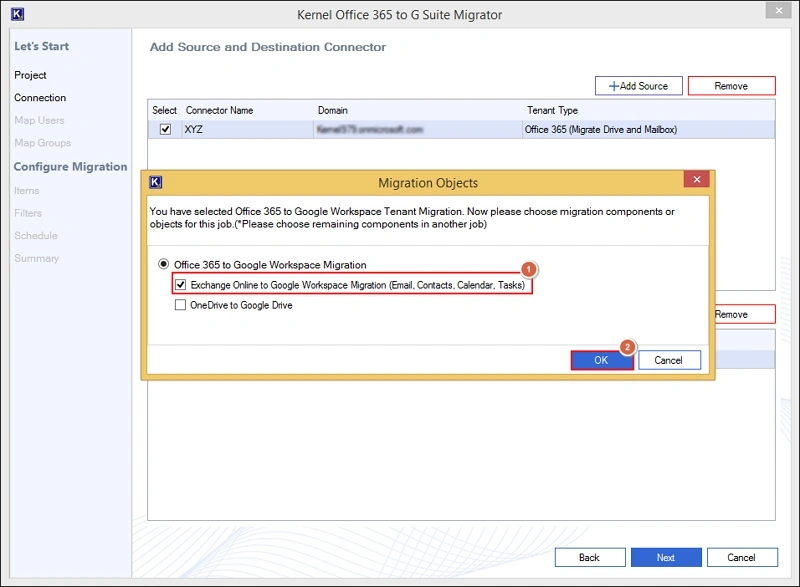
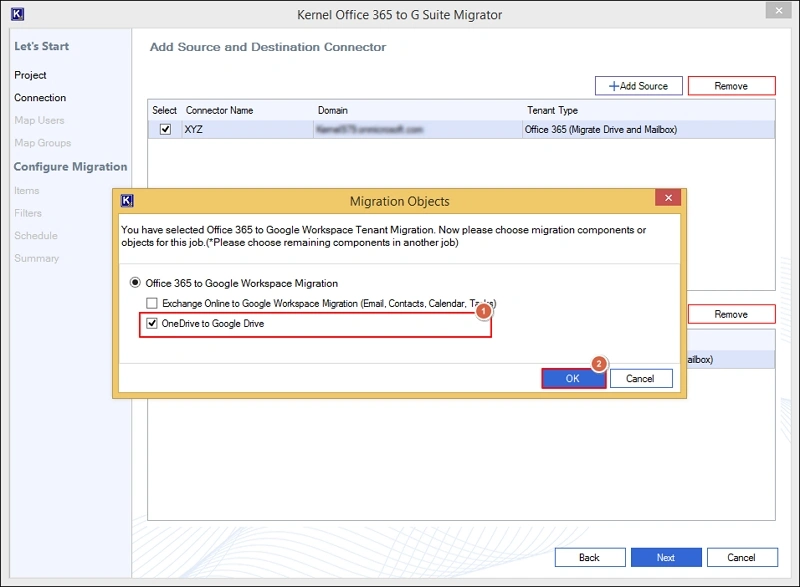
Step 8: Choose the Exchange Online to Google Workspace Migration option under the Migration Objects page. Click OK.
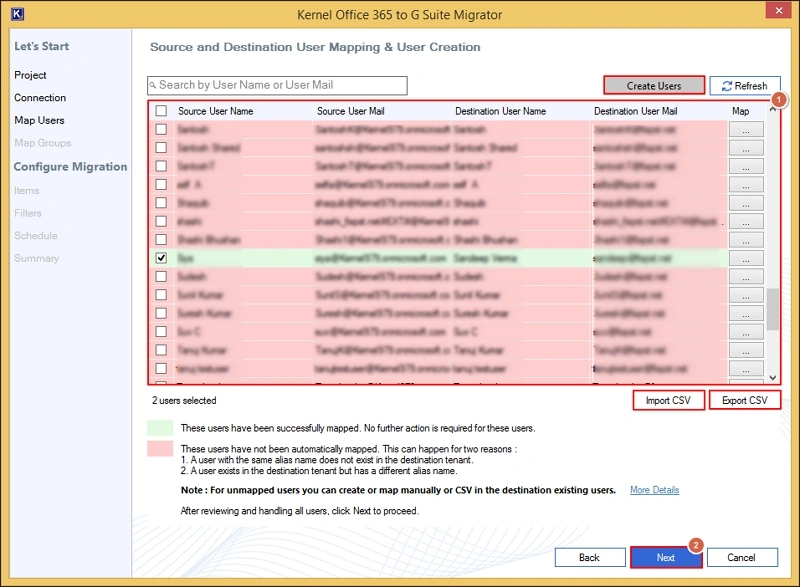
Step 9: Map the users accordingly between the source & destination. Select Next.
- You can take help of the Import CSV/ Export CSV option for instant mapping.
- Create users at the destination if needed with the Create Users option.
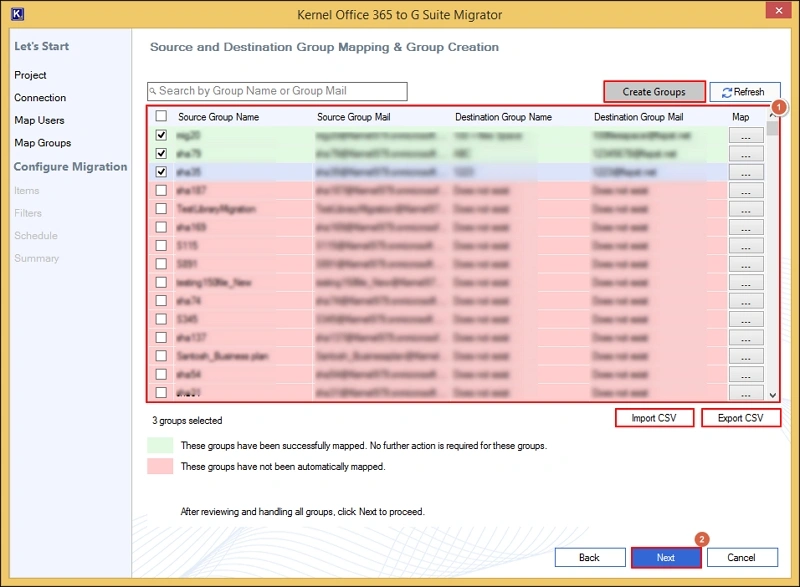
Step 10: Map groups, also, if you need to migrate them. Hit Next.
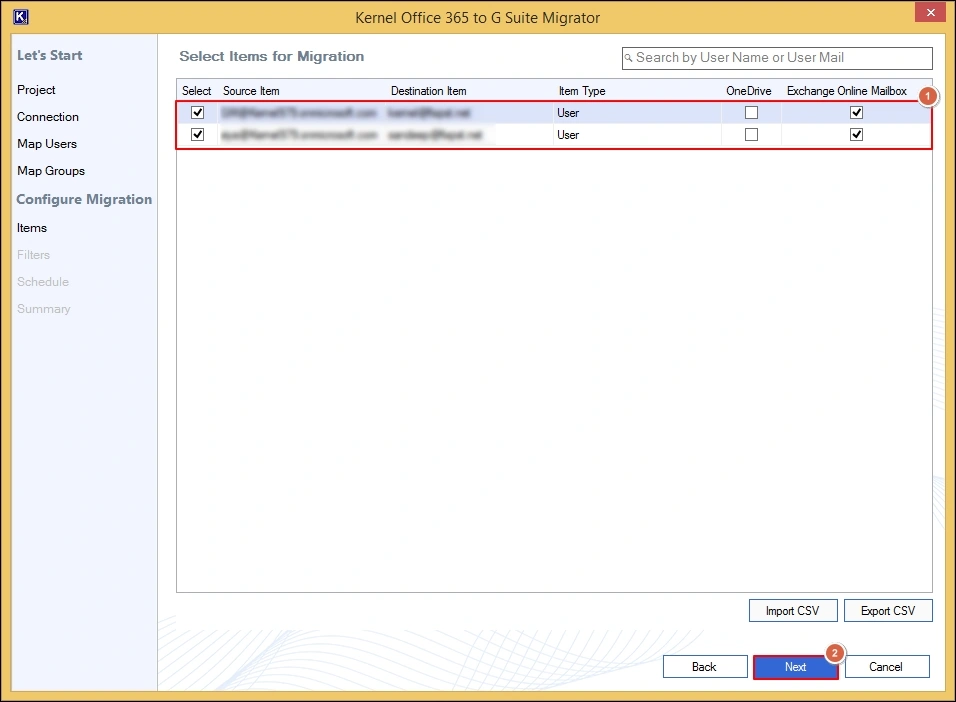
Step 11: Select the items for Migration. Tap on the Next option.
Step 12: Add filters as per the needed results, such as:
Folder Filter: To include & exclude any specific folder.
Ignore duplicate mails: Helps in incremental migration.
Date Filters: Permits you to set the range of the Exchange mailbox data.
Items: Allows migration of specific items to the destination.

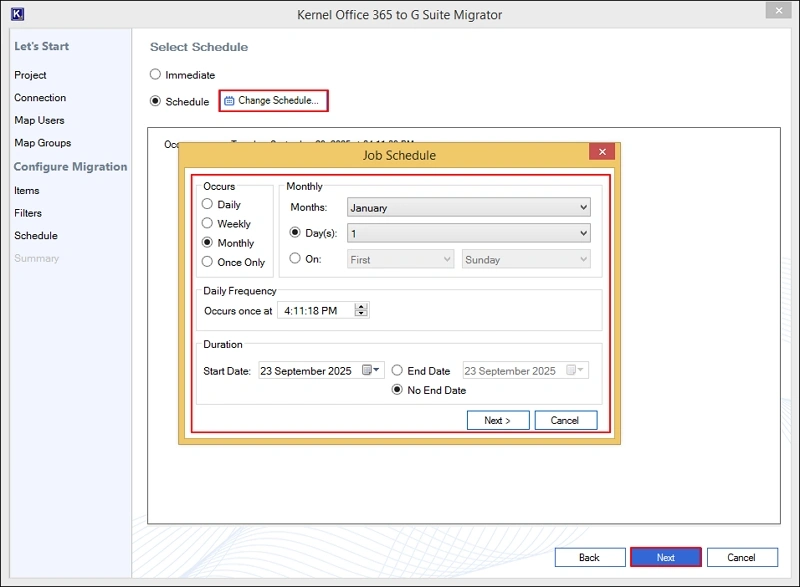
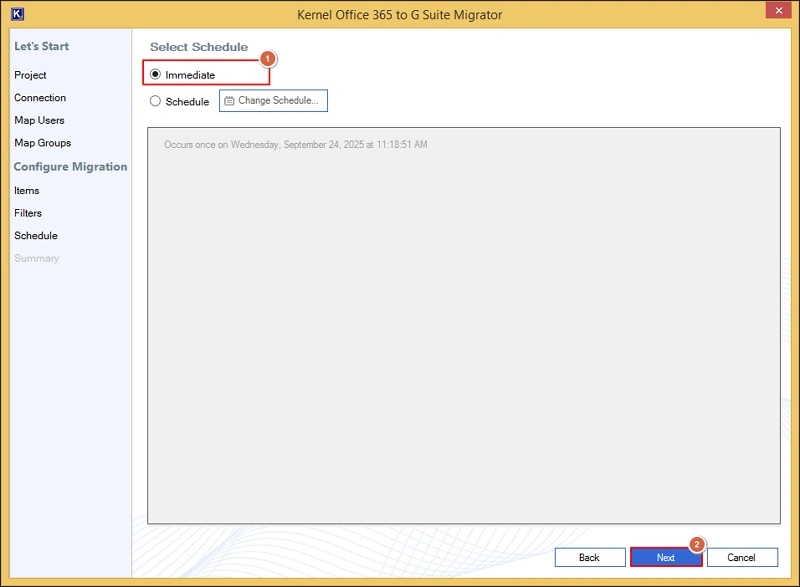
Step 13: Select the schedule option as per your suitability, like:
Immediate: To migrate emails from Office 365 to Google Mailbox instantly.
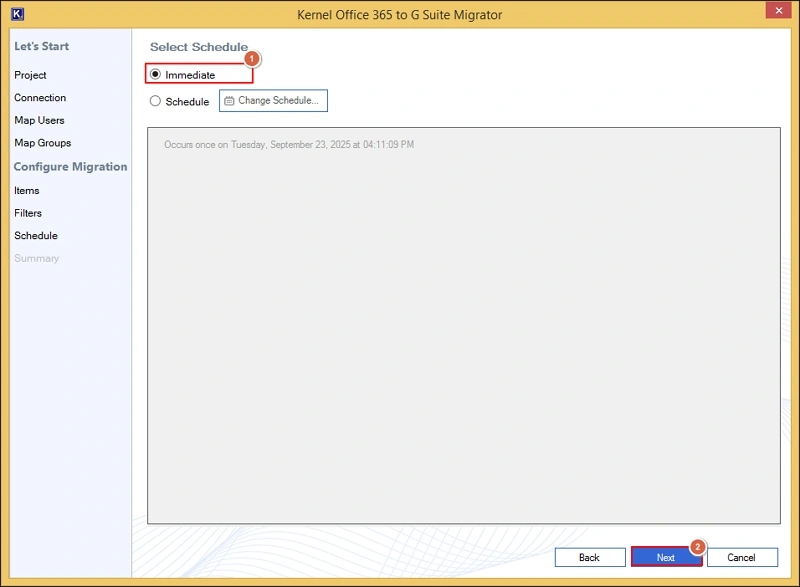
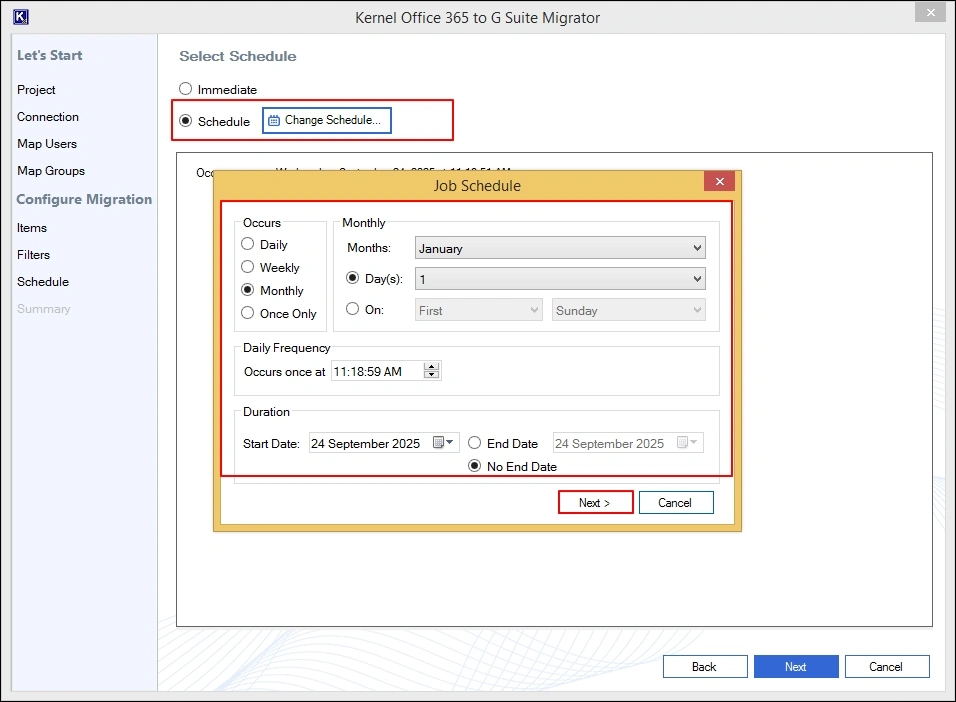
Change Schedule: Helps to schedule the migration for a specific date or duration, like Daily, Weekly, Monthly & Once Only. Choose the further filters accordingly.
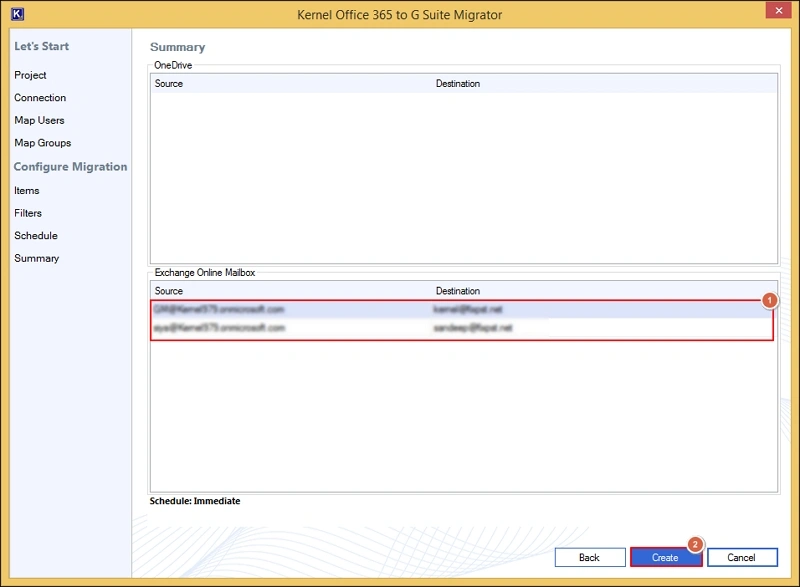
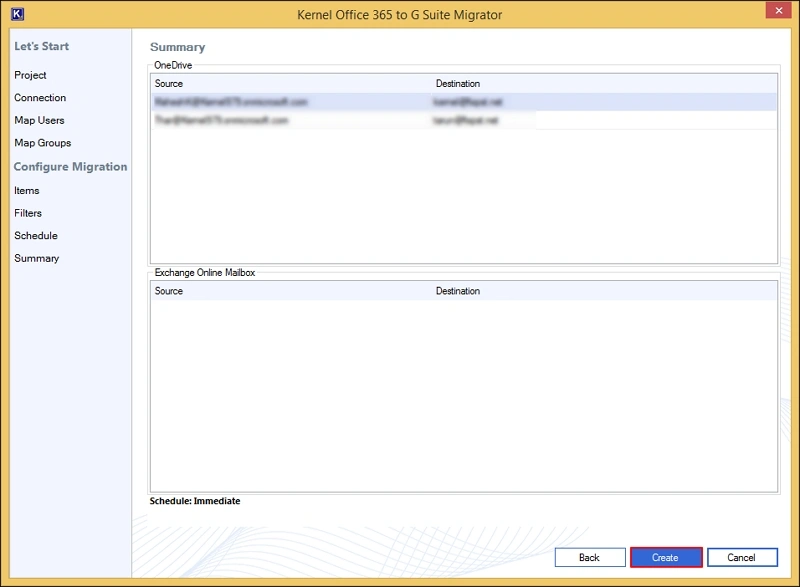
Step 14: Get the summary of the migration & click on the Create option.
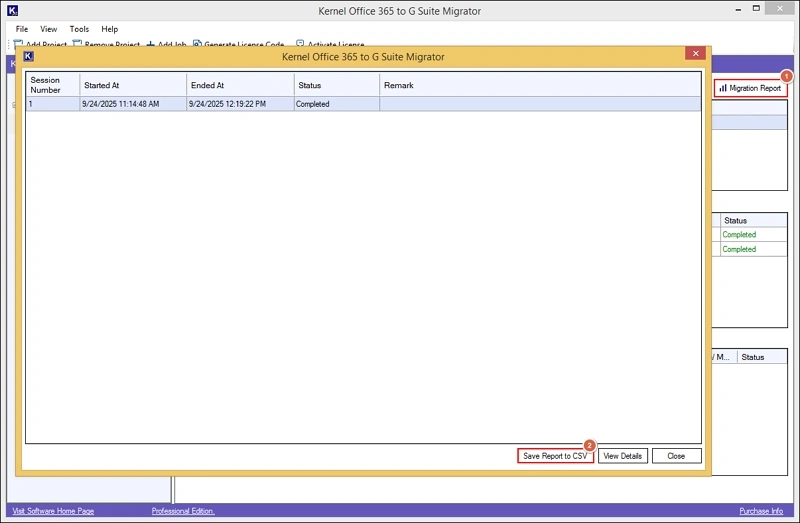
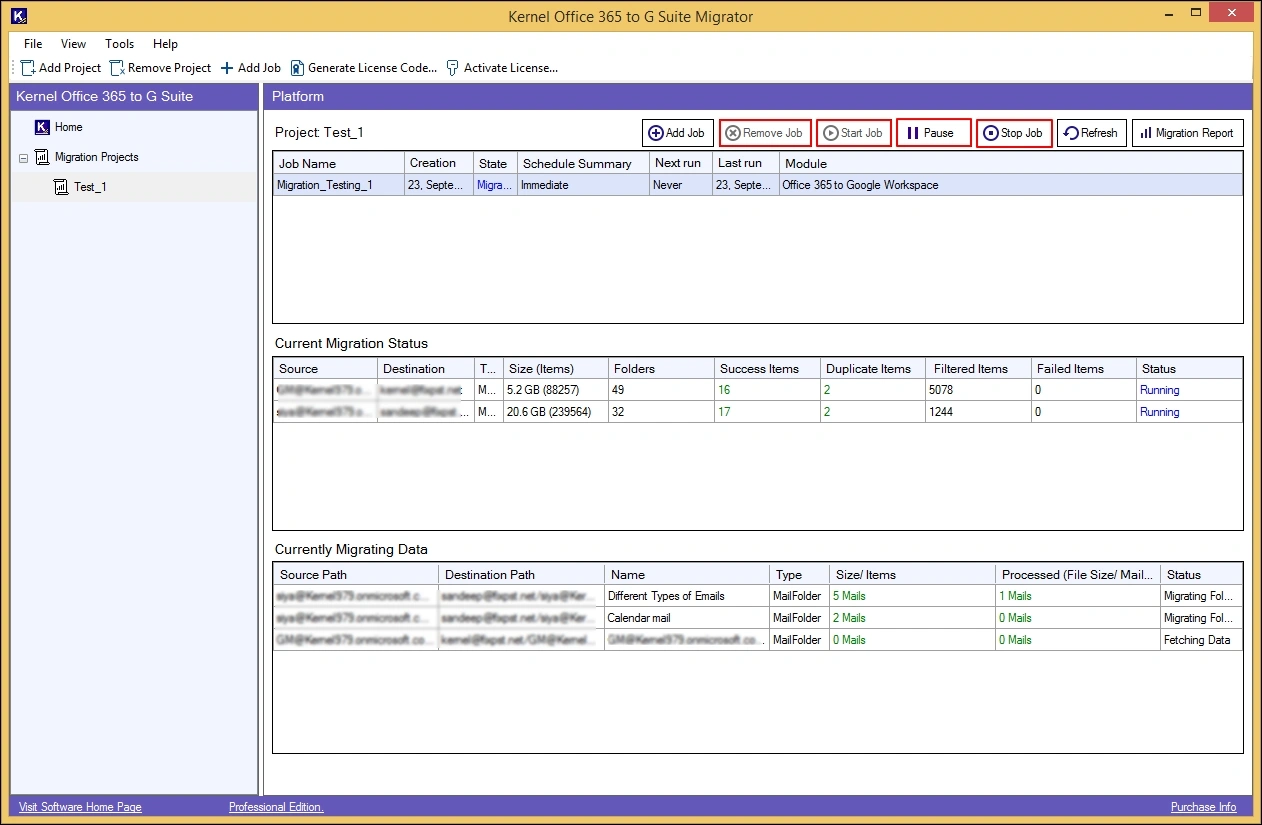
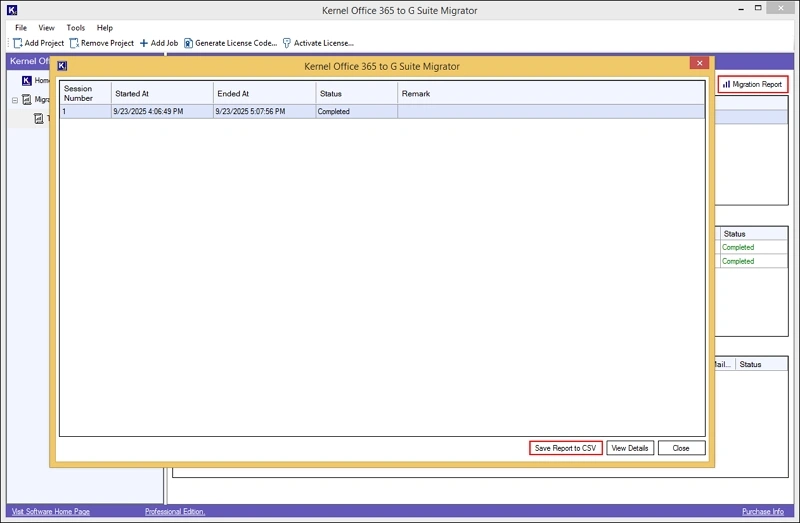
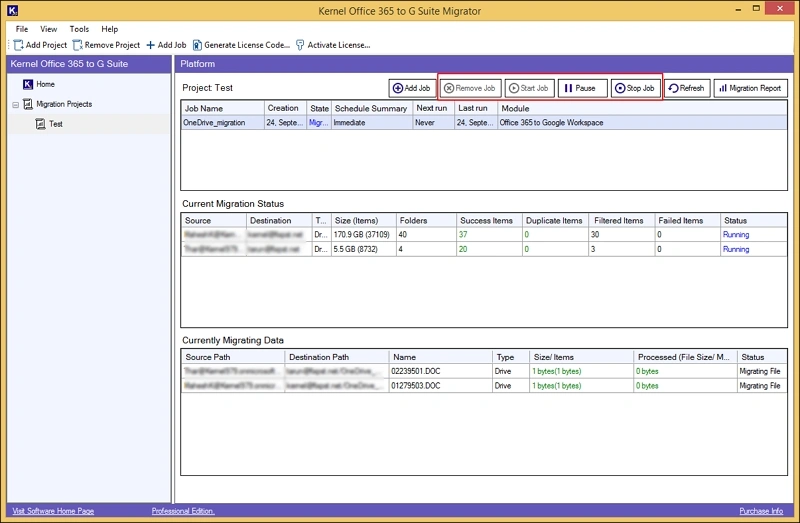
Step 15: Start the Job. Track the live status of the Office 365 to Google Workspace migration.
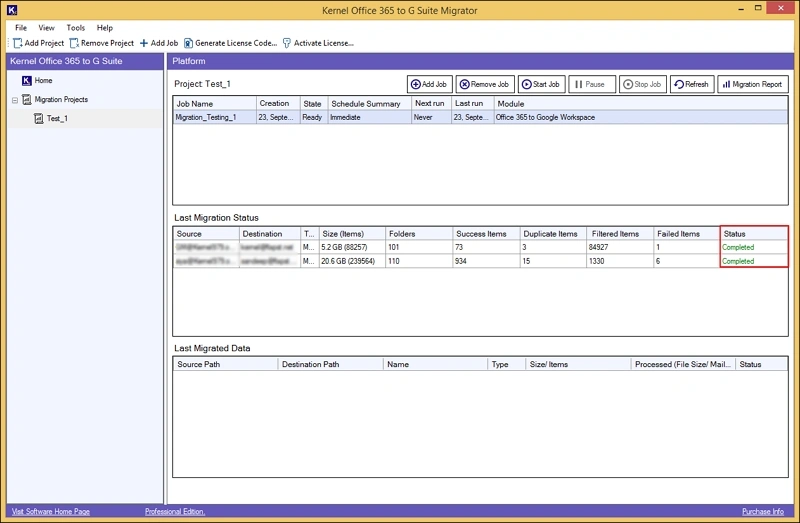
Step 16: Once the Completed status has been shown, access the Office 365 data in the chosen destination of Google Workspace.
Step 17: Choose the Migration report > Save Report to CSV option to get complete migration status in the local system.
Office 365 OneDrive migration
Transfer complete Office OneDrive data, such as files, documents, folders, photos, or videos, into Google Drive with the stepwise approach provided below.
Step 1: Launch the tool. The home page will be displayed.
Step 2: Tap on Add Project, provide a name & click OK.
Step 3: Select Add Job in the following wizard.

Step 4: Provide Job Name & hit the Next Option.
Step 5: Add Source details such as Connector Name, Tenant ID, Client ID, Client Secret. Click Add.
Step 6: Add Destination such as Connector Name, User ID, Service Account ID, & Browse the P12 file from the local system. Hit Add.
After entering credentials, click Add.
Step 7: Select the added source & destination. Then, hit the Next option.

Step 8: Choose the OneDrive to Google Drive option under the Migration Objects page. Click OK.
Step 9: Map source & destination users. Hit Next.
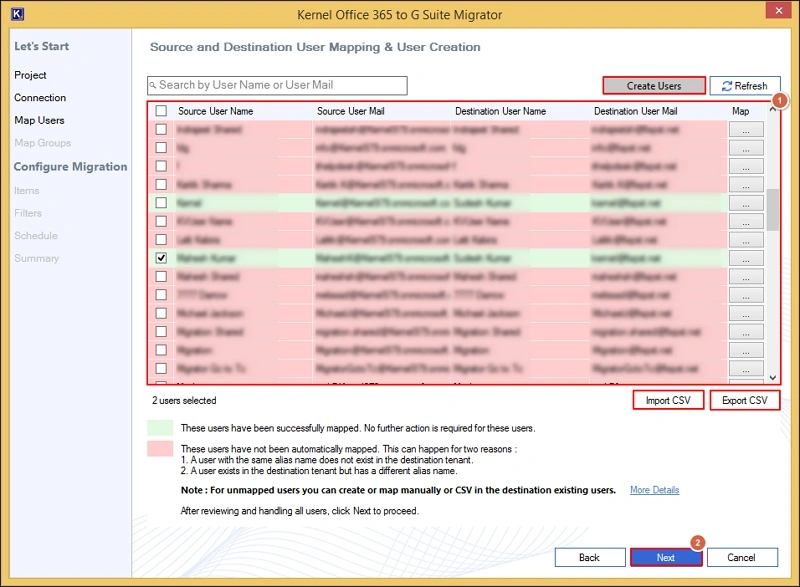
- You can create missing or needed users at the destination with the help of the Create Users option.
- Use the Import CSV/ Export CSV option for instant mapping.
Step 10: Select items for migration & tap on the Next option.

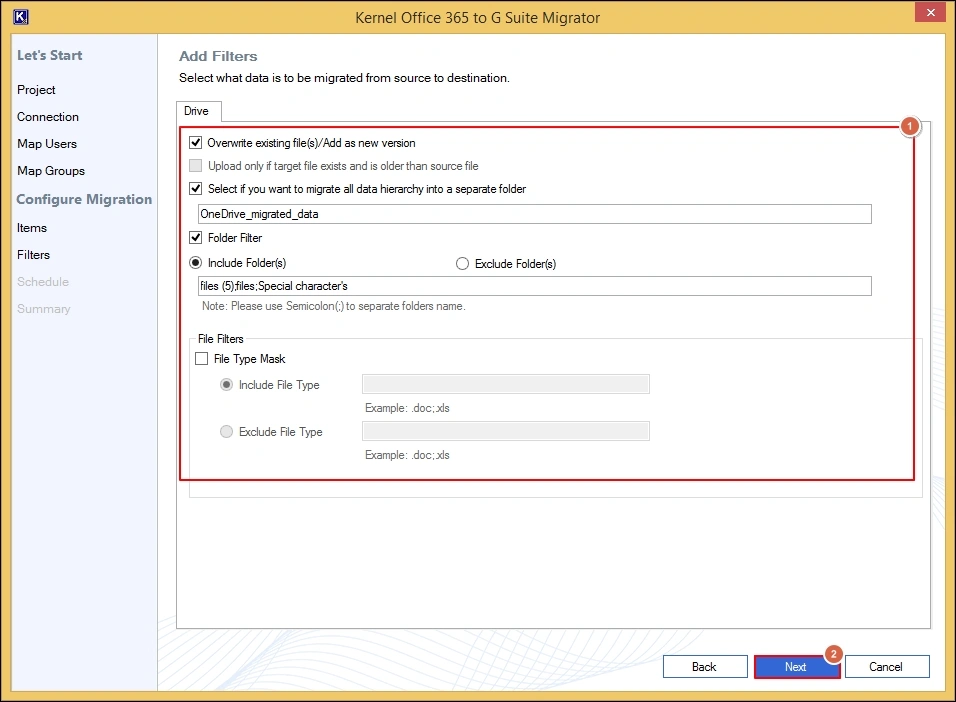
Step 11: Add filters as per your requirements & click on the Next option.
Overwrite existing file(s): Provide incremental migration after initial transfers.
Migrate into a separate folder: Helps to create a separate folder at the destination where all the migrated data will be stored.
Folder filter: Permits you to include & exclude any specific folder.
File filters: Allows you to manage file migration with the Include File Type/ Exclude File Type option.
Step 12: Schedule your migration with the following options:
Immediate Scheduling: Migration will start immediately.
Change Schedule: Allows you to set up timing for migration, such as daily, monthly, weekly, or once only. Follow further instructions accordingly.
Step 13: Get the summary of the migration & click on the Create option.
Step 14: Run the Job. It will start the Office 365 drive migration to Google Drive.
Step 15: Once the Completed status has been shown, access the Office 365 data in the chosen destination of Google Workspace.
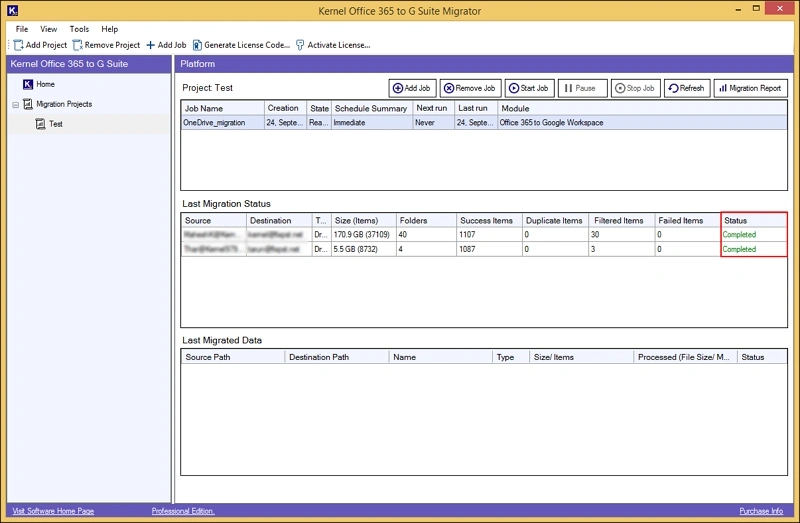
Step 16: Choose the Migration report > Save Report to CSV option to get complete migration status in the local system.