Kernel Microsoft Team Backup tool allows taking backup of all the components of Microsoft Teams and Chat easily. You can save the data to your system and use it whenever required.
Here’s how you can use Kernel Microsoft Team Backup and save all the Teams data:
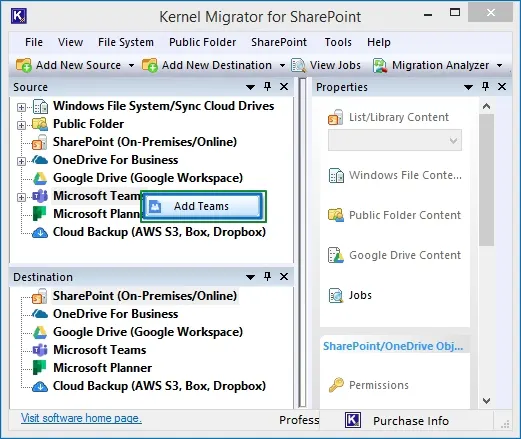
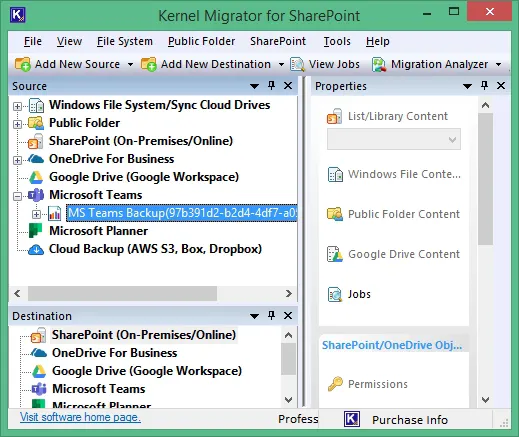
- Launch Kernel Migration for SharePoint and go to the source pane.
- Right-click on Microsoft Teams and click Add Teams button to connect the tool with desired Teams account.
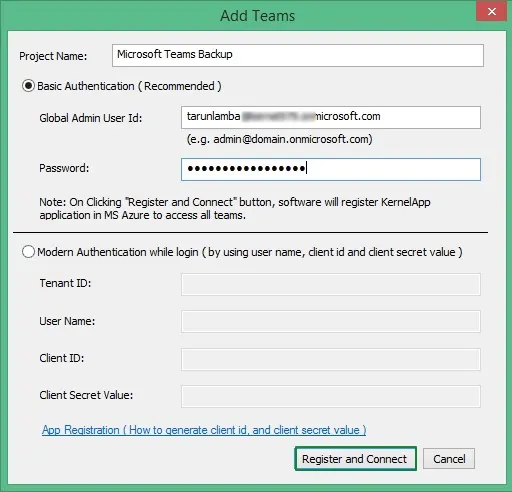
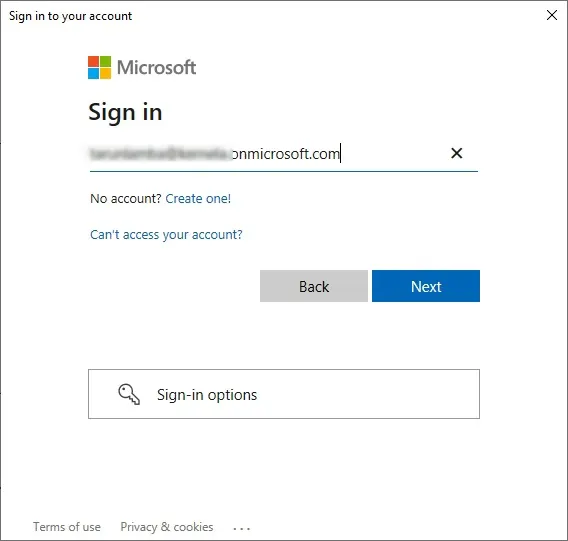
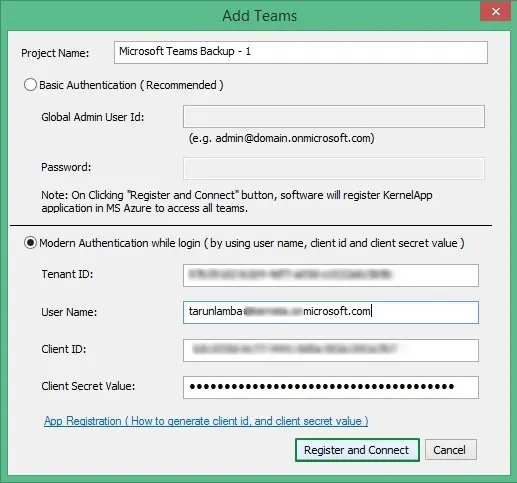
- On the login screen, enter a unique Project Name. You now have two options, basic and modern authentication, to proceed with.
- For Basic Authentication: Input Global Admin User ID and its password to connect.
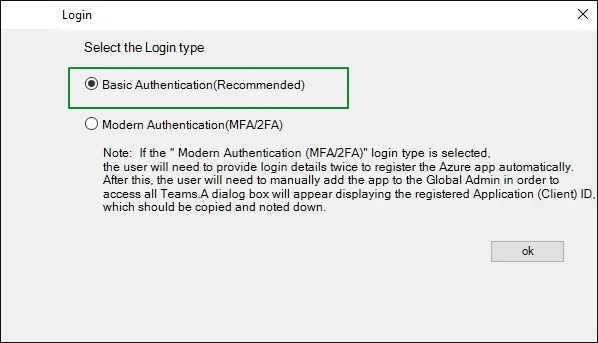
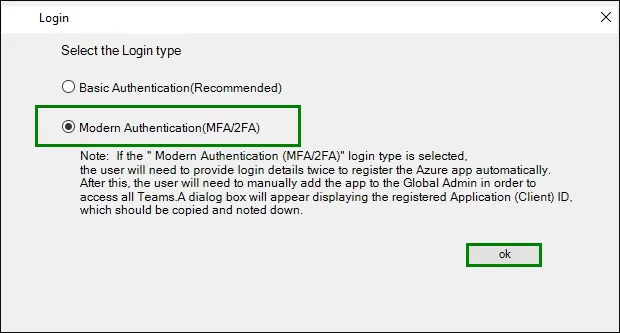
When you press Register and Connect, you’re directed to a new window showing two login options: Basic Authentication and Modern (MFA/2FA) Authentication.
- Basic Authentication (Recommended): The process is straightforward, simply click OK and it will connect the tool with the source.
- Modern Authentication (MFA/2FA): Click OK and follow the steps given below to complete app registration, perform Application Assignment Role, and then add Teams to the source:
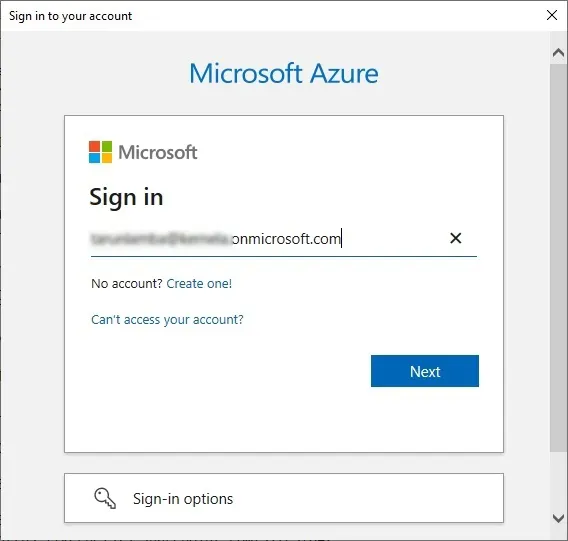
- Sign in to the Microsoft account that has the role of “Global Administrator.”
- Now, sign in to Microsoft Azure with the same Microsoft Office 365 account credentials.
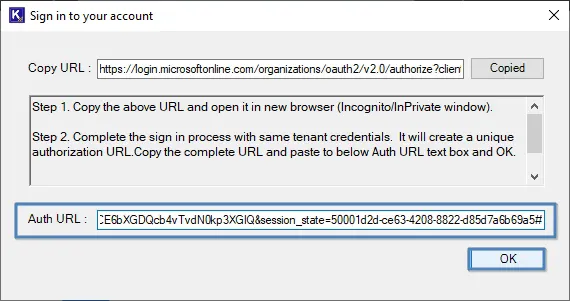
- On the Sign in to your account wizard, copy the given URL.
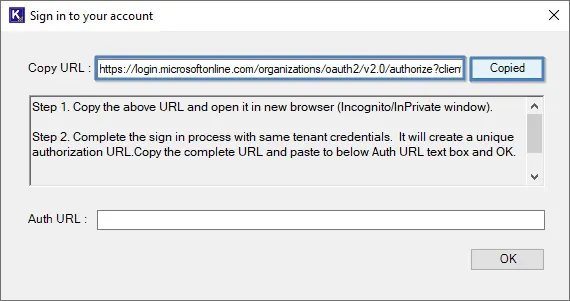
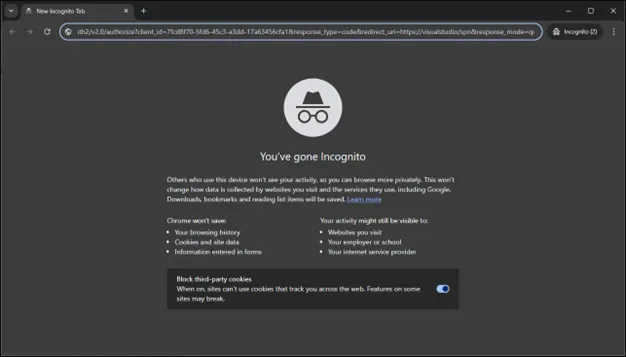
- Open Incognito window in your browser and paste the copied URL in the search bar.
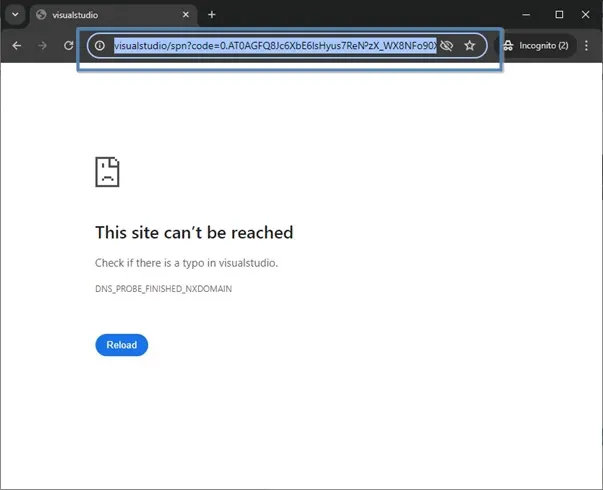
- It will then provide a visual studio URL, copy it from the search bar.
- Now paste this Auth URL in the “Sign in to your account” window and click Ok.
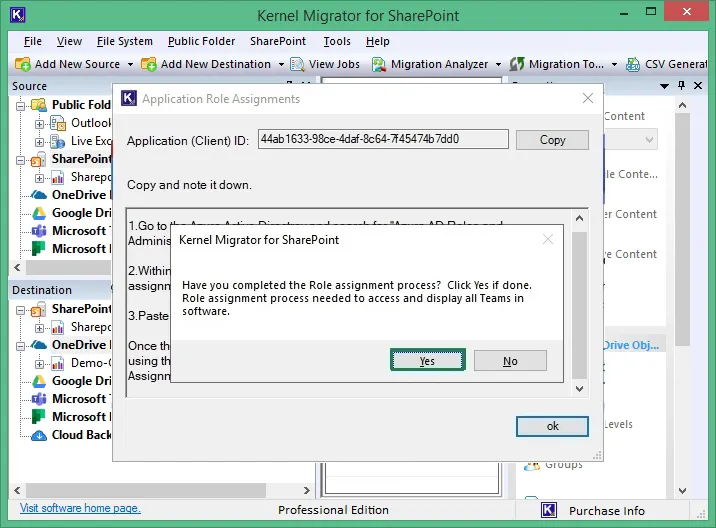
- This opens the Application Role Assignment window, from here, copy the client ID and follow the given instructions.
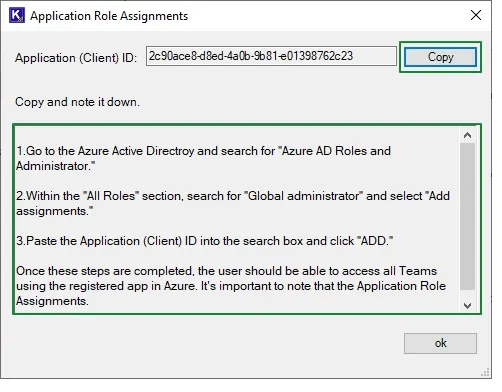
- After Role Assignment, click Ok. It will show you a message “Have you completed the Role assignment process?” Click Yes if done.
With this, Microsoft Teams account is added to the Source with Modern Authentication under Basic Login Type.
- Sign in to the Microsoft account that has the role of “Global Administrator.”
- Basic Authentication (Recommended): The process is straightforward, simply click OK and it will connect the tool with the source.
- Modern Authentication: Enter Tenant ID, Client ID, Client Secret Value, and User Name from the App Registration in Azure Active Directory.
- You can expand the Microsoft Teams tab to see the new Project added.
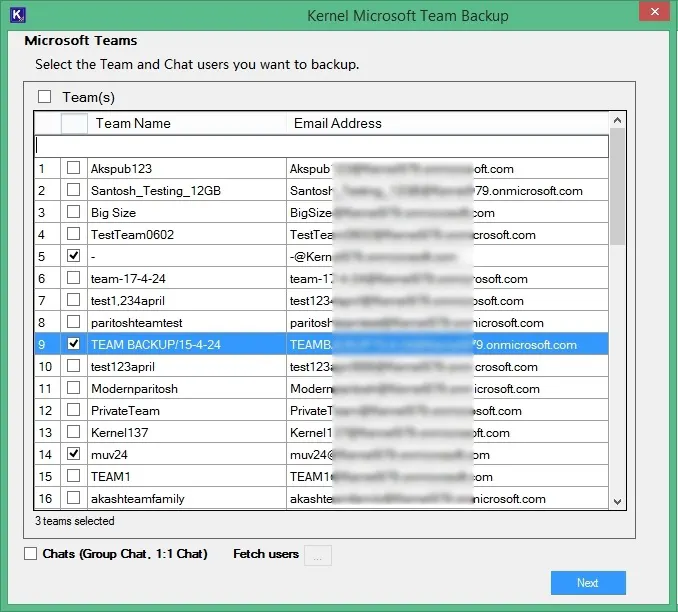
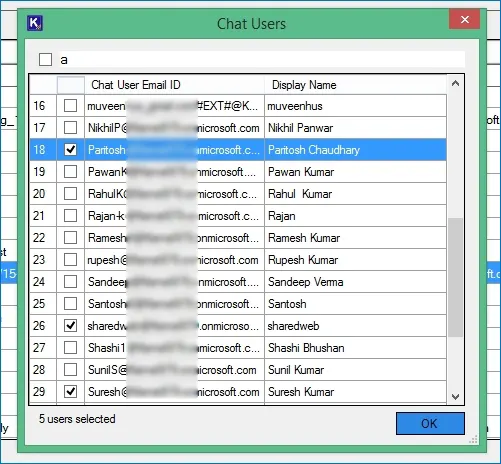
- Select the Teams from the list that you’re planning to take backup of. You can use the search bar to find any specific team. Mark the checkbox at the bottom beside Chats (Group Chat, 1:1 Chat) and then the three dots beside Fetch users to choose the Microsoft Teams Chat users.
- Selecting this will open a window where you can either add a CSV file to add bulk users or click to add Automatically.
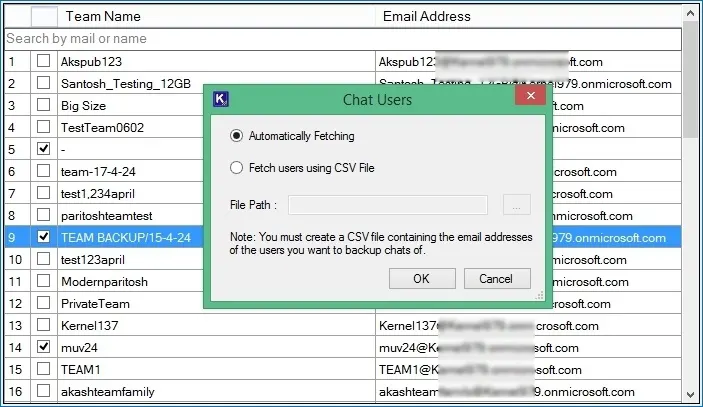
- Mark the users from the list whose chat you want to backup with other data and then click OK.
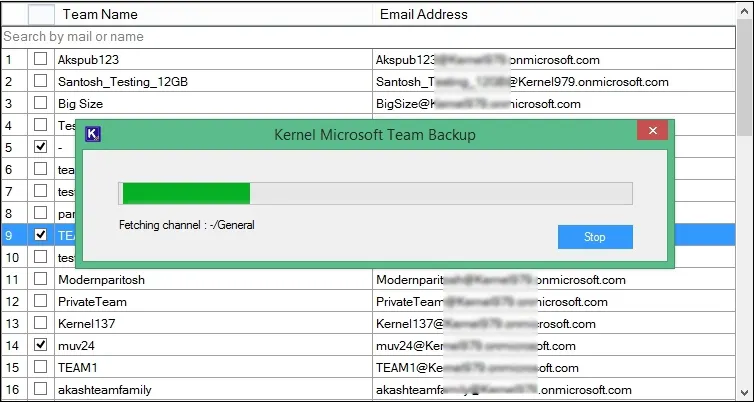
- Wait while the tool fetches the list of selected Teams and Chats for backup.
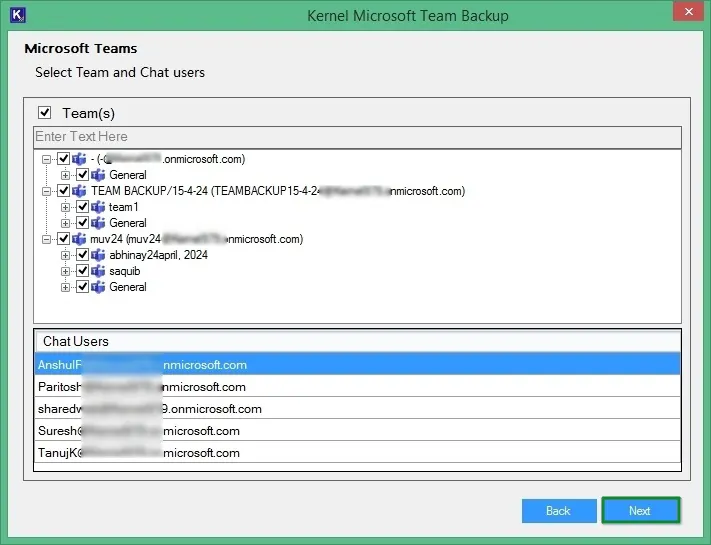
- The next pane will show the selected Teams in the same hierarchy the components were available in Microsoft Teams. You can deselect any item if you want to skip it from backup. Click Next.
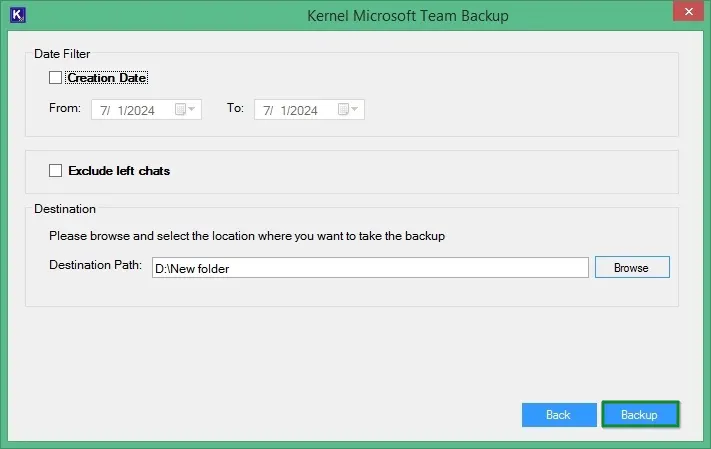
- You can filter the data based on the Creation Date. It will help you to perform selective backup of data if you’re looking to retrieve particular data. You can also select to Exclude left chats (if needed) from the Microsoft Teams Chat backup. This will skip the conversation from migration of the users who have left the chats.
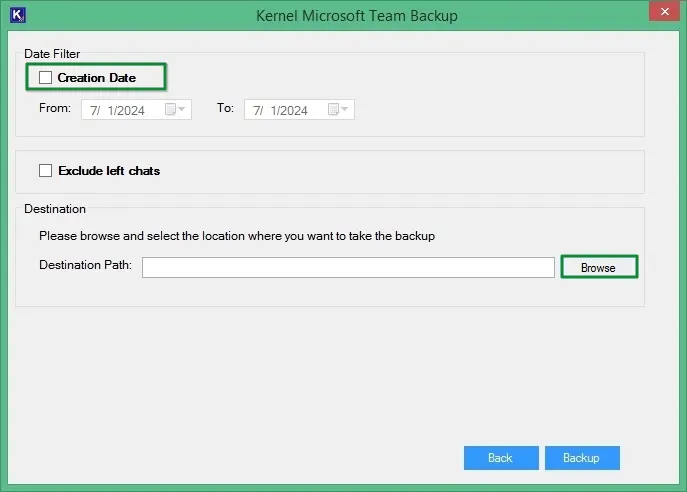
- Click Browse to give the destination where you want to store the backup Microsoft Teams and Chat data. After defining the destination, click Backup to start the backup of Microsoft Teams and Chat.
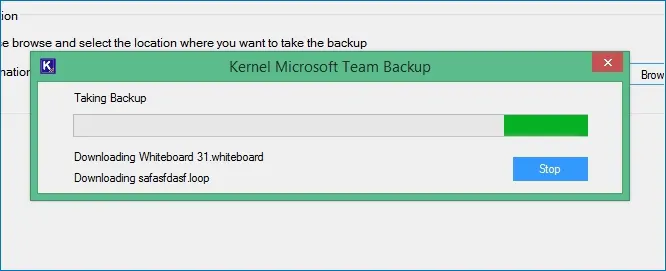
- As soon as the backup process begins, you can see the progress on the screen of the tool.
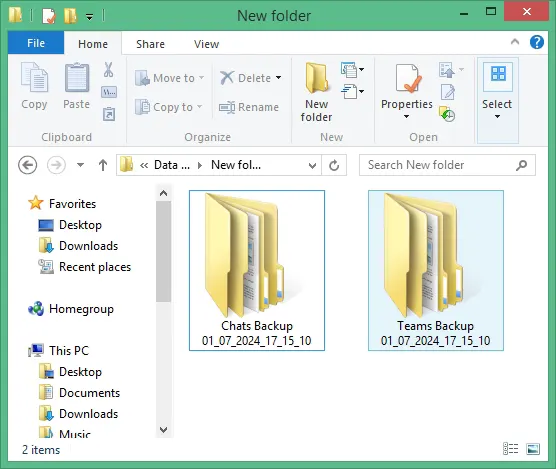
- Once the procedure is complete, the tool will show a dialog box with the location to the downloaded backup on your computer.
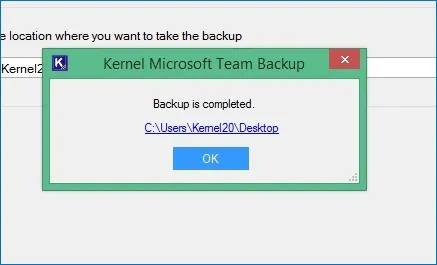
- Click on the location link to open the backup saved in your computer.
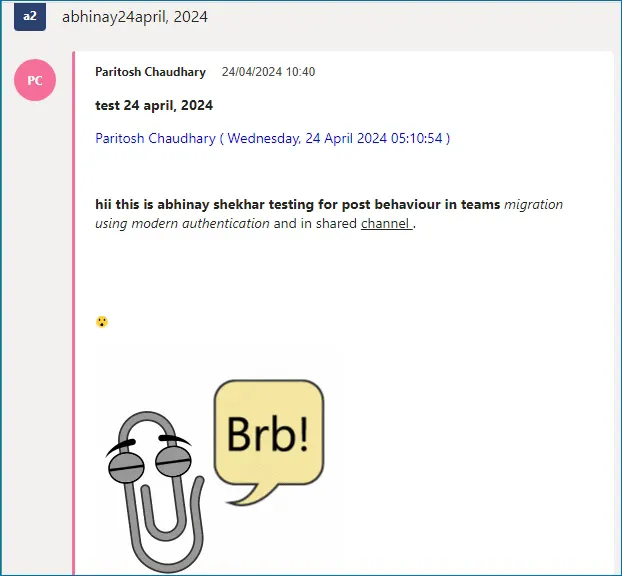
Here’s how the posts in MS Teams backup looks:
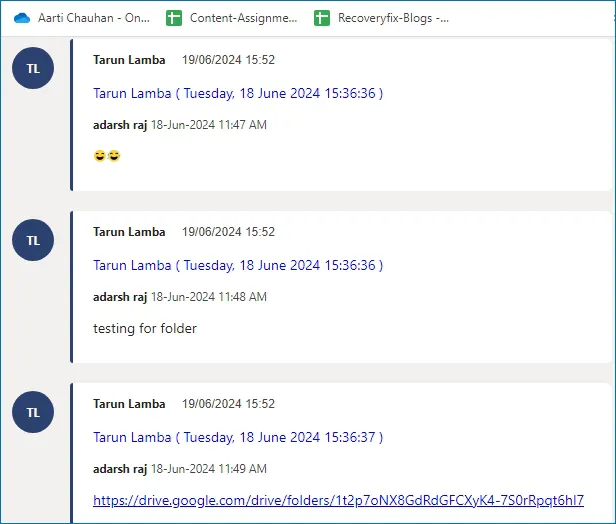
Here’s how the chat will open after you backup Microsoft Teams Chat:
Note: User should be a Global Administrator and possess a valid license of Microsoft 365 and Microsoft Teams to execute the data transfer.
Click Register and Connect.