Follow our step-by-step guide to convert MBOX files without losing data integrity.
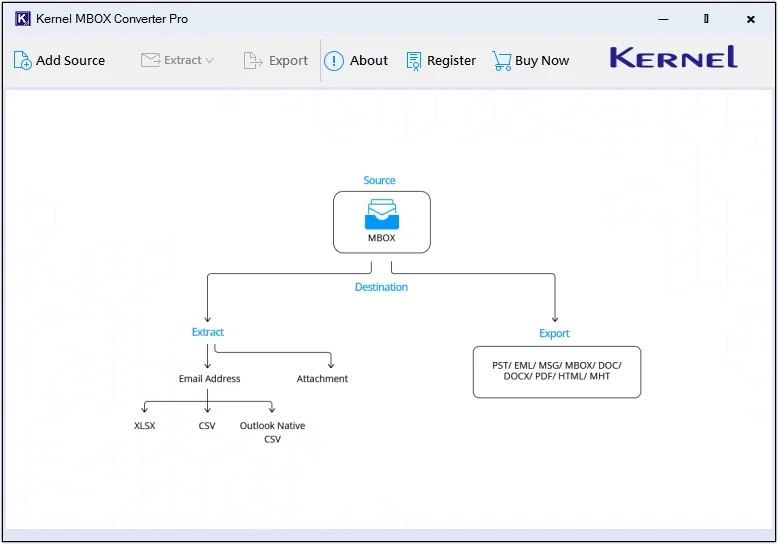
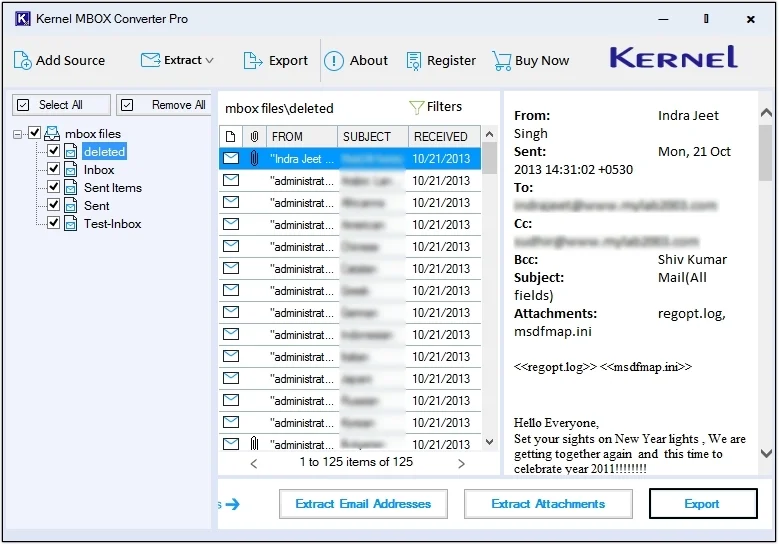
Step 1. The home screen of Kernel MBOX Converter Pro.
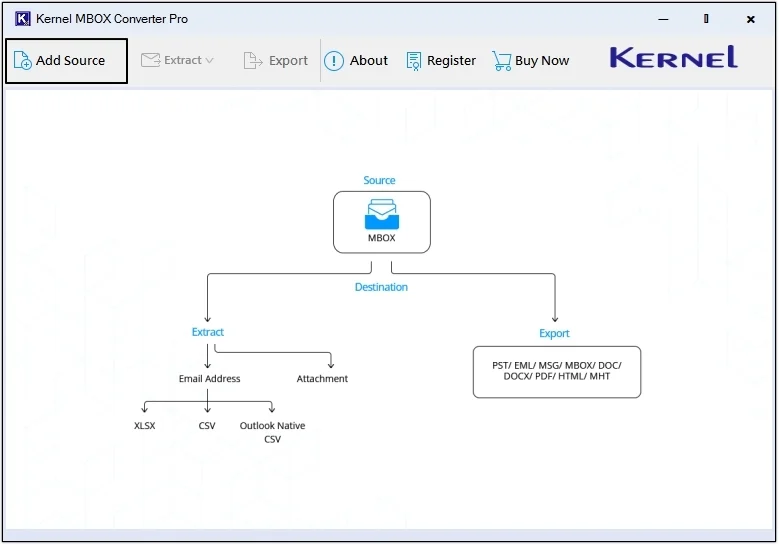
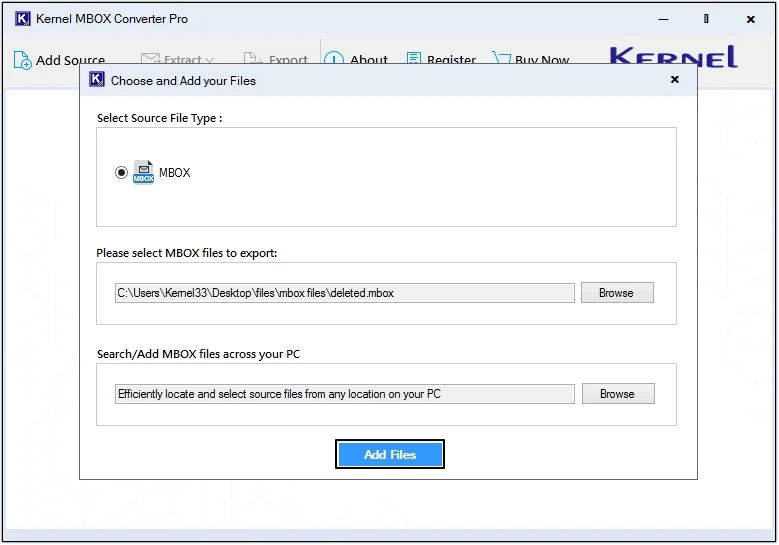
Step 2. Click on the Add Source button.
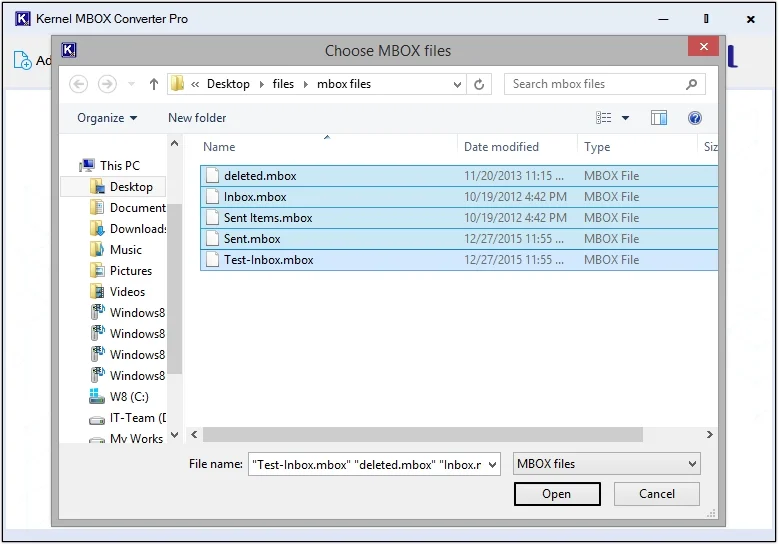
Step 3. Click on the Browse button to upload MBOX file(s).
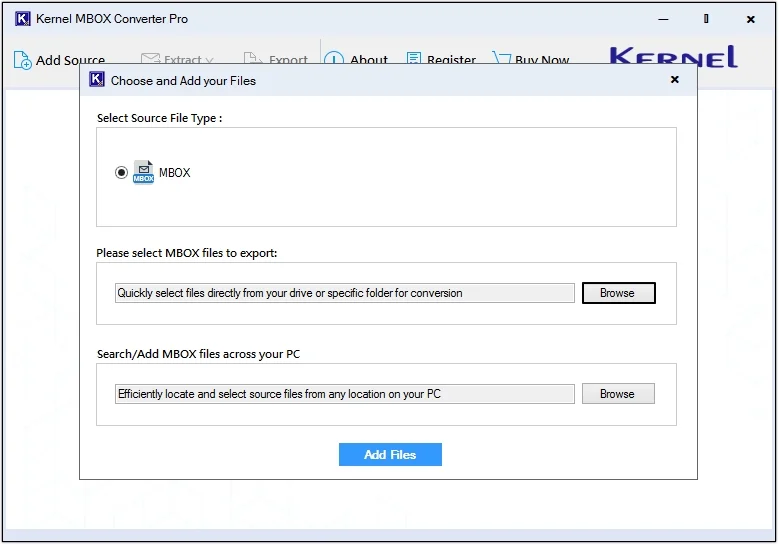
Step 4. Select the required MBOX files and click Open.
Step 5. Click on the Add Files button to proceed.
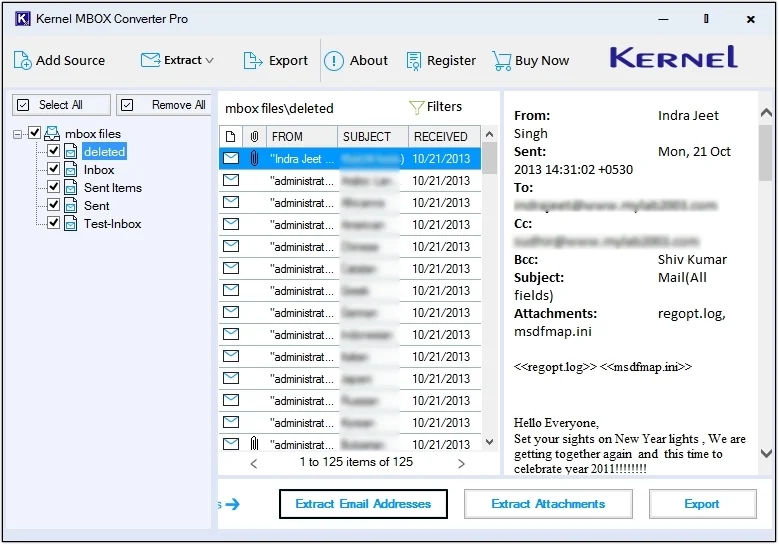
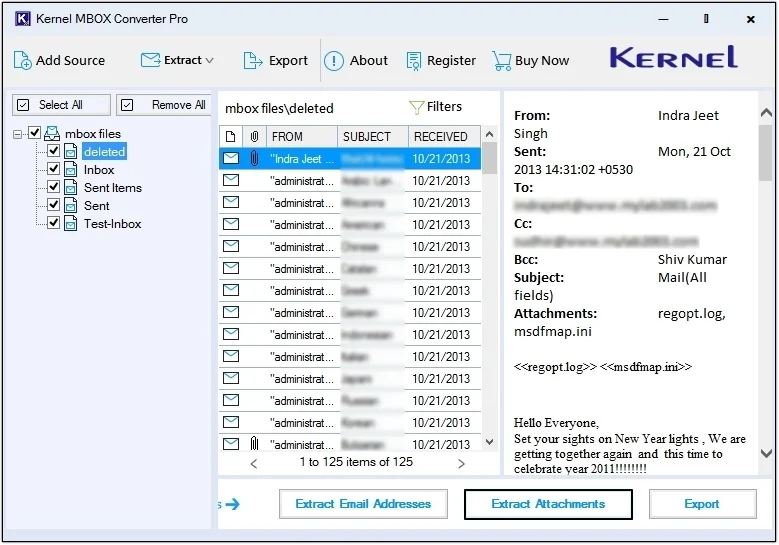
Step 6. Click on any email to get a detailed preview of it.
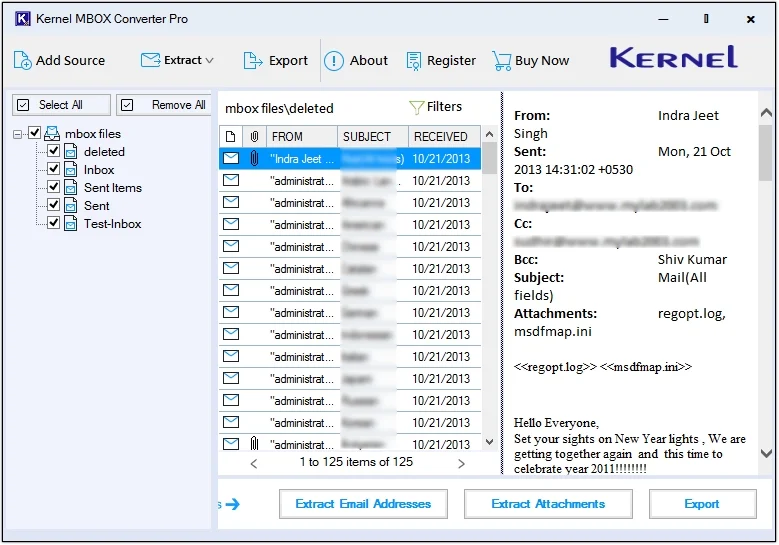
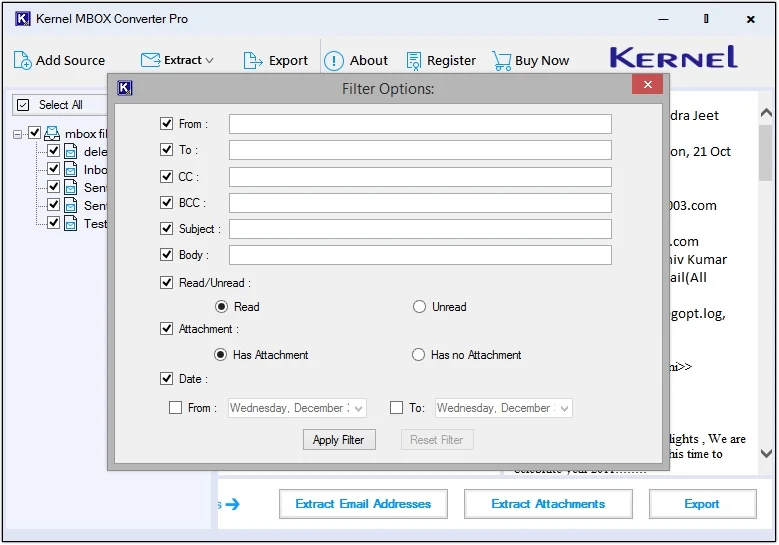
Note – Click on Filters to search for a specific email message based on different parameters for preview.
Choose The Required Save As Option
The Kernel MBOX Converter Pro offers three saving options: Extract Email Addresses, Extract Attachments, and Export. Let’s see how these three options work separately:
Steps to Extract MBOX Email Addresses:
Here’s how to extract email addresses saved in your MBOX file with complete security.
Step 7. Click on the Extract Email Addresses option.
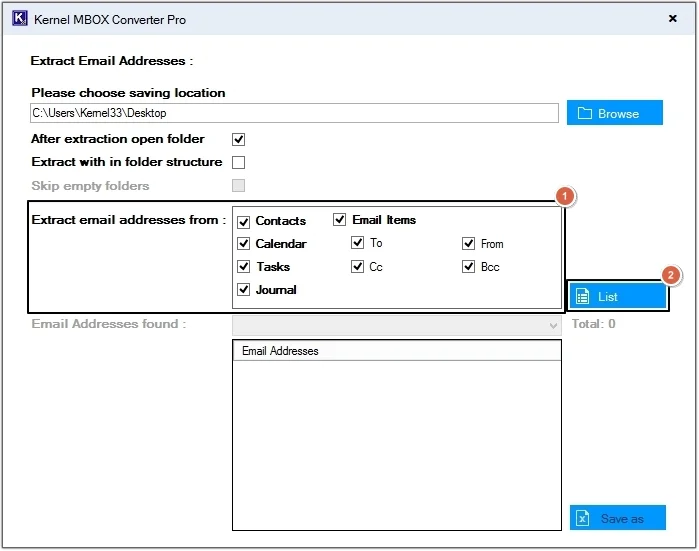
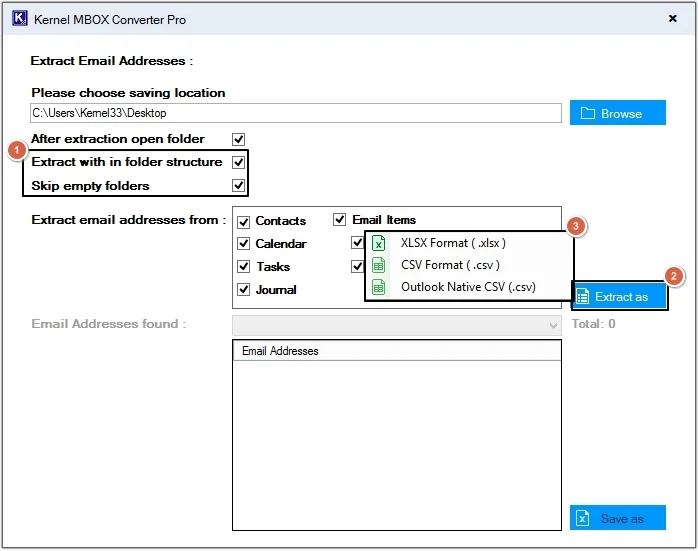
Step 8. Click on the Browse button to provide a saving location.
Note: Here are the available options:
- After extraction open folder: This option will automatically open the folder where email addresses are extracted and saved.
- Extract with in folder structure: With this feature, users can extract email addresses in the original folder structure.
- Skip empty folders: If there are any empty folders in your MBOX file, then this feature will help you eliminate them from being converted.
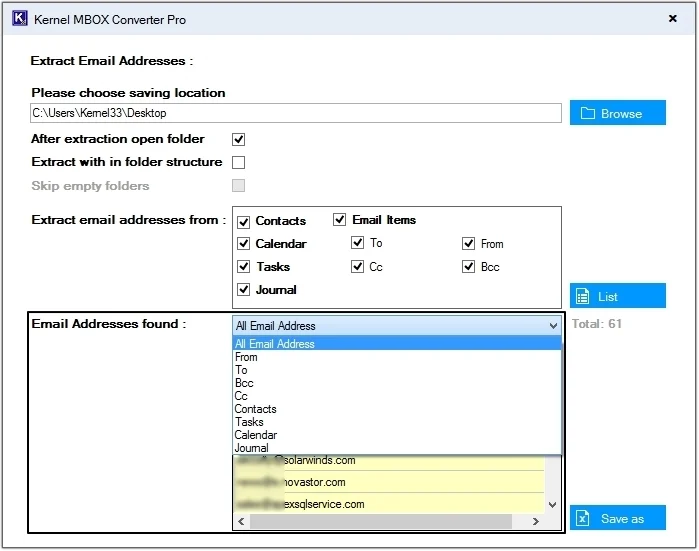
- Extract email addresses from: Apply filters to extract email addresses selectively from Contacts, Calendars, Tasks, Journal, and Email Items.
- Email Addresses found: This is the preview pane where all the scanned email addresses are displayed.
Part A. Extract email addresses in a single file
Step 9. Check the required options and select the email items to extract email addresses from. After that, click List.
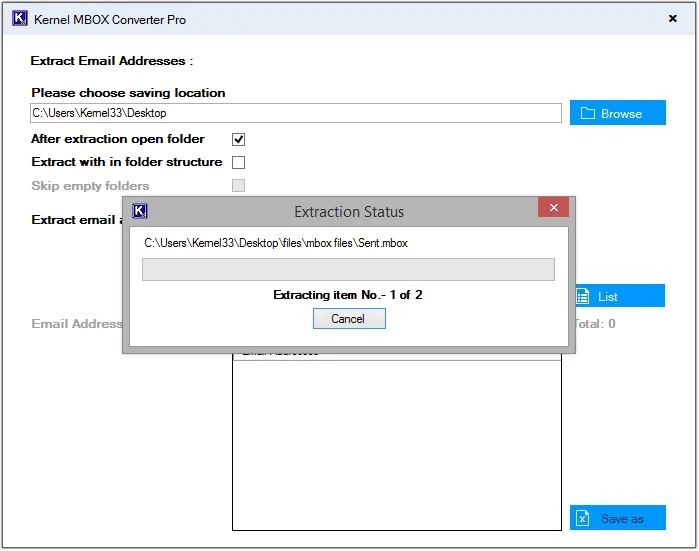
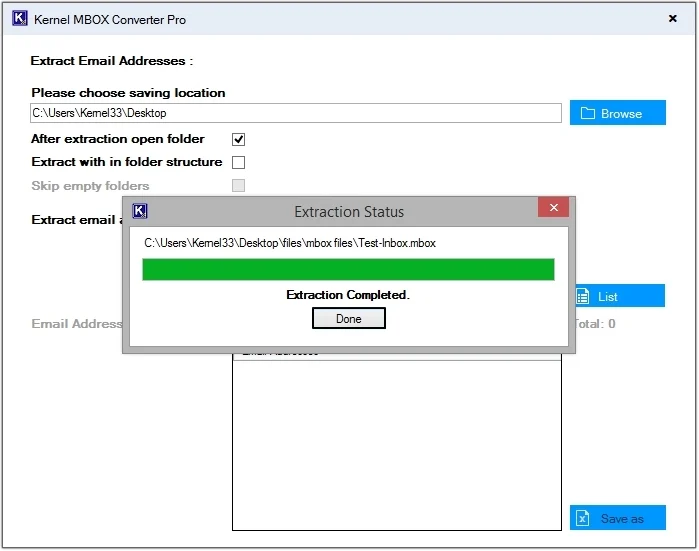
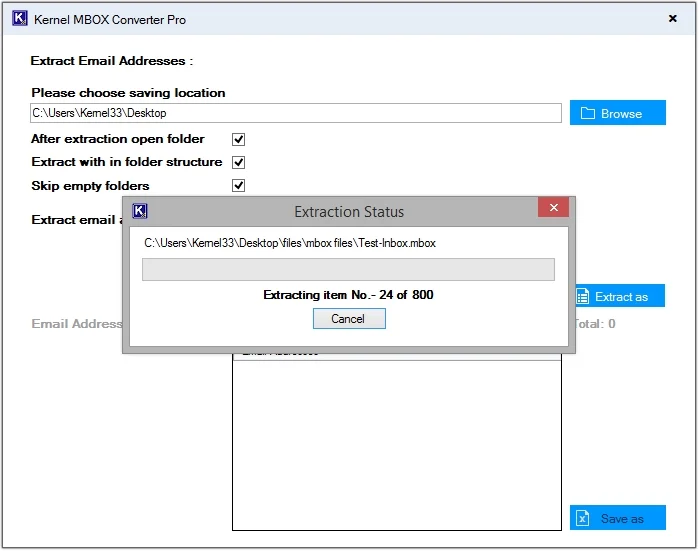
Step 10. The software will begin scanning and extracting all the email addresses stored in the MBOX file.
Step 11. Once the extraction process is completed, click on Done.
Step 12. All the email addresses will be displayed in the Email Addresses found pane.
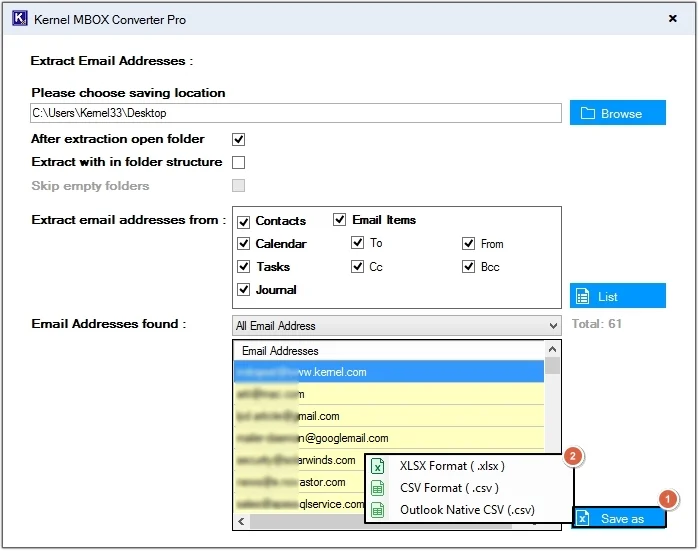
Step 13. Click on the Save as button, then select the required format to store email addresses.
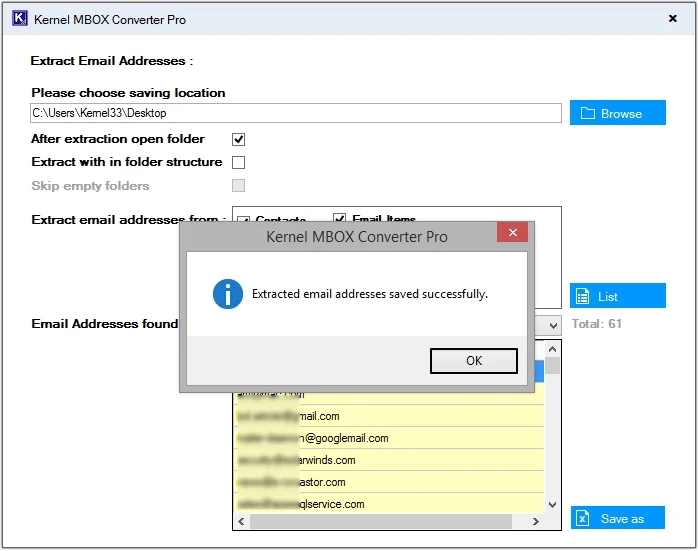
Step 14. All the email addresses will get saved in a single file. Click Ok to end the process.
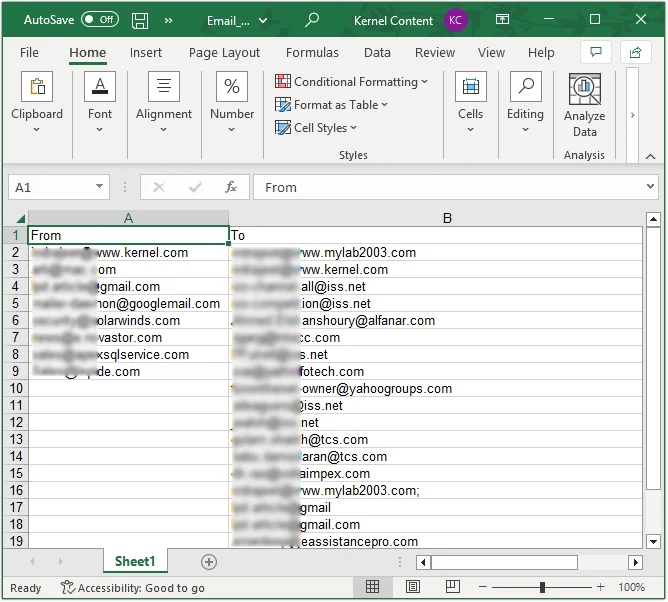
Step 15. View all the extracted email addresses.
Part B. Extract email addresses in original folder structure.
Step 8. Select the Extract with in folder structure option, then click Extract as and select the required saving format.
Step 9. The software will begin the extraction process.
Step 10. Once the process is completed, click Done to view saved email addresses.

Step 11. All the email addresses are saved within a folder structure; click on any to view the saved data.

Steps to Extract MBOX Attachments
Extract email attachments sent or received via email separately for better performance.
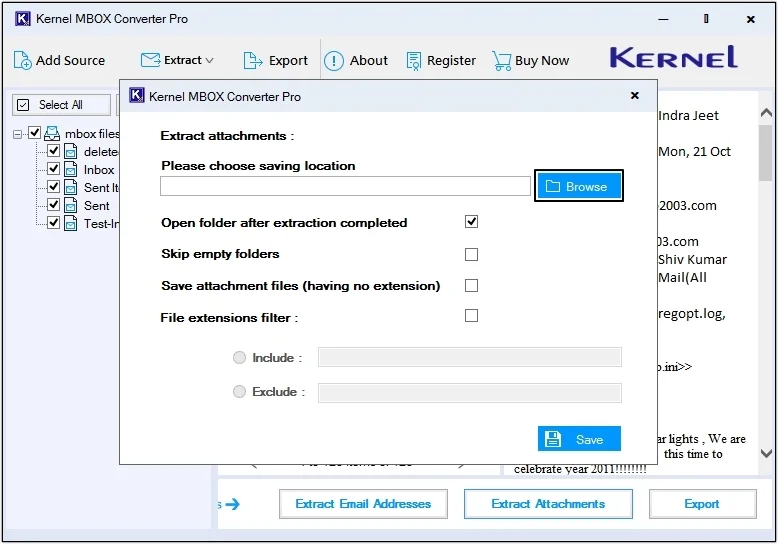
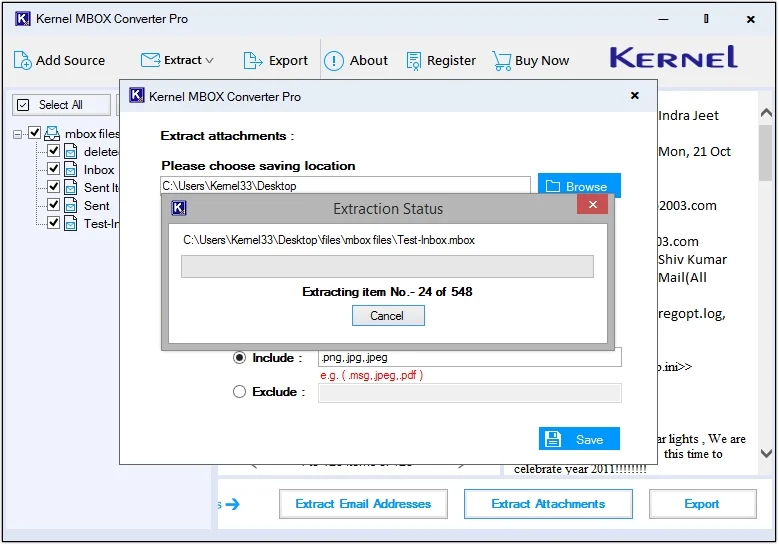
Step 7. Click on the Extract Attachments option.
Step 8. Click on the Browse button to define the saving location.
Step 9. Apply filters as per requirements and click on the Save button.
Note: Let’s check out all the filters before applying them:
- Open folder after extraction completed: This option will automatically open the folder where all the email attachments are saved.
- Skip empty folders: If there are any empty folders in your MBOX file, then this feature will help you eliminate them from being converted.
- Save attachment files (having no extension): All the email attachments having no extension will get saved after selecting this option.
- File extensions filter: With this option, you can exclude or include specific extension attachments.
Step 10. The tool will start extracting attachments from the MBOX emails.
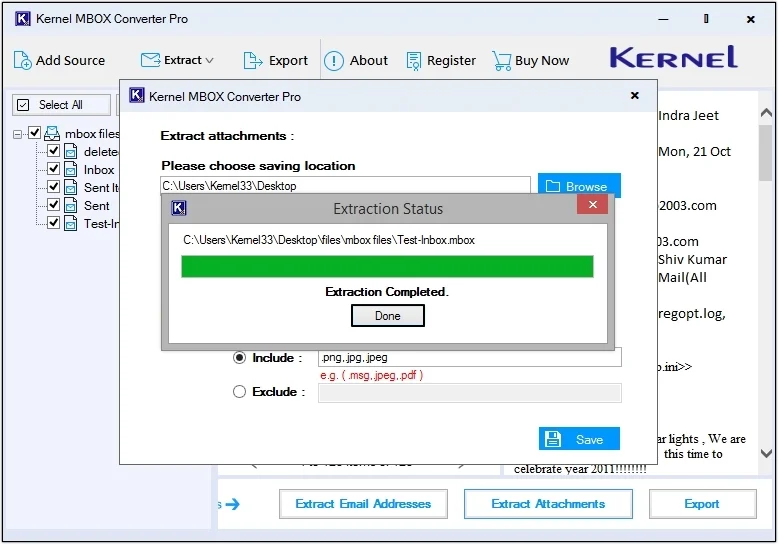
Step 11. You will see a success message once the process is complete. Click Done to open the saved files.
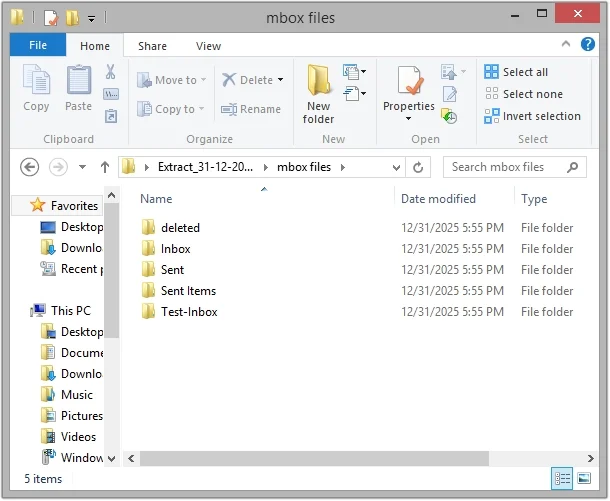
Step 12. Click on any folder to view saved email attachments.
Steps to Export MBOX Files
Convert MBOX files data into multiple file formats and access them without facing issues.
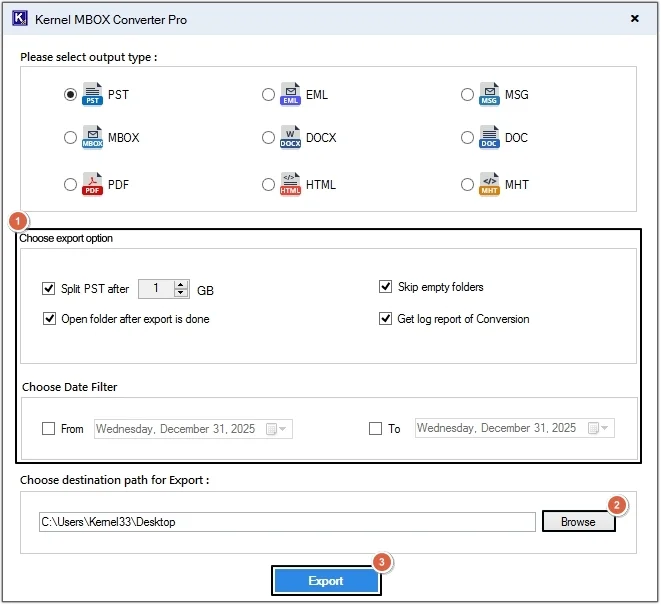
Step 7. Click on the Export button.
Step 8. Select the desired Output type from the 9 file format options (we have selected PST).
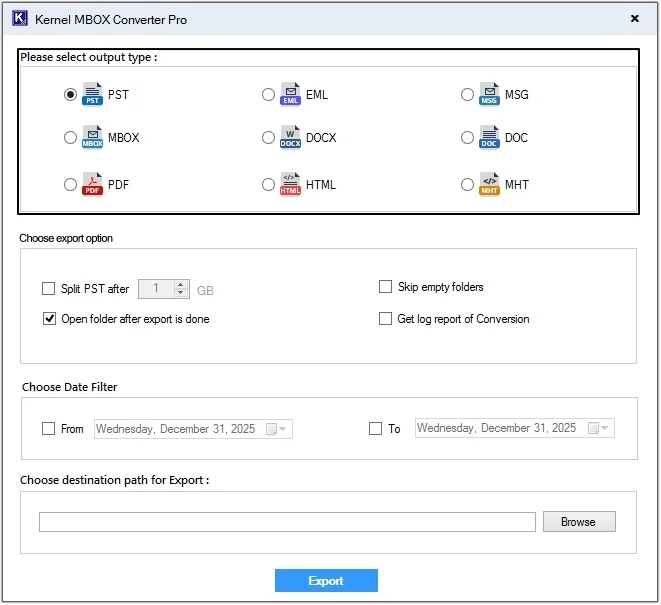
Step 9. Apply filters for precise conversion, then click Browse to provide a location and click the Export option.
Note: Let’s check out all the filters before applying them:
- Split PST after X GB: With this filter option, you can split a large MBOX file and save it into smaller PST files.
- Skip empty folders: If there are any empty folders in the MBOX file, then this filter will eliminate them from being converted.
- Open folder after export is done: This option will automatically open the folder where all the MBOX data is saved.
- Get log report of Conversion: Generate a detailed log report of the conversion process to validate the progress.
- Choose Date Filter: Utilize the date filter to save only the needed data from a specific time period.
Step 10. The software will start converting MBOX data.
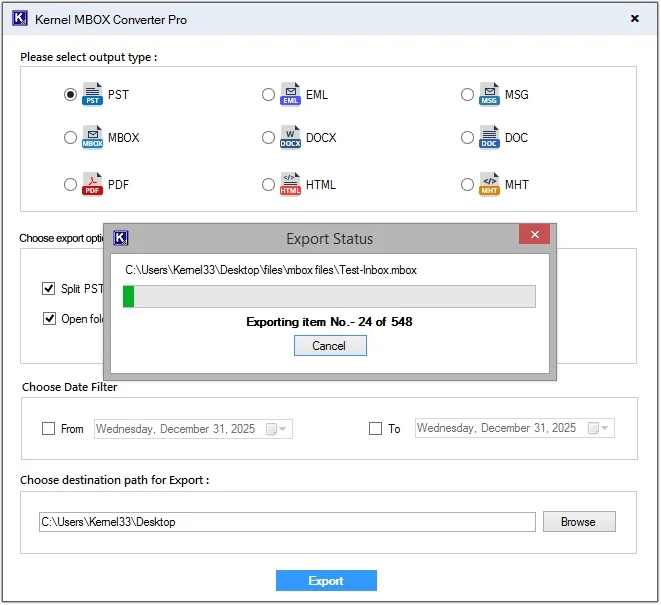
Step 11. Upon completion of the MBOX conversion, click Done.

Step 12. Click on the saved file to view the converted data.