Step-by-Step Guide to use Kernel IceWarp Converter
Step 1: Download, install, and launch the Kernel IceWarp Converter tool.
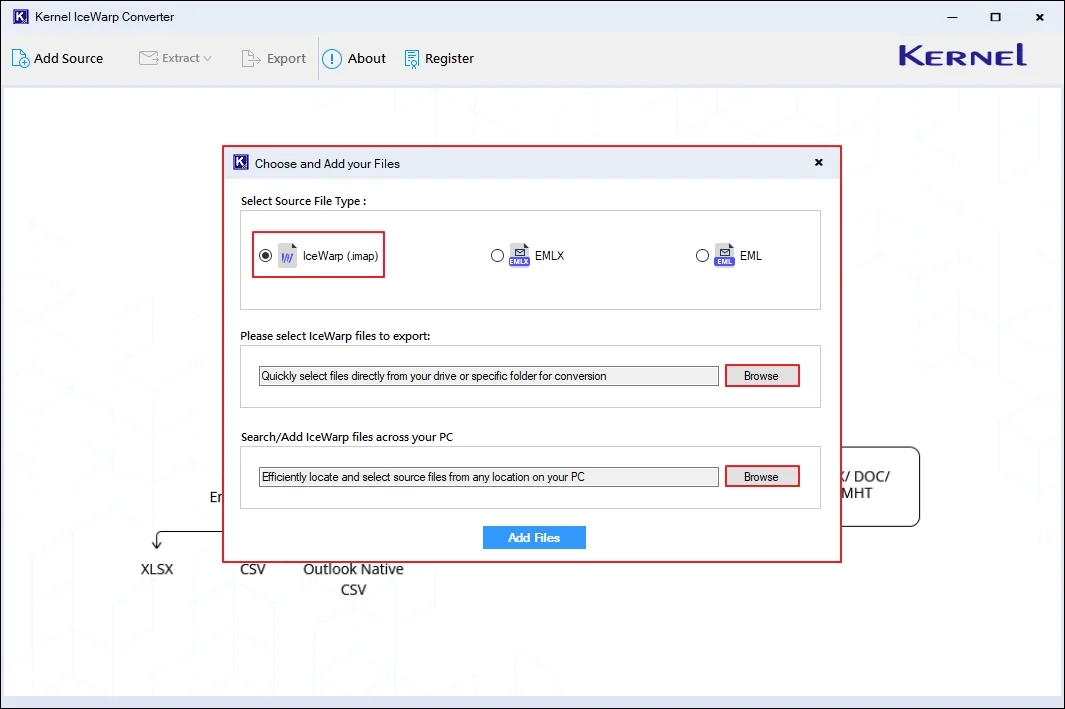
Step 2: On the software’s homescreen, select IceWarp (.imap) option. Under the Search/Add IceWarp files across your PC option, click Browse to select bulk IceWarp files.
Note: To go with a single IceWarp file, click on Browse below Please select IceWarp file to export option.
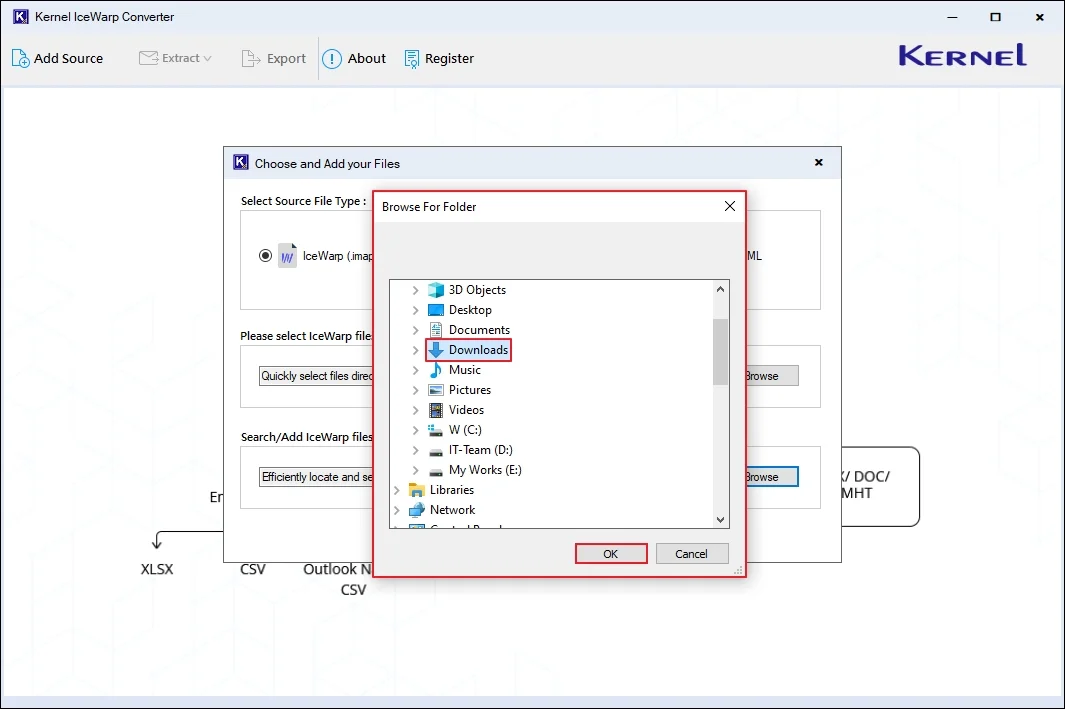
Step 3: Select a folder containing IceWarp files on your specific drive and click OK.
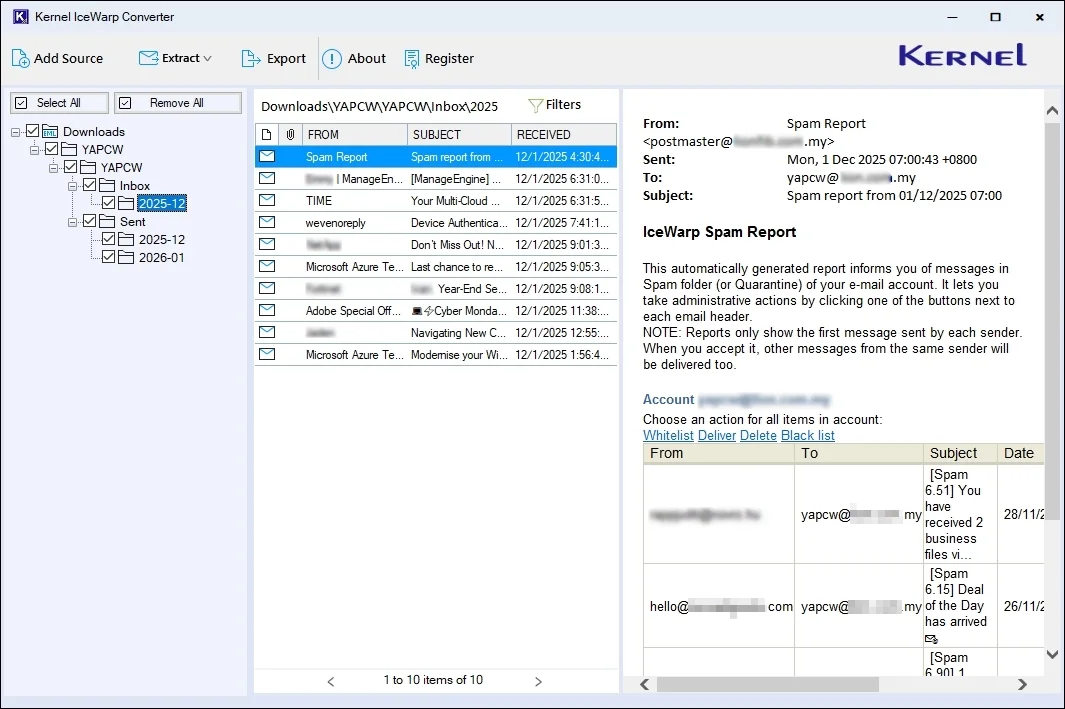
Step 4: The software will automatically fetch all the IceWarp files and list them in a hierarchical structure. Select any specific email and view its content in the Preview Pane.
Choose Required Option:
The software offers three different options to extract or export data from IceWarp files in multiple output formats.
Extract Attachments
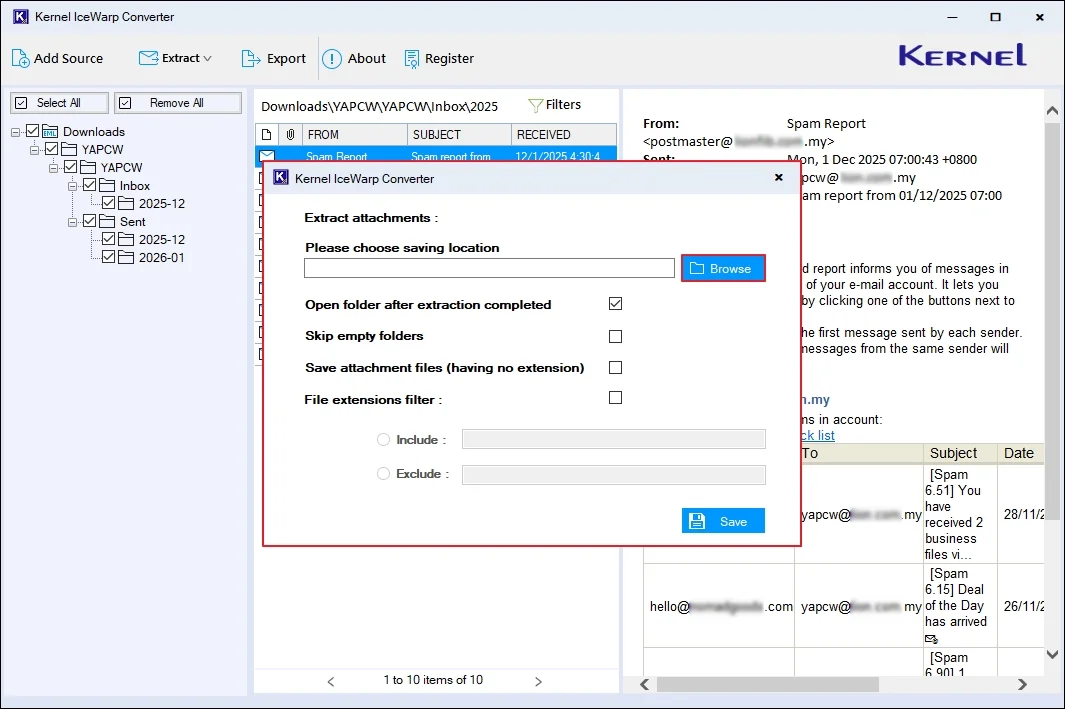
Step 5: Select your preferred emails, view their content, and click on Extract > Attachments.

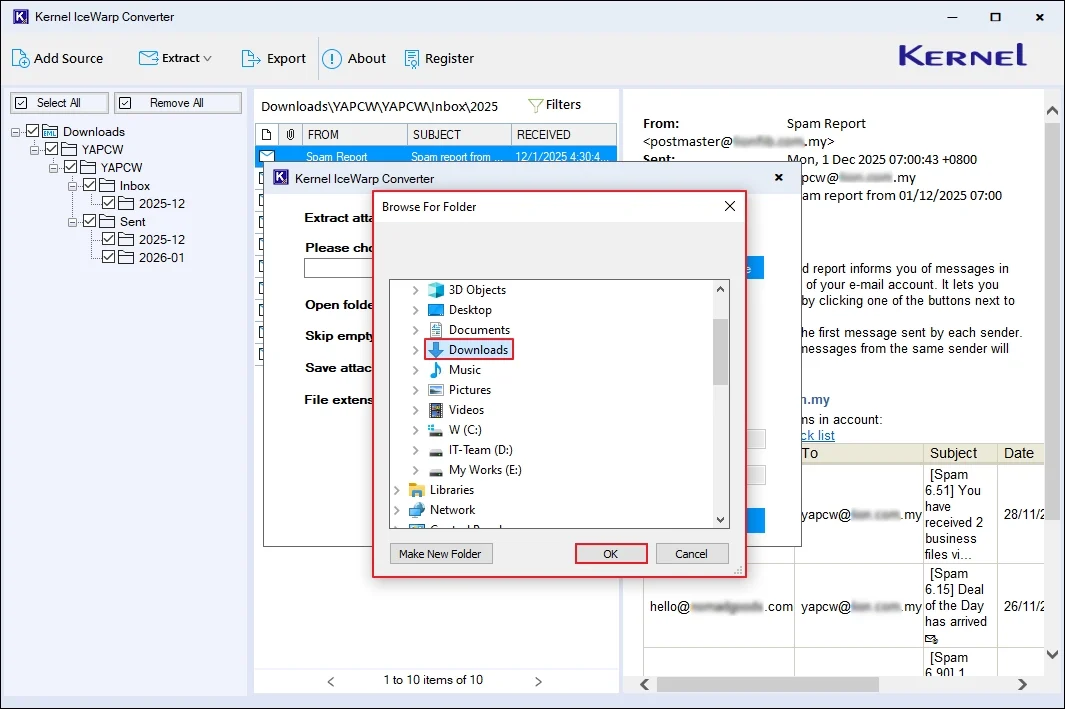
Step 6: In the following window, click on Browse to select the output saving location.
Step 7: Select any preferred location to save files and click OK.
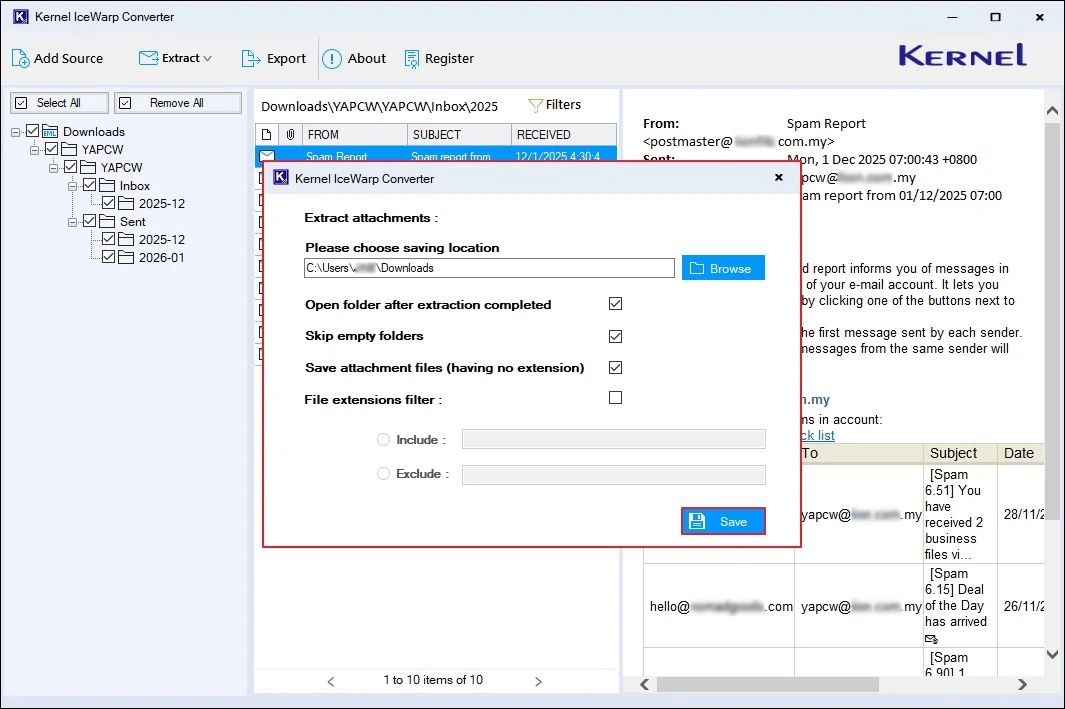
Step 8: In the following window, apply required options from:
- Open folder after extraction completed: The software will automatically navigate you to output files after a successful extraction process.
- Skip empty folders: Exclude extracting empty folders in the destination.
- Save attachment files (having no extension): Safeguard attachments without extension as the same as the source.
- File extensions filters: Enter folder names in the Include or Exclude bars to customize the folder extraction process.
- Finally, click on Save.
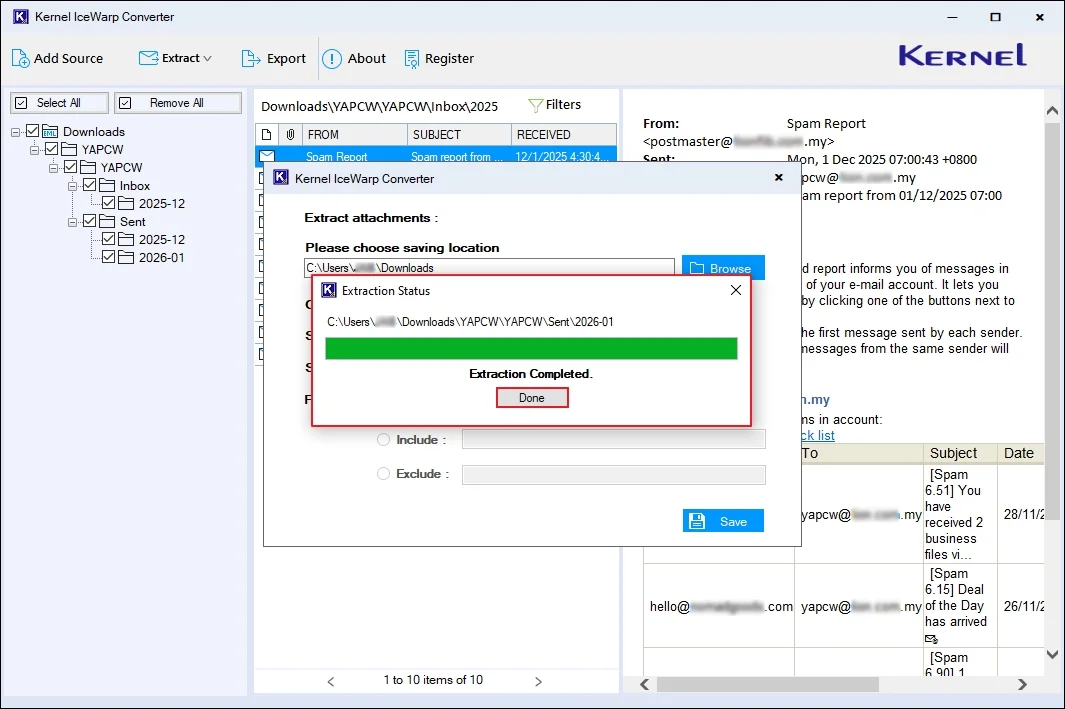
Step 9:The software will start exporting data. After a successful process, the tool will show Extraction Completed message. Click Done.
Note: The tool will navigate you to the exported file automatically.
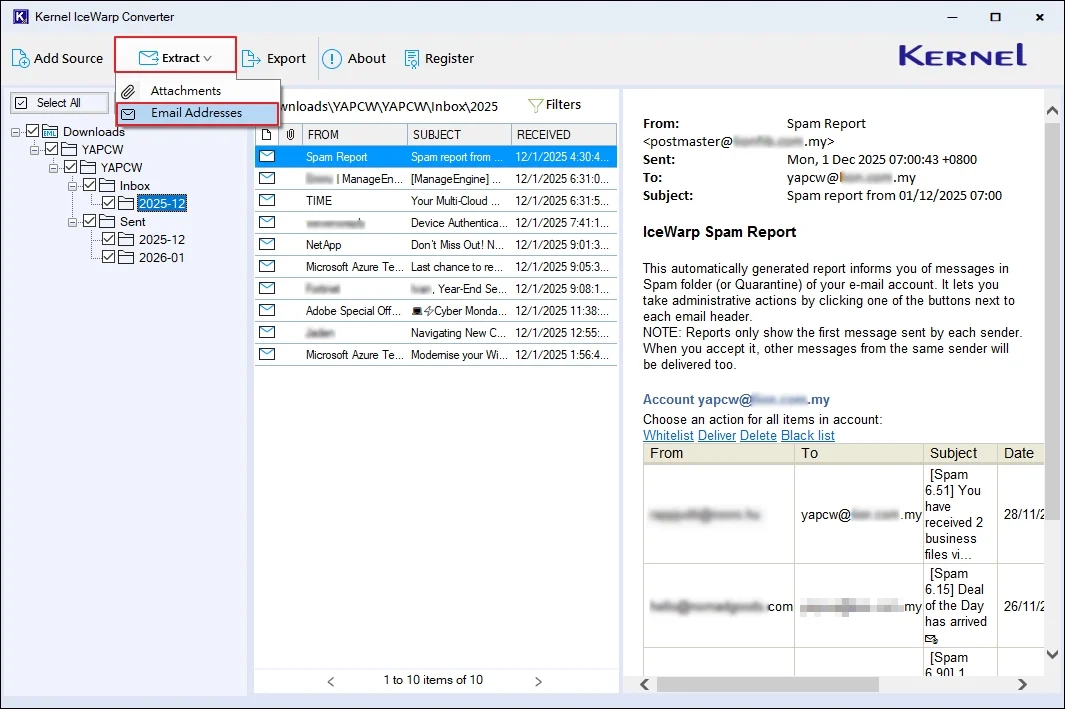
Extract Email Addresses
Step 5: The tool will retrieve and show all the emails. Select any specific email and view its content. Click Extract > Email Addresses.
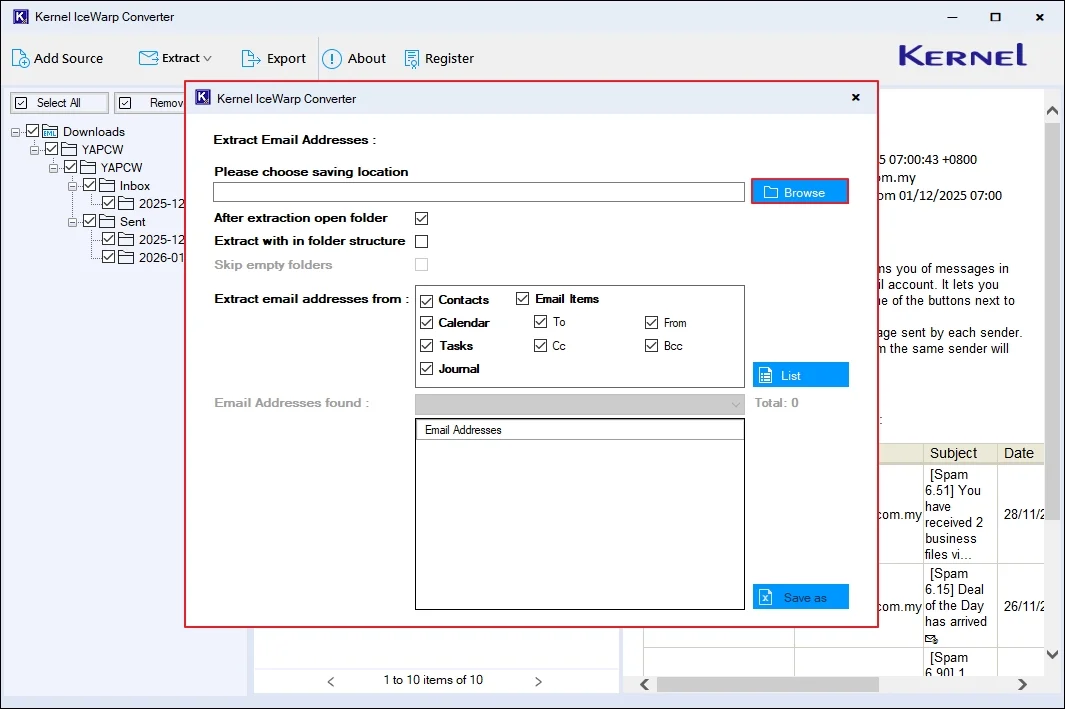
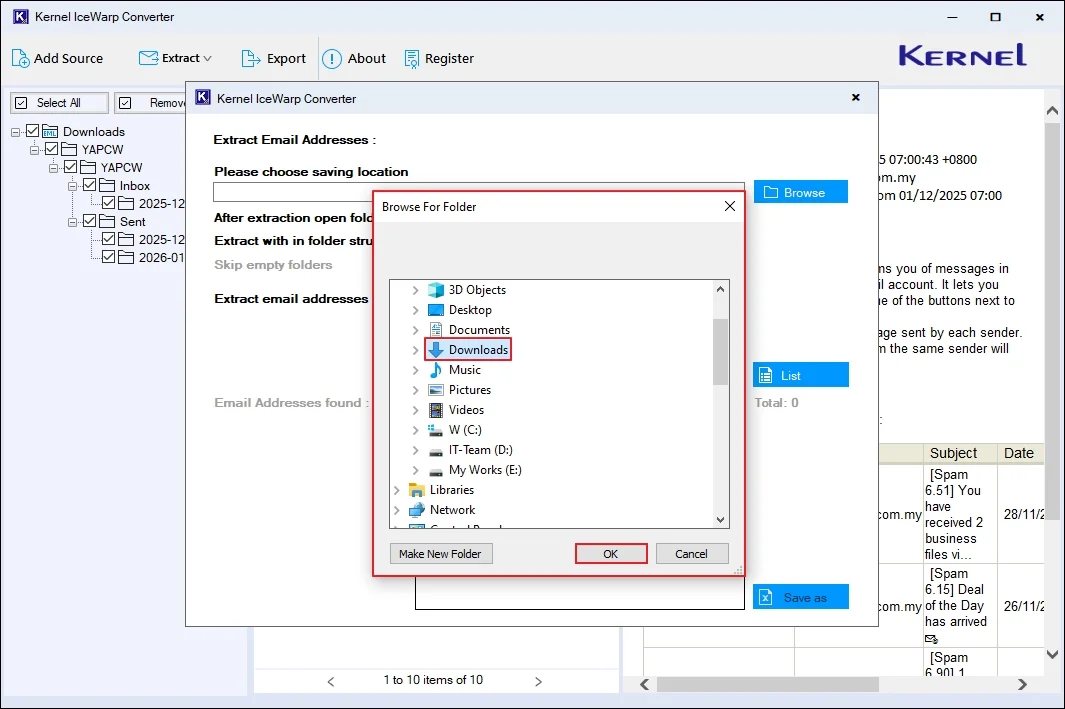
Step 6: In the following window, click on Browse.
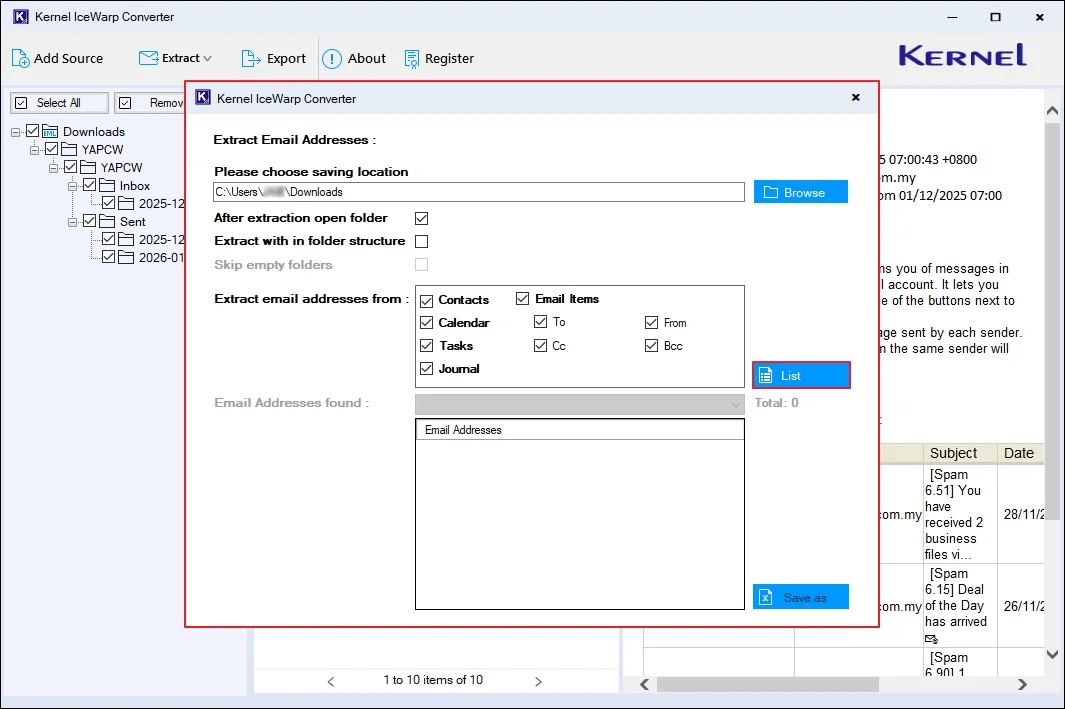
Step 7: Select your desired folder to save the output file and click OK.
Step 8: Now apply the necessary options from the available ones to simplify your export process:
- After extraction open folder: Access your output file automatically after a successful export process.
- Extract within folder structure: Get all your email addresses in the same folder as source in the original hierarchy.
- Skip empty folders: Exclude saving empty folders in the resultant file.
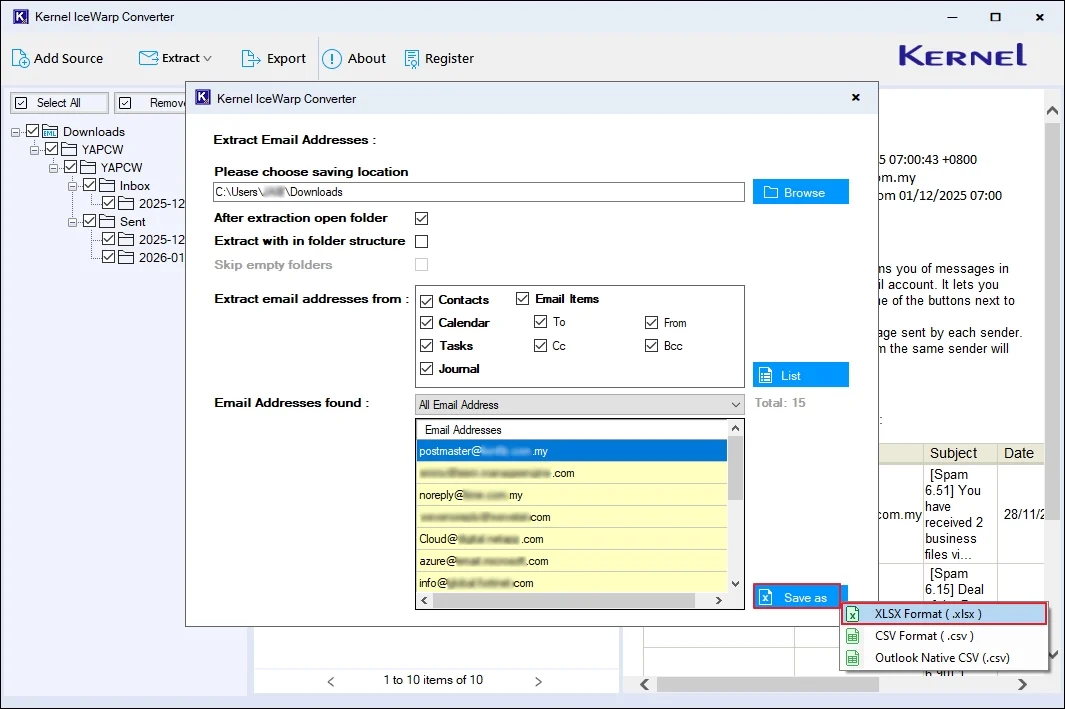
- Extract email addresses from: Contacts, Calendar, Tasks, Journal, and Email Items.
- Finally, click on List.
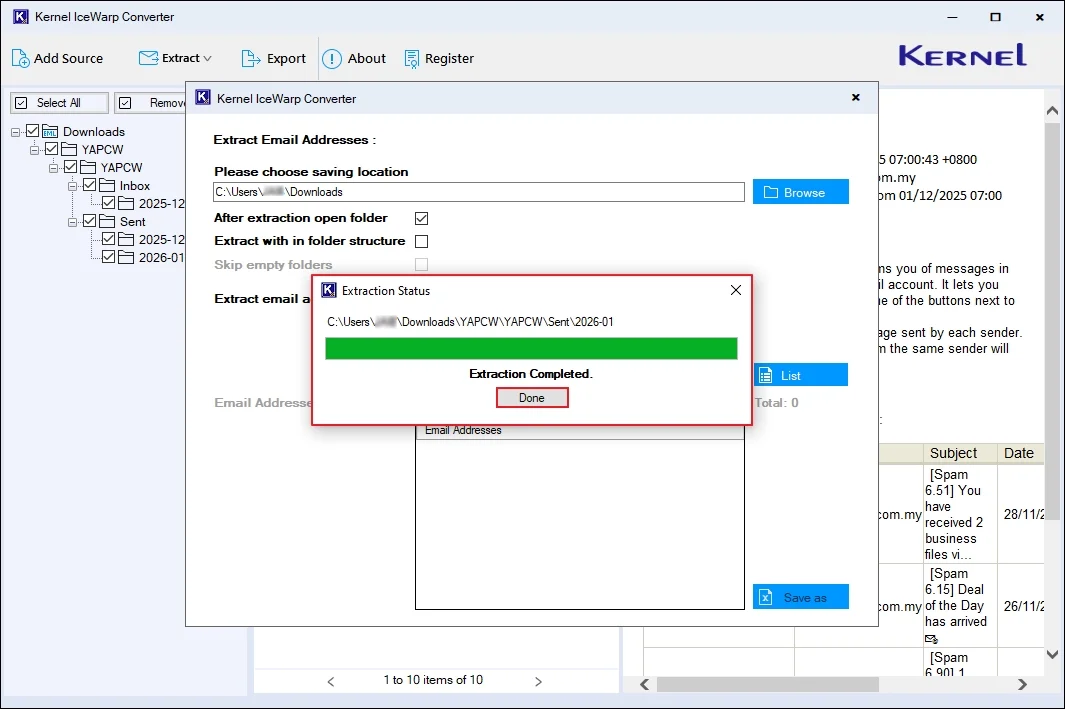
After applying all the required options, click List.
Step 9: The software will extract all the email addresses from the IceWarp files and show Extraction Completed message. Click Done.
Step 10: The software will list all the email addresses in the Email Addresses found section. Click on Save as and select your preferred formats from XLSX Format (.xlsx), CSV Format (.csv), and Outlook Native CSV (.csv) accordingly.
For now, we are going with XLSX Format (.xlsx).
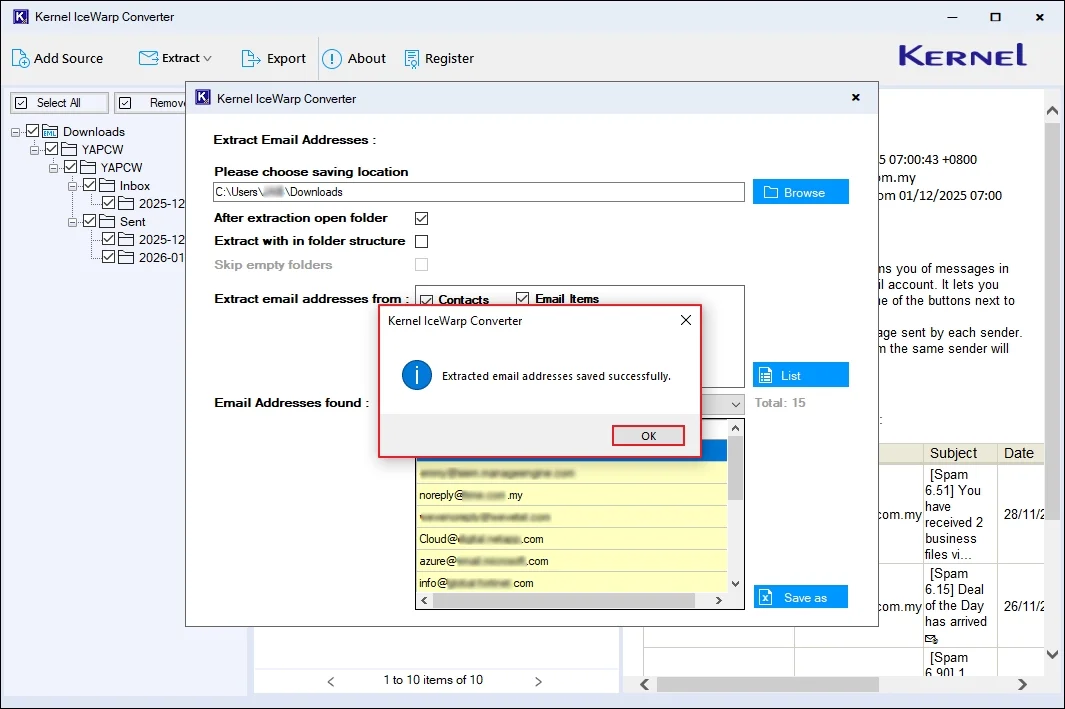
Step 11: The software will save your email addresses and show Extracted email addresses saved successfully message. Click OK.
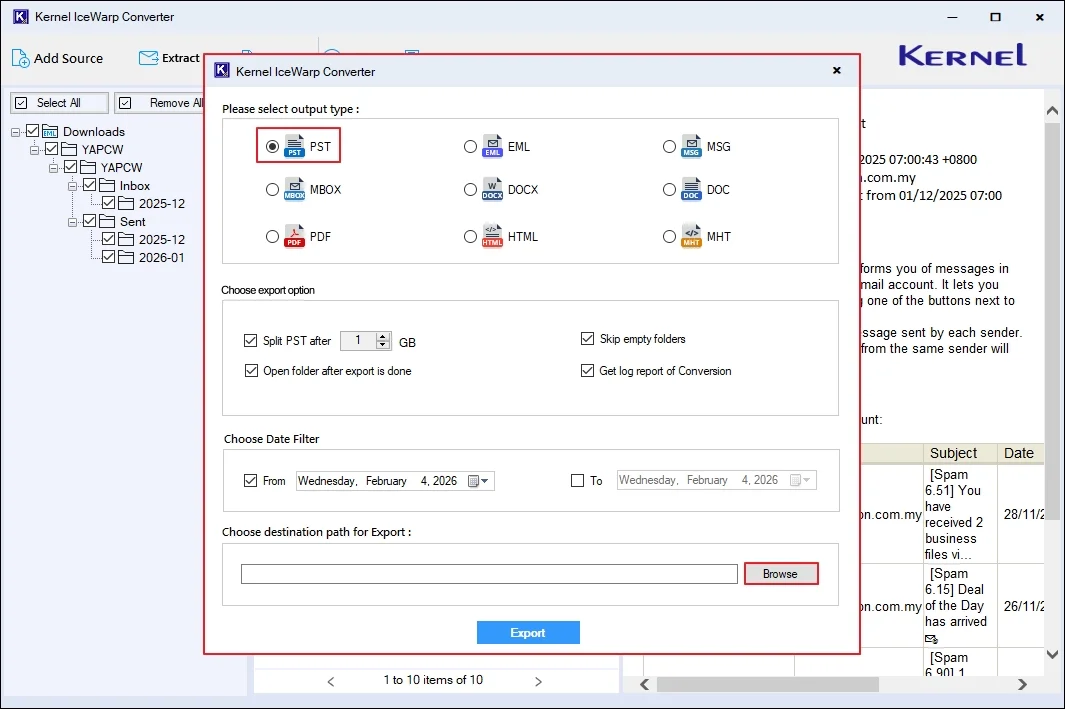
Export IceWarp emails
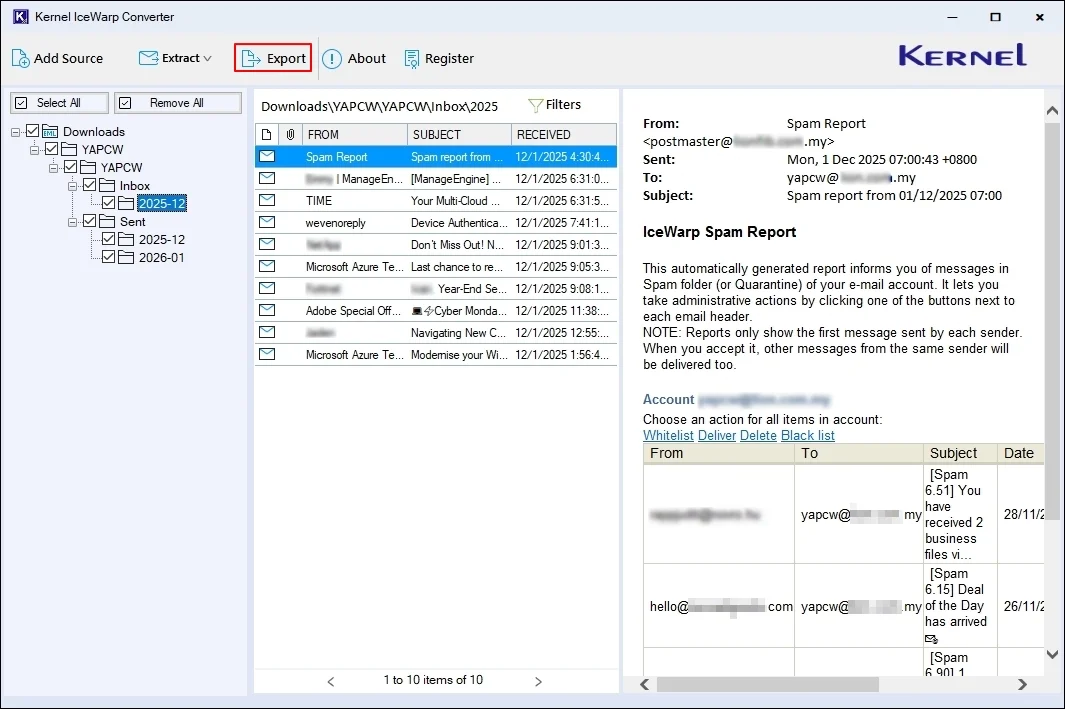
Step 5: Select any IceWarp email, view its content, and click on Export.
Step 6: Please select output type from PST, EML, MSG, MBOX, DOCX, DOC, PDF, HTML, and MHT accordingly. After that apply, required export options and filters:
- Choose export options from the options given below to customize conversion results.
- Split PST after: Manage large-sized OST files by splitting them into multiple PST files.
- Skip empty folders: Exclude saving empty folders in the output file format.
- Open folder after export is done: Access all your output files automatically after a successful export process.
- Get log report of conversion: Generate and download a detailed log report of every failed item in a TXT file in the Installation/Uninstallation folder.
- Choose Date Filter: Select From and To dates and export data of selective dates as per your convenience.
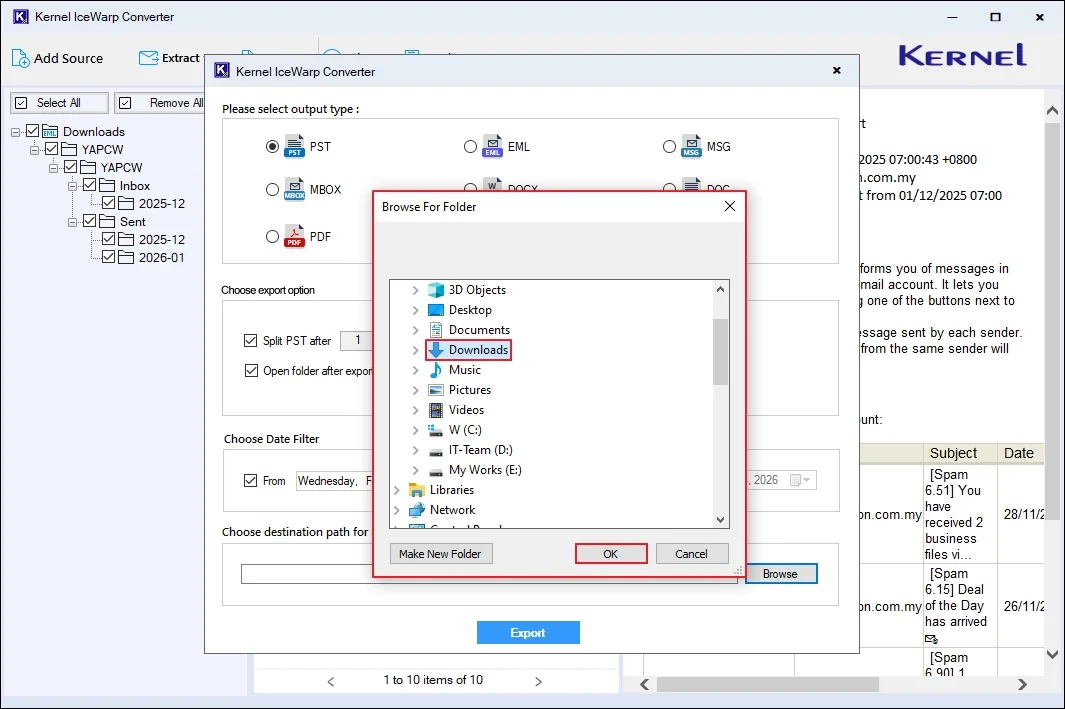
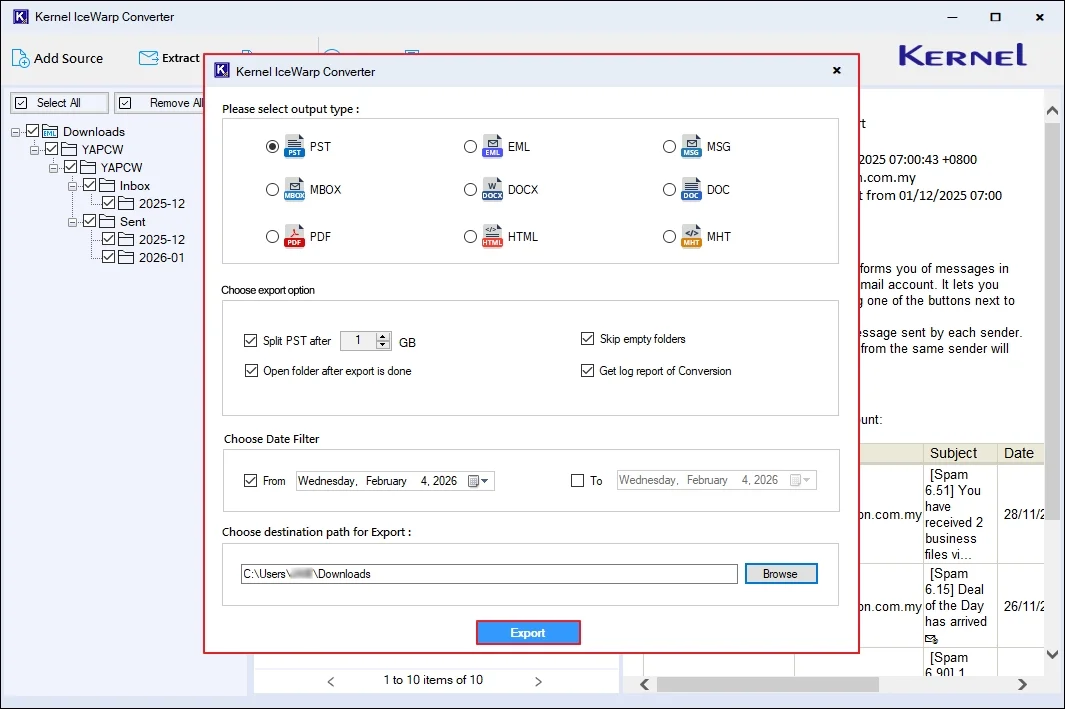
Finally, click on Browse below choose destination path for Export.
Step 7: Select a preferred location on your system to save the resultant file and click OK.
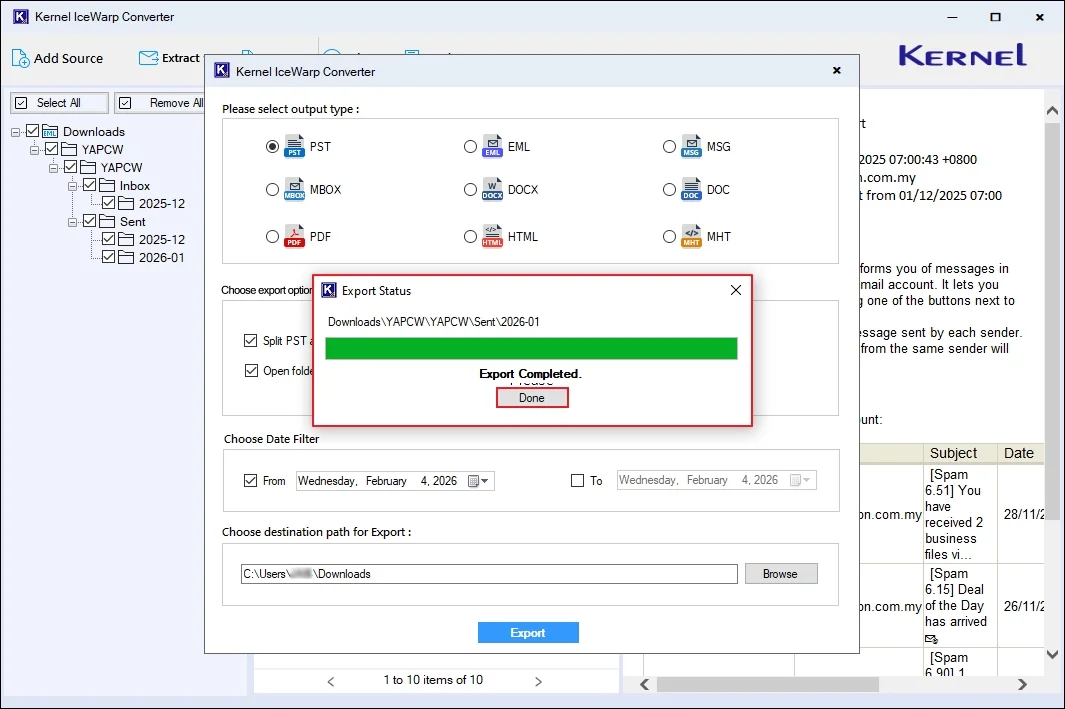
Step 8: Finally, click on Export to start IceWarp (.imap) conversion process.
Step 9: After saving all the emails, the tool will show Export Completed message. Click Done.