As technology continues to evolve, people all over the world are adopting cloud storage rather than hard drives or other physical storage to keep their important data. Google Drive is one of the most popular cloud storages in this era.
Google Drive, launched by Google on April 24, 2012, is a versatile cloud storage solution designed to store, synchronize, and share data across various devices. Users can create Google Sheets, Slides, and Docs effortlessly through any device and from anywhere. You can access it on the web browser or through mobile apps on android and iOS. Google Drive provides users with seamless content management experience.
Upon creating a new account, Google Drive starts as a clean slate with no default files or folders, providing users with a blank canvas to upload substantial amounts of data. Its key features include:
- For a free Google account, there is 15 GB of free space shared by all apps in Google Workspace. But you can purchase Google One subscription to increase storage limit to 100 GB, 200 GB, 2 TB.
- Google Drive Viewer supports a wide range of file formats to allow opening in the web browser.
- Images (PNG, JPEG, TIFF, BMP, WEBP).
- Videos (MPEG4, 3GPP, MOV, AVI, WEBM, WMV, FLV, OGG).
- Text (TXT).
- Audios (MP3, WAV, M4A, OGG).
- MS Office (Word, Excel, PowerPoint).
- Adobe (PDF, AI, PSD)
- Executables (EXE).
- Archives (ZIP, RAR, TAR, GZIP).
- Maximum file size limit to upload is up to 5 TB.
- Android device’s backups are stored in Google Drive.
- Third-party add-ins can be added through Chrome Web Store and applied on Google Drive.
- There is a deep search facility that allows to open saved items minutely.
- While sharing the information, the user can allow to ‘can edit’, ‘can comment’, and ‘can view’ to the recipient.
How to upload files to Google Drive?
Before moving to learn about the ways to upload files, it is important to know the prerequisites of migrating files from File system to Google Drive.
- Check internet connectivity
- First disconnect your Google account and then reconnect it.
- Check storage space available in the drive.
- Disable all the network security components such as anti-virus, ad blockers, and firewall.
- Delete all the cache data.
- Re-check the file names, size, types, etc. and if needed, rename or resize the files.
Uploading a file to Google Drive is quite easy. Just follow the steps given here and you’ll be able to have a seamless upload of files –
- Step 1: Login to your Google account.
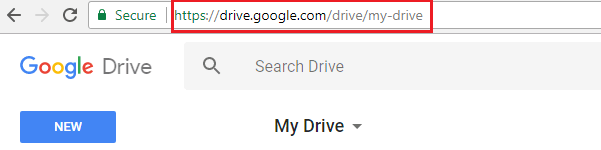
- Step 2: Type the URL - https://drive.google.com/drive/my-drive in the web browser.
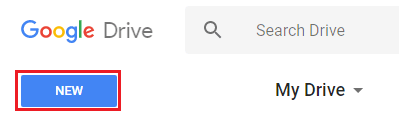
- Step 3: Click New button just under ‘Google Drive.’
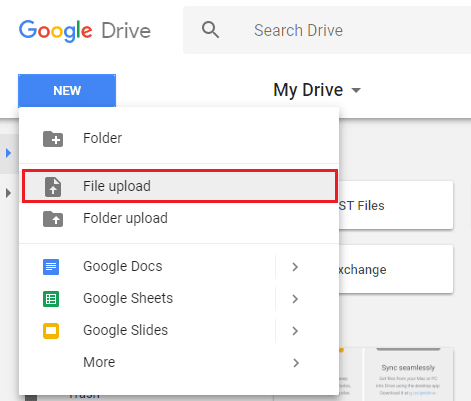
- Step 4: Select either File Upload or Folder Upload.
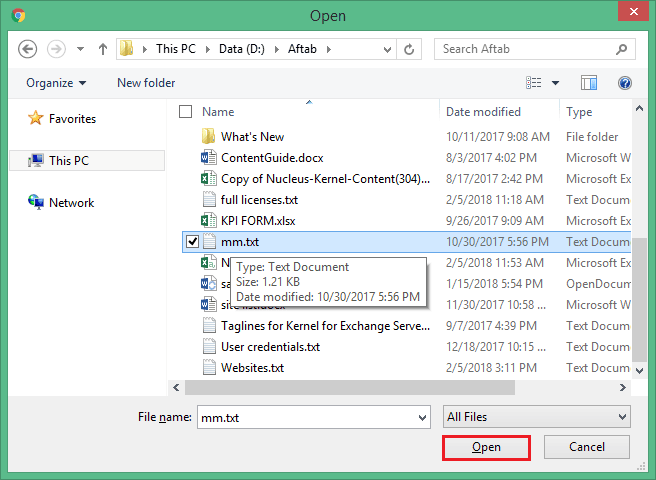
- Step 5: Now, browse and select the desired files/folder.
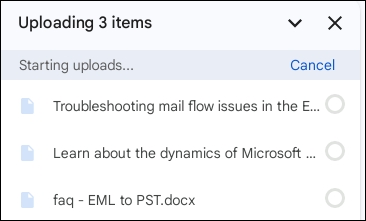
- Step 6: Wait while the file is uploaded.
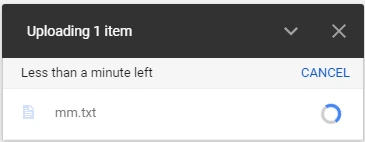
- Step 7: When the uploading is complete, a confirmation message is displayed.
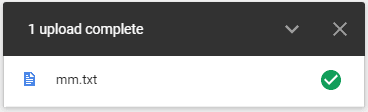
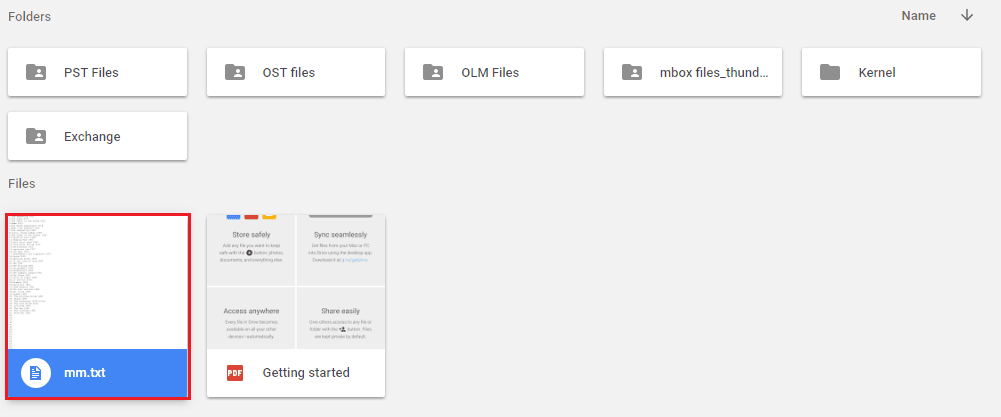
- Step 8: When the file gets successfully saved on Google Drive, you can view it there.
Another method that supports uploading files from File system to Google Drive is quite simple. Users will just need to drag files from their local computer and drop them to Google Drive.
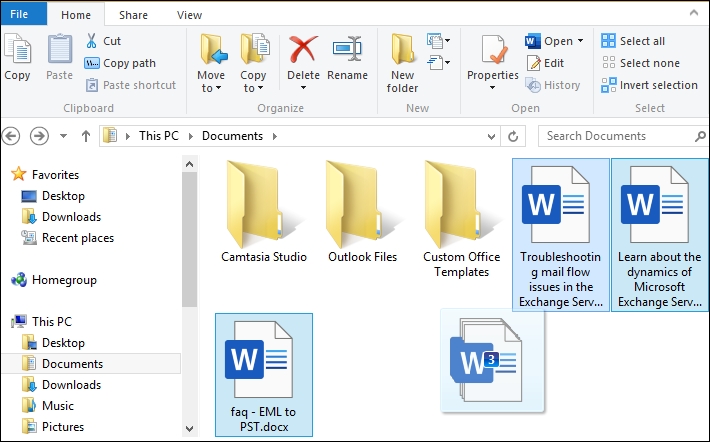
- Go to the files location that you want to upload.
- Select the files and folders and drag them to Google Drive’s website.
- Now, drop them to Google Drive and your files will be uploaded.
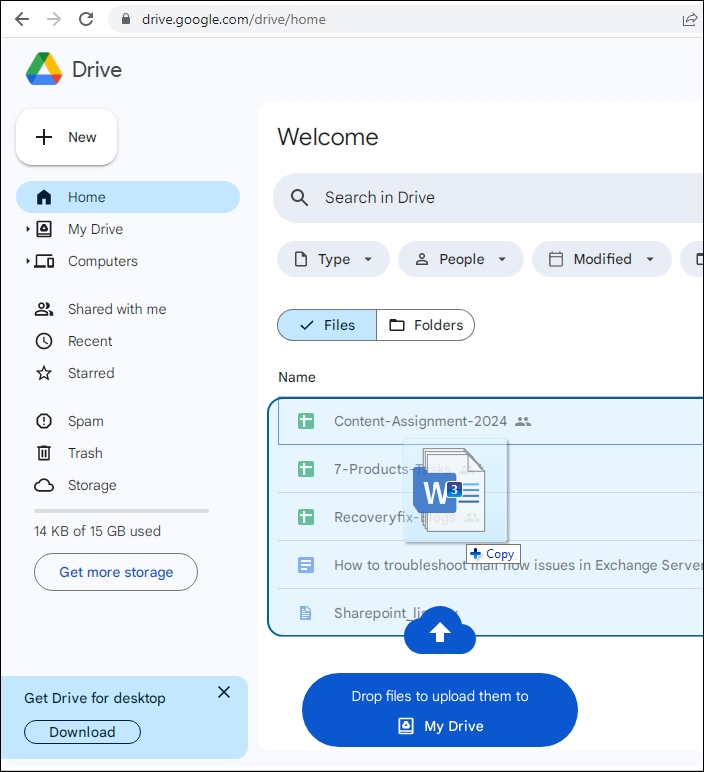
- The status of the files uploaded to the drive will be shown in the bottom-right of the Google Drive window.
Uploading a few files to Google Drive is quite easy as you have seen. But if the file is quite heavy, it may take much time for the upload. Further if the internet connection is slow, the uploading may get canceled too. Also, manual uploading is not feasible when there are many files.
To make sure that you always upload the files correctly, you can use a professional Kernel Migration for SharePoint tool which can migrate the offline files and folders from your computer to Google Drive even when there are many files for upload.
- Migrates files from local system as well as remote servers.
- Upload a large number of files to Google Drive at a time.
- Migrates metadata and user-permissions along with other files and folders.
- Automates migration using CSV file.
- Allows filtering of the file system data by various filters.
- Options to migrate to SharePoint, OneDrive, and Google Drive.
- Supports all Windows versions including Windows server.
For migration, try the following steps to upload files and folders from file Server to Google Drive. –
- Launch the tool and to start the process, select files from Windows File System or add remote server by clicking on Add New Source.

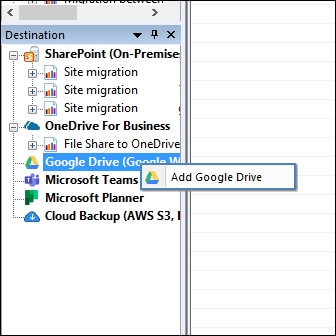
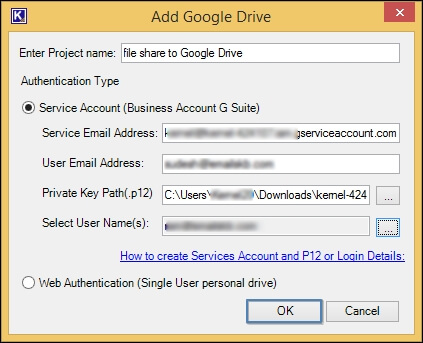
- Once you add File System as the source, go to the destination pane and right click on Google Drive (Google Workspace) and select Add Google Drive.
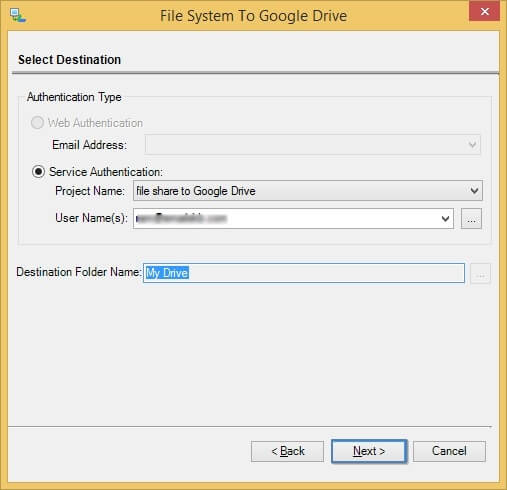
- If you select Service Authentication, enter the details Google Suite Service Account id, User Email Address, P12 key, and select the User Name(s).
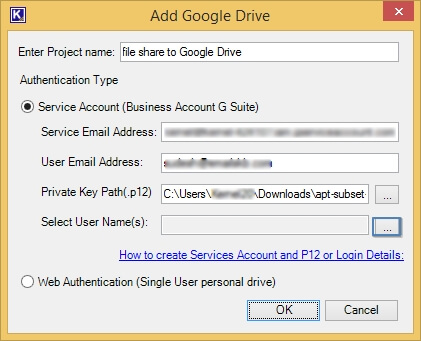
- Tap on the three dots to select user name from the list of connected users to the G suite account.

- Once the user(s) is selected, click OK to proceed.
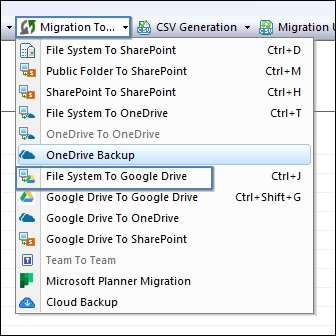
- Now, go to Migration to dropdown and select File System to Google Drive
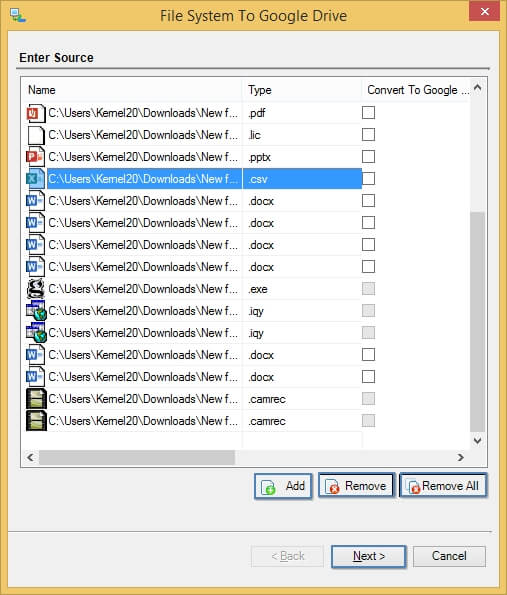
- In the Enter Source window, click on Add button to add files or folders from your local or remote computer.
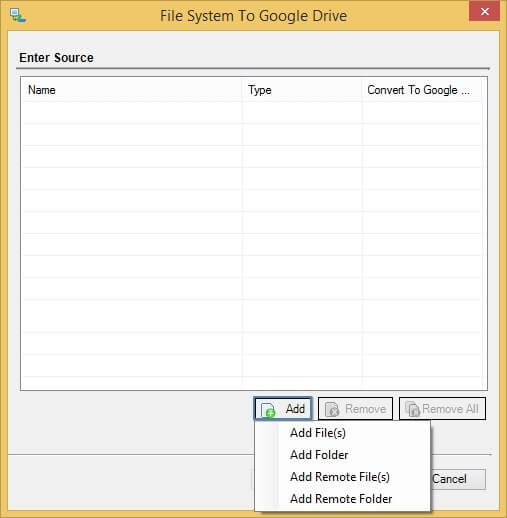
- You can add more files to the list by clicking on Add button. Remove selected files using Remove button and all files can be removed by hitting the Remove All button.
- In the Select destination wizard, there are two methods which you can choose to migrate files to Google Drive:
- through Web Authentication
- through Service Authentication
Note: The web authentication method lets you migrate local files using Google Drive Account. Select Web Authentication (selected by default) and input the destination folder in the Google Drive account
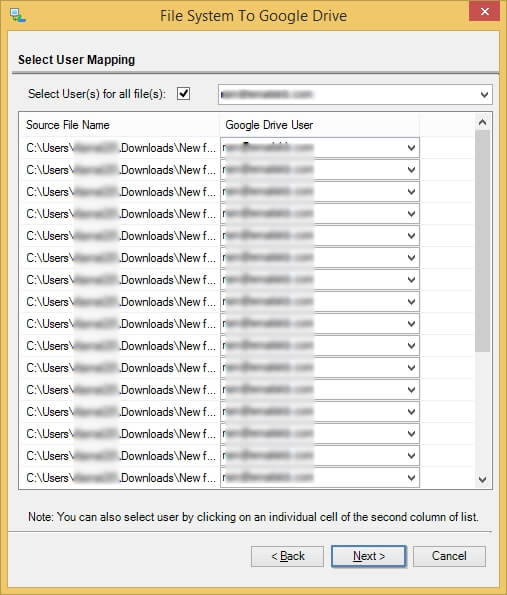
- Check that the Source files are mapped with correct Google Drive User by selecting using the dropdown list containing user names. Click Next.
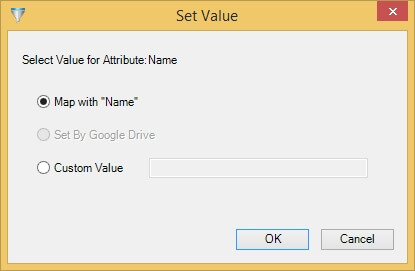
- Now, the tool tries to map the attributes of the selected files automatically. Remaining attributes can be mapped manually. Then click Next.
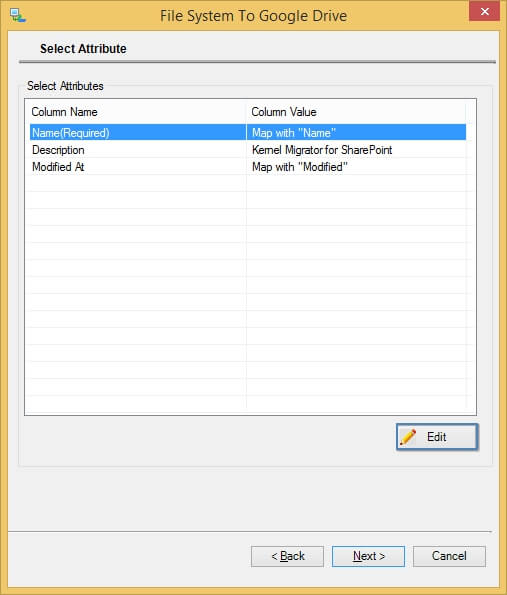
- You can make changes in the selected value of attributes using Edit button. Once done click OK.
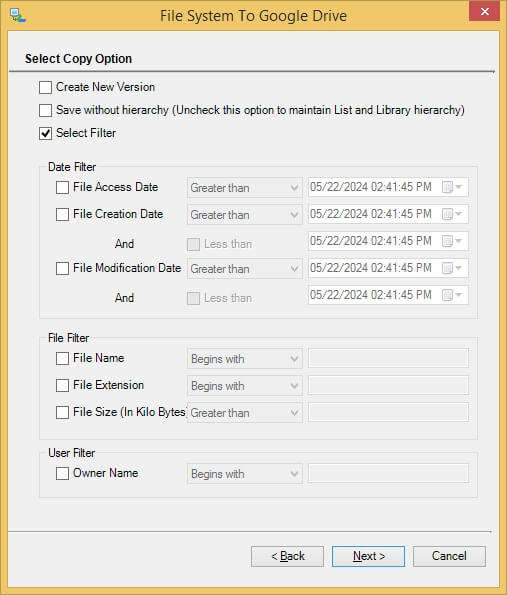
- Now, provide migration options (filters) as required and then click Next.
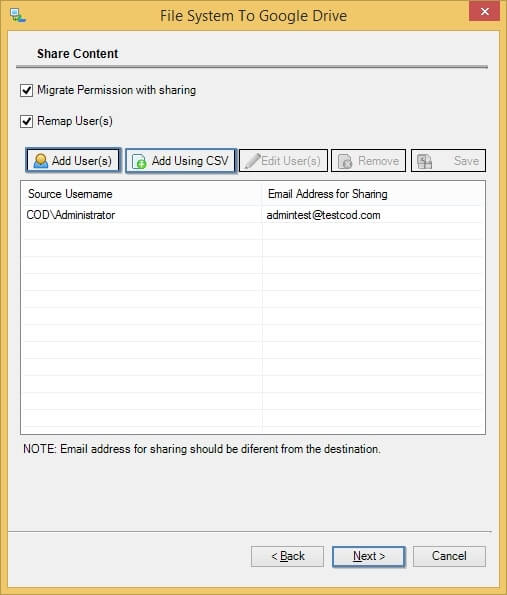
- You can also migrate the permissions to other users while sharing the content. For this, just check Migrate Permission with sharing. Subsequently, you can add users with whom content is to be shared. Click Next to start the migration.
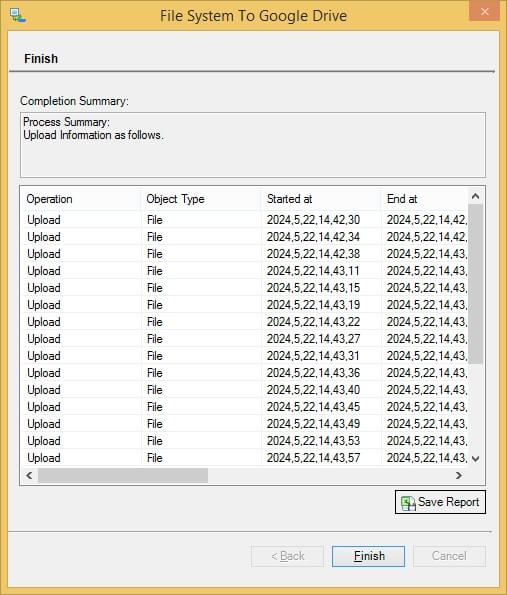
- The migration process gets started and the software displays its progress.
- Once the migration is completed, the tool shows a summary of the entire process. Click Finish.
Conclusion
Selecting the best method to upload files to Google Drive depends on your requirement and file types you want to upload. Nevertheless, Kernel Migration for SharePoint is a reliable solution for quick and bulk data upload ensuring no data corruption and no missing files. Hence the next time you face complications in uploading files to Google Drive, use our SharePoint migration tool. It helps in seamless upload of data from File System to SharePoint, Google Drive, and OneDrive.
Solution to Migrate SharePoint, Office 365, OneDrive & Google Drive