How to use Kernel for Windows Data Recovery Free Version Software?
Data stored in physical and logical drives of the Microsoft Windows systems are prone to corruption due to many reasons like external influences, system errors, power supply issues, anti-malware interruptions, etc. Data retrieval is possible without spending any money in an automatic manner with the free utility – Kernel for Windows Data Recovery Free version. One limitation which you need to know is that it recovers your Windows data up to 2GB size only. This free tool can be easily downloaded from the software website.
Here, we are explaining the complete process to recover your Windows data up to 2GB free with Kernel for Windows Data Recovery Free version.
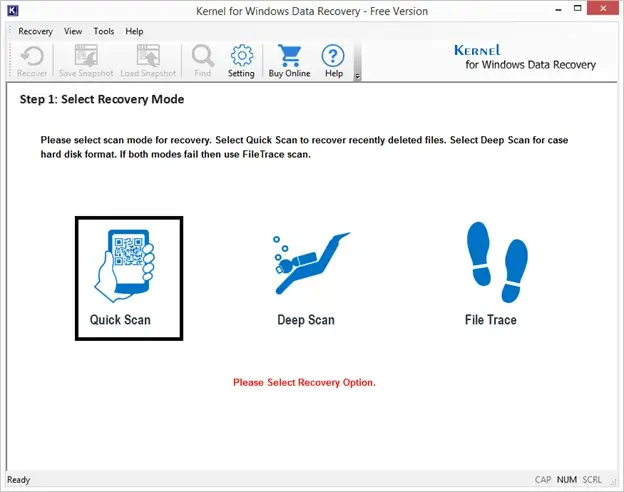
Start the installed software on your system. You will get the display screen like this. Select any scanning mode out of Quick Scan, Deep Scan, or File Trace. These scanning modes are:
- Quick Scan – For quick recovery of the lost file(s) and folder(s)
- Deep Scan – In case of hard disk format, partition deletion, recreation, etc.
- File Trace – In the case above two modes don’t work for you, choose this scanning mode
Here, we are selecting Quick Scan mode for the recovery.
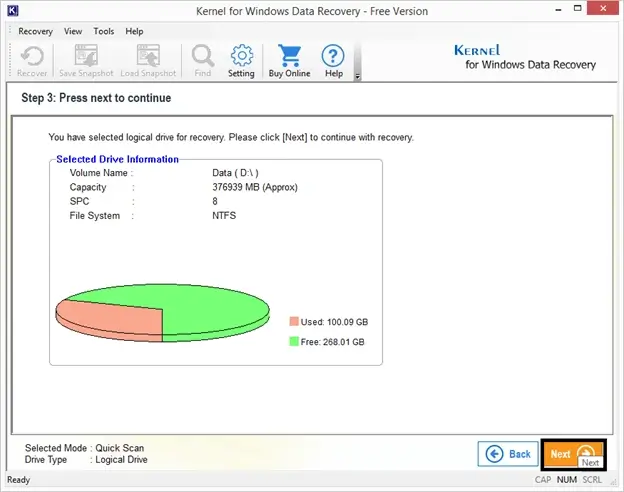
Choose the drive which from you want to recover the data and click Next option.
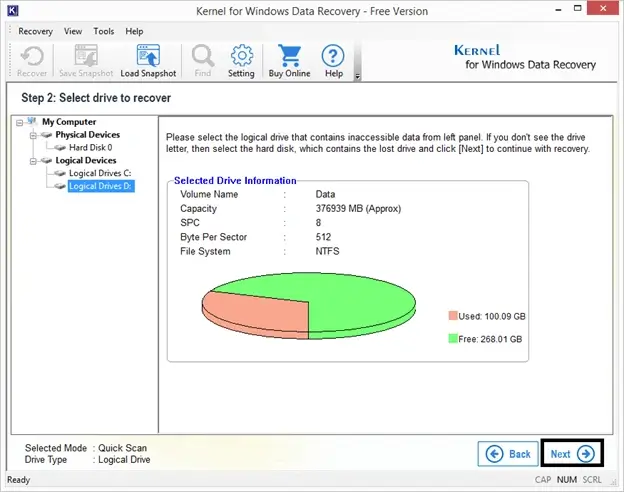
Here, you can view the complete information of the selected drive like Volume name, capacity, SPC, File System, etc. Click Next to continue.
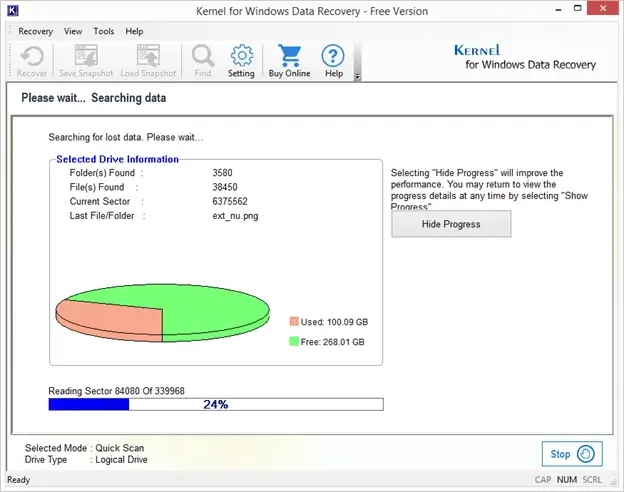
The scanning process of the selected drive is started and shows the progress.
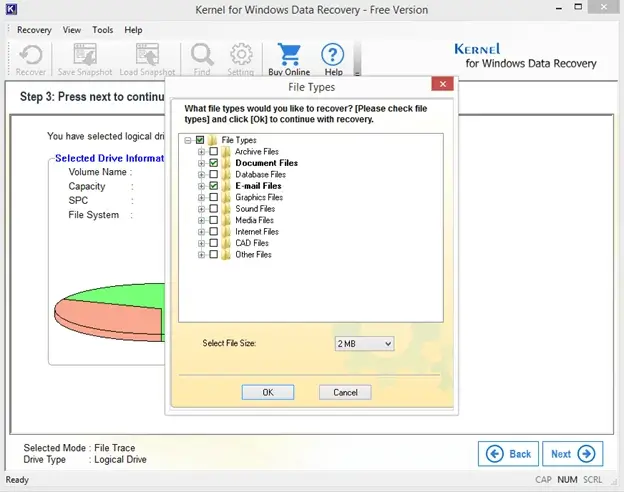
Note: In case of File Trace, you will get the option to choose File Types and File Size for the retrieval before scanning of the data (specific data scanning).
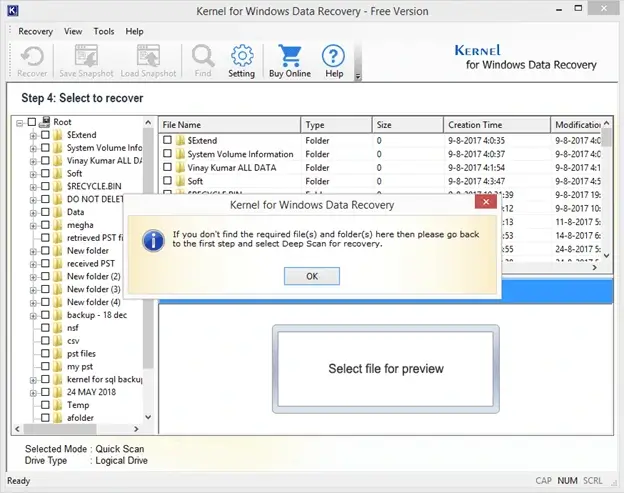
Once the scanning process is complete, a dialogue box is shown where it informs that you can choose another scanning mode if results are not satisfactory with the chosen one. Click OK.
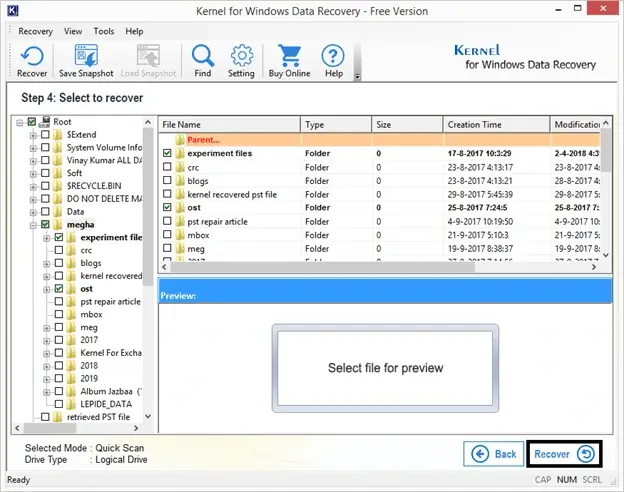
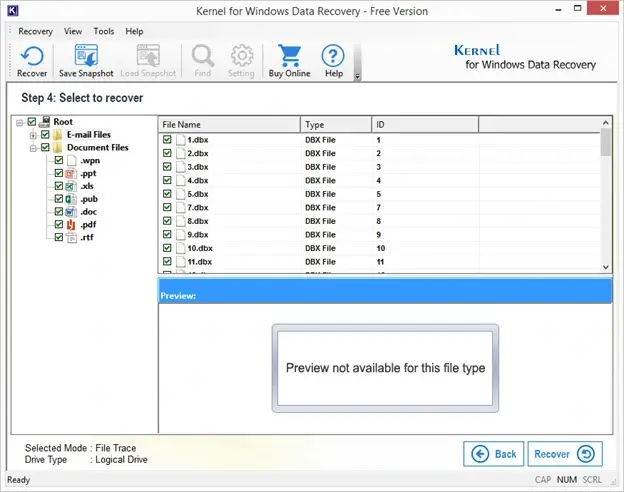
Choose the desired folders/files and then click Recover option to start the recovery process.
Note: In case of File Trace scan, you will get only the selected file types after the scan.
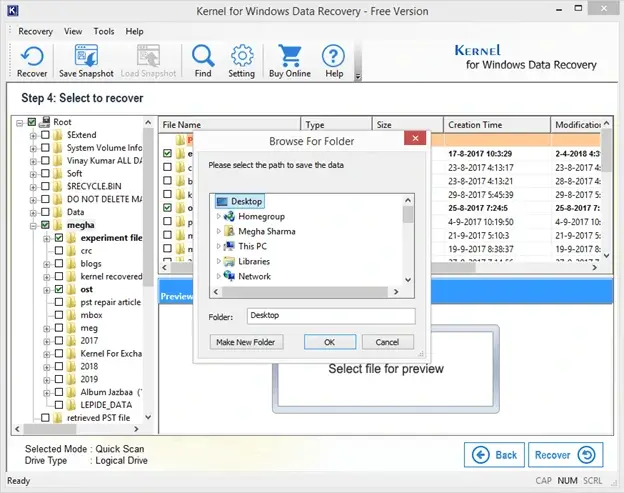
Provide the saving location for the recovered files and click OK.
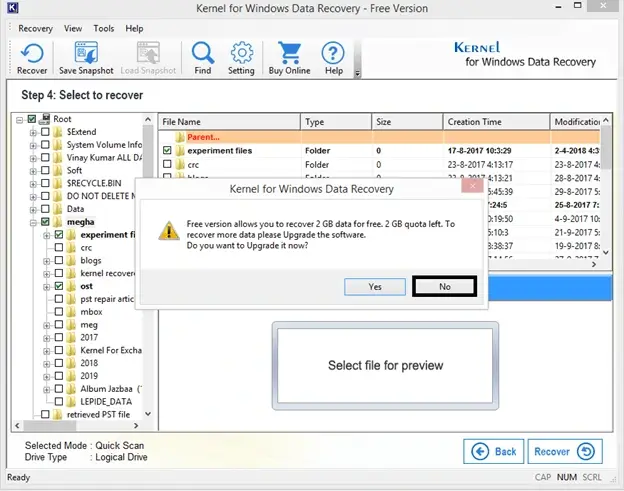
A notification message will pop up which informs that you can recover only 2GB data for free and want to upgrade the software. Click Yes to upgrade it and click No to continue.
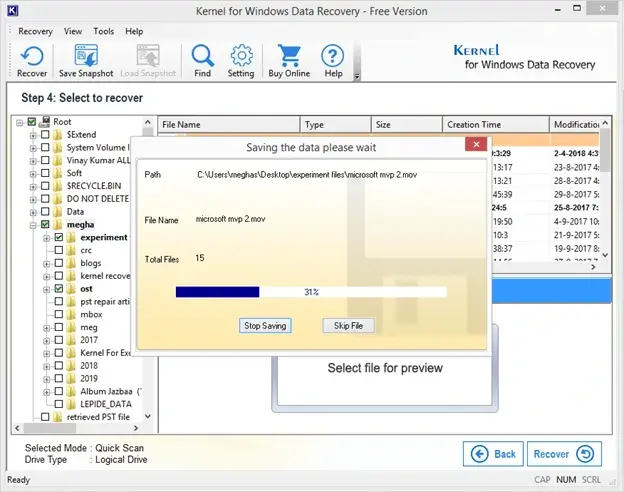
The recovery and saving process will get start, shown in progress.
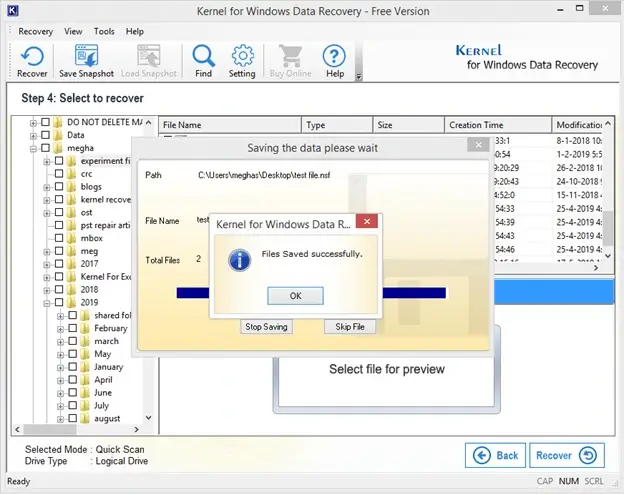
The recovery is completed within a very short time and displays a message.
Hence, we have successfully recovered lost or deleted Windows data for free with the ultimate Kernel for Windows Data Recovery – Free Version tool