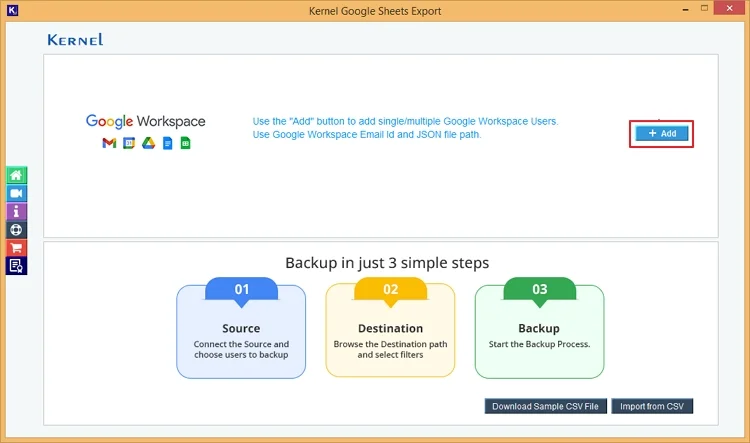
Here’s the detailed step-by-step guide to export Google Sheets to local or network attached drive using the software:
Step 1: Launch the Kernel Google Sheets Export tool and use the Add to add single or multiple Google Workspace users.
Step 2: Add the G Suite Account Login Email Id and JSON File Path to connect the account with the tool.
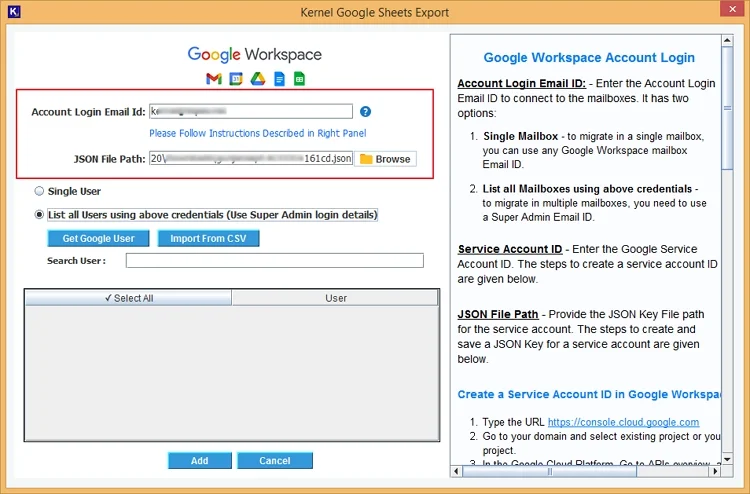
Step 3: Select Single User or List all Users using above credentials (Use Super Admin login details) to list all the users. Click Get Google User to fetch users from the respective account.
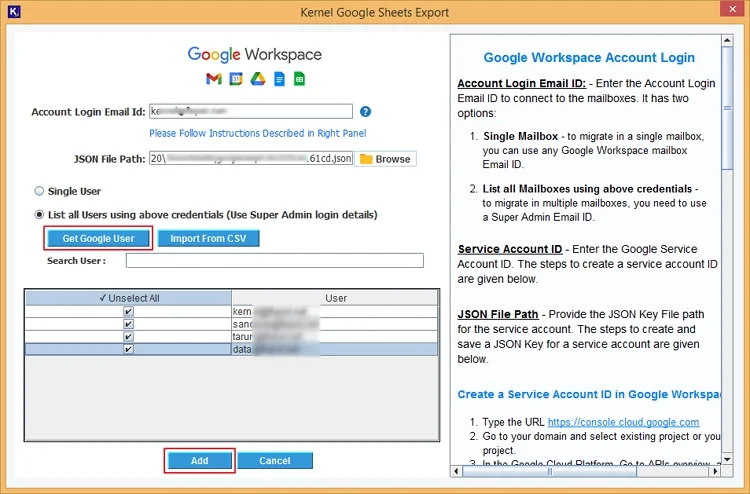
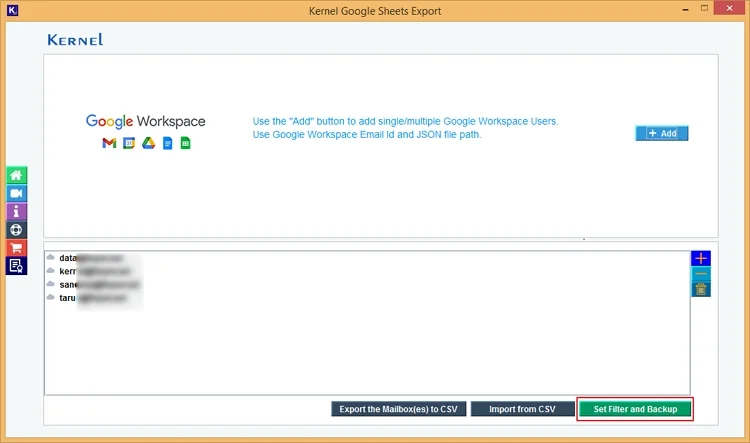
Step 4: Select the desired Google Sheet users from the listed and click Add to proceed with the export. Click Set Filter and Backup.
Note: Use Export the mailboxes to CSV file and then Import from CSV to run bulk data export. Click on (+) sign to add more users and (–) sign to remove users from the list.
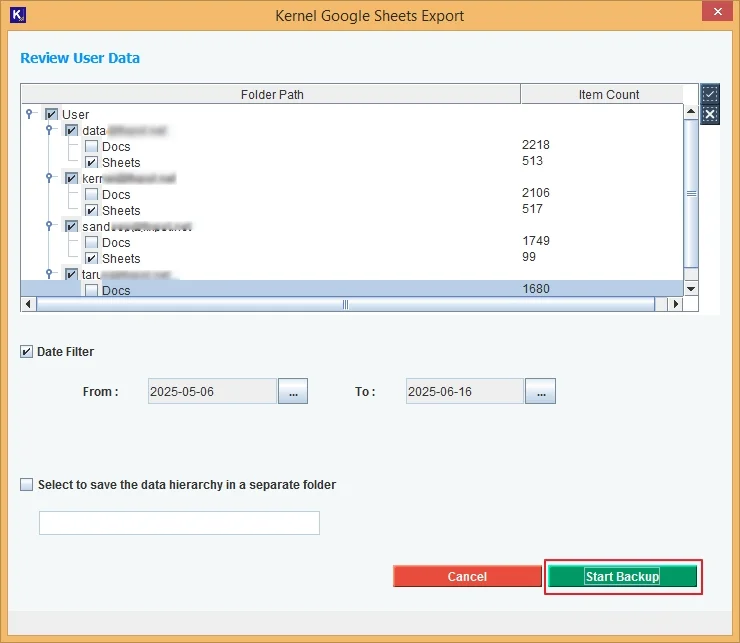
Step 5: After the tool finishes enumerating folders, Review User Data and apply date filter if required to run selective sheets export.
Step 6: Click on the checkbox “Select to save the data hierarchy to a separate folder” to move all the sheets to a separate folder with hierarchy. Click Start Backup.
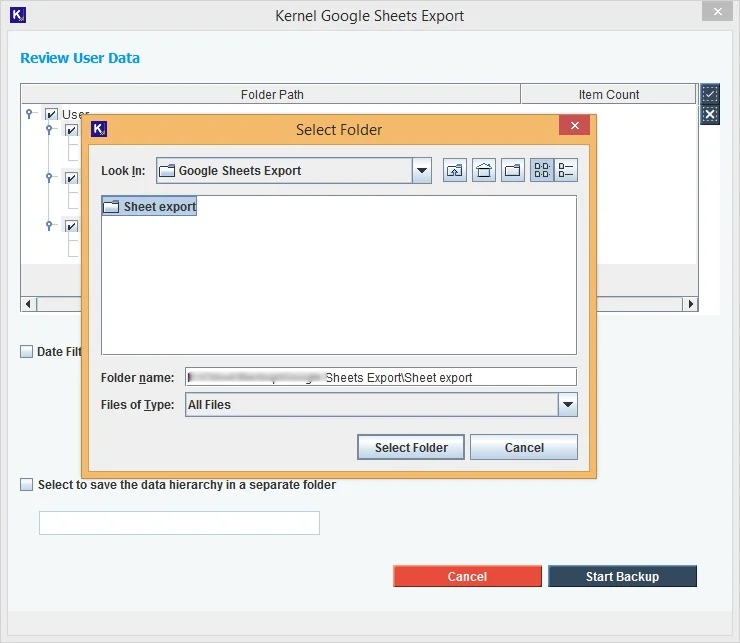
Step 7: Provide the destination from your system to save the files.
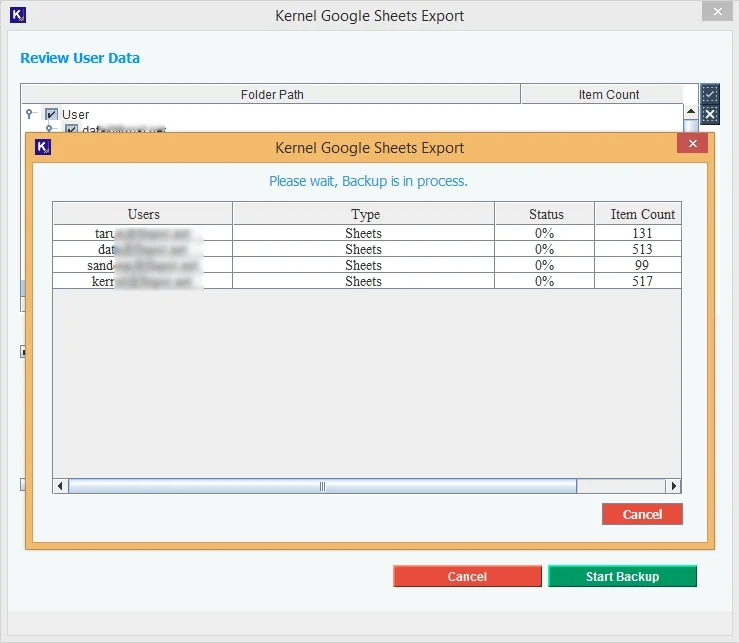
Step 8: Once the export process is started, you can track the real time progress from the screen.
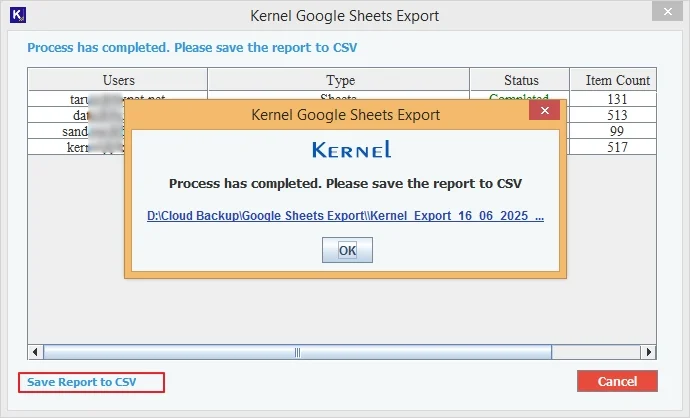
Step 9: After the completion, the tool provides a wizard with the process summary and export location. Click on the link to visit the files. Press OK to finish.
Note: Use the Save Report to CSV link to save the report to a CSV file. Click Cancel to exit.