The Express edition is the perfect solution to migrate mailboxes from Exchange (on-premises/hosted) or Office 365 to another Exchange (on-premises/hosted) or Office 365. It follows a simple procedure for migration and provides advanced filtering options. Most importantly, the software does not require MS Outlook to execute the migration.
Following migrations can be done using the Express edition
- Exchange Server (hosted & on-premises) to Exchange server (on-premises) migration
- Exchange server (hosted & on-premises) to Office 365 migration.
- Office 365 to Exchange Server (hosted & on-premises) migration.
- Office 365 to Office 365 migration.
How to perform mailbox migration using Express Edition
The Express Edition provides two modes for the migration of mailboxes.
- Migrate Single Mailbox / Office 365 Group
- Migrate multiple mailboxes (using an account with Administrative credentials)
Migrate Single / Archive mailbox
The Express Edition helps you migrate a single mailbox/archive mailbox from a source server (Exchange Server / Office 365) to a destination server (Exchange Server/ Office 365). Just use the following steps:
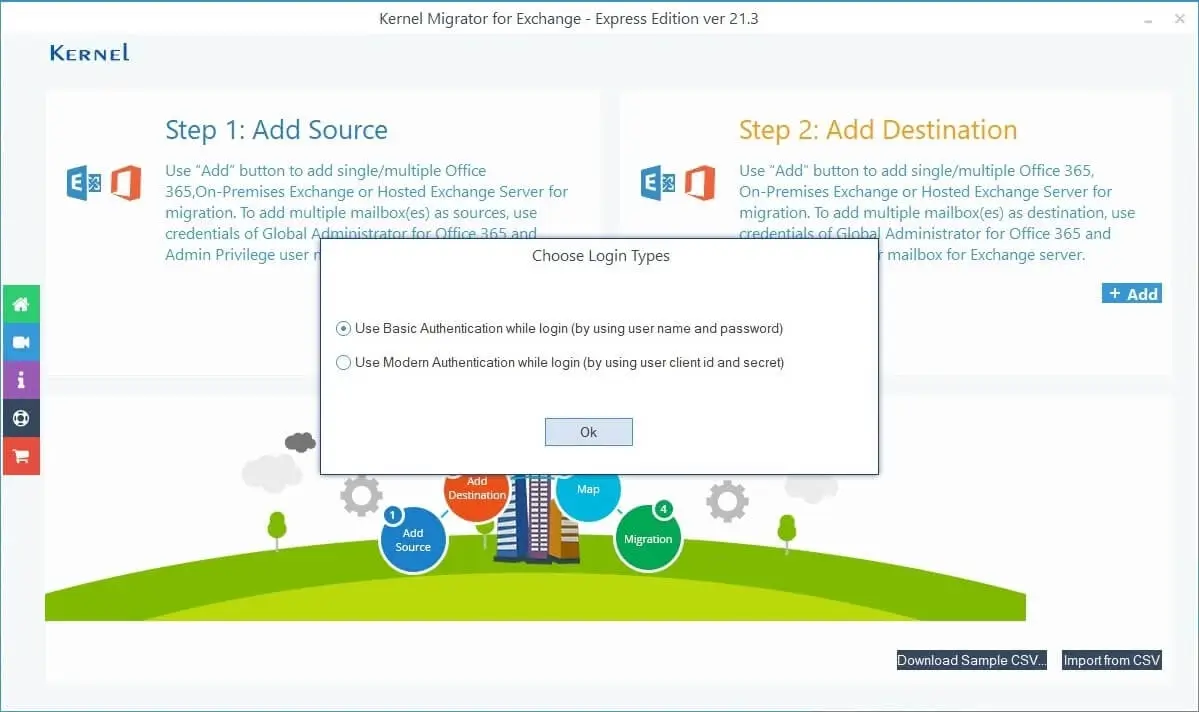
Step 1: Launch the tool. The Home screen of the application appears. To add the source (Exchange Server / Office 365), click the Add Source button. The Login method types appear. Select one and click OK.
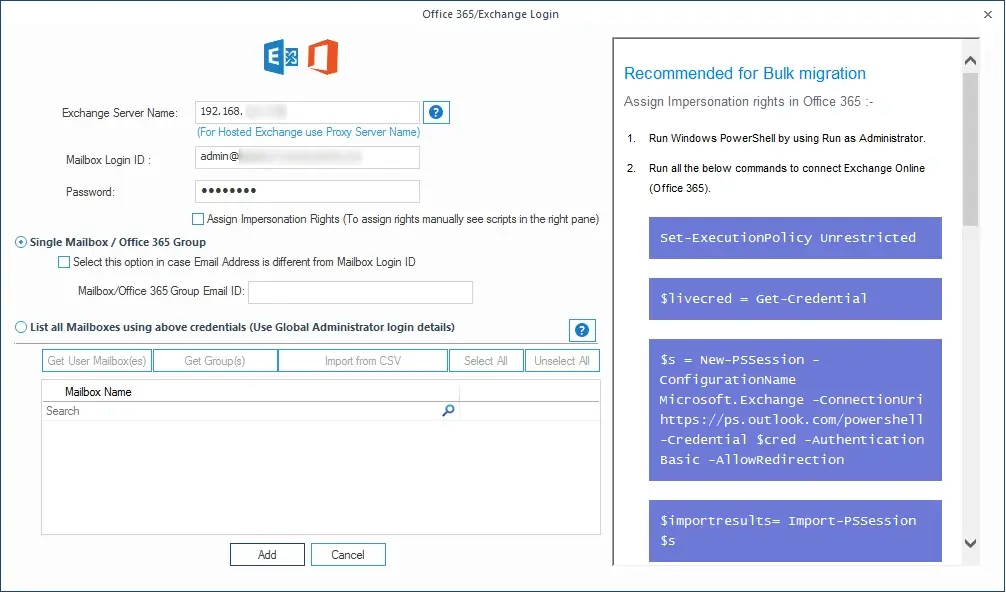
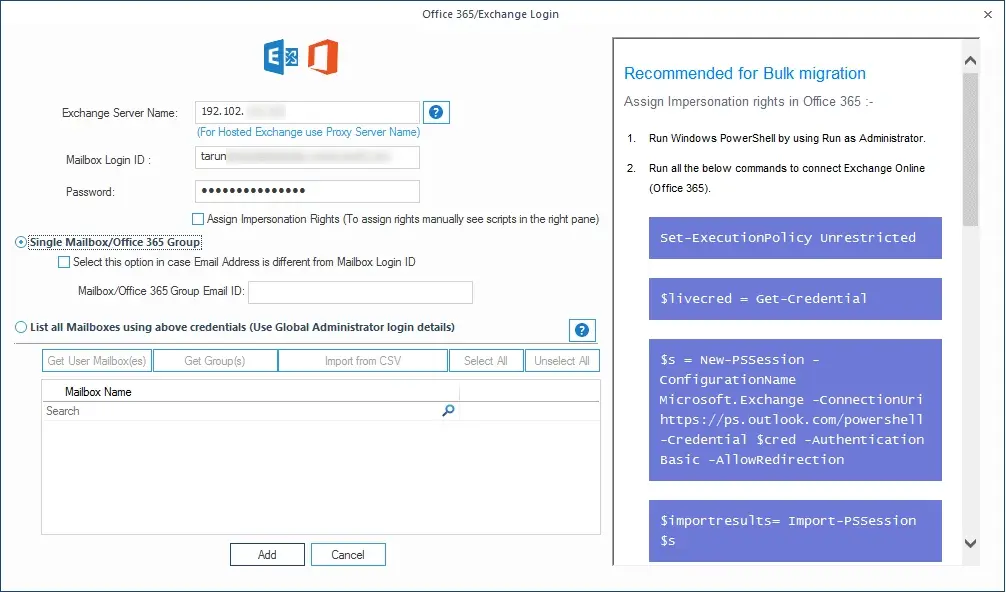
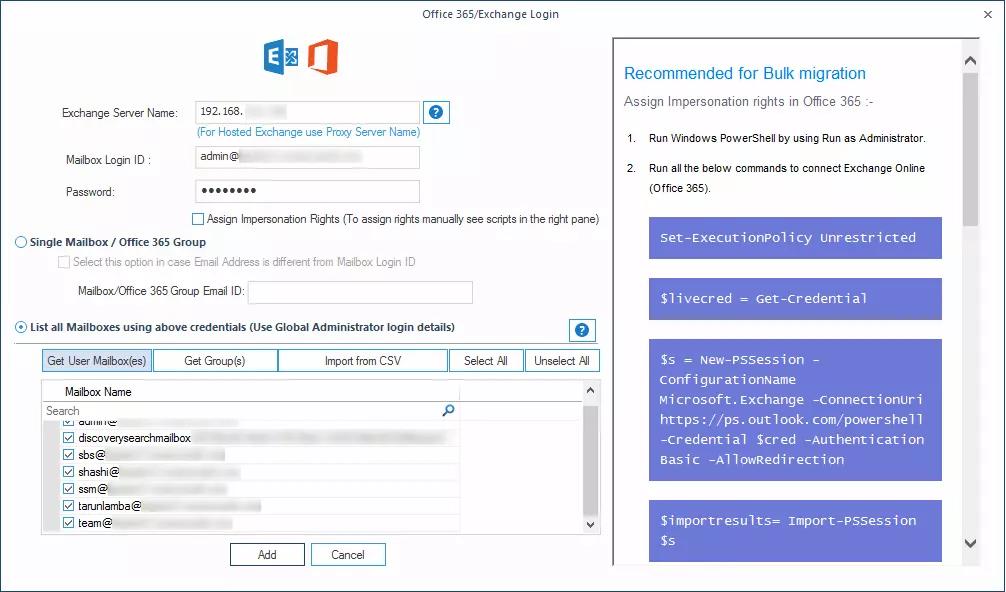
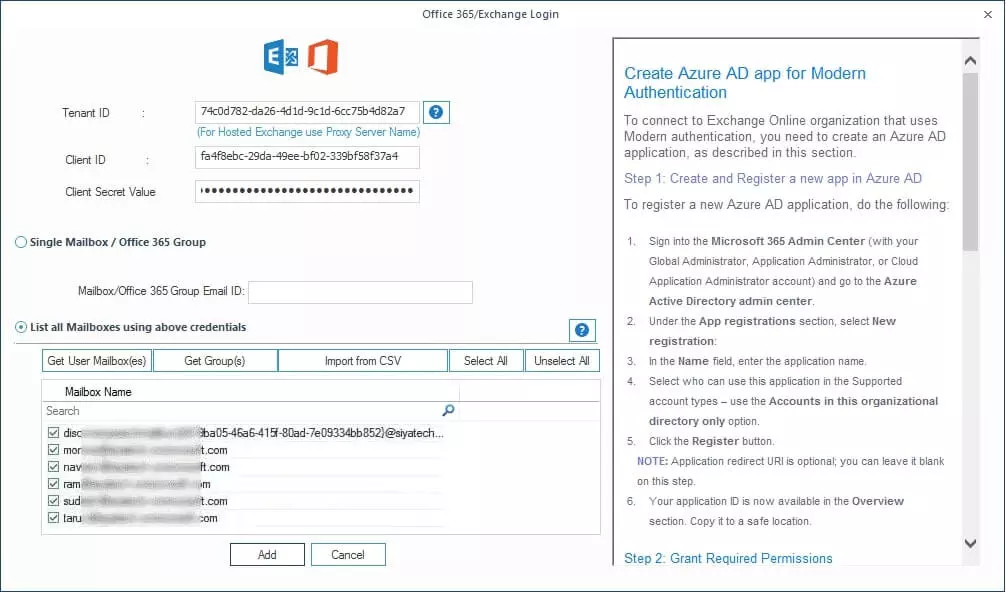
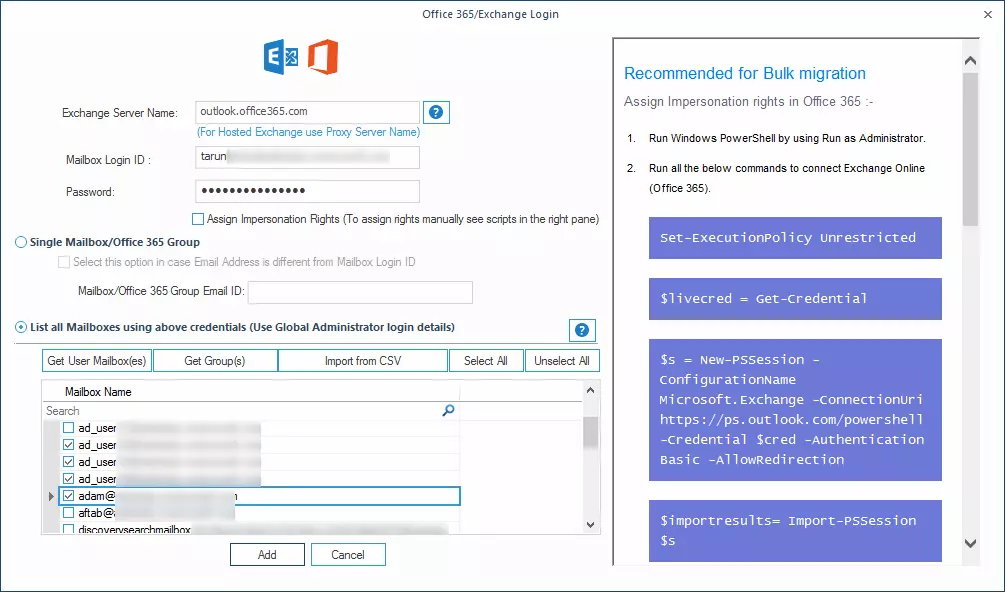
Step 2: In the Office 365/Exchange Login page, provide the source (Exchange Server/Office 365) credentials as:
| To add Exchange Server (on-premises or hosted) as source, enter: |
|
| To add Office 365 as source, enter: |
Using Basic Authentication
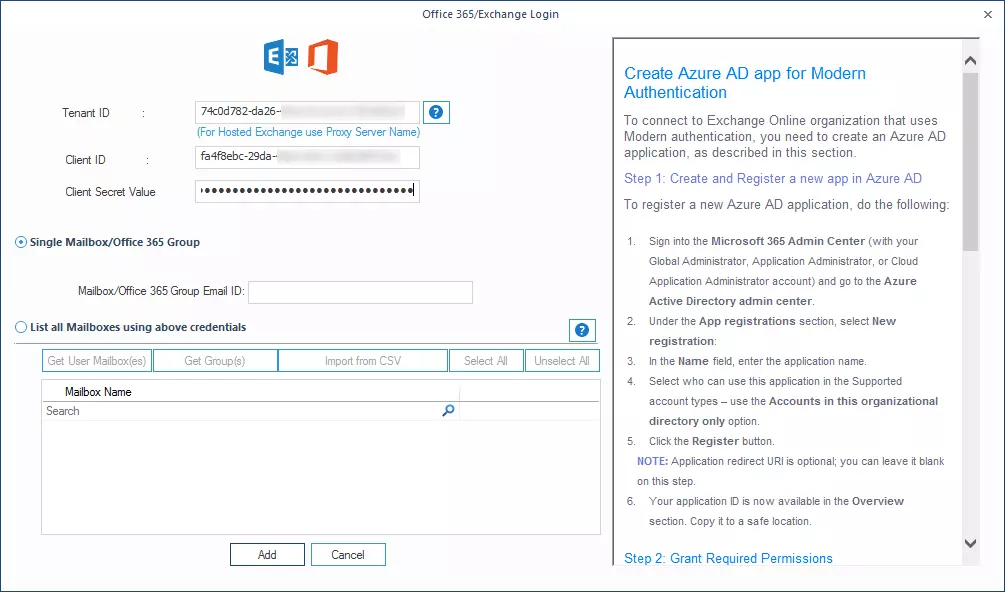
Using Modern Authentication
|
Step 3: After adding the source, click Add in the Add destination box to add Exchange Server/Office 365 as Destination. Then, choose the login type.
Step 4: In the Office 365/Exchange Login page, provide the destination (Exchange Server/Office 365) credentials as:
| To add Exchange Server (on-premises or hosted) as destination |
|
| To add Office 365 as destination |
Using Basic Authentication
Using Modern Authentication
|
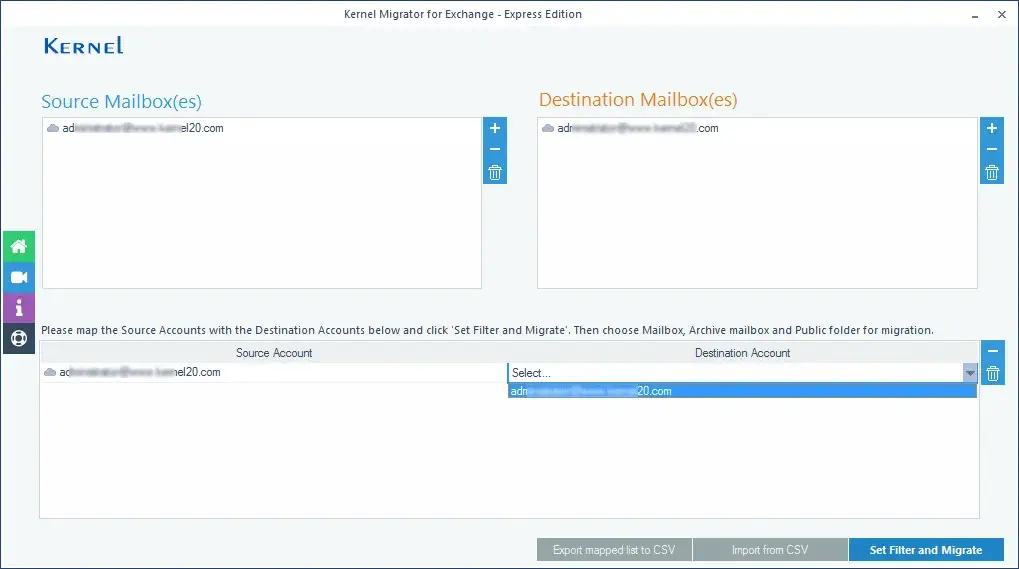
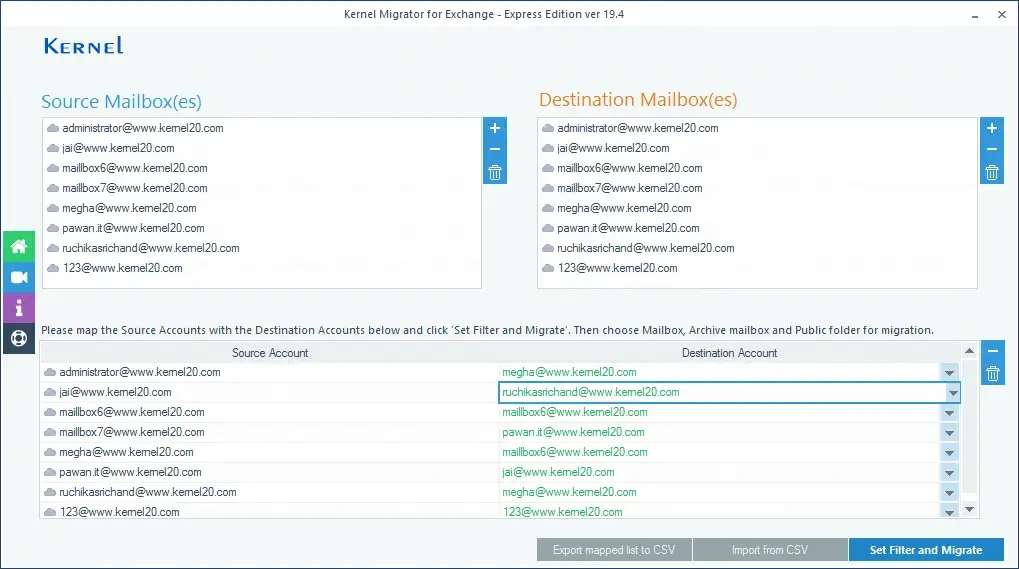
Step 5: Now the source and destination mailboxes are successfully added. Under Mapping of Source and Destination, select the required destination mailbox (from the drop-down menu) against each source mailbox.
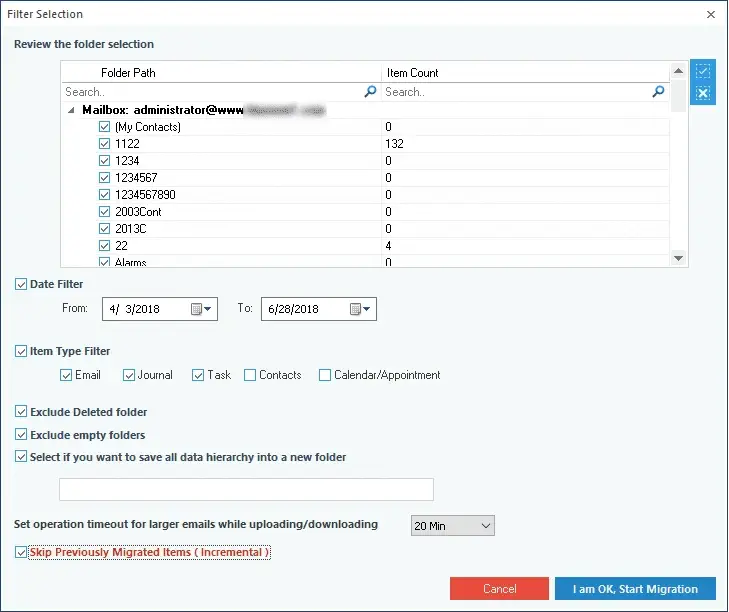
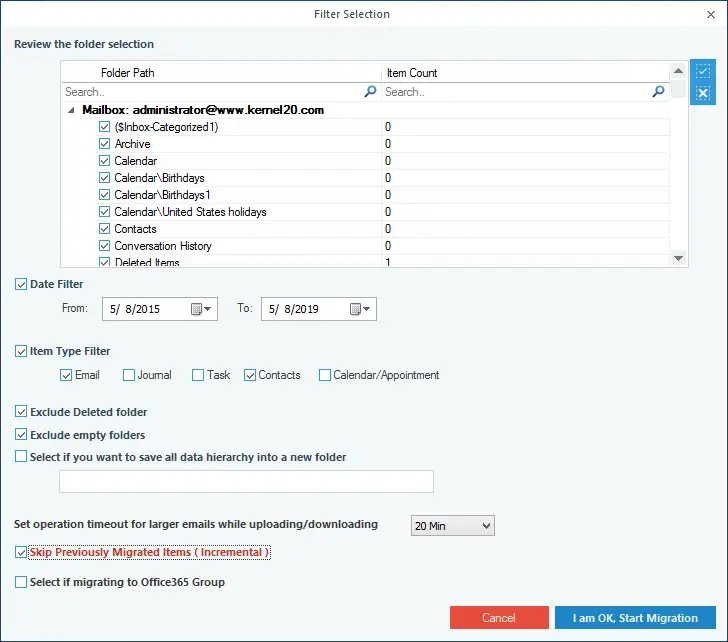
Step 6: In the Filter Selection window, you can provide the required filtering:
- Review the folder selection - To select the folders for migration.
- Date Filter - Enter the From date and To dates.
- Item Type Filter - Select the item types for migration.
- Exclude Deleted folder - Select if you want to exclude Deleted Items folder from migration
- Exclude empty folders - Select if you want to exclude empty folders from the migration.
- Select if you want to save... - Provide a folder name (to save the data with hierarchy inside a mailbox folder)
- Set operation timeout... - Select an upper time limit for migration (the migration will be rejected if it exceeds this time limit).
- Skip Previously Migrated Items - Skips previously migrated items (duplicate items) from the migration.
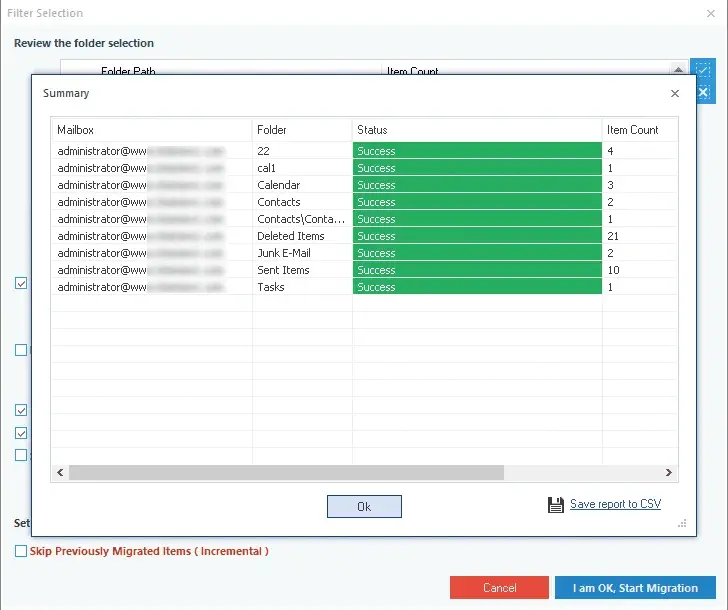
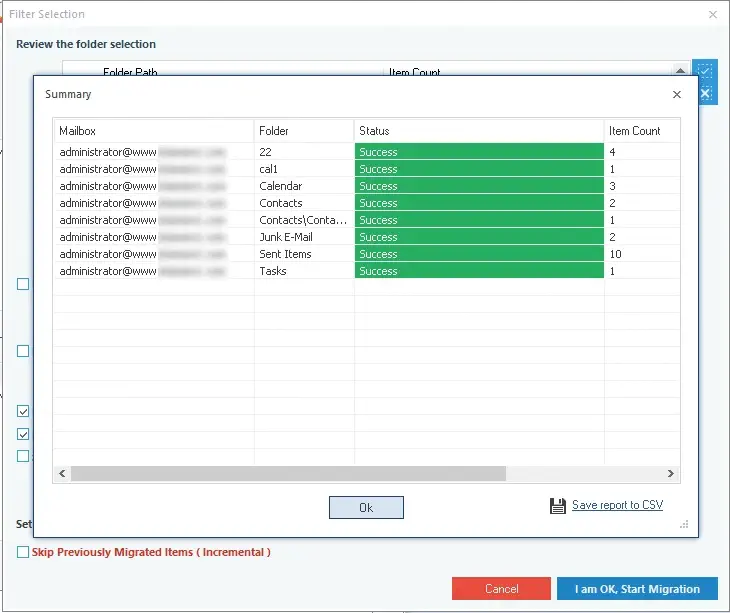
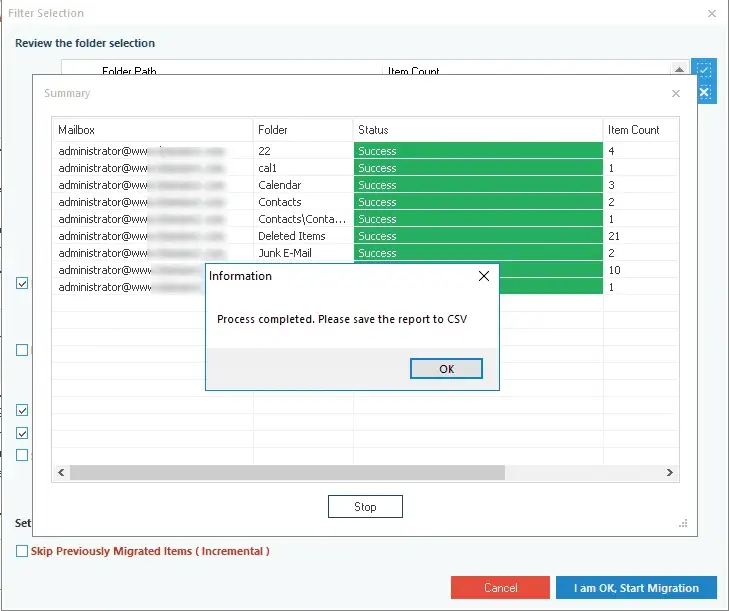
In the end, click I am OK, Start Migration.
Step 7: After the completion of the migration, the software displays a confirmation message. Click OK.
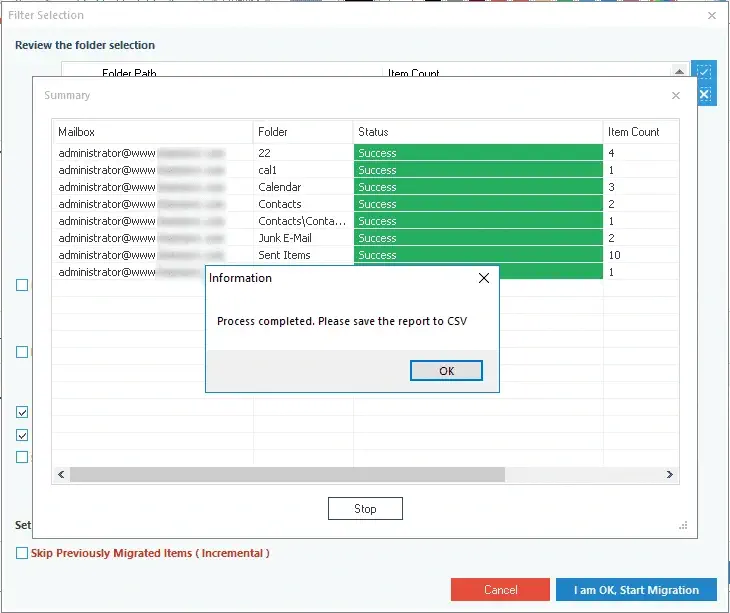
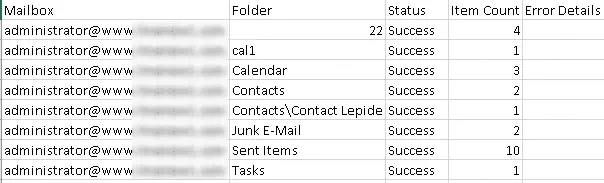
Step 8: Now, click the Save report to CSV to save the migration report.
Migrate multiple mailboxes
Migration of multiple Exchange server/Office 365 mailboxes to another Exchange Server or Office 365 is simple as the single mailbox migration. You just need an account with administrative privileges. Just follow the given steps.
Step 1: Run the application and click Add in the Add Source selection. Then choose the login method.
Step 2: In the Office 365/Exchange Login page, input the Source Office 365 or Exchange Server account. The source account must have the administrative privileges. Then select the second option of List all mailboxes using above credentials and click Get User Mailbox (es) to recover all associated mailboxes. The admin can also add Groups to migrate their data. Just click on Get Group(s) option.
After selecting the desired mailboxes, click Add.
Step 3: The mailboxes are added as the source. Now click Add in the Add Destination section. Select the required option and click OK.
Step 4: Enter the credentials of destination Office 365/Exchange Server account. The account must have administrative privileges. Then select the second option of List all mailboxes using above credentials and click the Get User Mailbox(es). Groups are also available for migration and you can connect with them using Get Group(s) option.
Step 5: After adding source and destination, map the source mailboxes to the destination mailboxes from the drop down in the Mapping of Source and Destination section. Finally, click Set Filter and Migrate.
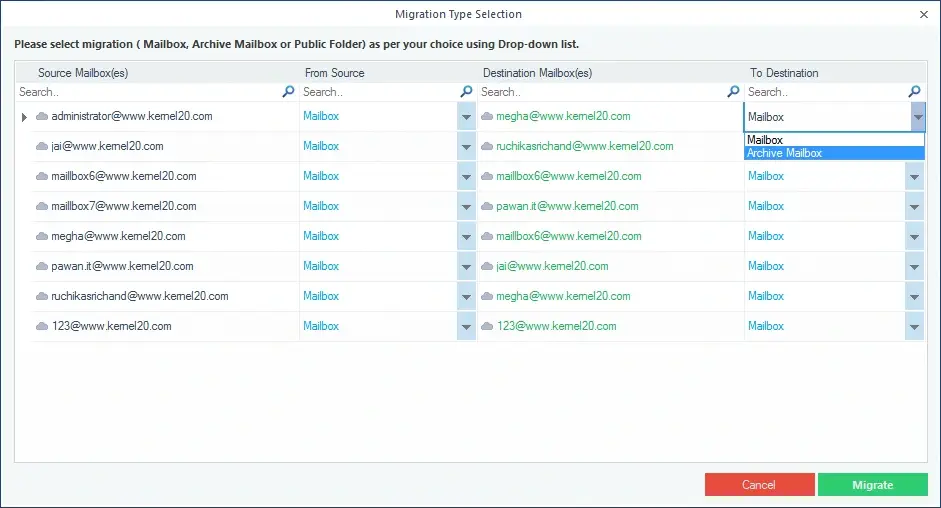
Step 6: Next step is to choose among the mailbox, archive mailbox, and public folder. After selecting the desired option, click Migrate.
Step 7: In the Filter Selection window, you can provide the required filtering:
- Review the folder selection – To select the folders for migration.
- Date Filter – Enter the From date and To dates.
- Item Type Filter – Select the item types for migration.
- Exclude Deleted folder – Select if you want to exclude Deleted item folder from migration
- Exclude empty folders – Select if you want to exclude empty folders from the migration.
- Select if you want to save... –Provide a folder name (to save the data with hierarchy inside a mailbox folder)
- Set operation timeout... – Select an upper time limit for migration (the migration will be rejected if it exceeds this time limit).
- Skip Previously Migrated Items (Incremental) – Skips previously migrated items (duplicate items) from the migration.
In the end, click I am OK, Start Migration.
Step 8: After the completion of the migration, the software displays a confirmation message. Click OK.
Step 9: Click Save report to CSV to save the complete migration report.