Here is the detailed step-by-step procedure to split single/multiple Excel files based on different parameters, such as by rows, sheets and size using this excellent Excel Split tool:
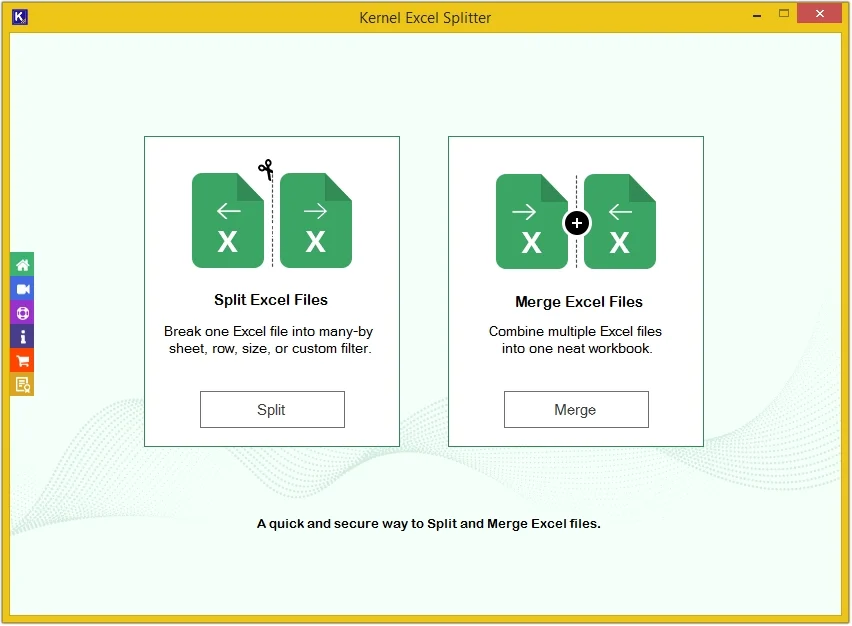
Step 1: The home screen of the Kernel Excel Splitter Tool.
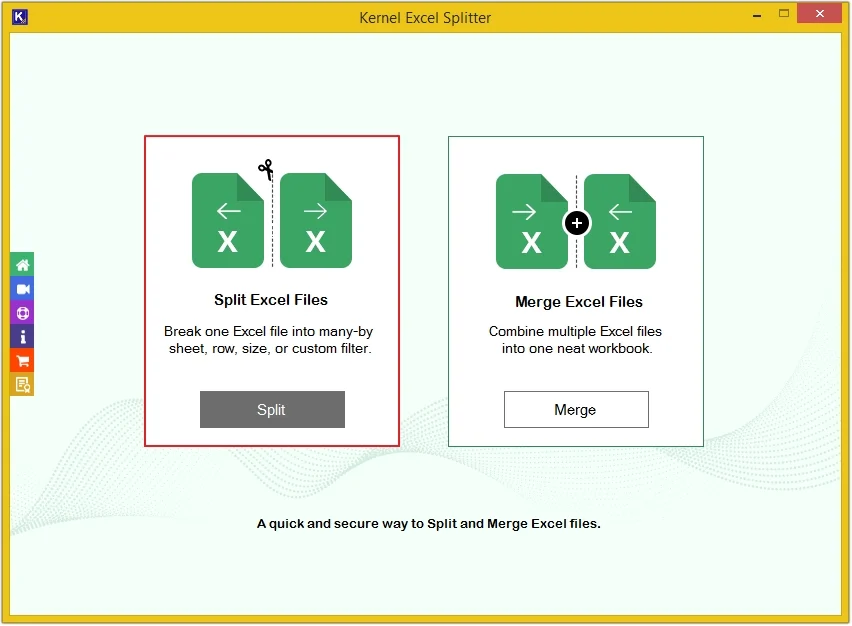
Step 2: Click on the Split option under Split Excel Files.
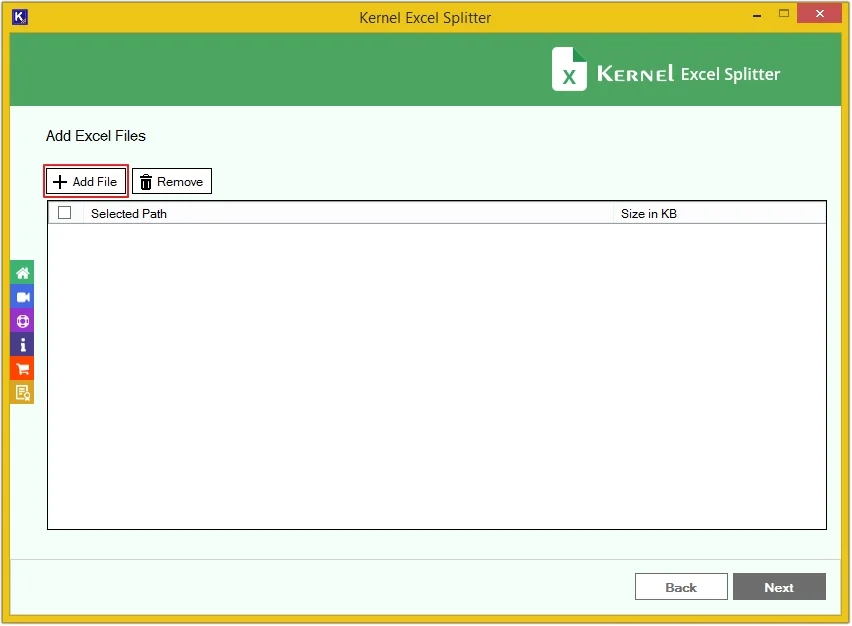
Step 3: Click Add File to upload Excel file(s).
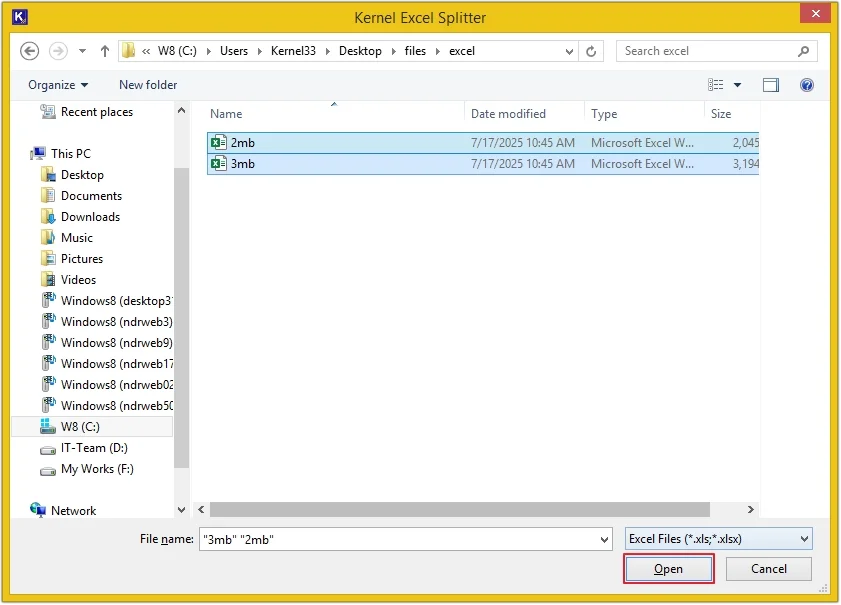
Step 4: Select Excel files and click Open.
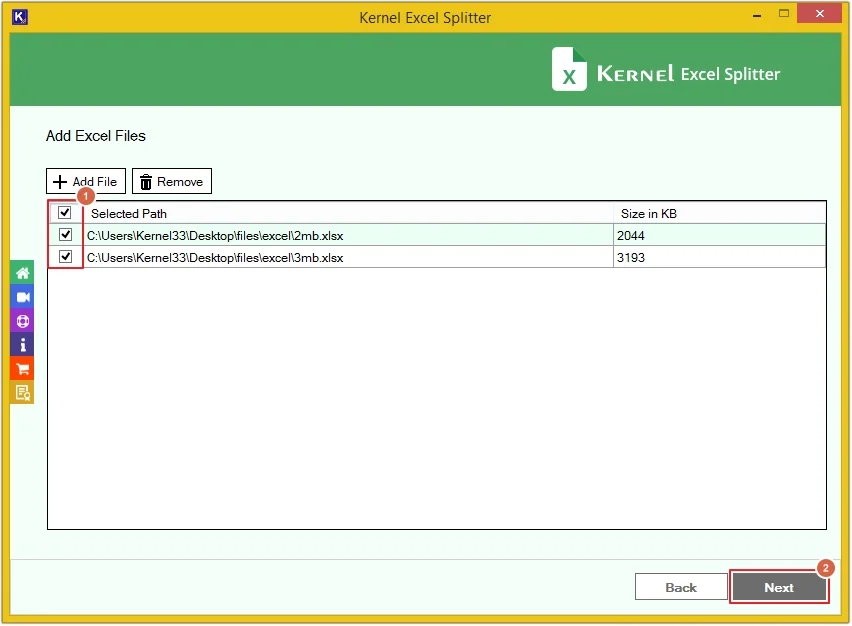
Step 5: Checkmark Excel files and click Next.
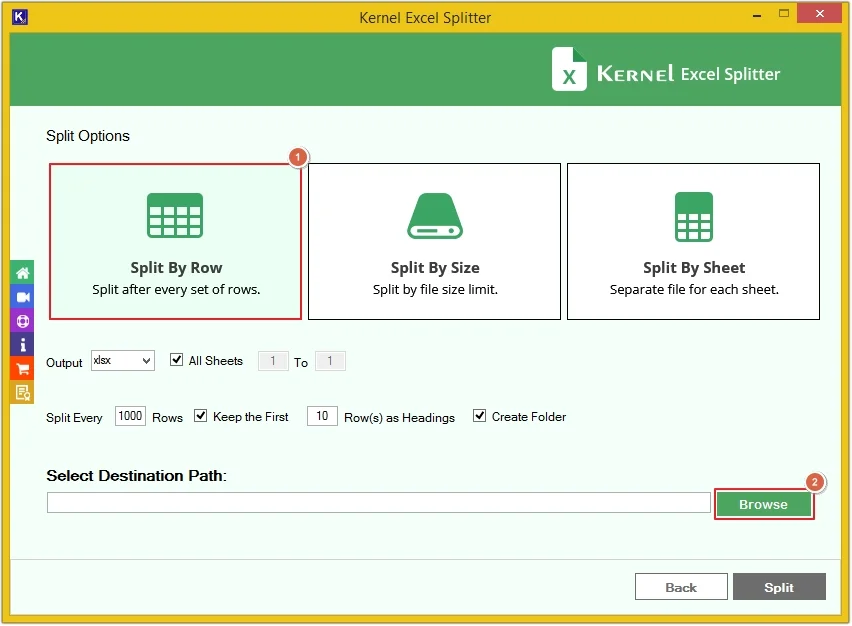
Select Split Options
Here you’ll get three options to split Excel files. Select any as per requirements:
Split Excel files by Rows
With this option, your Excel sheets will get split after every set of a selected number of rows.
Step 6: Select Split By Row and apply filters, then click Browse to provide a saving path.
- Output file type: Select the desired format to save the file, such as XLSX, XLS, CSV, XML, ODS.
- All Sheets: Select from which sheet to which sheet you want to split your Excel files.
- Split Every [X] Rows: Choose after how many rows you want to split your Excel files.
- Keep the first [X] row(s) as headings in each output file: Set the first [X] rows as headings according to requirements.
- Create Folder: Uncheck this option to save the file by its original name, and select this option to save the file with the software name.
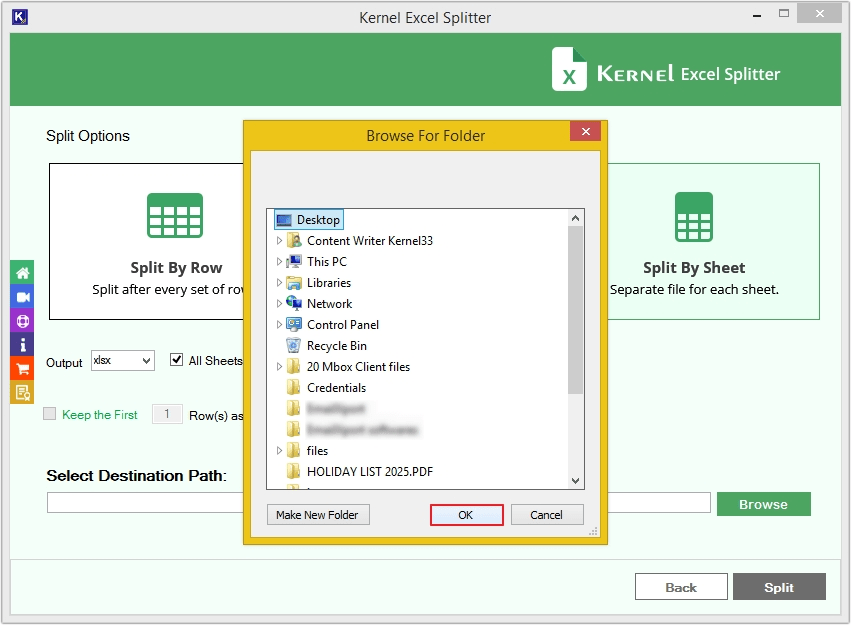
Step 7: Provide saving location or make a new folder, then click OK.
Step 8: Click on the Split button.
Step 9: The tool will start splitting Excel files.

Step 10: Upon completion, you’ll receive the Split process completed successfully message, click OK.

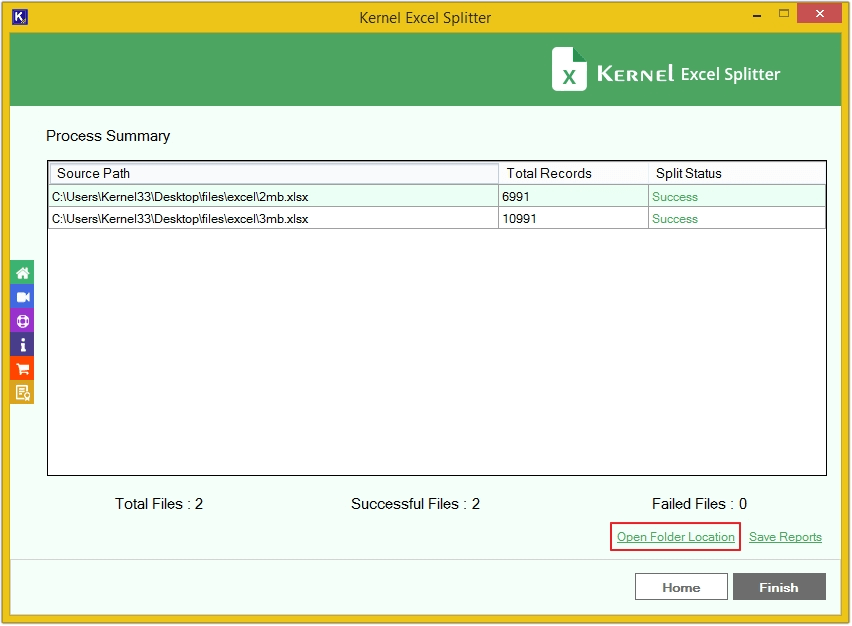
Step 11: Click Open Folder Location to access saved files directly.
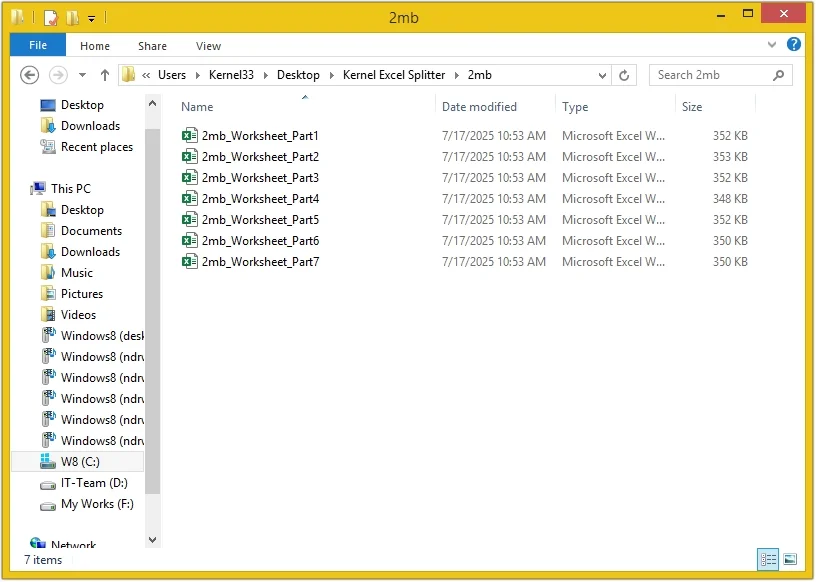
Step 12: Click on any sheet to view its content.
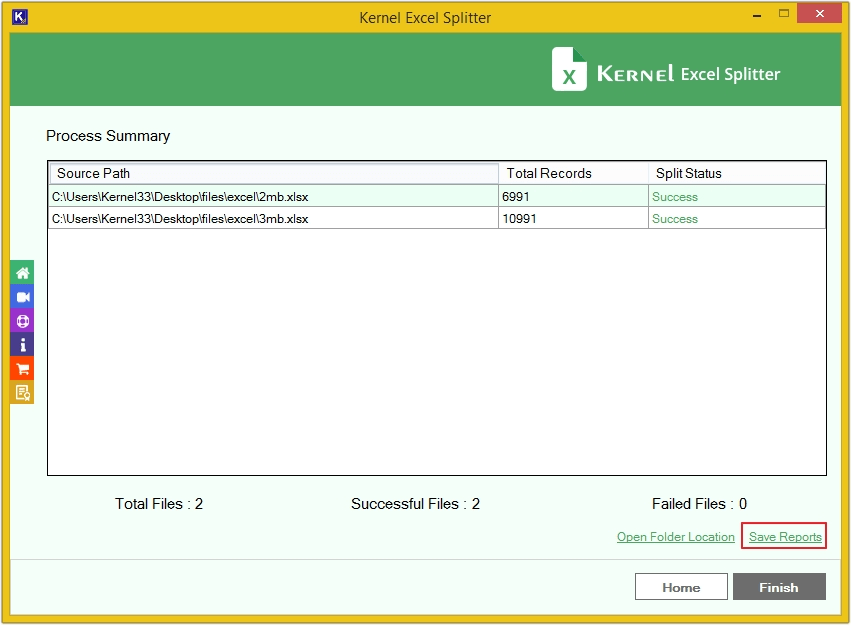
Step 13: To save the split summary in a CSV file, click the Save Reports option.
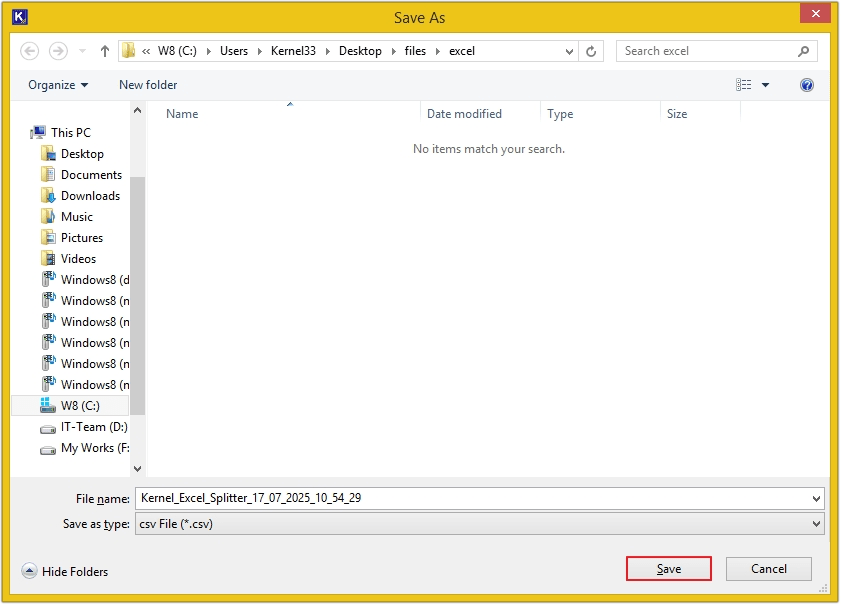
Step 14: Provide the location and click Save.
Split Excel files by Size
With this option, your Excel sheets will get split based on different file sizes.
Step 6: Select Split By Size and apply filters, then click Browse to provide a saving path.
- Split Excel after File Size: Define the file size to split large Excel files based on KB, MB, and GB.
- Create Folder: Uncheck this option to save Excel sheets by original name, and select this option to save Excel sheets with the software name.
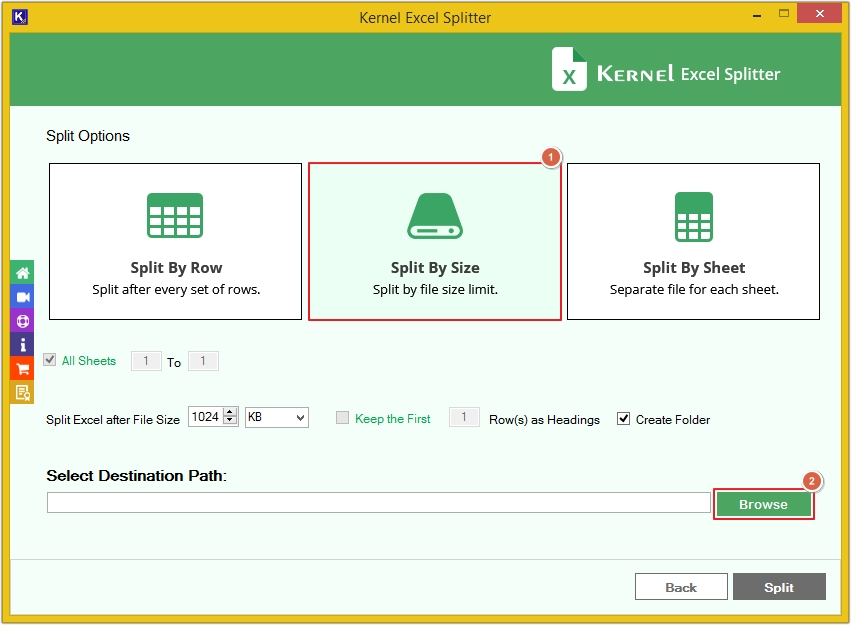
Step 7: Choose saving location or make new folder, then click OK.
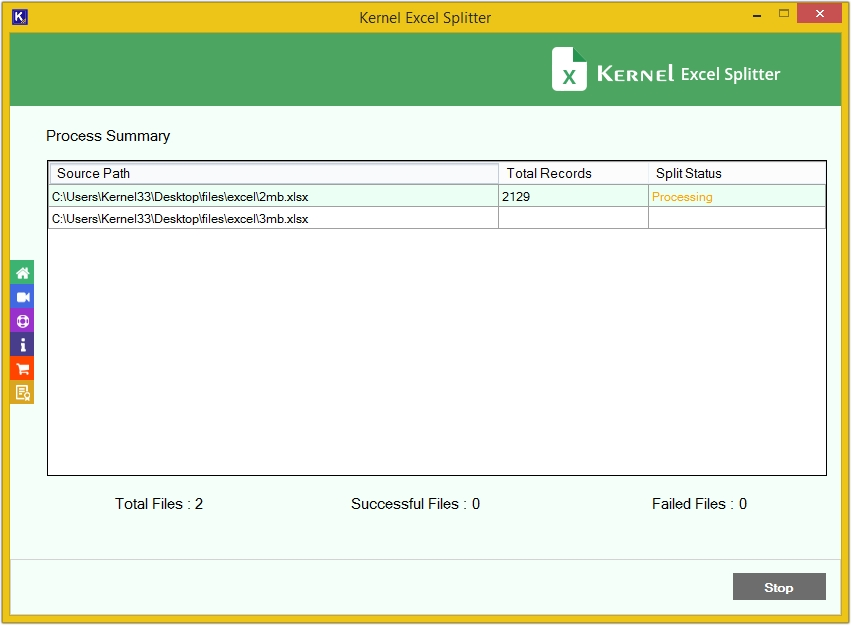
Step 8: Click Split.
Step 9: The tool will begin the split process.
Step 10: You’ll receive a success message. Click OK.
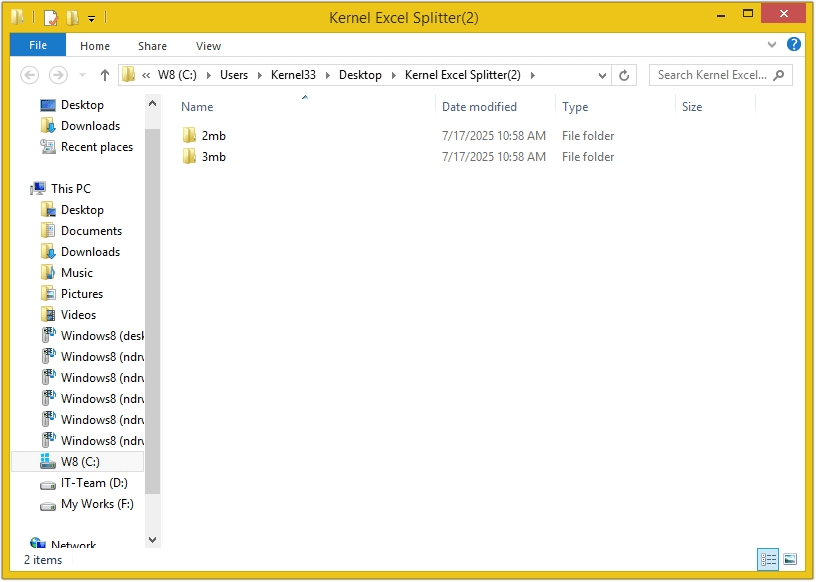
Step 11: Click on Open File Location to check saved files.
Step 12: View files content by clicking on it.
Step 13: Click Save Reports to keep the split summary in a CSV file.
Step 14: Define location, then click Save.
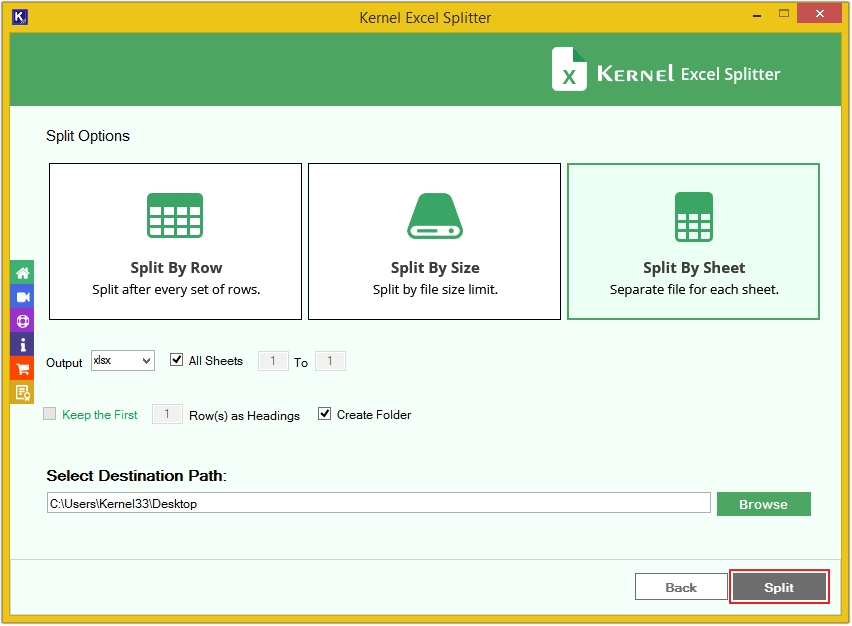
Split Excel files by Sheets
With this option, your Excel sheets will get split by sheets.
Step 6: Select Click on Split By Sheets and apply the required filters, then click Browse.
- Output file type: Select the required output format to save the file, such as XLSX, XLS, XML, CSV, or ODS.
- All Sheets: Choose from which Excel sheet to which Excel sheet you want to split your files.
- Create Folder: Uncheck this option to save the Excel file by its original name and choose this option to save the Excel file with the software name.
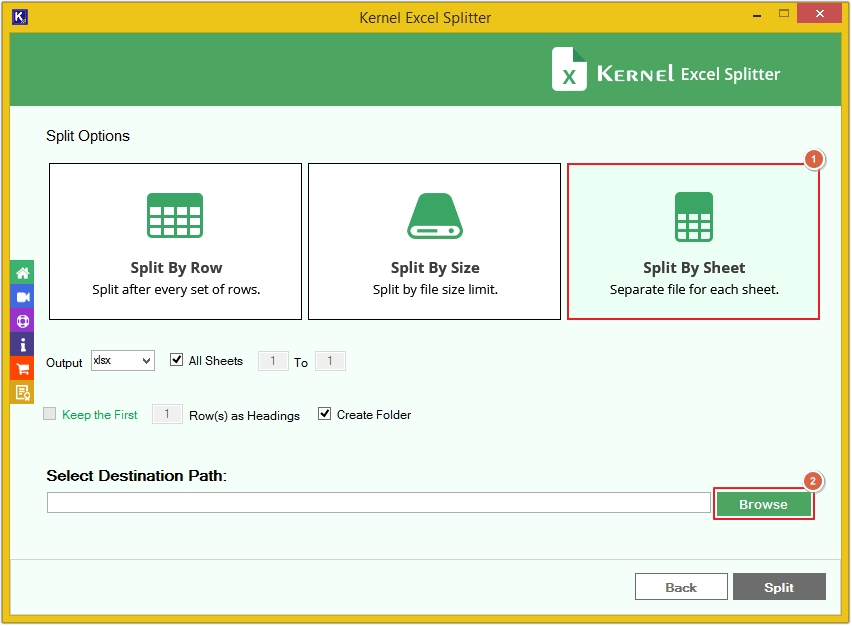
Step 7: Define a saving path or make a new folder, then click OK.
Step 8: Click on the Split option.
Step 9: The software will begin splitting Excel sheets.
Step 10: Once the process is completed, click OK.
Step 11: Click on the Open Folder Location to directly navigate to the saving location of Excel sheets.
Step 12: Click any sheet to get a preview.
Step 13: Click on Save Reports to keep the summary in CSV format.
Step 14: Provide the location and click Save.