The Kernel Document Converter helps to convert documents to your desired formats and extract email addresses from documents as well. Go through the detailed steps below:
Convert Documents
Step 1: Download and install the Kernel Document Converter on your system. Once done, launch it.
Step 2: Tap on the Add File icon, select the file type you want to convert, then click Browse.
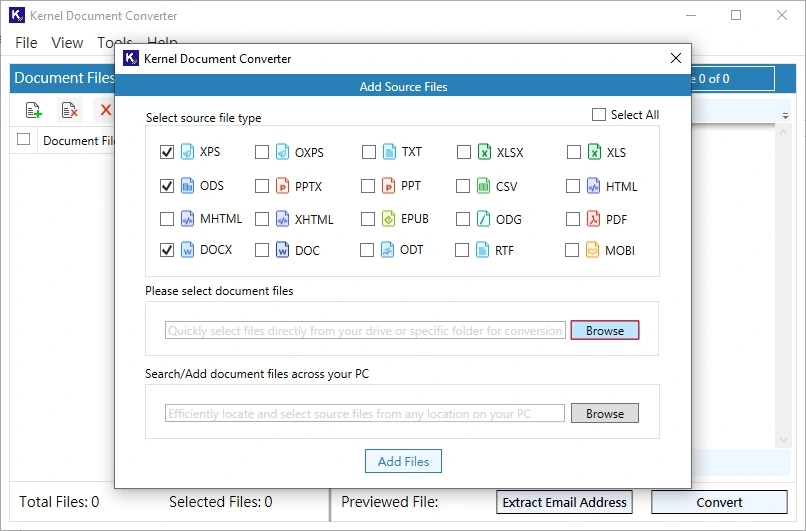
Note: To add documents from a specific folder, tap on Browse under Search / Add document file across your PC.
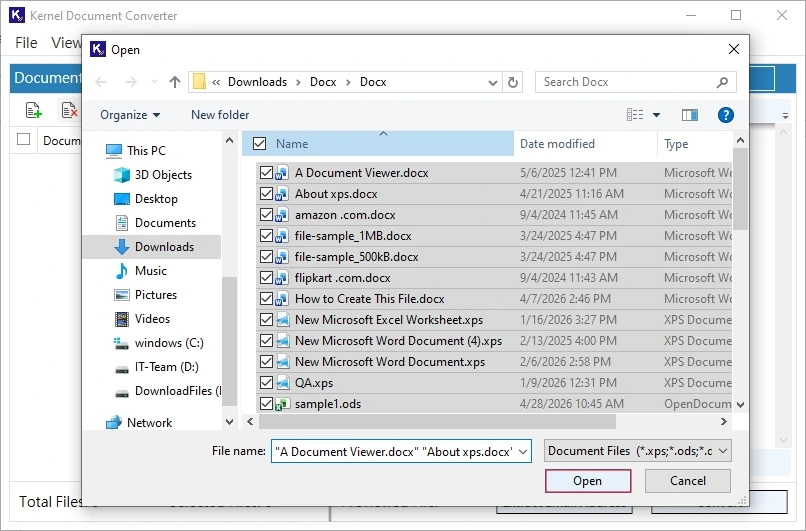
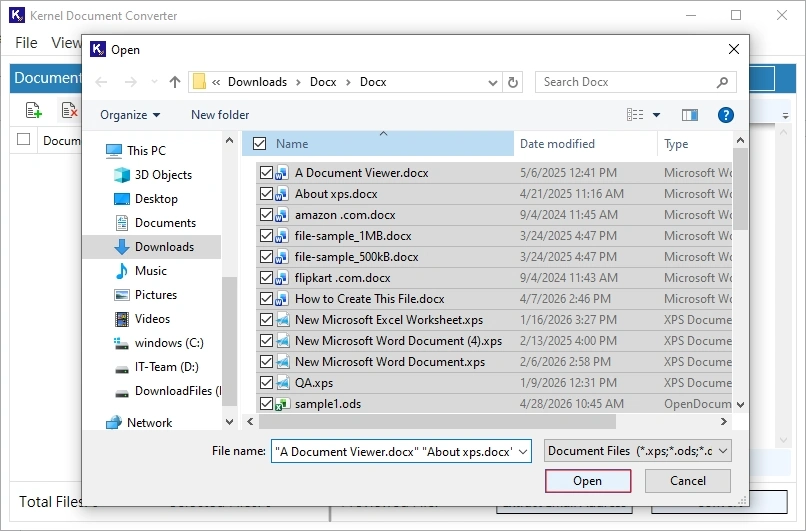
Step 3: Navigate to where your files are saved, select them, and click Open.
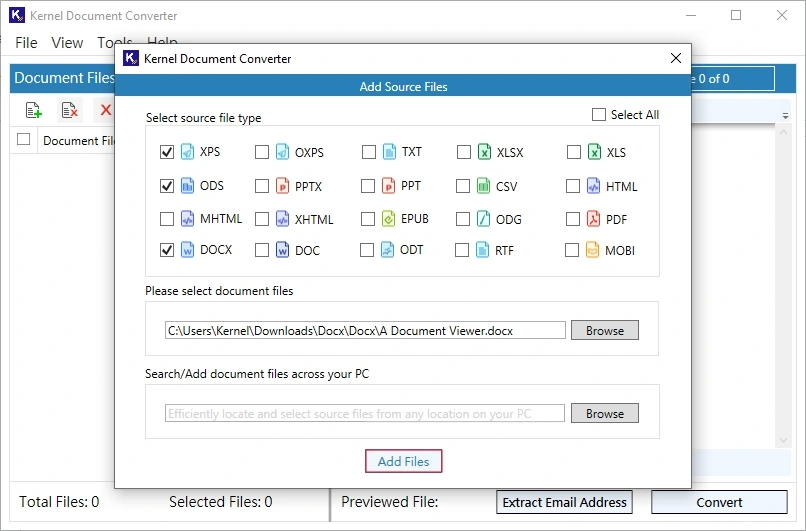
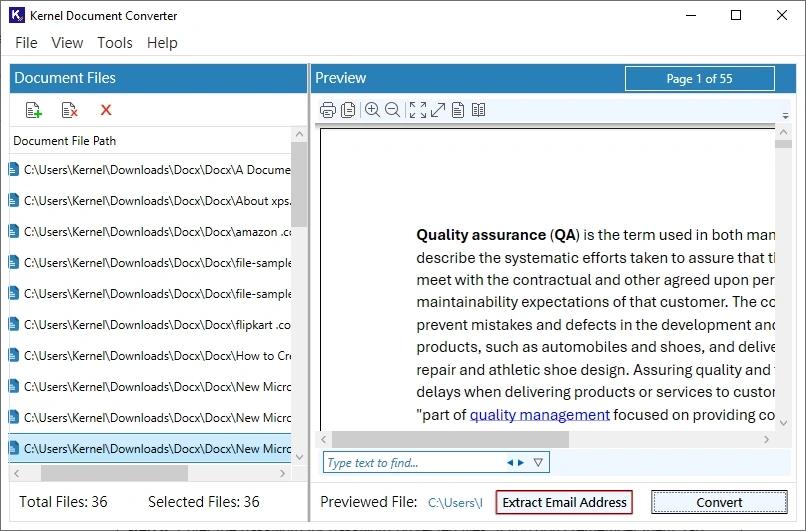
Step 4: Once required files are added, tap on Add Files. All select files will be listed.
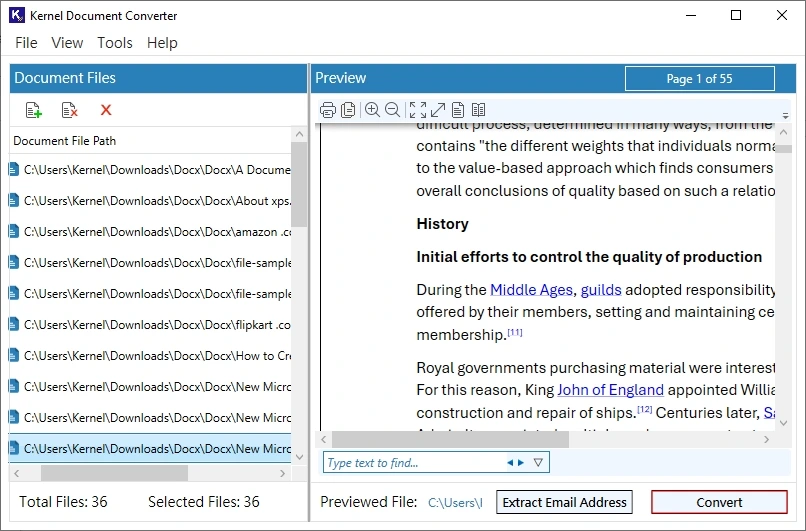
Step 5: Now, double-click on any file or select file, then tap View to preview the content. Once previewed, click Convert.
- Print the document file directly from the tool.
- You can use the Theme Setting option from the View tab.
- Use the Zoom control button to preview the document data accordingly.
- Input specific text in the ‘Type text to find’ box to search within the file.
- Select the document data and copy it via the given button.
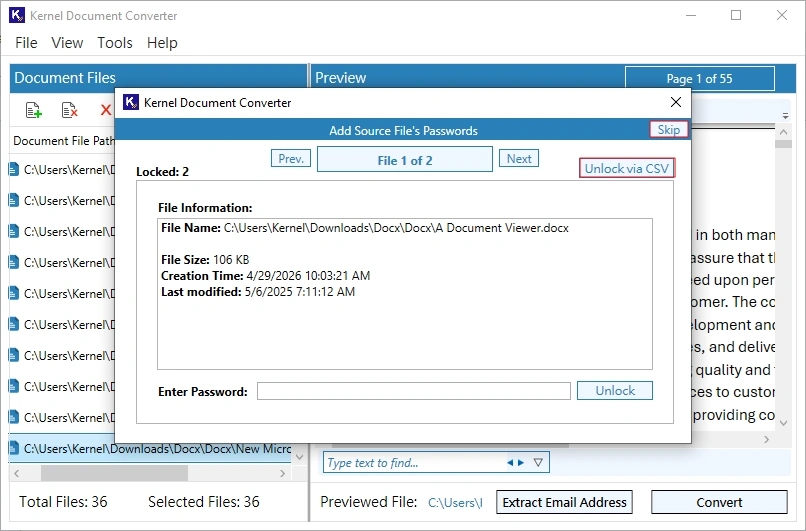
Step 6: Enter the password for password-protected files. If you don’t remember them, tap Skip then confirm to Yes.
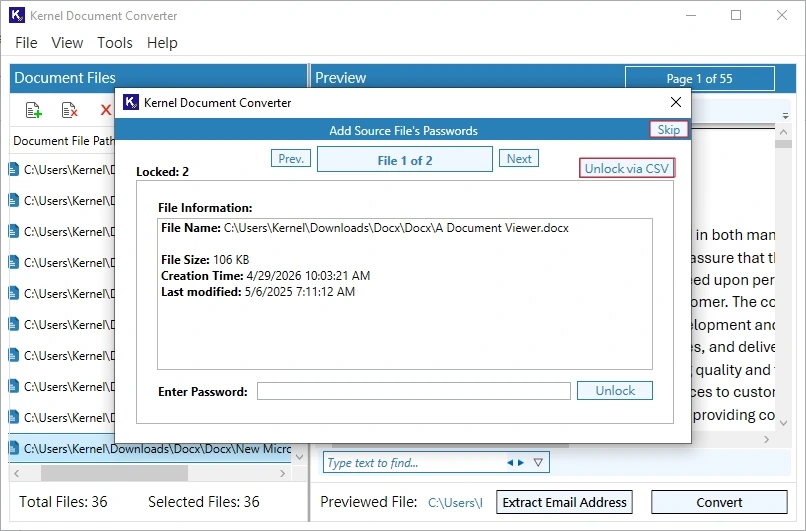
Note: With Unlock via CSV, you can add a CSV file having the password mapped with the files path.
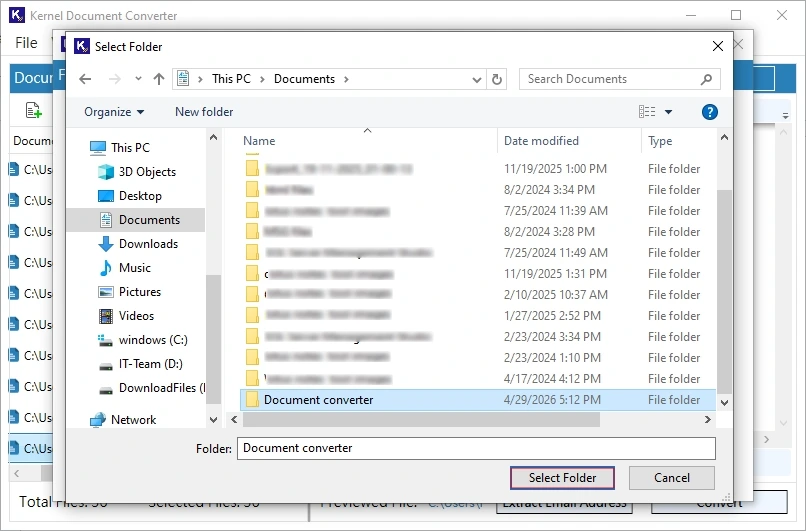
Step 7: Click Browse to specify the saving location for the destination file.

Step 8: Select the folder where you want to save your converted files then tap Select Folder.
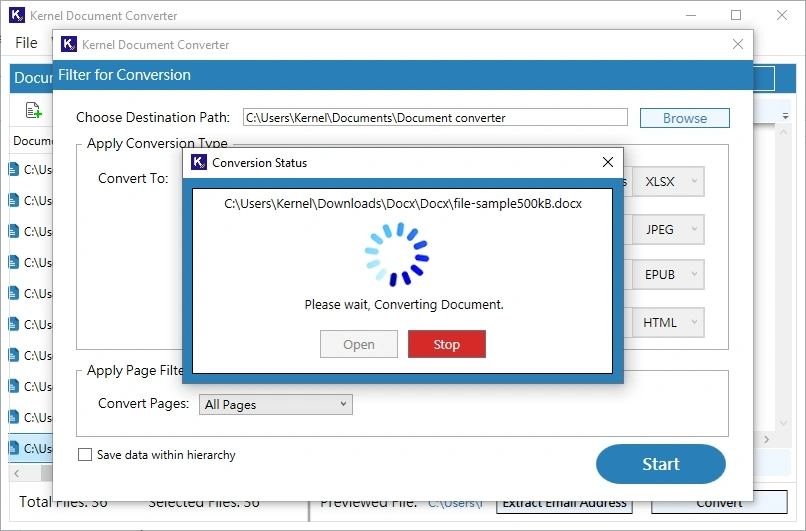
Step 9: Now select your saving file format from Conversion File Type and page filter from Apply Page Filter. Click Start.
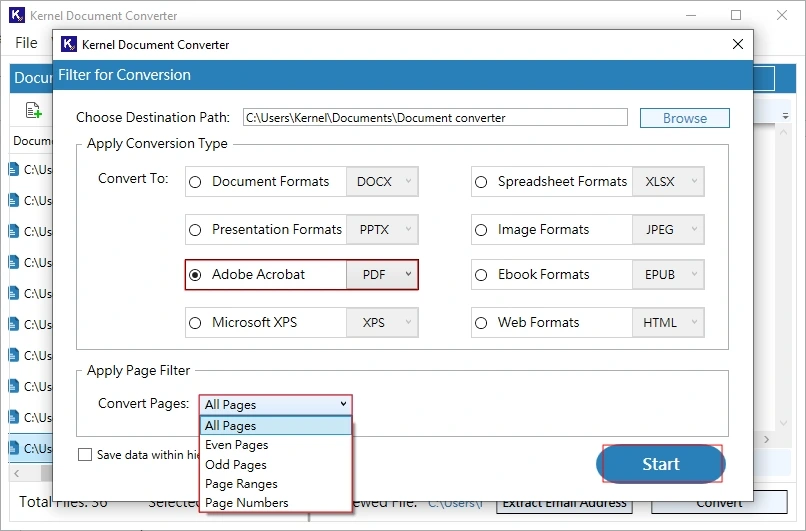
Note: Here PDF is selected from Adobe Acrobat and All Pages in Page Filter. You can choose anyone. Also, you can tick the option Save data within hierarchy as per your preference.
Step 10: The document conversion will start. Wait for a while.
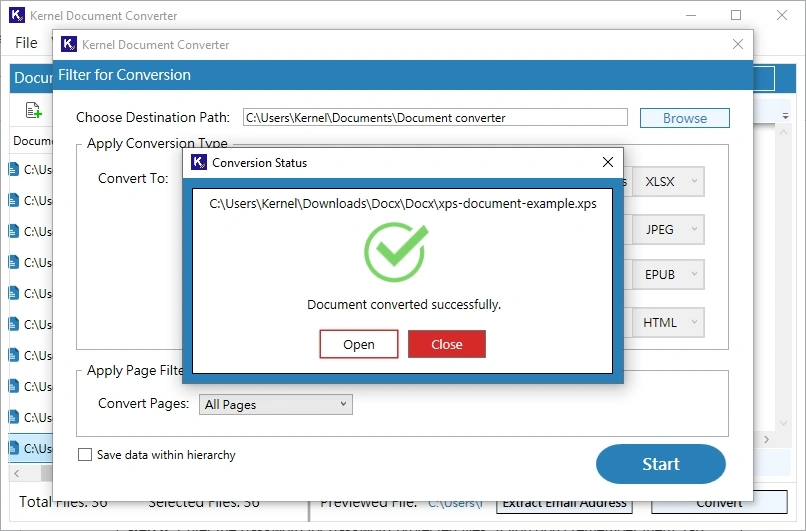
Step 11: Document conversion will be completed successfully. Once done, tap on Open to navigate directly to the results.
Extract Email Address
Step 1: Download and install Kernel Document Converter on your system. Once done, open it.
Step 2: Tap on Add File icon, select the file type you want to convert, then click Browse.
Note: To add documents from a specific folder, tap on Browse under Search / Add document file across your PC.
Step 3: Navigate to where your files are saved, select them, and click Open.
Step 4: Once required files are added, tap on Add Files.

Step 5: To preview file content, double-click on the file or select the file, then tap View. Once previewed, tap on Extract Email Address.
- Print the document file directly from the tool.
- You can use the Theme Setting option from the View tab.
- Use the Zoom control button to preview the document data accordingly.
- Input specific text in the ‘Type text to find’ box to search within the file.
- Select the document data and copy it via the given button.
Step 6: Enter the password for password-protected files. If you don’t remember them, tap Skip then confirm to Yes.
Note: With Unlock via CSV, you can add a CSV file having the password mapped with the files path.
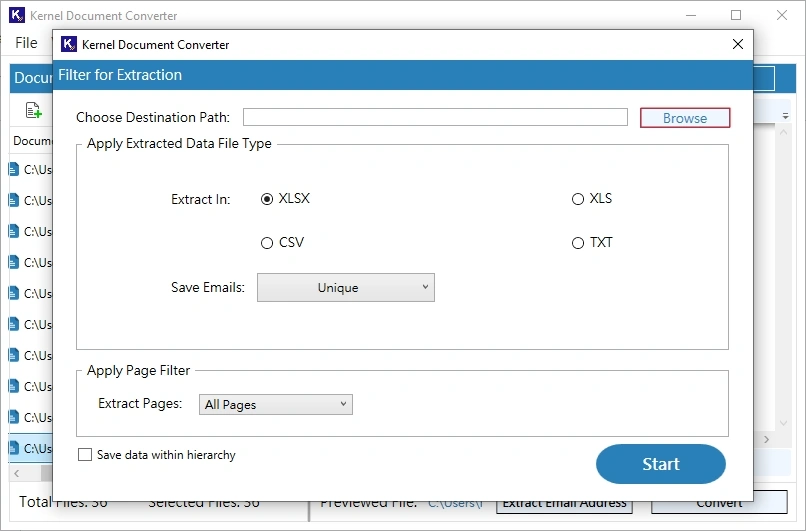
Step 7: Tap on Browse to provide the saving location of the extracted email address.
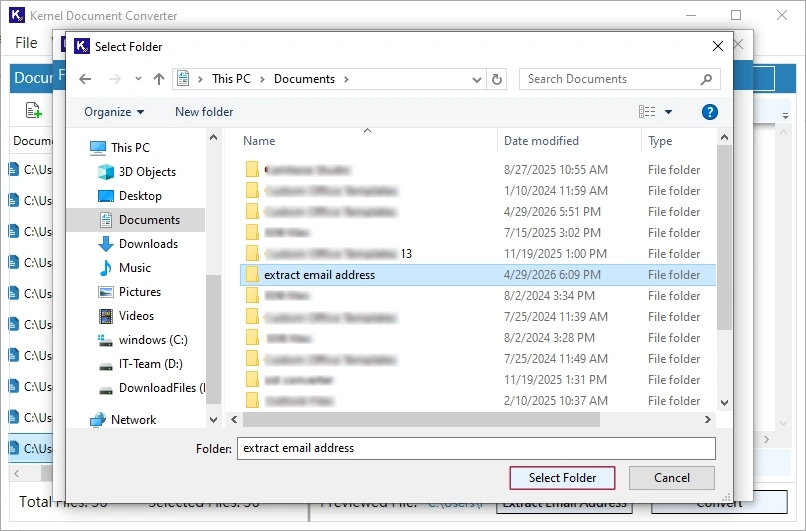
Step 8: Select the folder where you want to save your converted files then tap Select Folder.
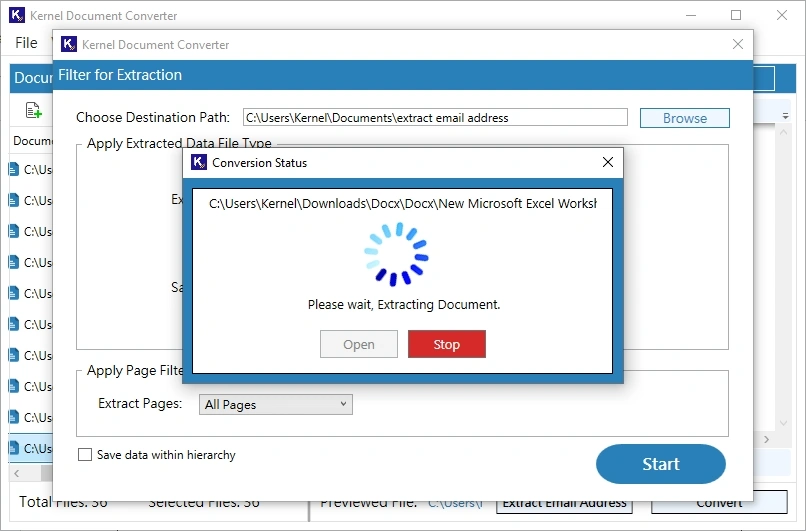
Step 9: Now select file format to save extracted email address, then select from Save Emails. Also apply page filter from the Extracted Pages. Then click Start.
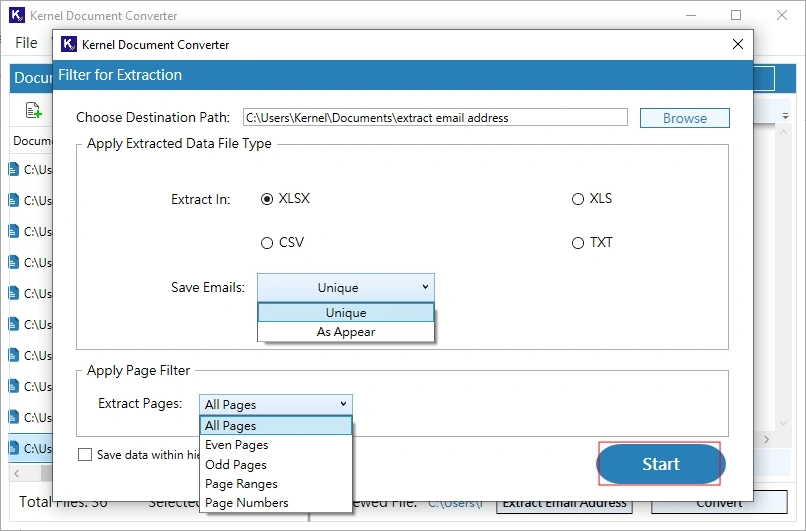
Note: Here XLXS is selected as a saving file and All Pages in Page Filter. You can choose anyone. Also, you can tick the option Save data within hierarchy as per your preference.
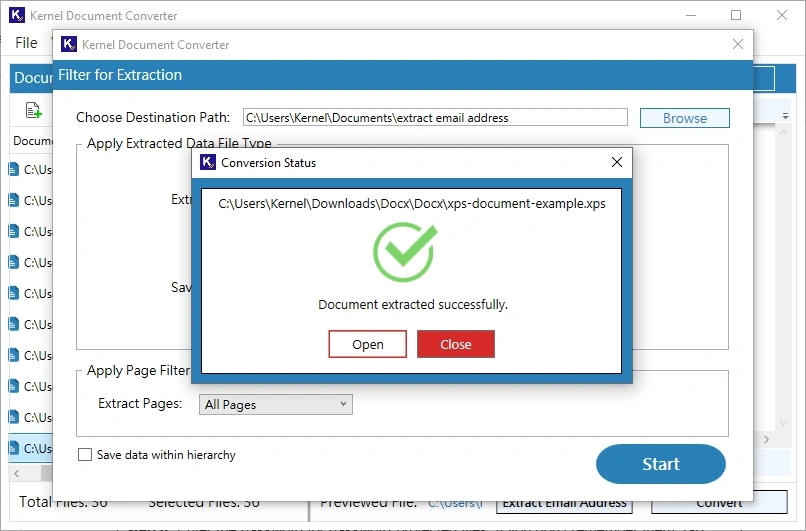
Step 10: The email address extraction process will start. Wait for a while.
Step 11: Email extraction from selected documents will be completed successfully. Once done, tap on Open to navigate directly to the results.