Step 1. Open the cloud backup tool and click on the Microsoft 365 option. 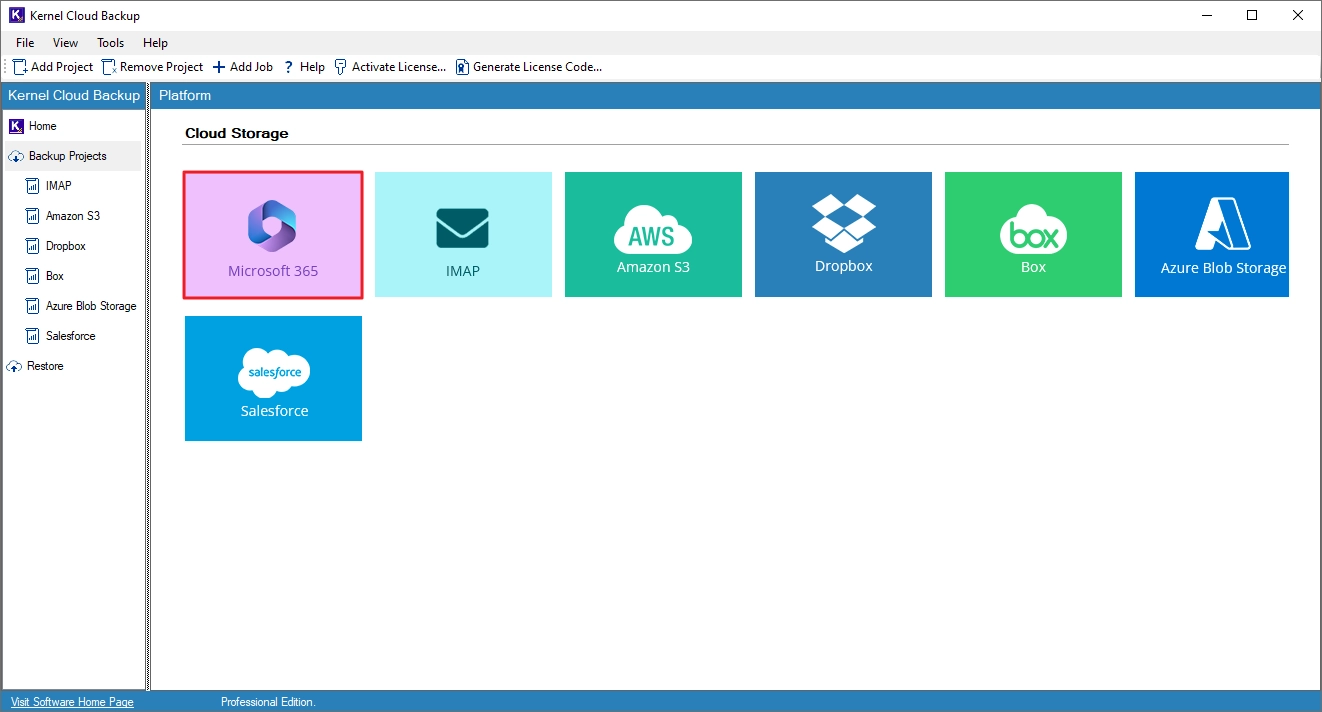
Step 2. Provide a new Project Name and a Job Name. Then, click Next. 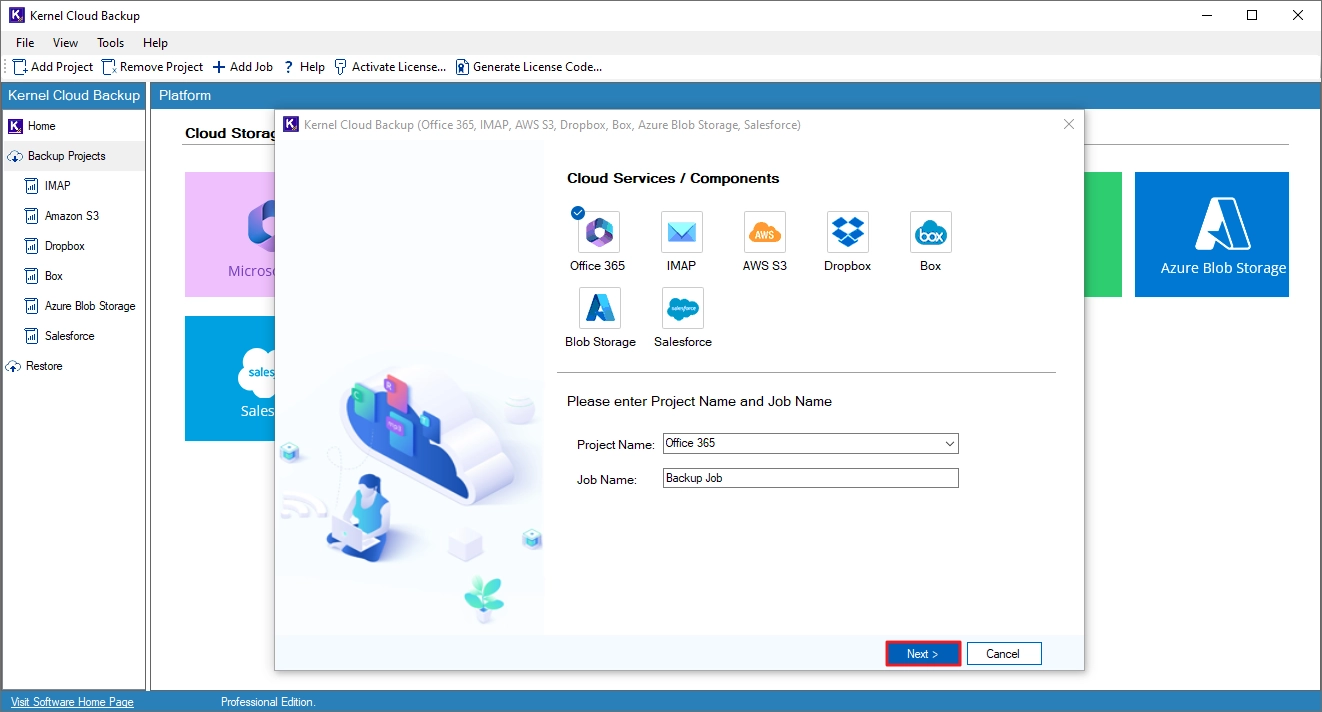
Step 3. Input the target Microsoft 365 account admin credentials and click Next. The tool will ask to save the credentials, click Yes to save them. 
- Click on the Download Sample button. A CSV file will be downloaded. Add the email address of the users whose data you want to back up in the CSV file and save the changes. Then, go back to the tool.
- Click on the Import O365 Users button and upload the CSV file you modified in the last step.
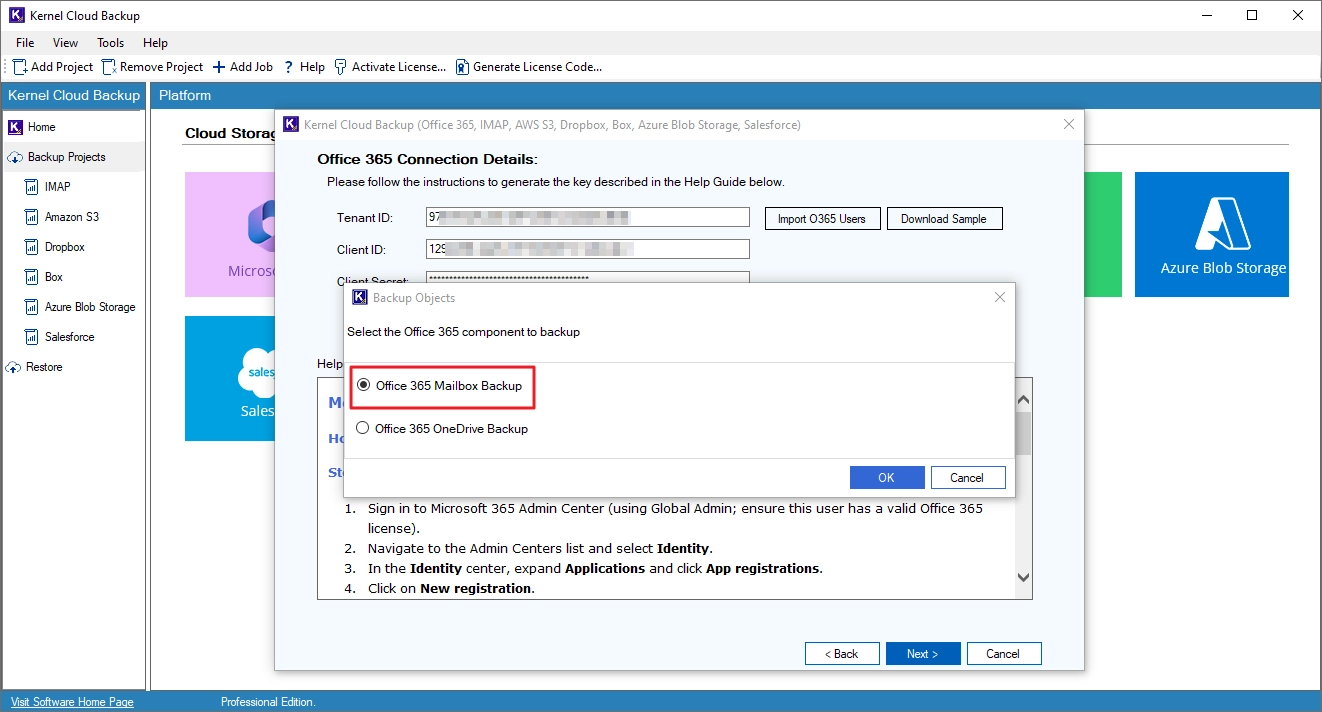
Step 4. Select the Office 365 Mailbox Backup option and click OK.
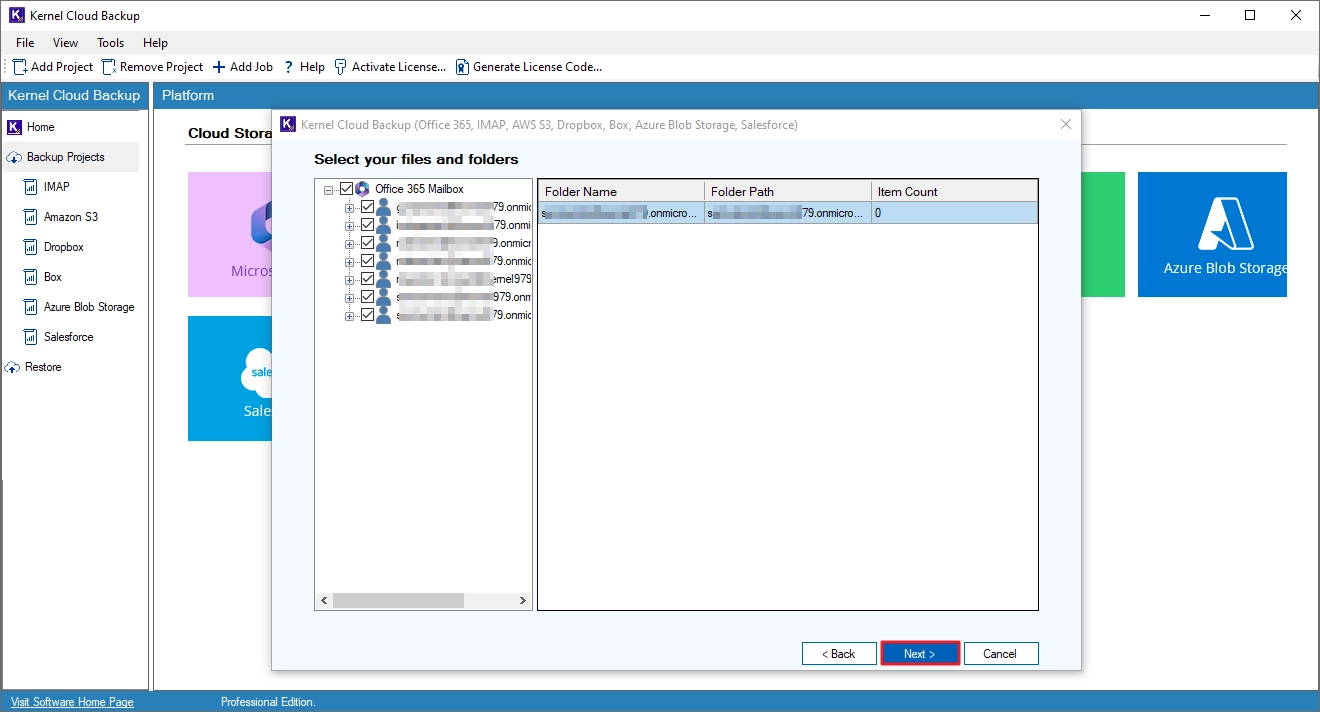
Step 5. Select the mailboxes that you need to back up and click Next.

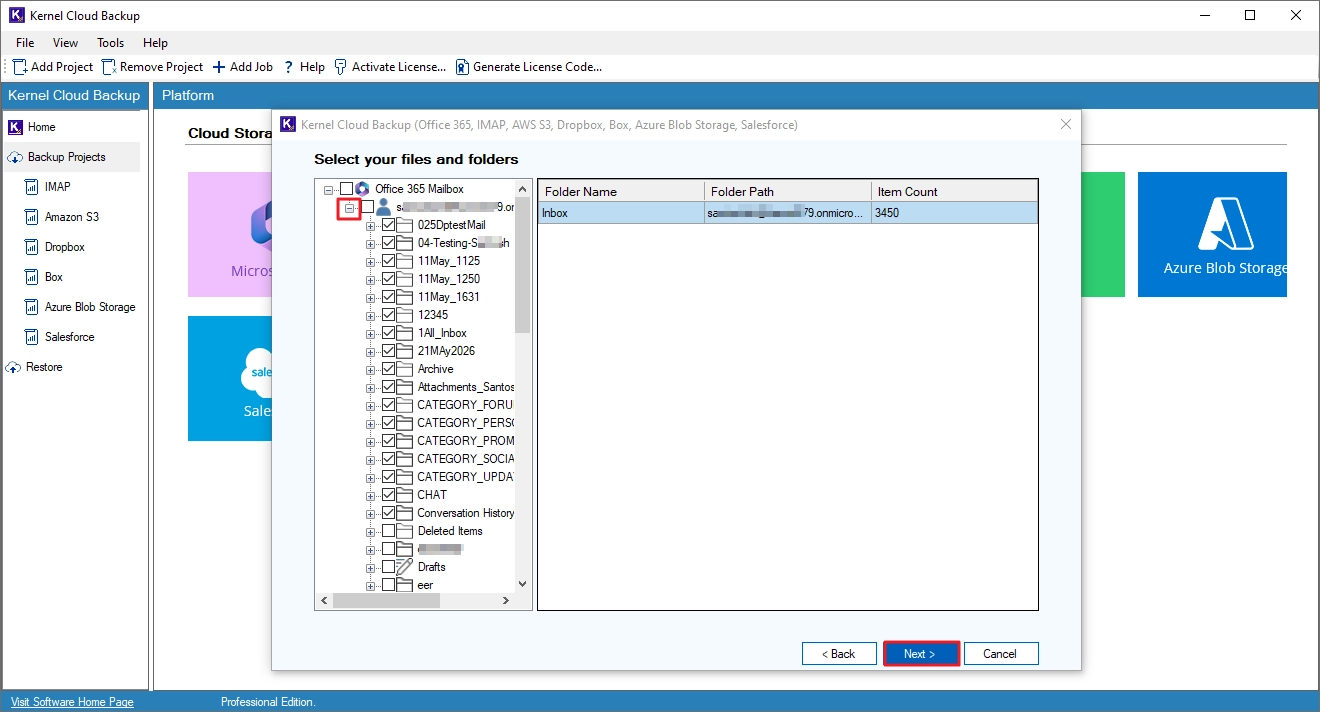
Step 6. Review the selected mailboxes. Click on the + (plus) icon to expand a mailbox and view the folders present in it. Click Next to proceed.
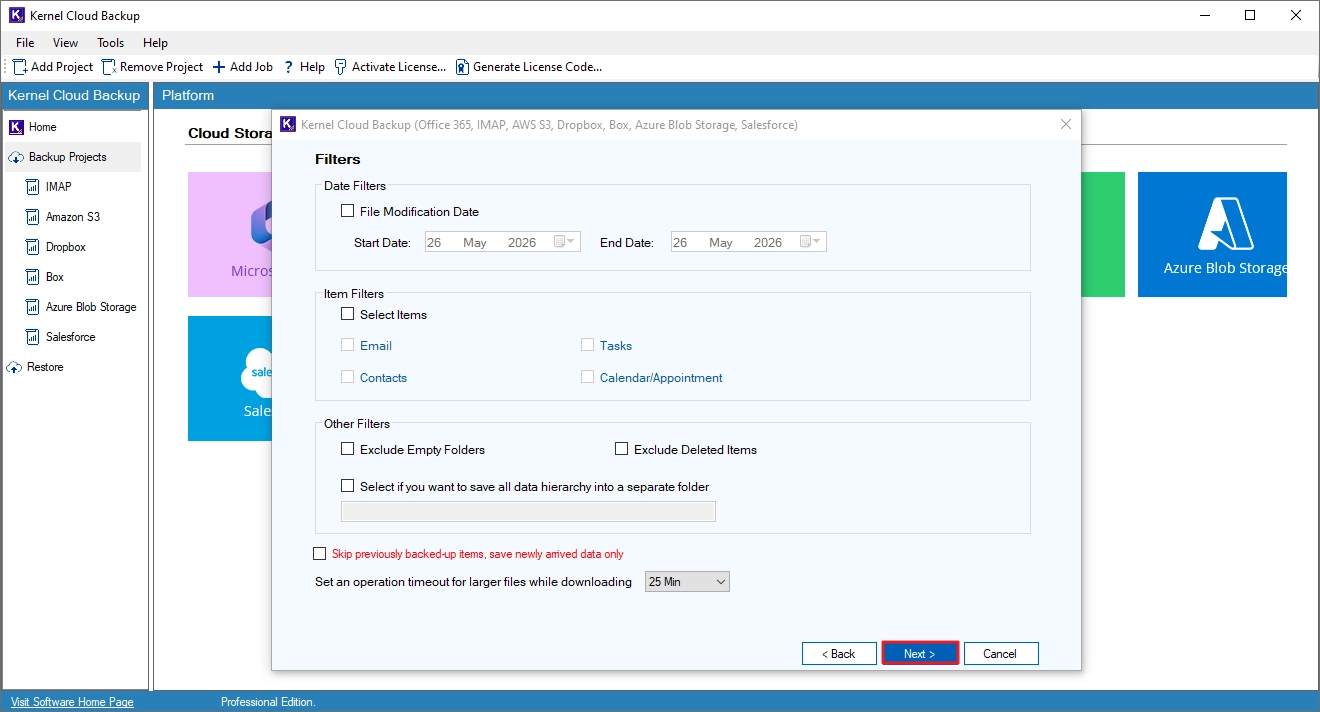
Step 7. Apply the following filters:
- Date Filters: Back up emails that are sent or received within a specific time period.
- Item Filters: Backup specific item types.
- Other Filters: Skip non-critical folders and save the backup in a new folder.
Additionally, you can skip the items that are already backed up in a previous backup job. Then, click Next to proceed.
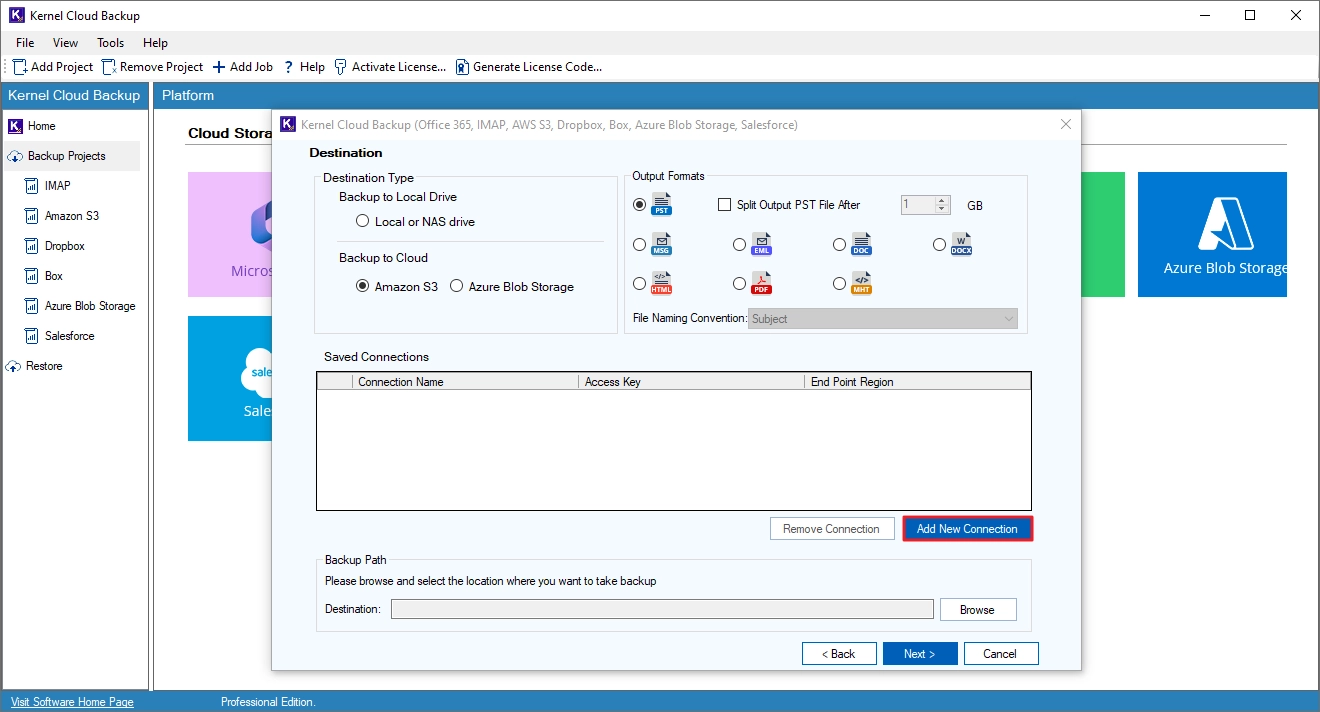
Step 8. Choose to save the backup to the local drive or the cloud. Then, select the output file type. Click Browse (for local drive or NAS) and specify where to save the output file. Finally, click Next.

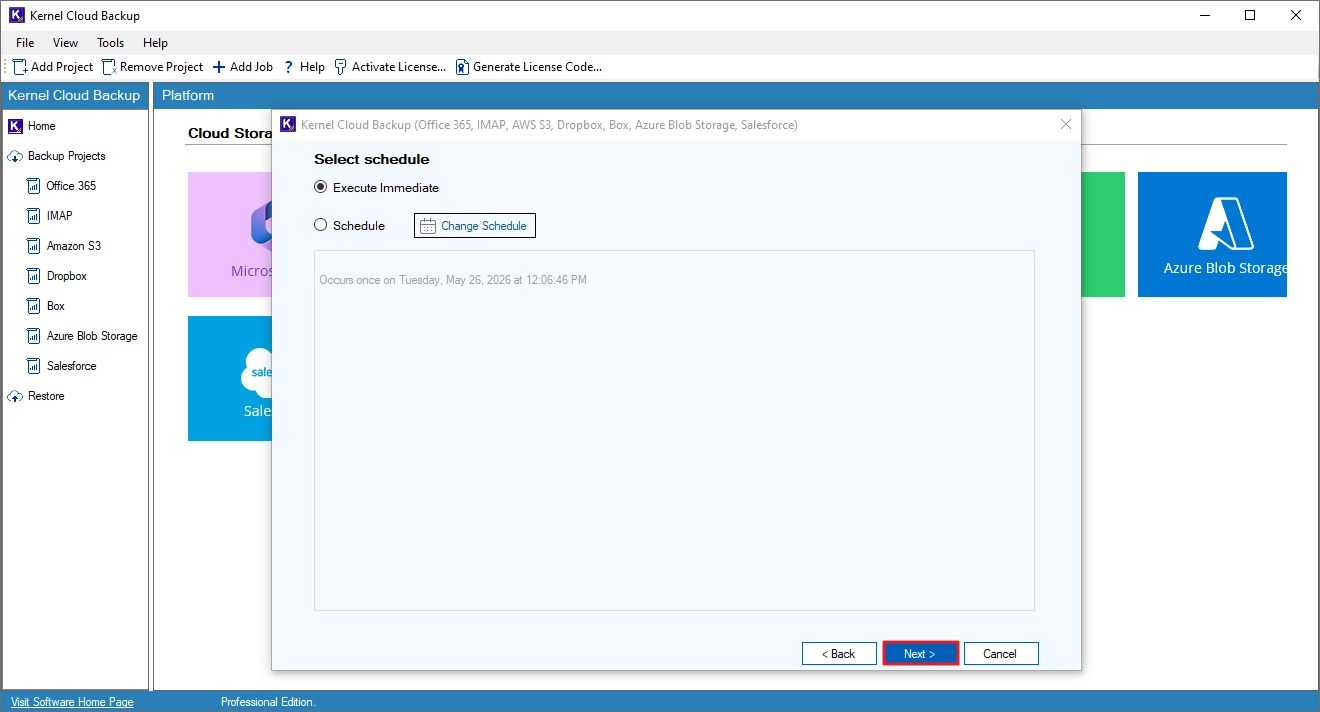
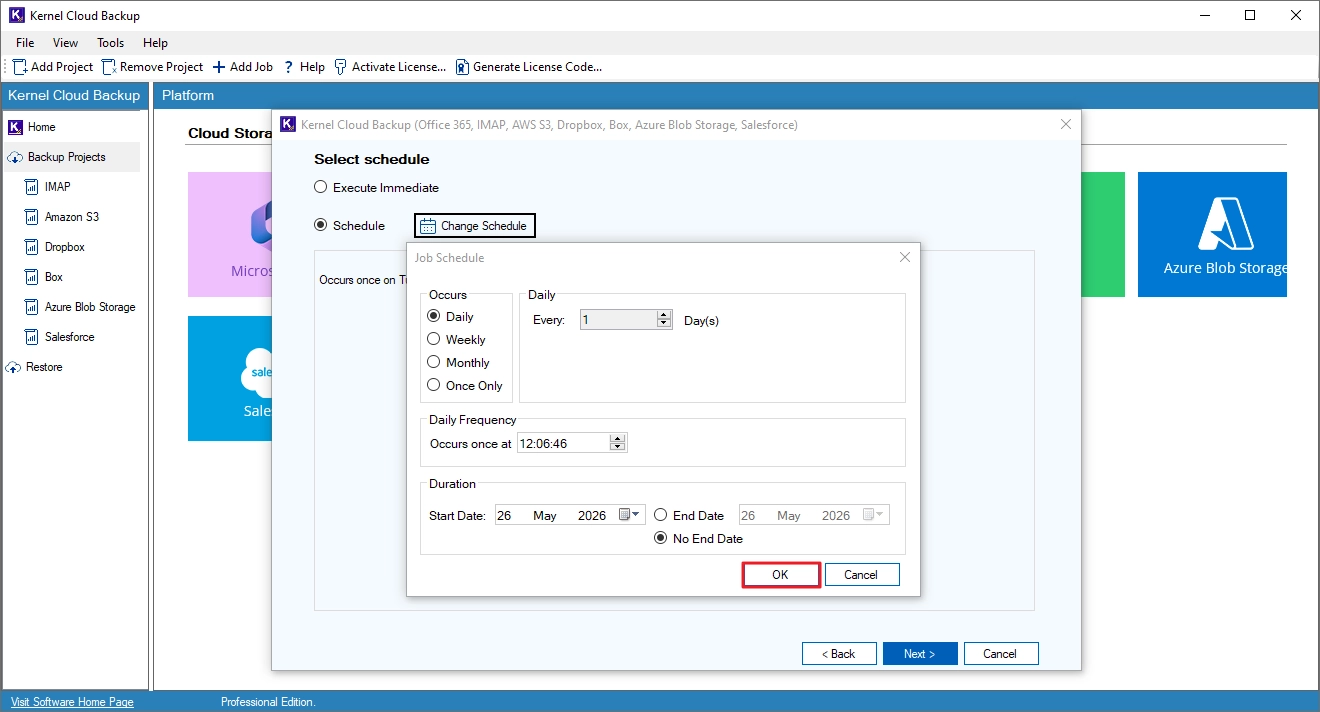
Step 9. To execute the backup job instantly, select Execute Immediate and click Next.
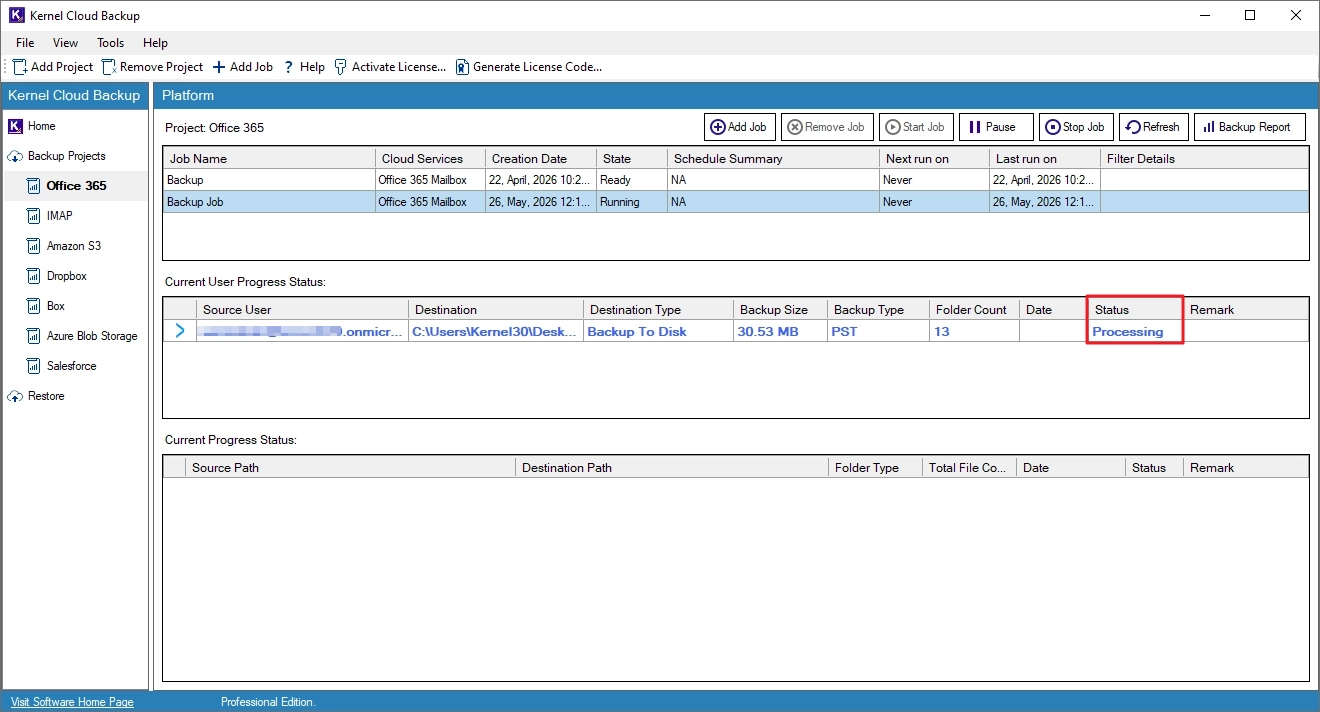
Step 10. The backup is running with the job status shown as Processing.
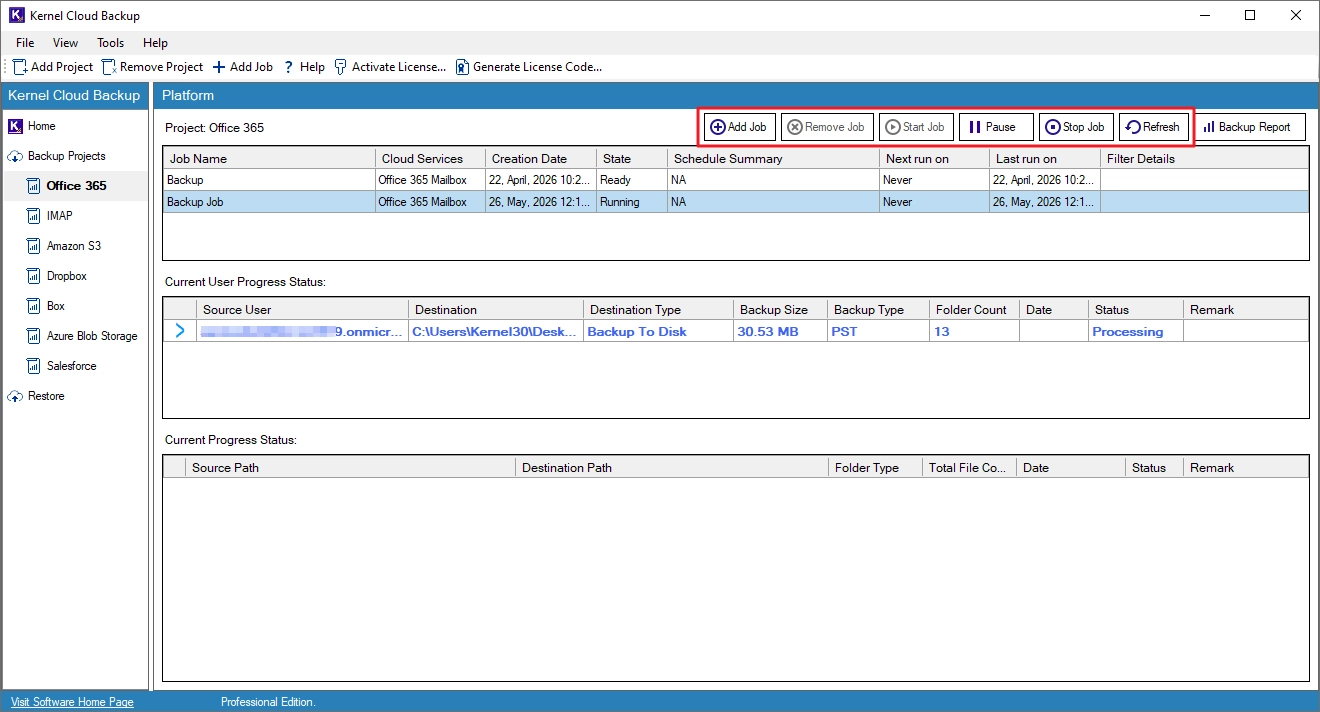
Step 11. You can manage the backup jobs with these options:
- Add Job: Create and run new jobs under the current project.
- Remove Job: Delete the selected job from the project.
- Start Job: Start the selected job.
- Pause: Temporarily stop the selected job.
- Stop Job: Terminate the selected job.
- Refresh: Update the status of the selected job.
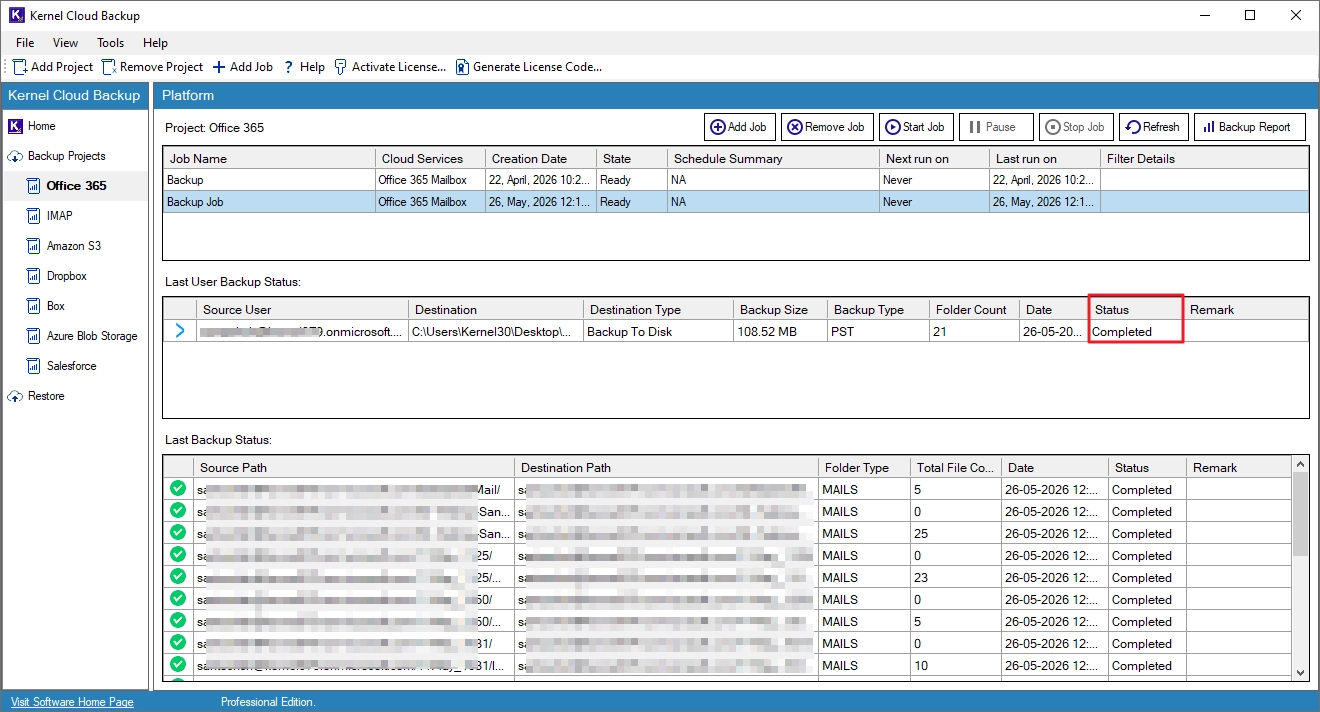
Step 12. The backup job is successfully completed.
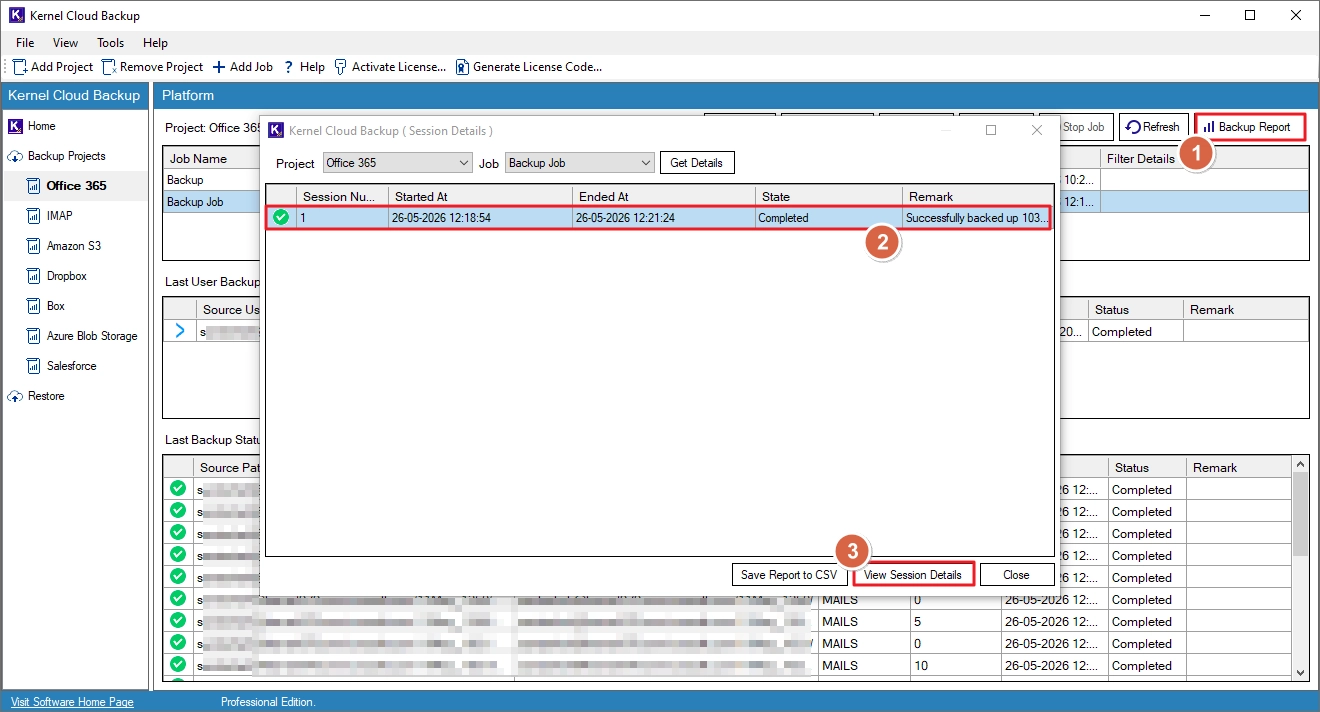
Step 13. To view the report of the backup job, click Backup Report, select the session, and click View Session Details.
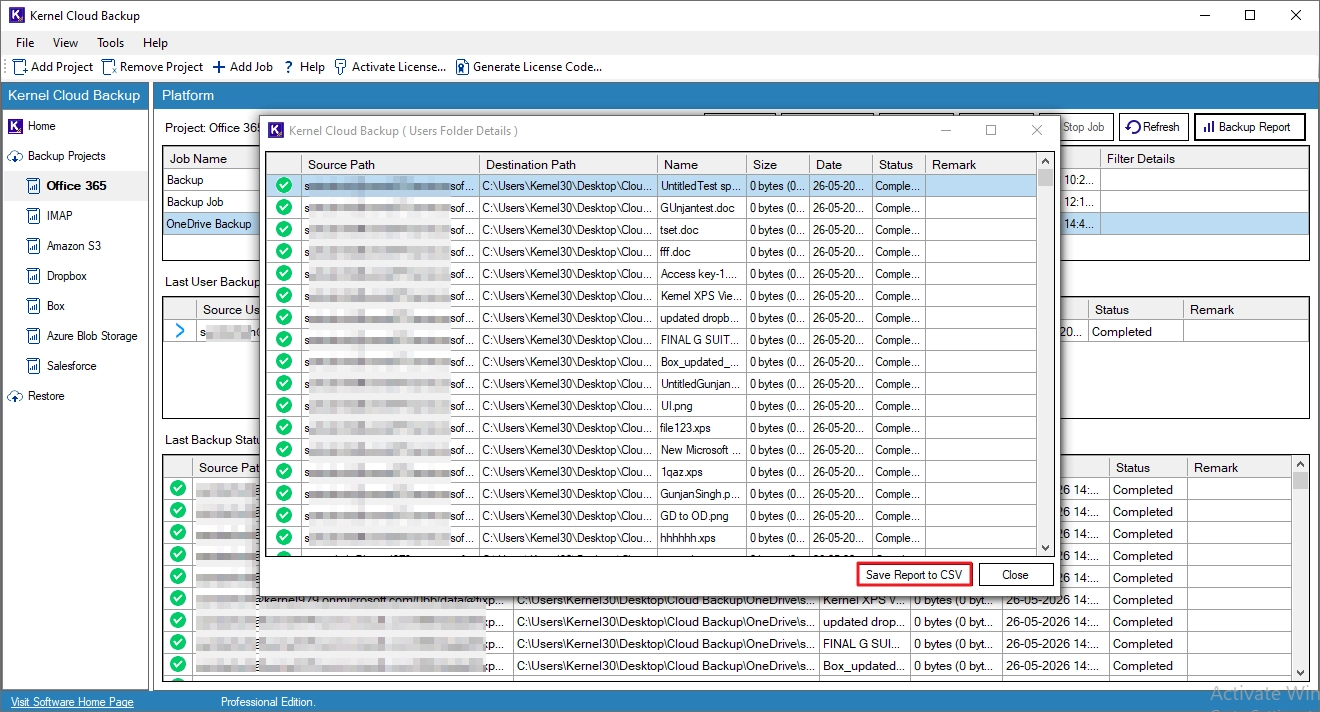
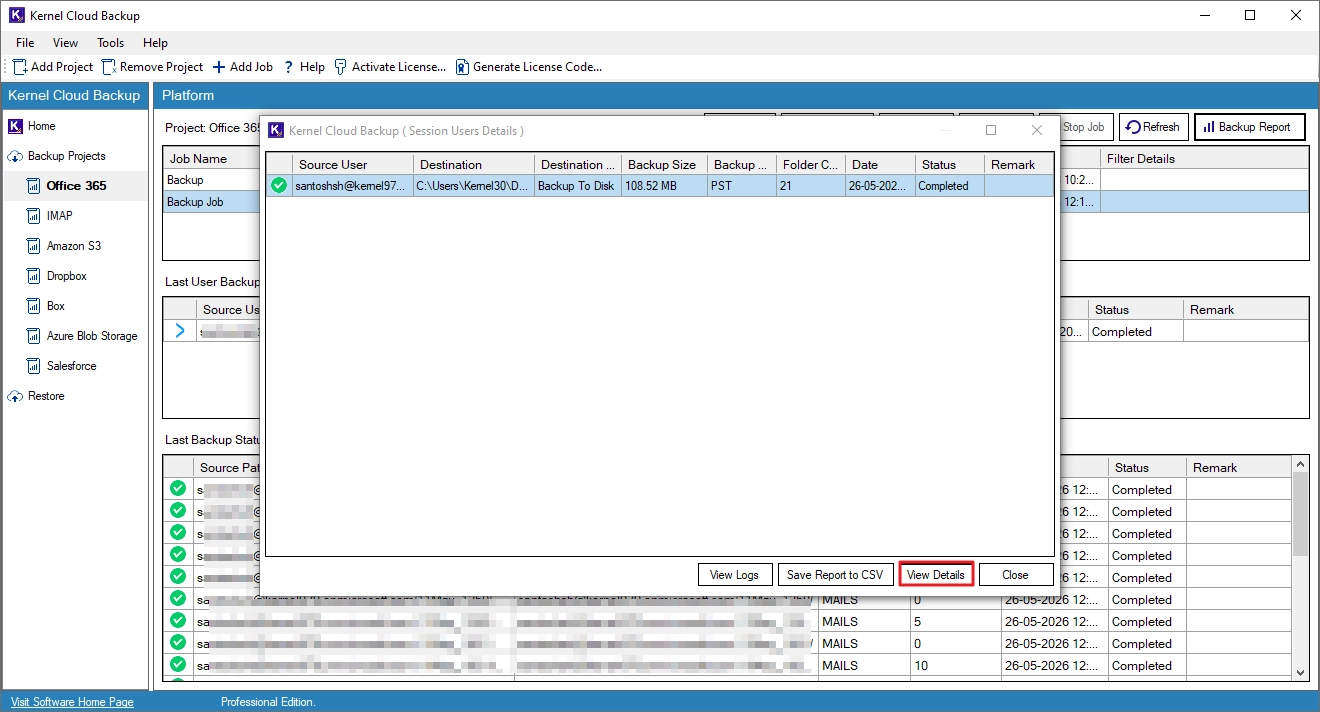
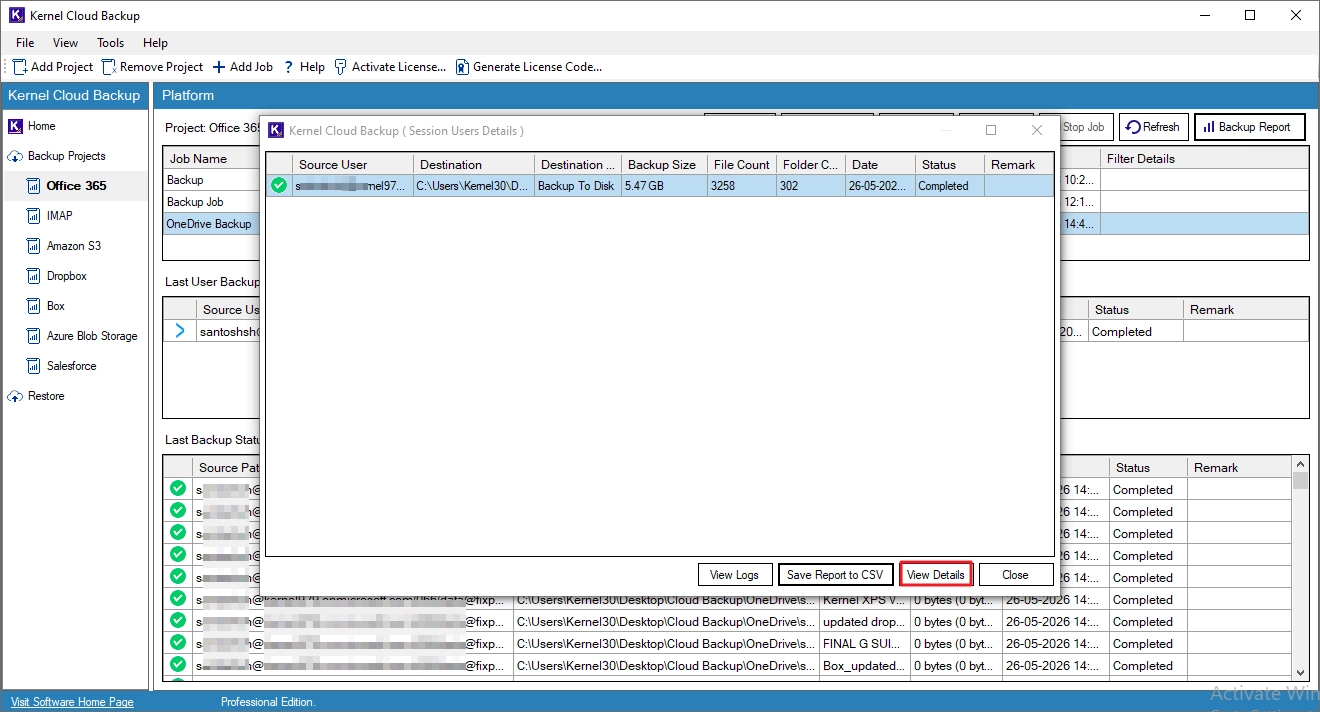
Step 14. Select the report and click View Details.
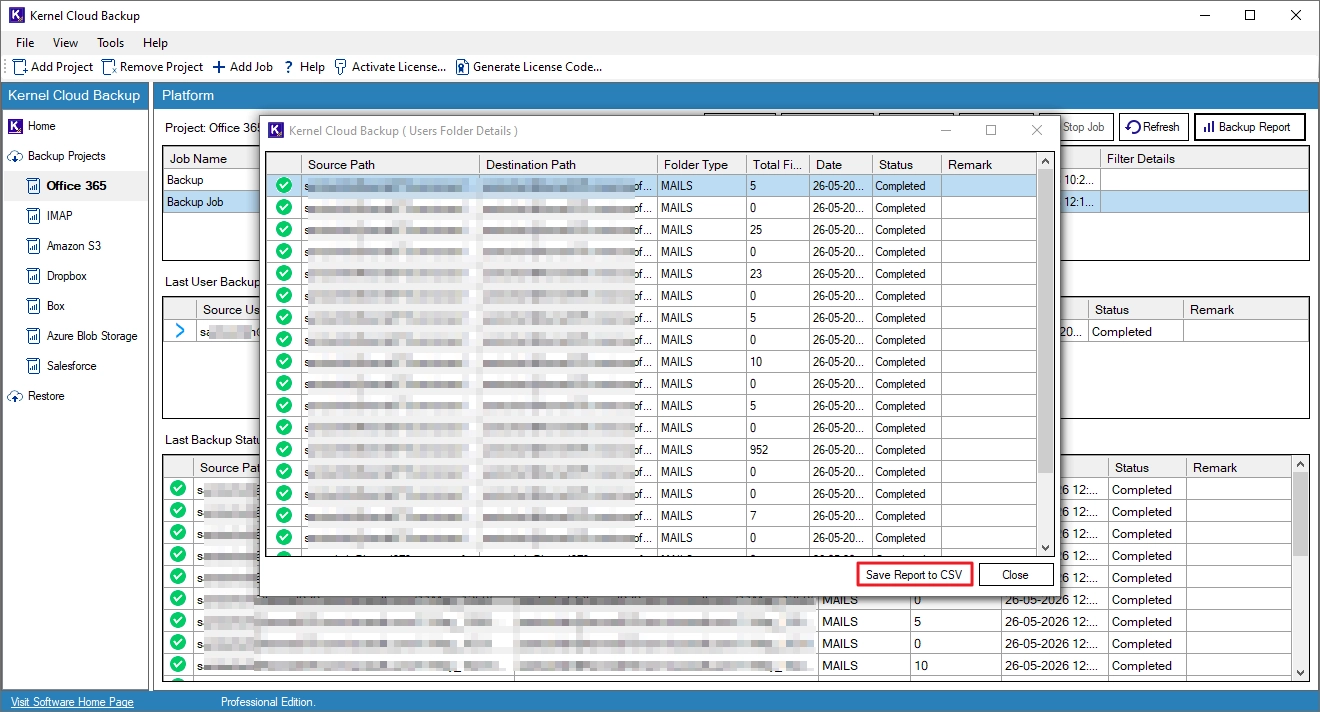
Step 15. To save the report to your system, click Save Report to CSV, specify a saving location, and click Save.
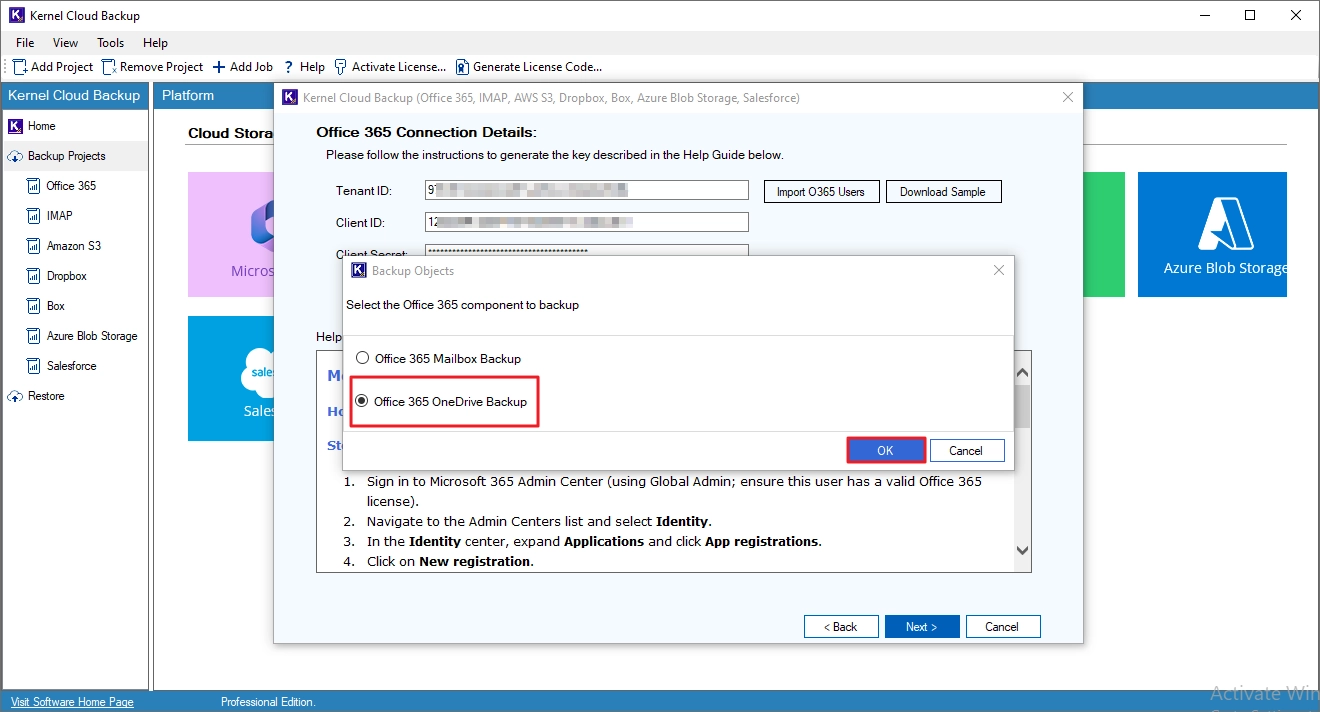
Step 4. Select the Office 365 OneDrive Backup option and click OK.
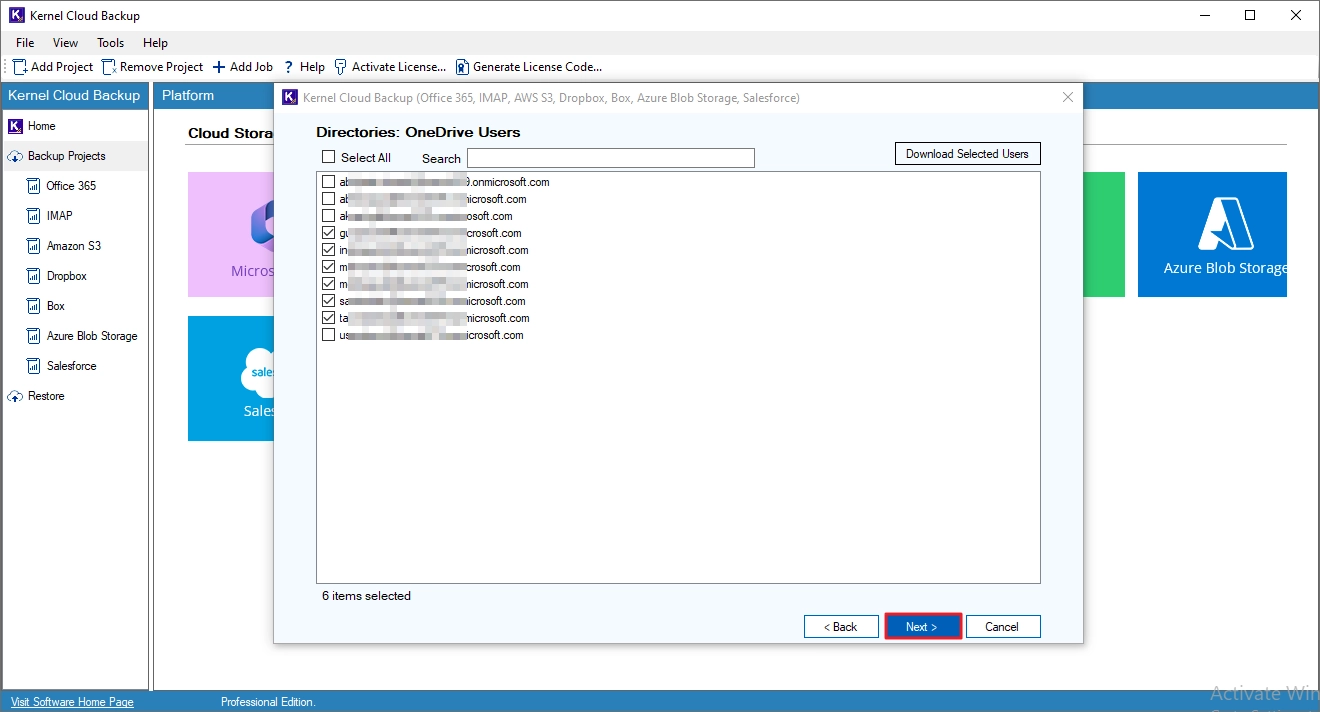
Step 5. Select the OneDrive users that you need to back up and click Next. You can also search and add specific users.
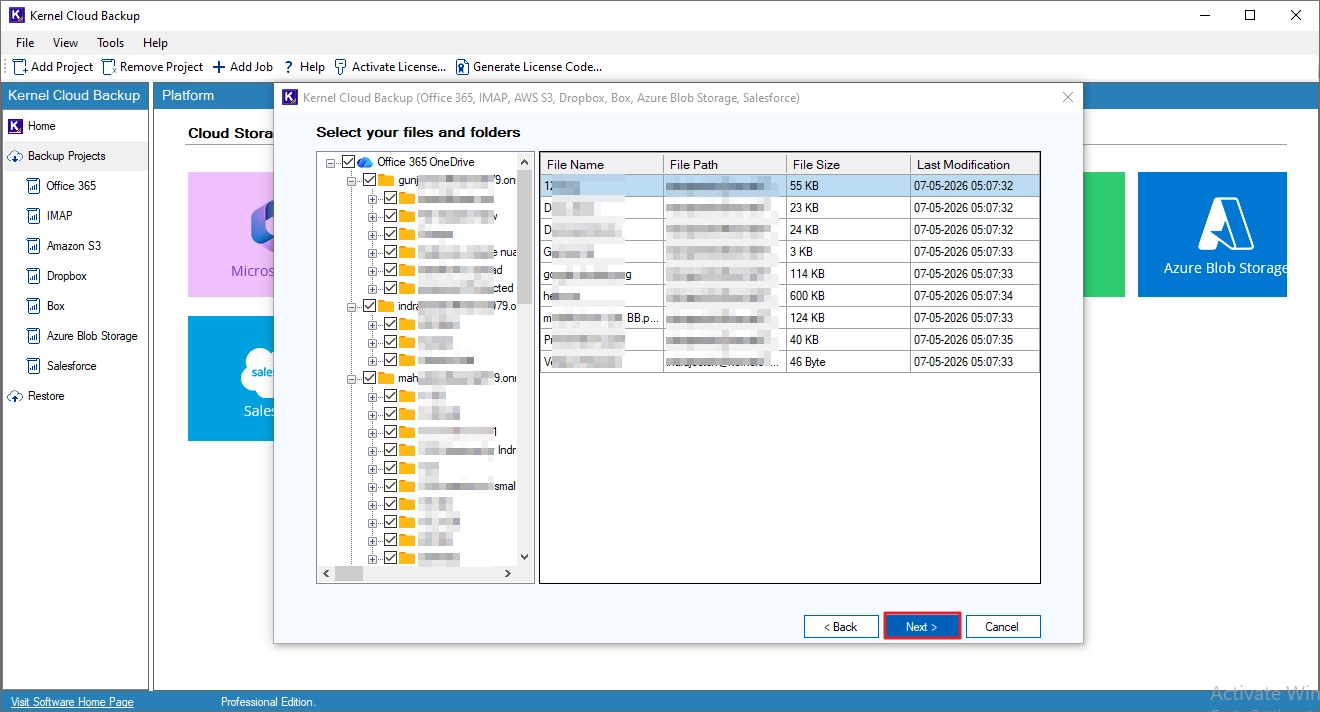
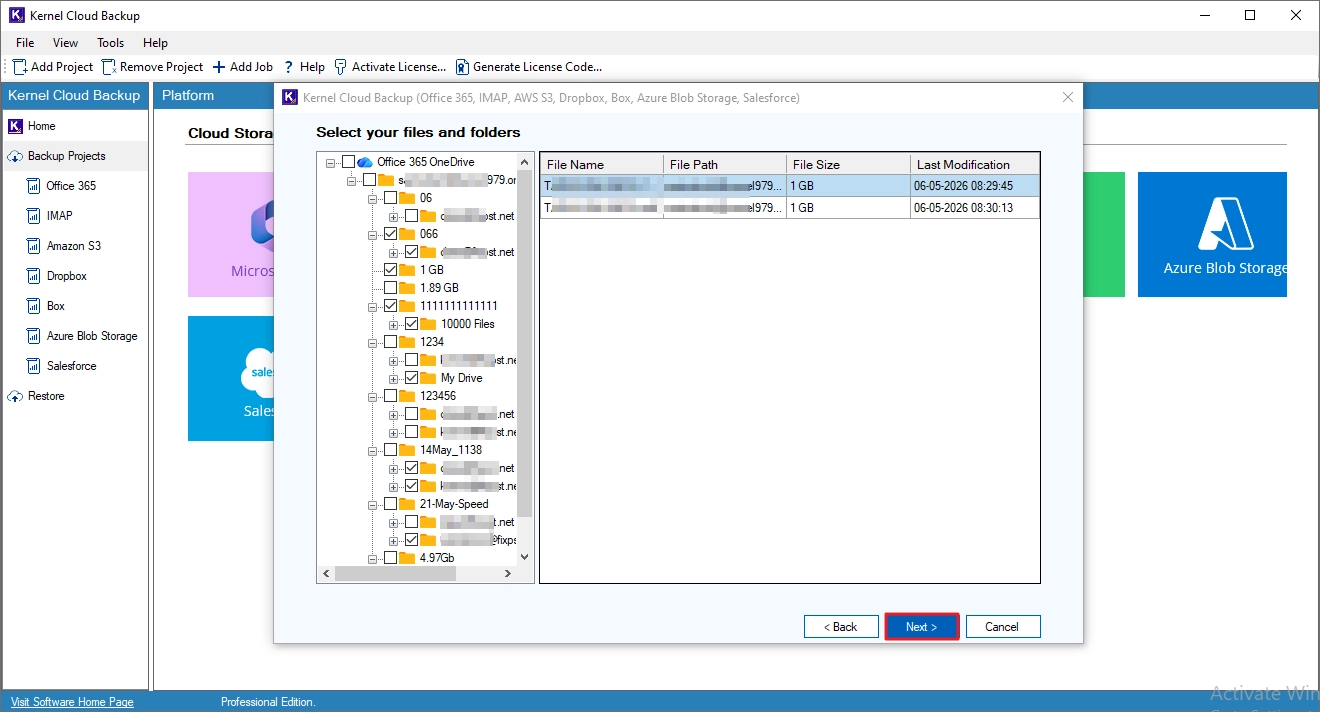
Step 6. Review the selected users. Click on the + (plus) icon to expand the OneDrive folder and view the folders present in it. Click Next to proceed with the backup.
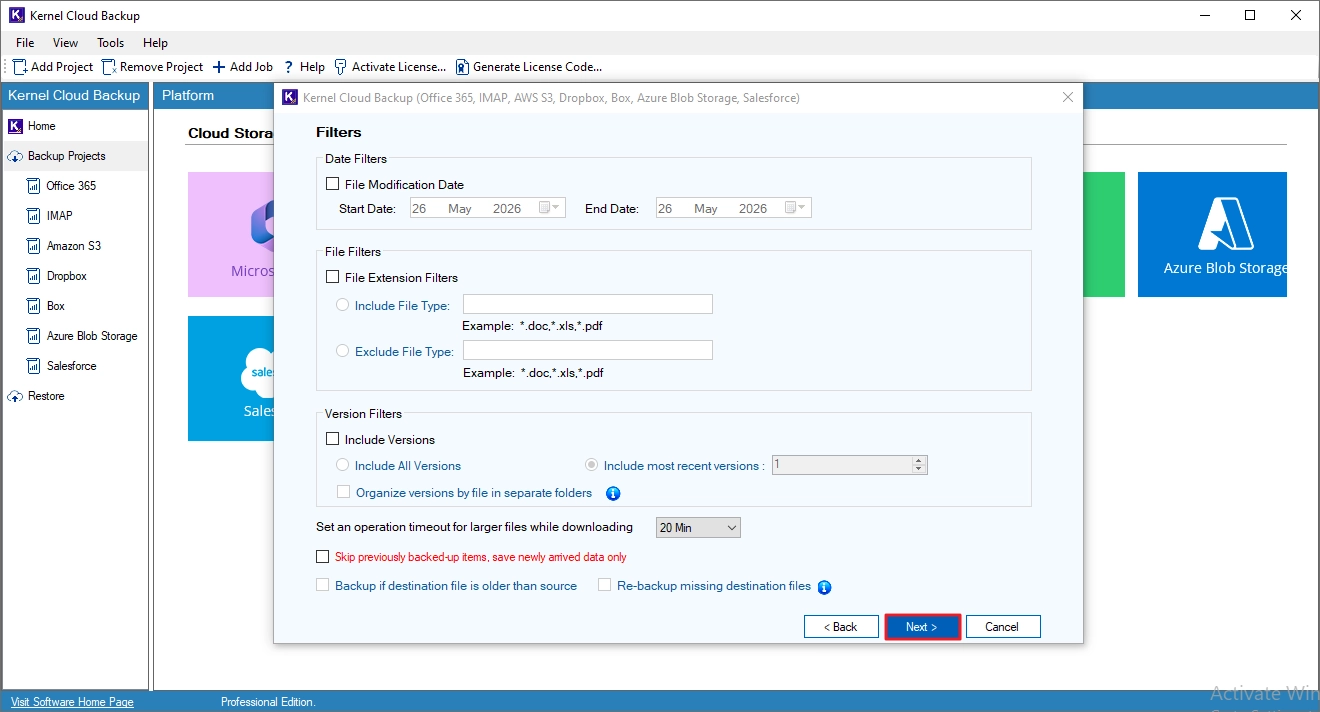
Step 7. Apply the following filters:
- Date Filters: Back up data created within a specified start and end date.
- File Filters: Back up specific file formats using the file extensions.
- Version Filters: Choose to back up all versions or only the most recent versions of a file.
- Additionally, you can skip the items that are already backed up in a previous backup job.
Finally, click Next.
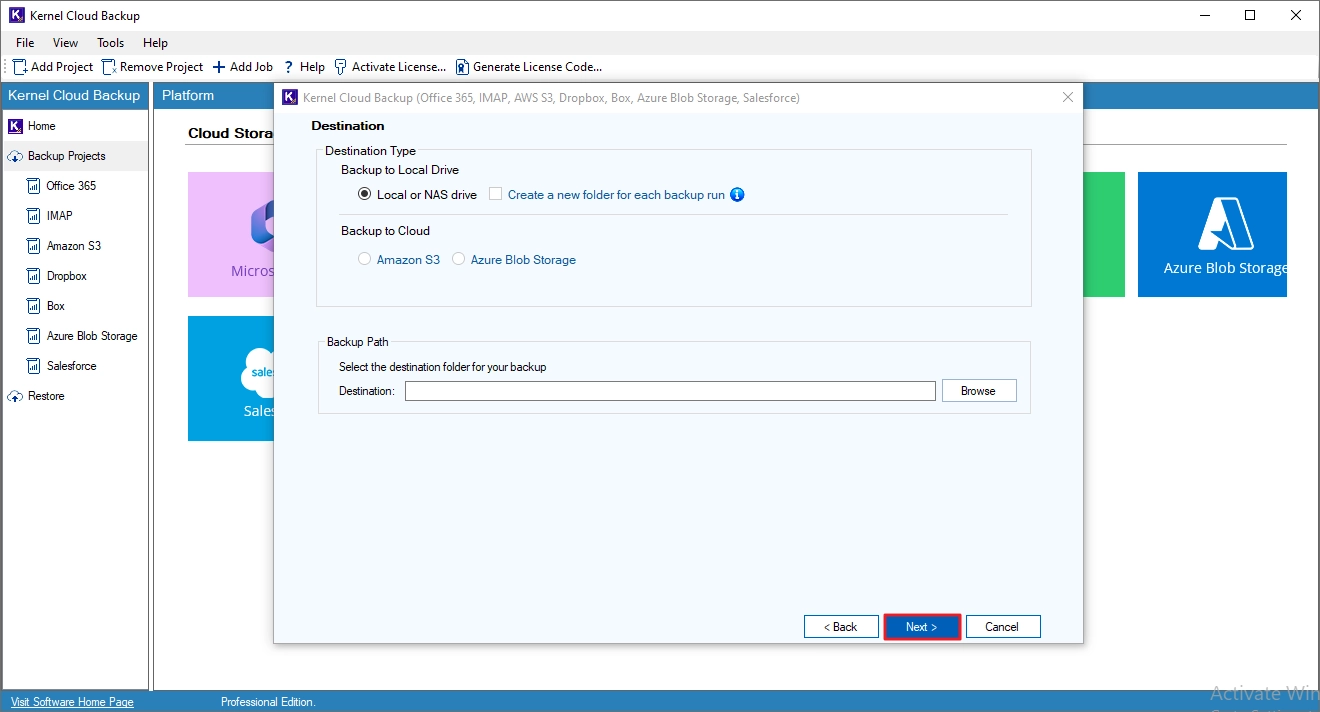
Step 8. Choose to save the backup to the local drive or the cloud, specify the saving location, and click Next.
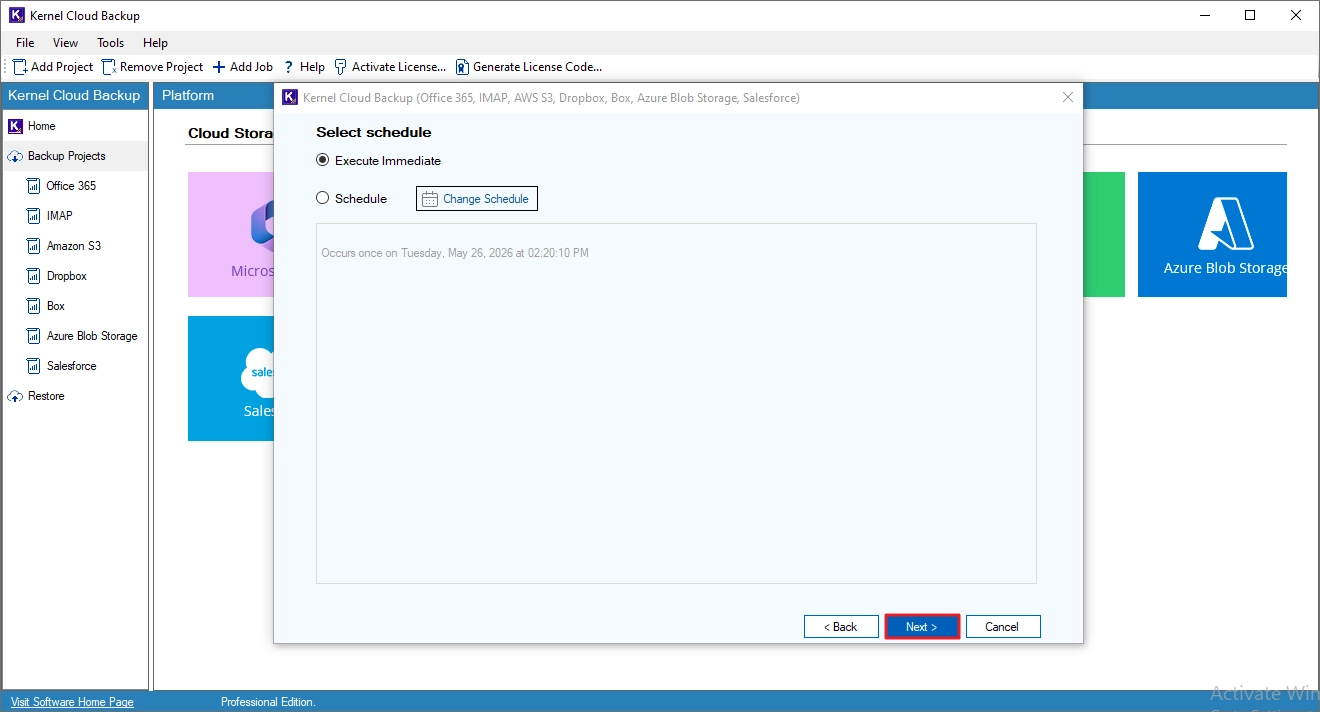
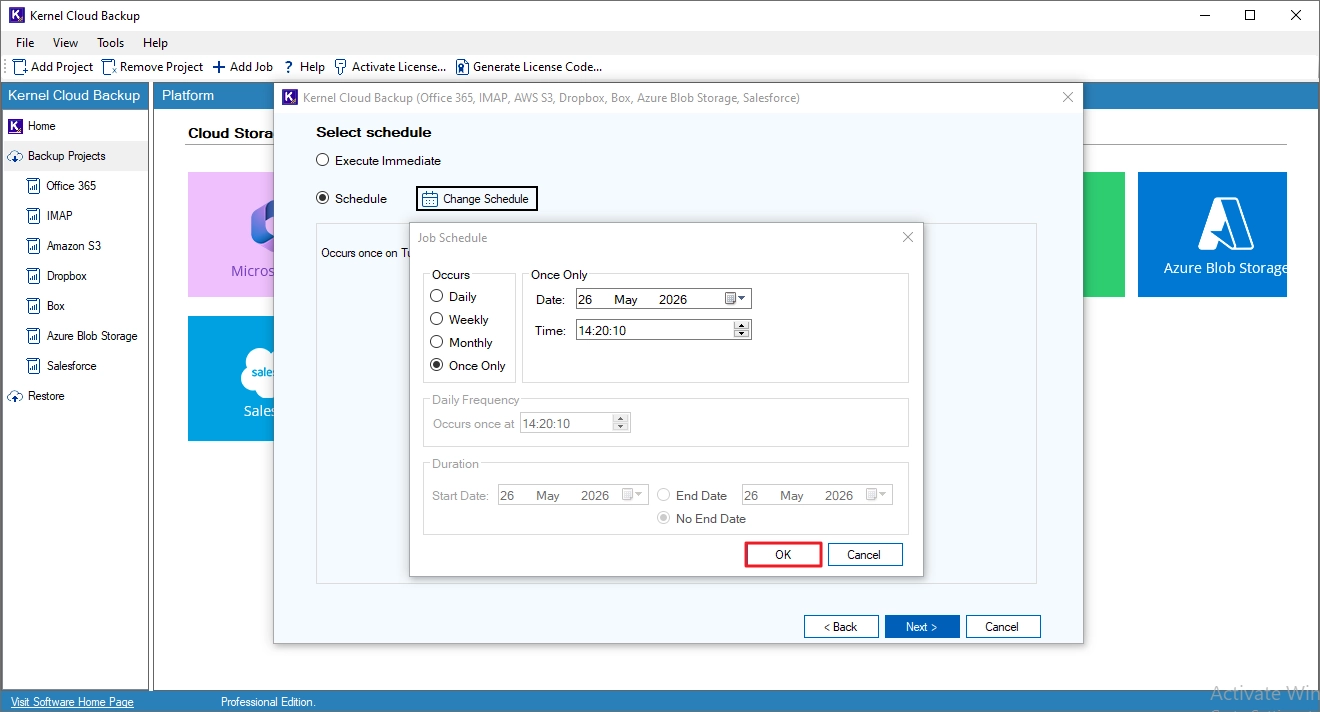
Step 9. To execute the backup job instantly, select Execute Immediate and click Next.
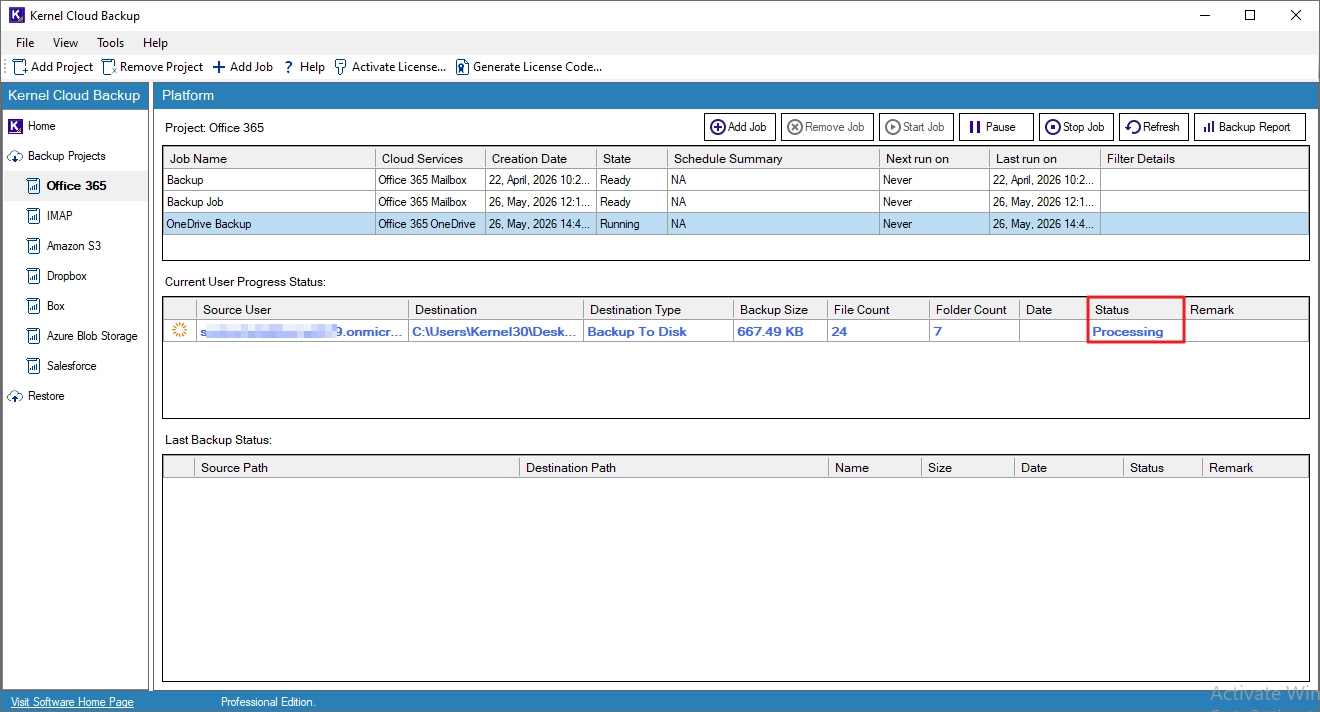
Step 10. The backup is running with the job status shown as Processing.
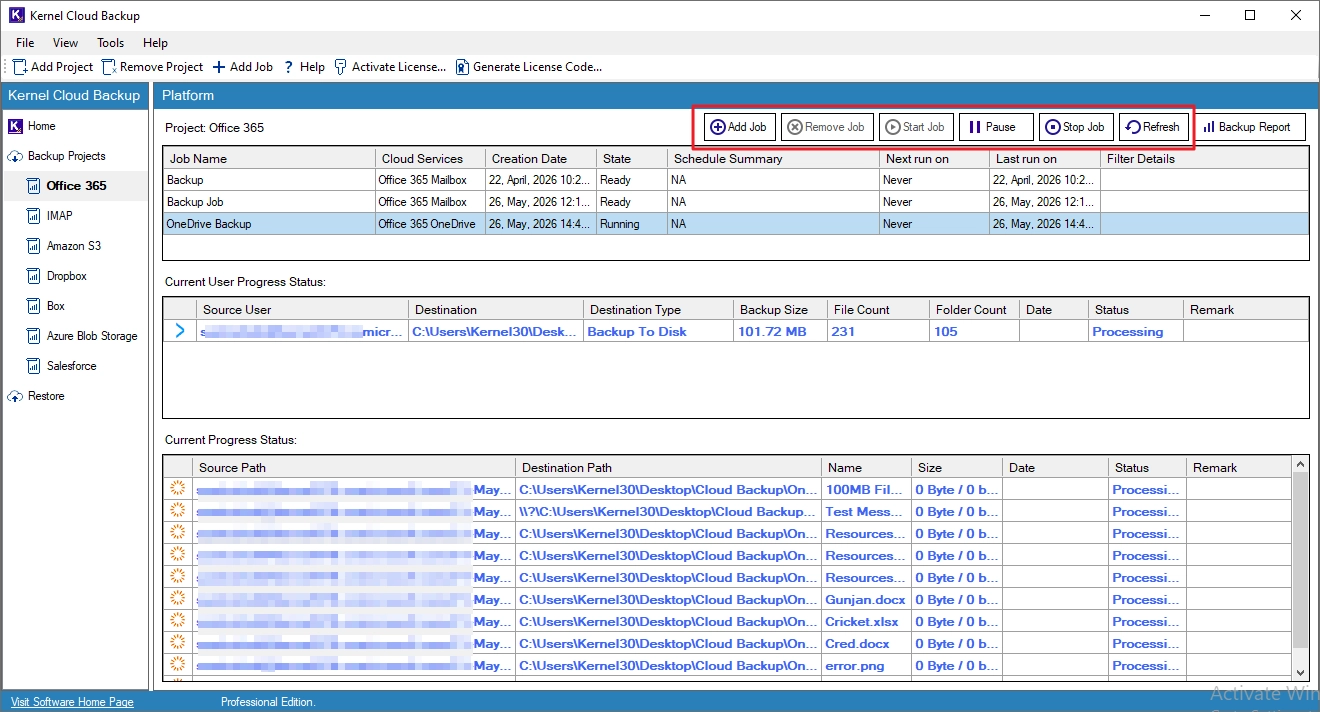
Step 11. You can manage the backup jobs with these options:
- Add Job: Create and run new jobs under the current project.
- Remove Job: Delete the selected job from the project.
- Start Job: Start the selected job.
- Pause: Temporarily stop the selected job.
- Stop Job: Terminate the selected job.
- Refresh: Update the status of the selected job.
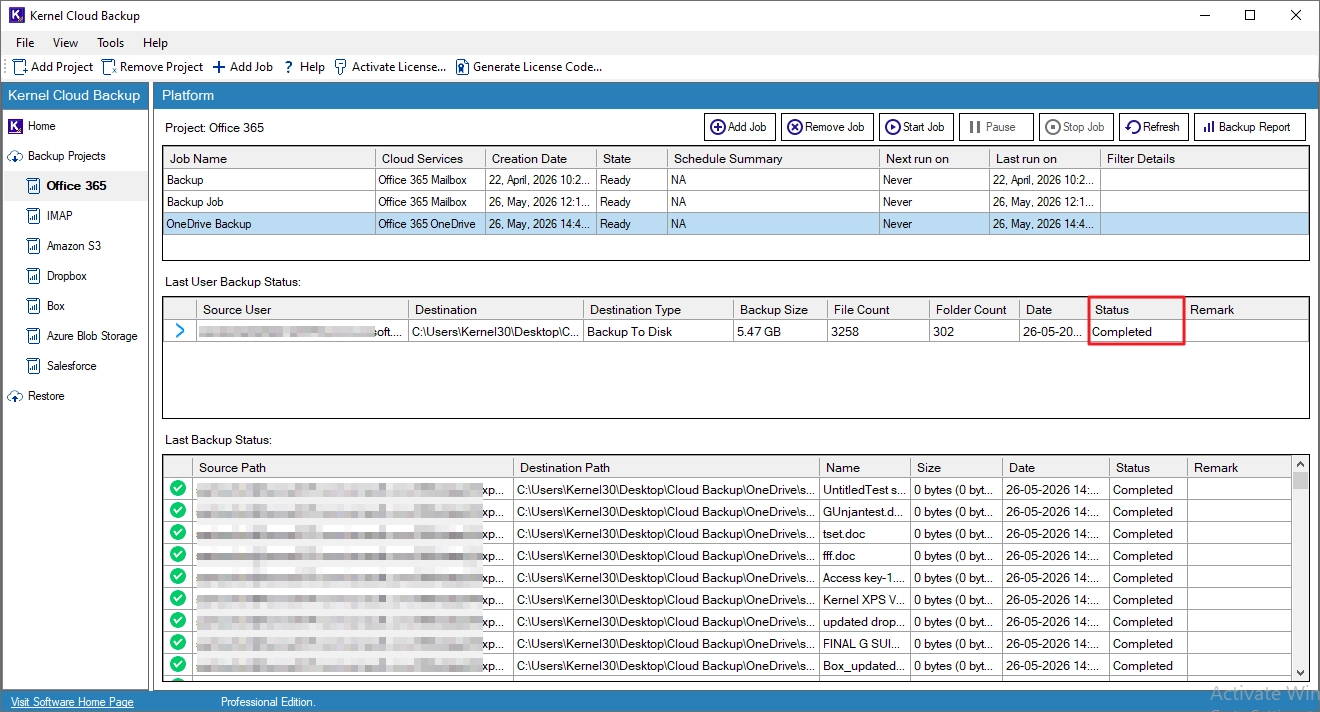
Step 12. The backup job is successfully completed.
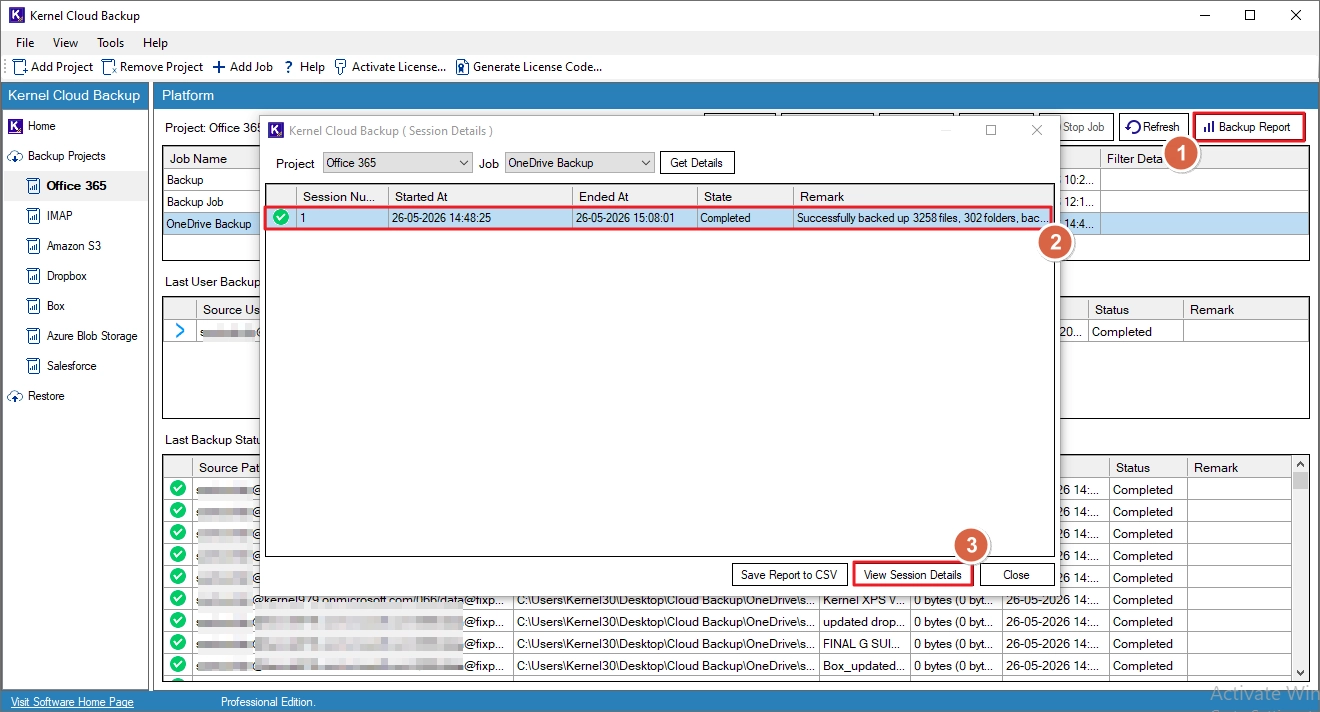
Step 13. To view the report of the backup job, click Backup Report, select the session, and click View Session Details.
Step 14. Select the report and click View Details.
Step 15. To save the report to your system, click Save Report to CSV, specify a saving location, and click Save.