Follow these steps to back up your mailboxes from the IMAP server.
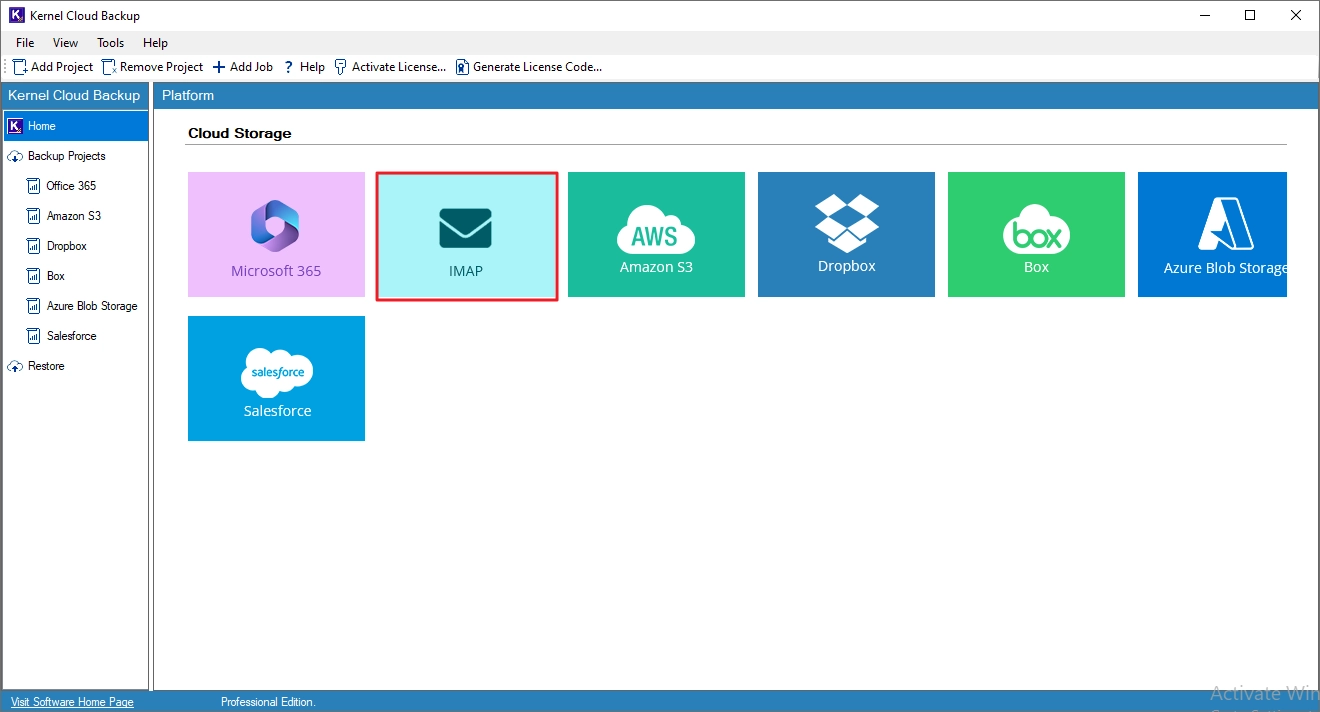
Step 1. Open the tool and select the IMAP option from the home screen.
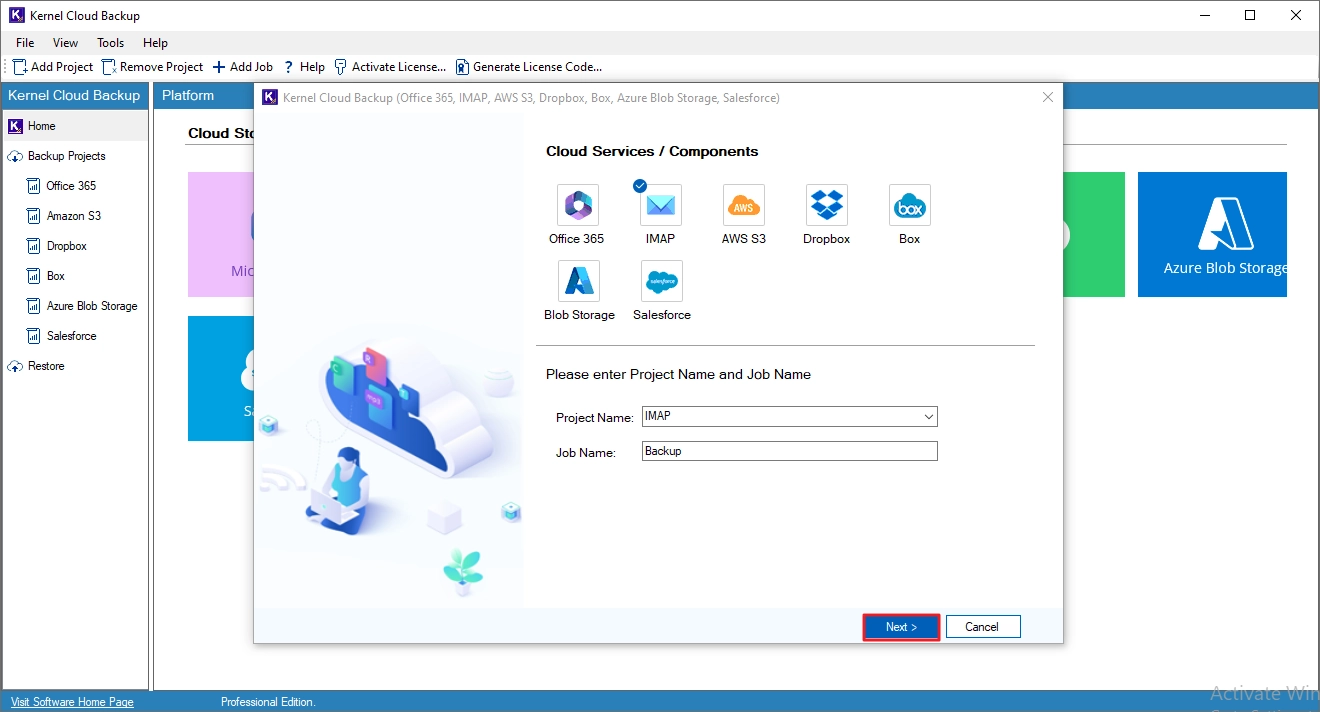
Step 2. Provide a new Project Name and Job Name. Then, click Next.
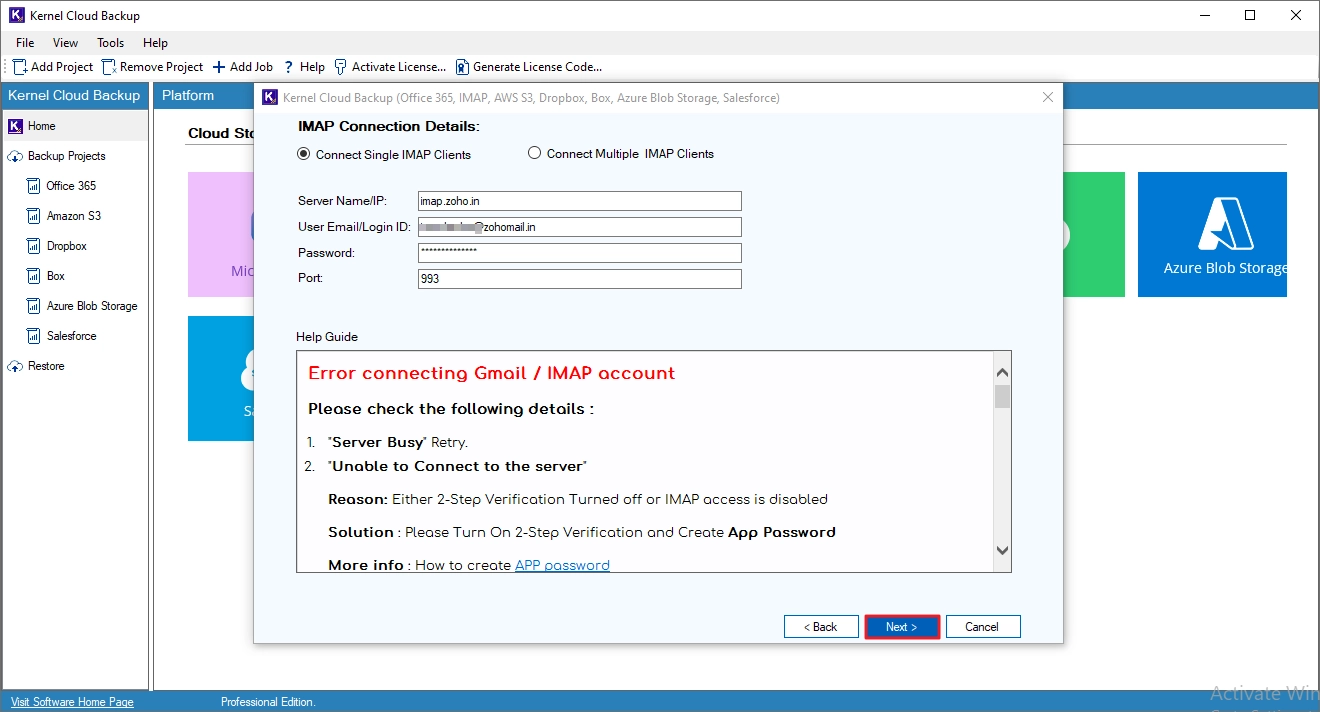
Step 3. You have two ways to connect to the source IMAP account.
- Connect Single IMAP Client: Input the details of the source IMAP account and click Next.
- Connect Multiple IMAP Clients: Upload a CSV file containing the details (server name, user email, password, port number) of different IMAP accounts. Then, validate the credentials and click Next.
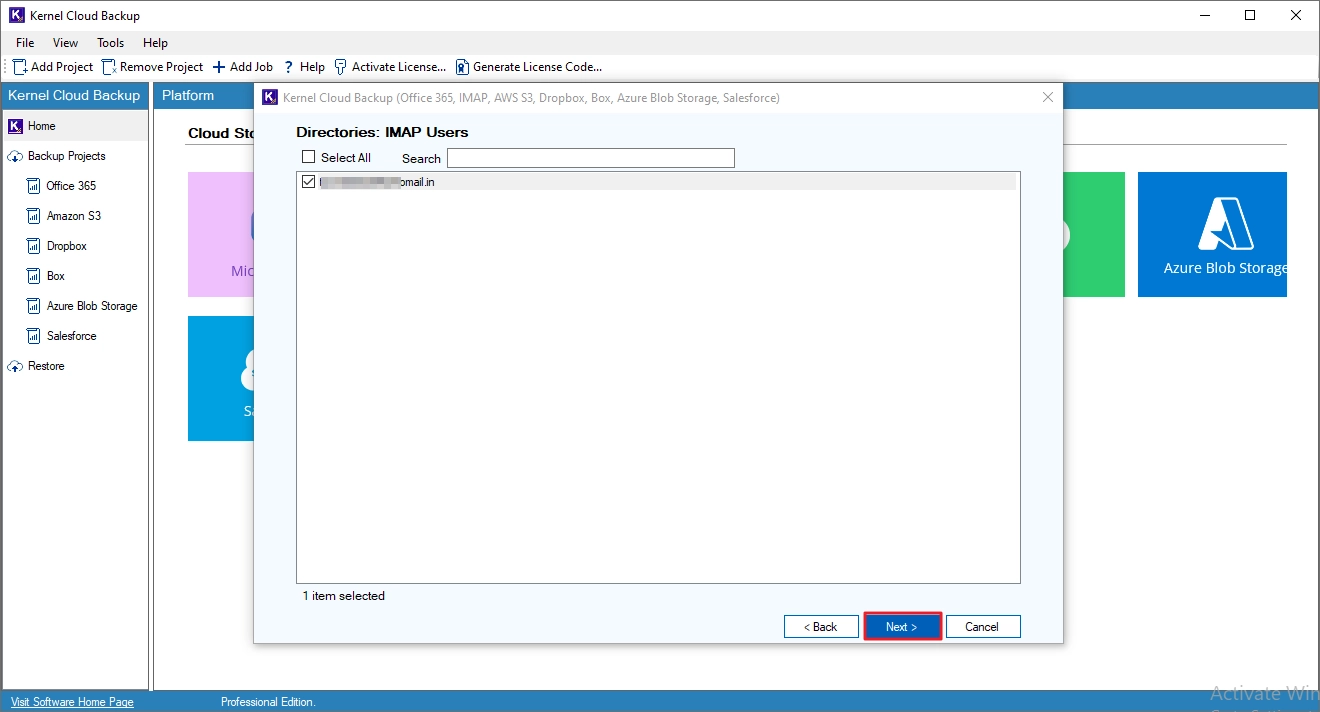
Step 4. Select the mailboxes that you want to back up. You can also search and select a specific user mailbox using the Search option. After mailbox selection, click Next.
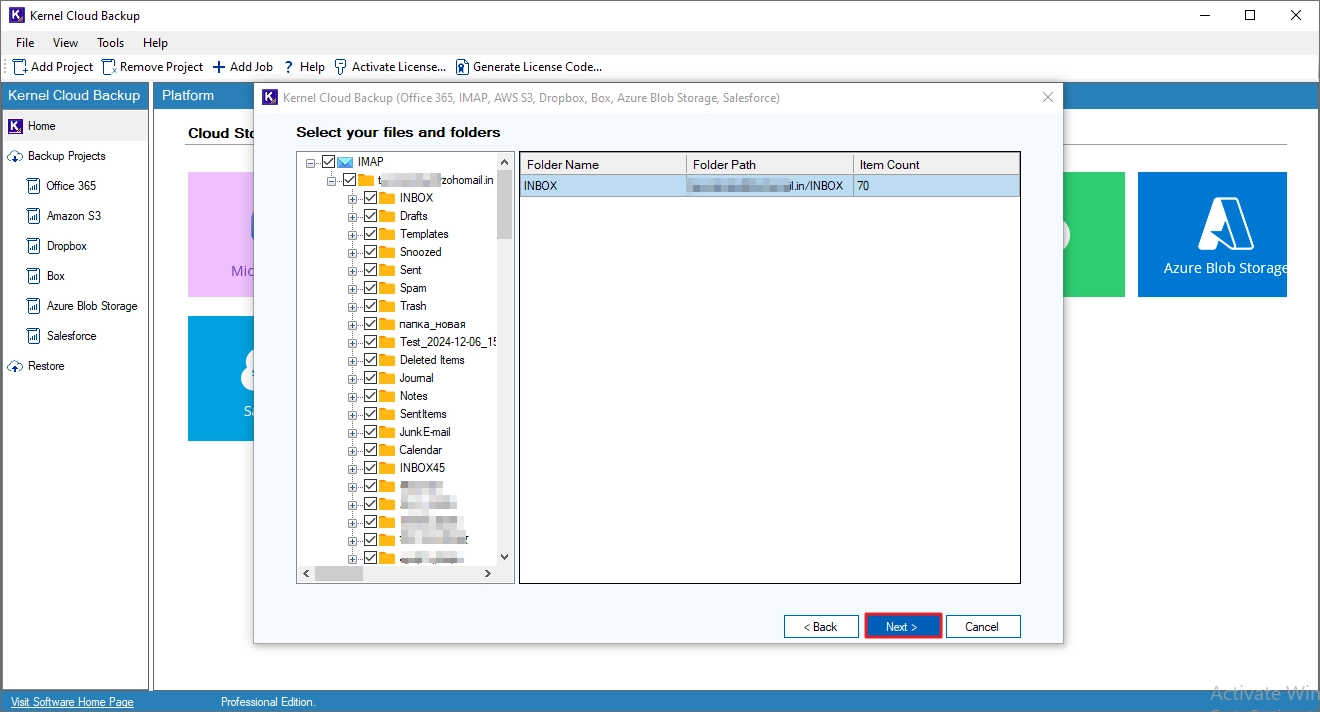
Step 5. Review the selected mailboxes. Click on the + (plus) icon to expand the mailbox folder and view the complete folder hierarchy of the user's mailbox, along with the item count (on the right-side pane). Click Next to continue configuring the backup job.
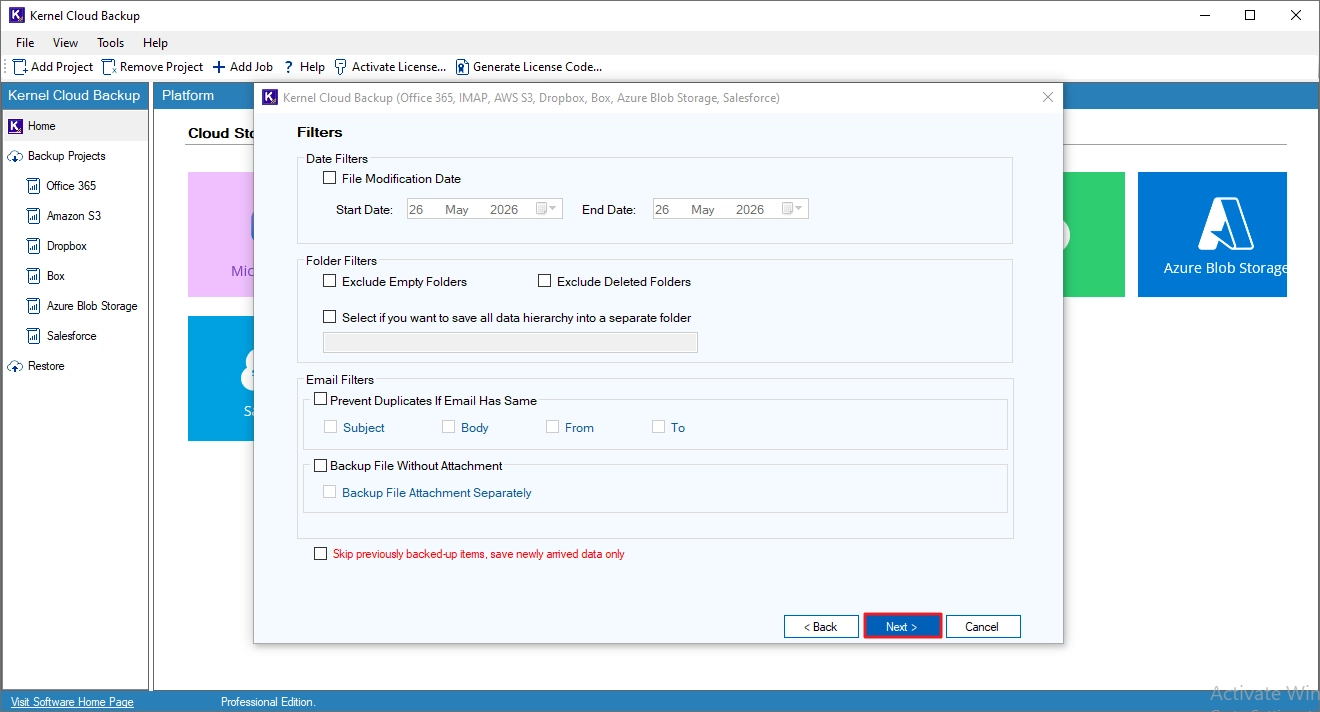
Step 6. Customize the data backup with these filters.
- Date Filters: Back up items that are sent or received between a specific start and end date.
- Folder Filters: Skip insignificant folders and save the data items (with original hierarchy) in a separate folder.
- Email Filters: Exclude backup of duplicate items and choose to save attachments separately.
- Additionally, you can choose to skip the previously backed-up items.
After applying the filters, click Next.
Step 7. Choose the backup destination (local drive, NAS, or cloud), select the output format, specify the saving location, and click Next.

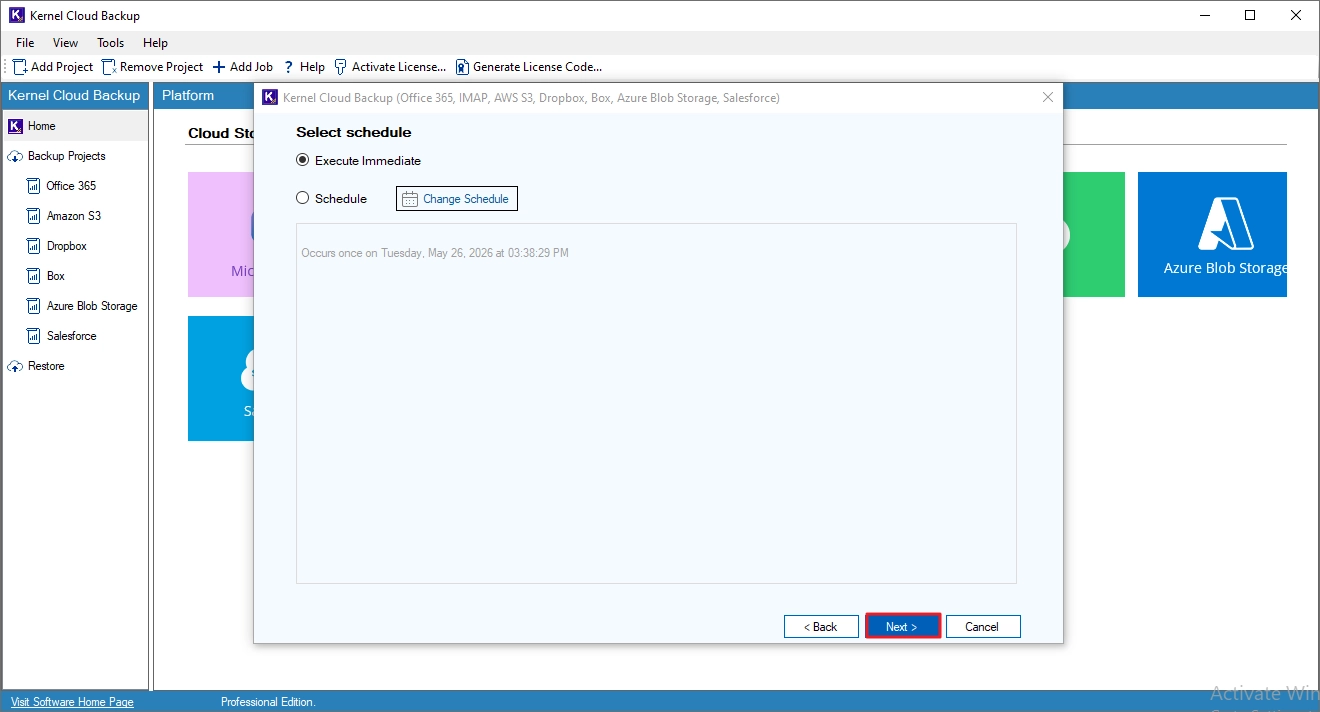
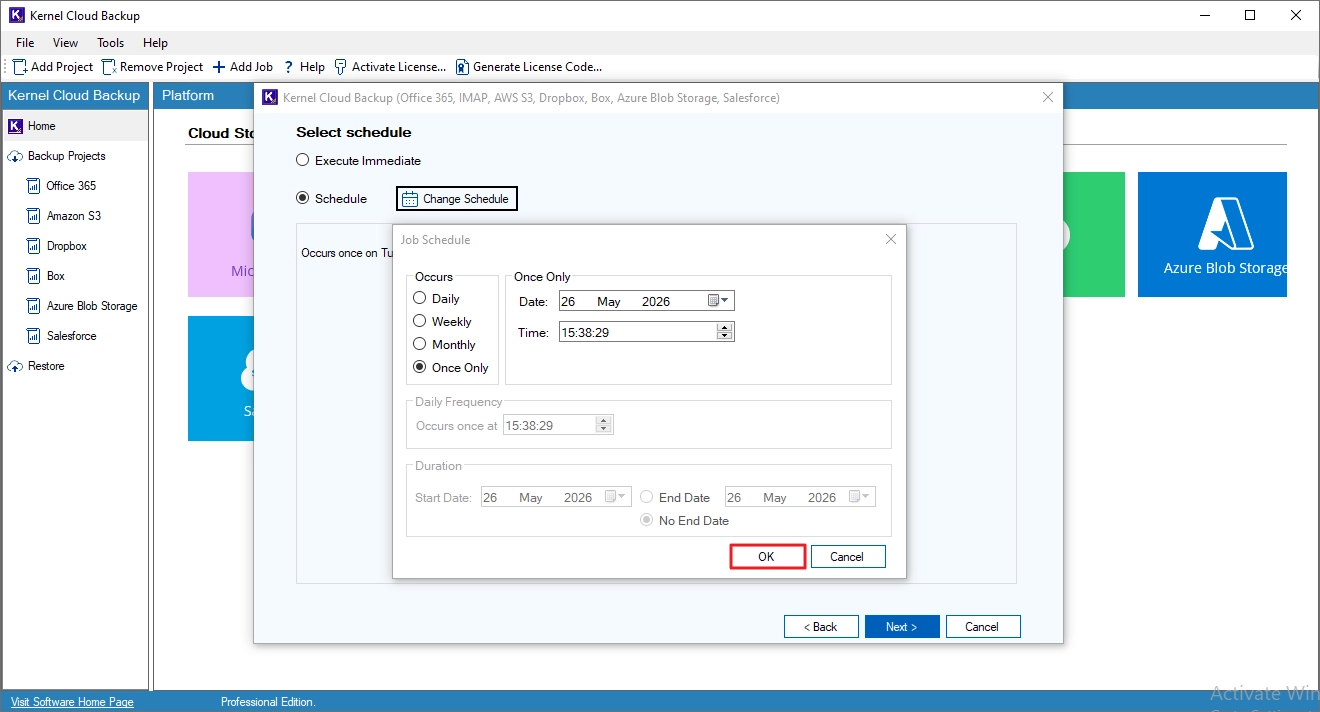
Step 8. Select Execute Immediate and click Next to run the backup instantly.
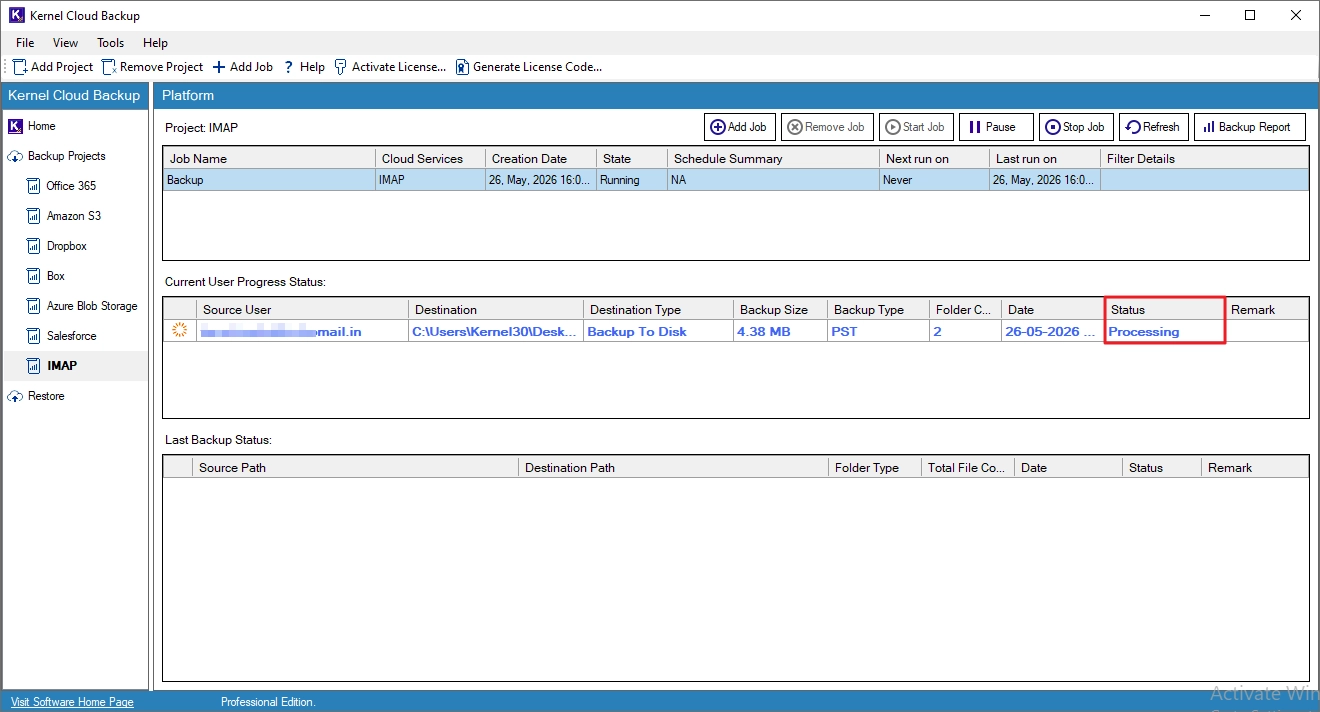
Step 9. Monitor the live IMAP backup. While the backup is running, the Job status will be shown as Processing.
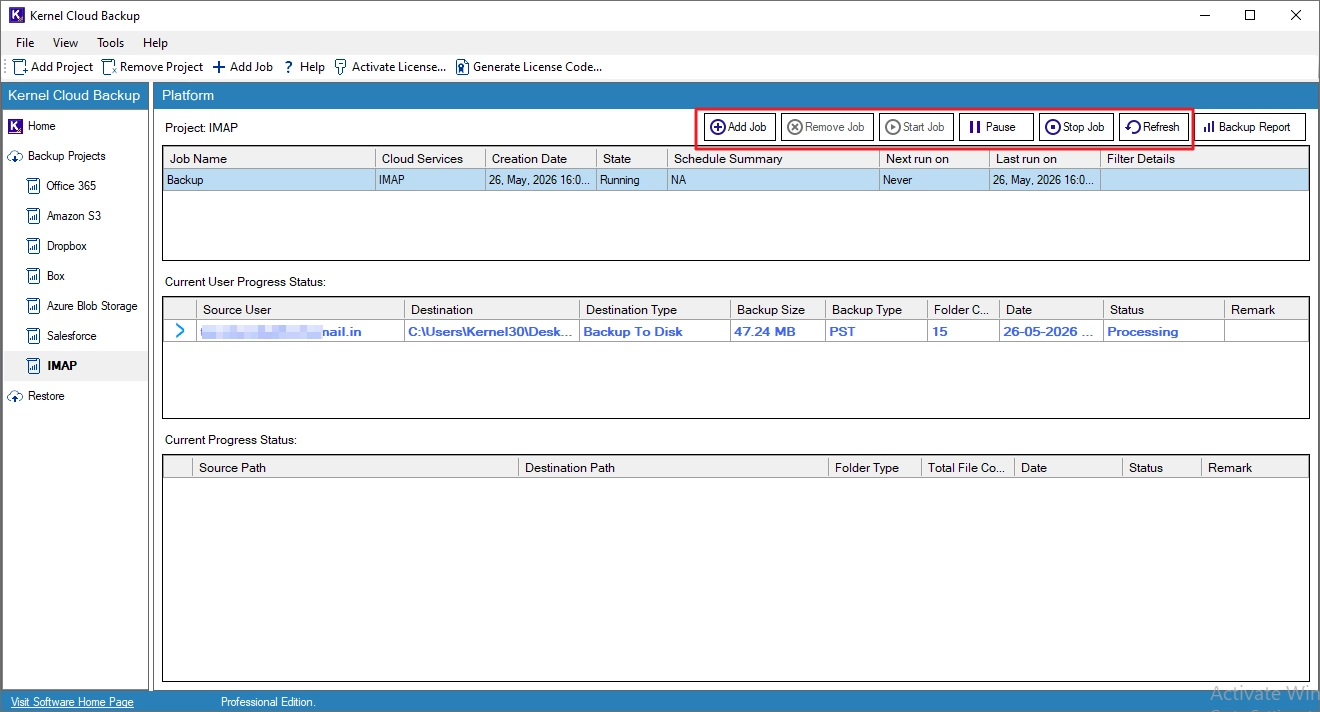
Step 10. Manage the backup job with these options.
- Add Job: Create and run new jobs under the current project.
- Remove Job: Delete the selected job from the project.
- Start Job: Start the selected job.
- Pause: Temporarily stop the selected job.
- Stop Job: Terminate the selected job.
- Refresh: Update the status of the selected job.
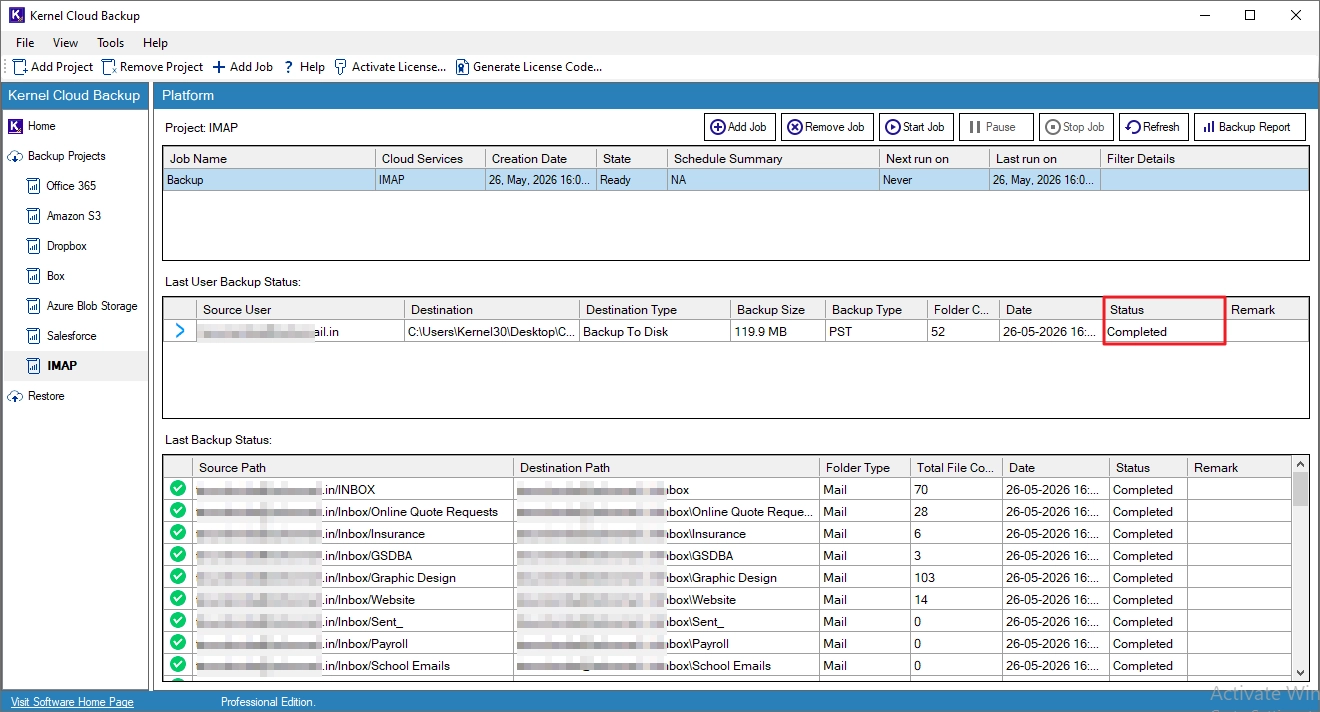
Step 11. The backup job is completed successfully.
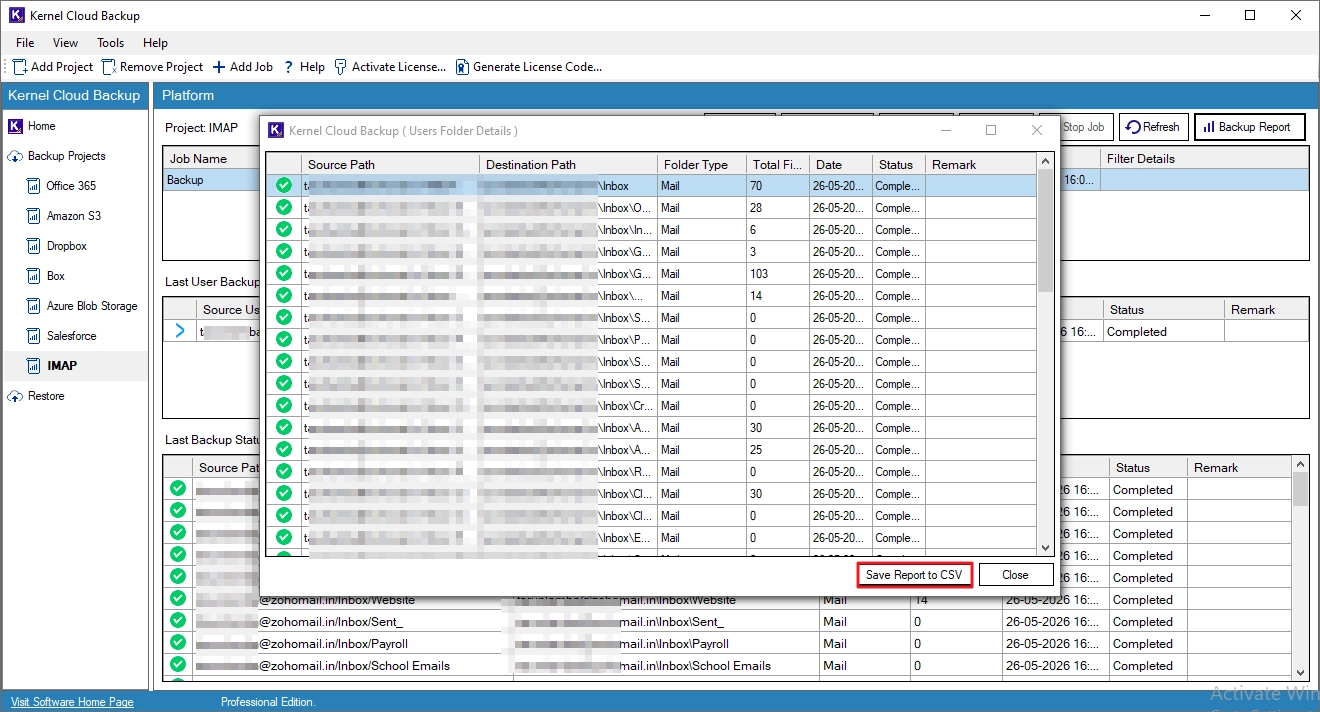
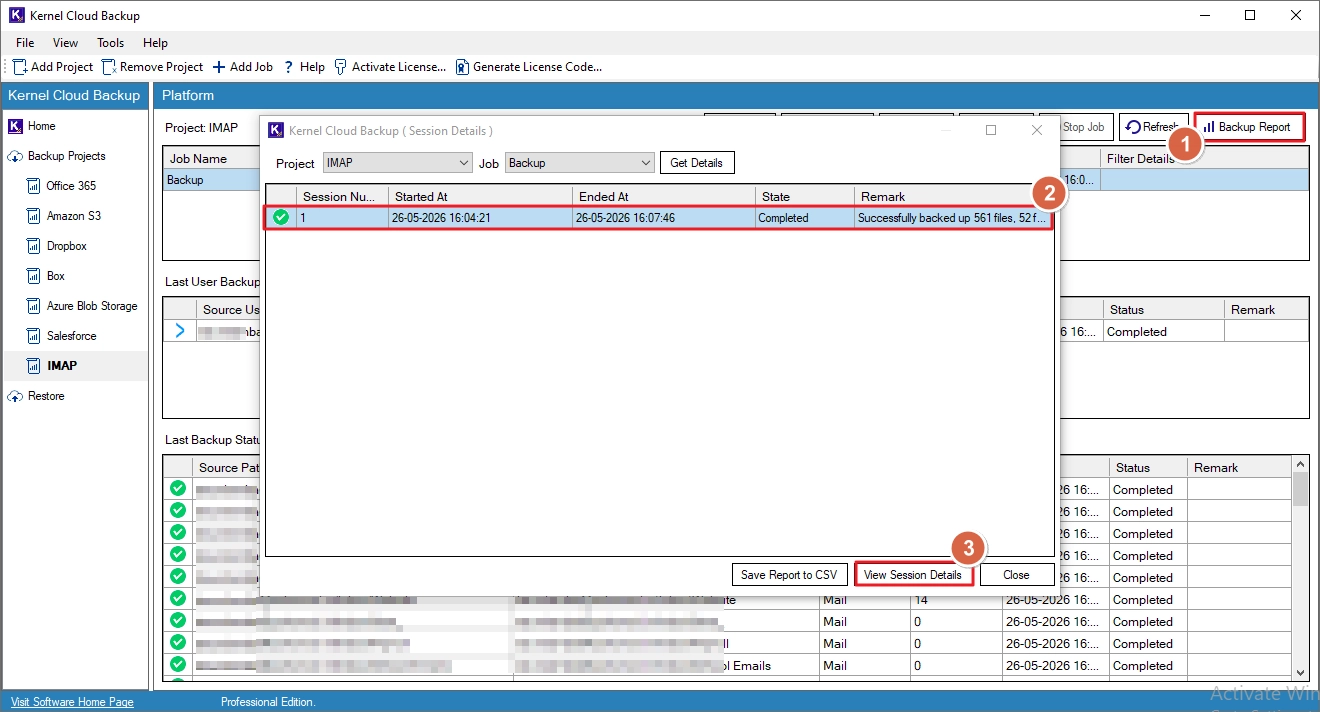
Step 12. To view the report of the backup job, click Backup Report, select the session, and click View Session Details.
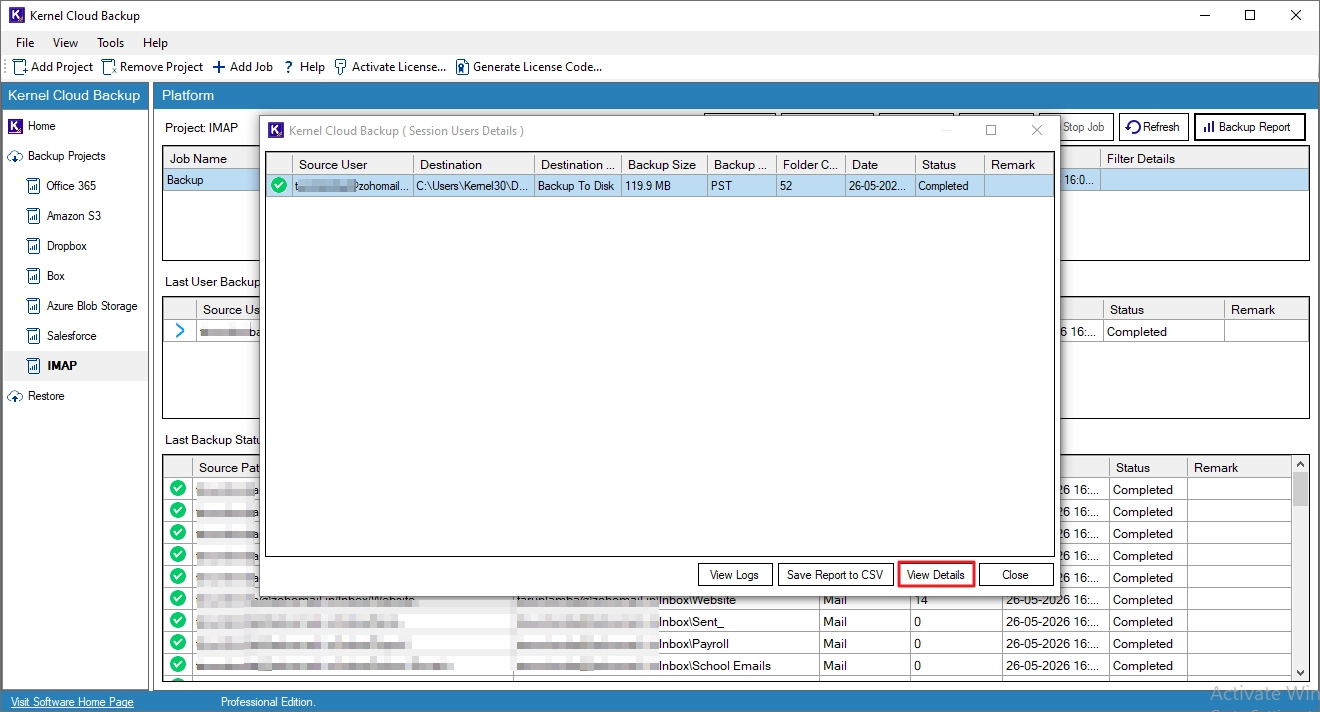
Step 13. Select the report and click View Details.
Step 14. To save the report to your system, click Save Report to CSV, specify a saving location, and click Save.