Read time: 6 minutes
By default, both Windows 10 Mail app and Outlook have a preview pane feature, also known as the reading pane. Preview pane is the function that allows you to view mailbox content in a short window. When you choose an email, it automatically opens on the right panel. This feature also displays the first line of each email together with the subject line.
Sometimes, this feature can be frustrating, like working in a public place or for other reasons; you don’t want others to see your email’s content. But don’t worry, you can turn off the preview pane to hide messages, which we will discuss below.
Here, in this blog, we will know how to disable the preview pane or reading pane in the Windows 10 Mail app and different versions of Outlook. Later, we will also discuss a professional tool to repair Outlook 2019, 2016, and 2010 PST manually.
How to disable preview pane?
To disable it, you can use the below methods. Let’s discuss each process step-by-step:
Method 1: Disable Outlook’s reading pane for a selected folder
Occasionally, you want to disable the reading pane in selected folders so that those content will not pop up in any frame of your system. To disable the reading pane in selected folders, you need to follow below steps:
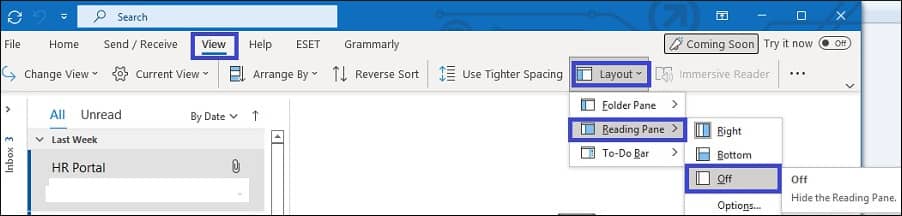
- Open ‘Outlook’ and select the ‘View’ tab.
- In the ‘Layout’section, select ‘Reading Pane.
- Click on ‘Off,’ and the reading pane turns off for the selected folder.
Steps to disable reading pane in Outlook’s all other folders
When you move your essential data to another folder, that has enabled reading pane. When you click on the message, the reading pane will preview its content, and it will impact your privacy. Follow the below steps to disable reading pane in all other folders:
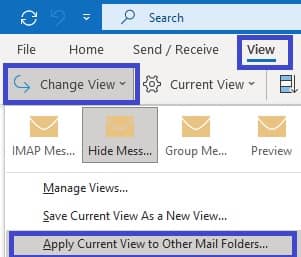
- Open ‘Outlook’ and select the ‘View’ tab.
- Now, select ‘Change View’ and click on ‘Apply Current View to Other Mail Folders.’
- Reading Pane is now disabled in all other mail folders also.
Method 2: Disable message preview in Outlook
When your message preview is enabled, then after tapping on an email, you can easily view the email content like the subject and other body. To hide the preview text in Outlook that appears under the message subject, follow the below steps:
- Open ‘Outlook’ and select the ‘View’ tab.
- Click on ‘Current view,’ then select ‘Message Preview’ and click on ‘Off.’

Method 3: Create an Outlook shortcut to disable reading pane by default
To disable the reading pane in Outlook by default, you can create an Outlook shortcut folder on your desktop. It will help you turn off the reading pane for all email accounts in Outlook. Follow the below steps to perform this method:
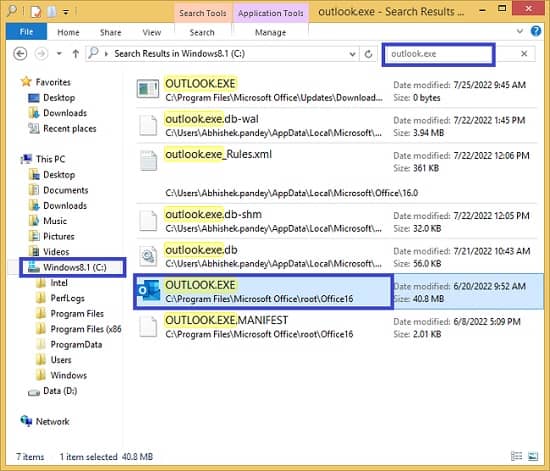
- Open ‘File Explorer’ and select the C drive. Then search for ‘Outlook.exe’ in the search bar, and you will get an ‘OUTLOOK.EXE’ folder.
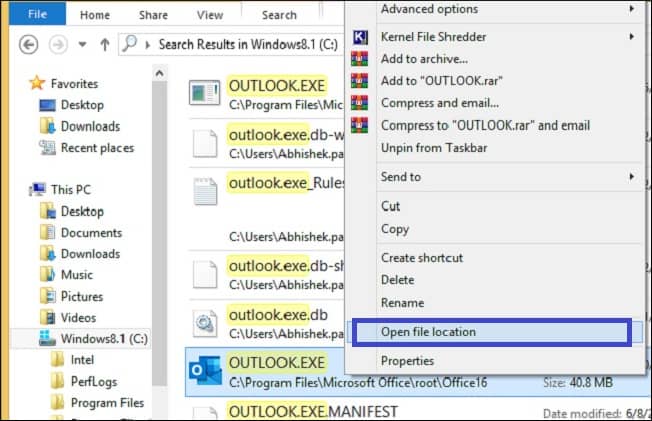
- Right-click on the ‘OUTLOOK.EXE’ folder and select ‘Open file location.’
- Copy the file address from the address bar.

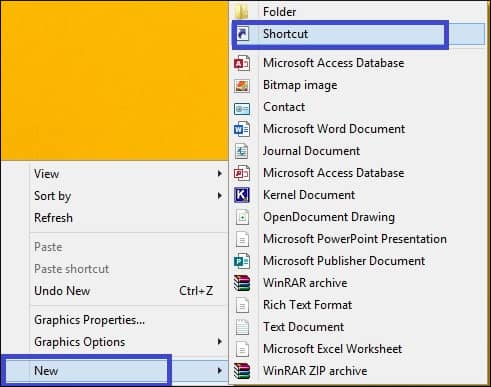
- Right-click on the desktop window and select ‘New’ and then ‘Shortcut.’
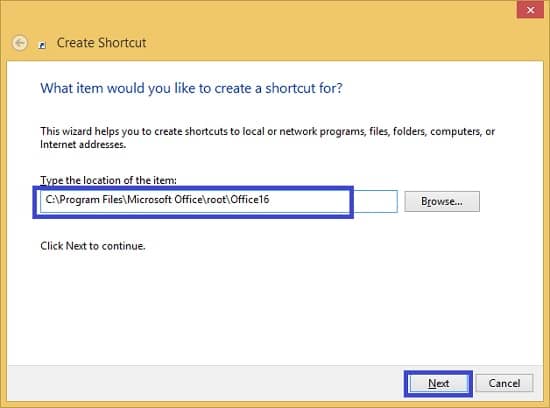
- Now, paste the address in the ‘Type the location of the item’ box that you copied in step 3 from the address bar. Click on ‘Next.’
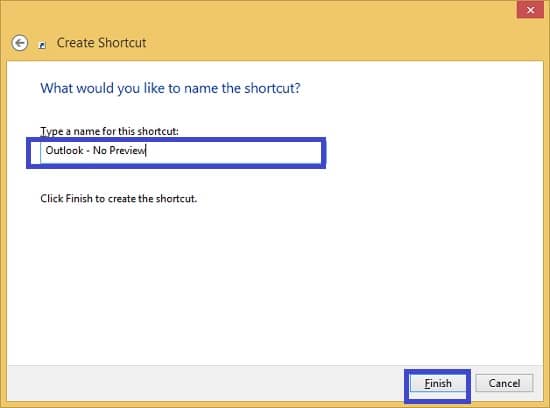
- Enter a name for your shortcut folder in the ‘Type a name for this shortcut’ box. Then, click on ‘Finish.’
- Finally, the new Outlook shortcut is visible on your desktop. Double-click to open it. Now, you will find that the reading pane is automatically disabled for all folders.
Method 4: Disable message preview in Windows 10 mail app
Like Outlook, Windows 10 Mail also has an inbuilt feature that can show all the email content by selecting the email. Through the below steps, you can disable the preview pane in the Windows 10 mail app:
- Open the Mail and click on the ‘Settings’ icon in the lower-left corner of the Mail window.
- In the ‘Settings’ menu, select ‘Message List.’
- Move the toggle switches to ‘Off’ under Preview text and Image preview.
Method 5: Disable message preview on Outlook.com
Many users use Web Outlook to have their day-to-day conversations. Web Outlook also provides a message preview. You can disable message preview in Outlook.com through the below steps:
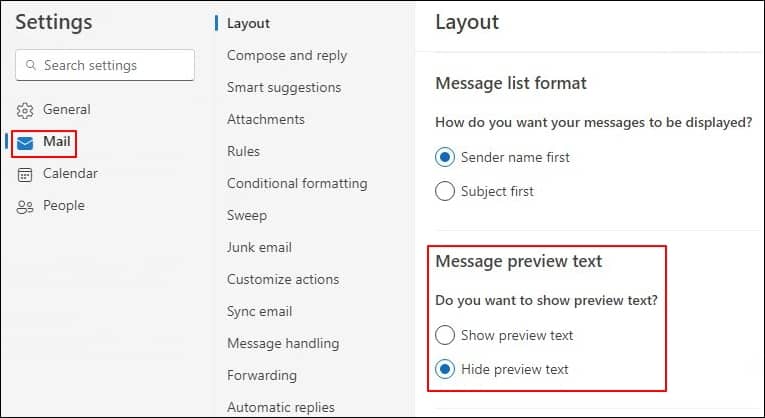
- Open Outlook.com and click on the ‘Settings’ icon in the upper-right corner.

- In the ‘Settings’ menu, click on the ‘View all Outlook Settings.’
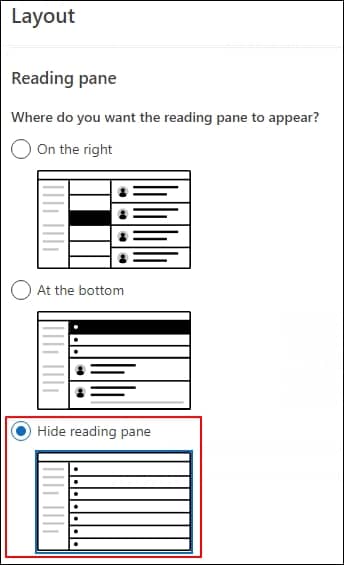
- Select the ‘Layout’ tab, then select the ‘hide reading pane’ under the reading pane option.
- Now, scroll down, and in the ‘Message Preview Text,’ select ‘Hide Preview Text.’
Professional tool to fix Outlook inaccessibility issues
The reading pane or preview pane may seem convenient and can be helpful several times. Through it, you can preview emails without sending read receipts or marking them as read. You can even customize the fonts used in the reading pane. But be careful if you use the reading pane because you may open dangerous files, attachments, or emails that can harm your computer. It can also lead to crashed Outlook and corrupted PST files.
In such a case, we recommend you go with a professional tool named Kernel for Outlook PST Repair tool to repair corrupt PST files. This tool repairs corrupted PST files and recovers lost data within a few clicks. It can quickly resolve oversized PST file issues and save them to new healthy PST files. Through it, you can easily export PST files to Office 365, web mails, and email servers. Overall, it is the best tool for repairing Outlook PST files.
Conclusion
There can be some positive and negative aspects to the preview pane in Windows 10 Mail app and Outlook. If you do not find this feature worthy, you can disable it using the above-discussed methods. However, if your PST file becomes inaccessible, then, you can rely on a professional PST repair tool to repair corrupted PST files This tool also recovers deleted Outlook items and supports all Outlook versions.