Read time 12 minutes
Comma Separated Values file format or CSV file format is a very simple format to store tabular data such as spreadsheets or databases. It is also straightforward to open CSV files using paid and open-source tools such as MS Excel, OpenOffice Calc, LibreOffice, and more. CSV is a universal file format; hence, it is convenient for many users to save their emails in a CSV format for easy accessibility. In this tutorial, we will explore ways to export Gmail emails to a CSV format.
Ways to export Gmail emails to CSV file format
In this section, we will explore ways to export Gmail emails to a CSV format.
Download Kernel Gmail Backup tool to Export Gmail Emails to CSV and other file formats, like PDF, EML, DOCX, DOC, & MSG file formats.
Way 1: Manually save each email
This is a very straightforward method for exporting Gmail emails to CSV, but it is recommended only in those cases when you have a few emails for conversion. Manually saving every mail is tedious and time-consuming; hence, we don’t recommend this for converting a bunch of emails. Nevertheless, the detailed steps are outlined below:
- Click on the email that you would like to export.
- Next, click on the More tab (three vertical dots) and select the Download message.
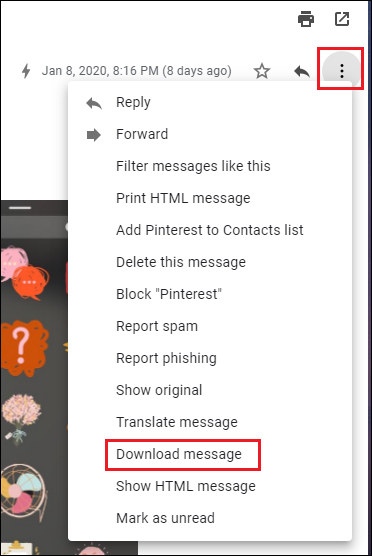
- Your message will then be downloaded in the EML format. FYI, EML format files can easily be opened in desktop email clients such as MS Outlook, Thunderbird, Zimbra, and more.
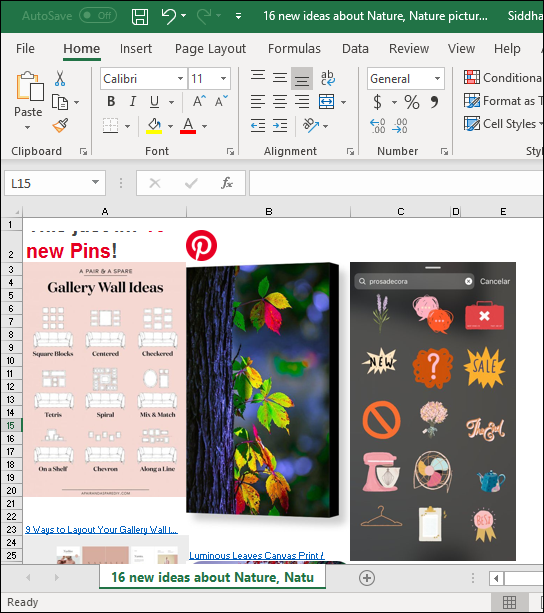
- Next, open a blank spreadsheet in MS Excel and drag and drop the EML file into the blank spreadsheet.
- You will now be prompted with a new message, as shown below; hit Yes to proceed.

- The email will now open in a Protected View due to security reasons. Click on Enable editing to view the mail.

- Your email message can now be viewed in a CSV format, as shown below:
- Proceed to Save the CSV file.
- Repeat steps 1-8 for each of the emails that you want to export as a CSV file.
Way 2: Export to CSV using chrome extension
Cloud HQ’s Email to Google Sheets extension is an excellent utility for exporting your email items directly to CSV. Let us now explore how it works.
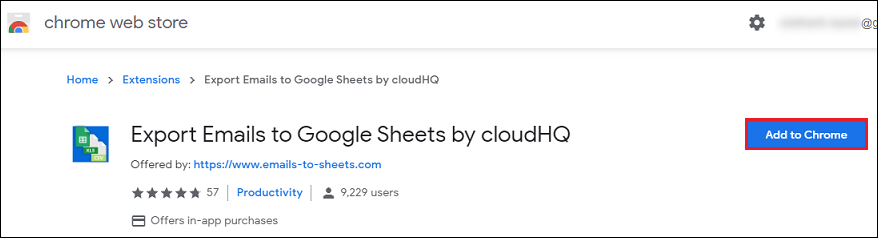
- Open Chrome web store and search for the extension with the name Export Emails to Google Sheets by cloudHQ. Next, click on Add to Chrome. The extension will automatically be integrated with your Gmail account.
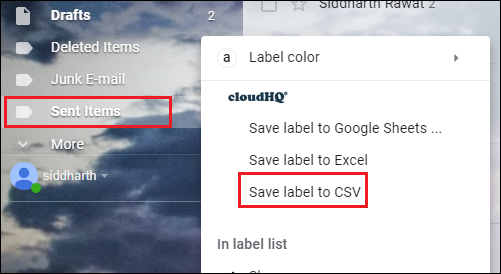
- Let’s say you want to convert the emails under the Sent Items folder to CSV. Left-click on the ellipses (three vertical dots) next to the label and select Save label to CSV or Save label to Google Sheets.
- In the Save Settings/ Default Columns, select all that apply to you and hit Start.
- Next, you will be prompted with the following message:
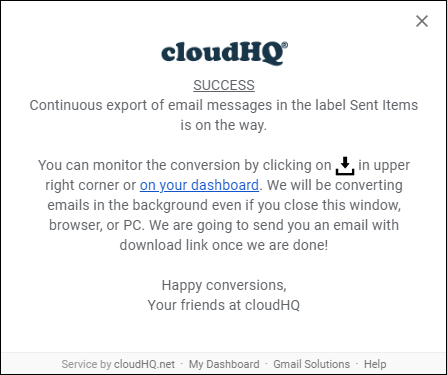
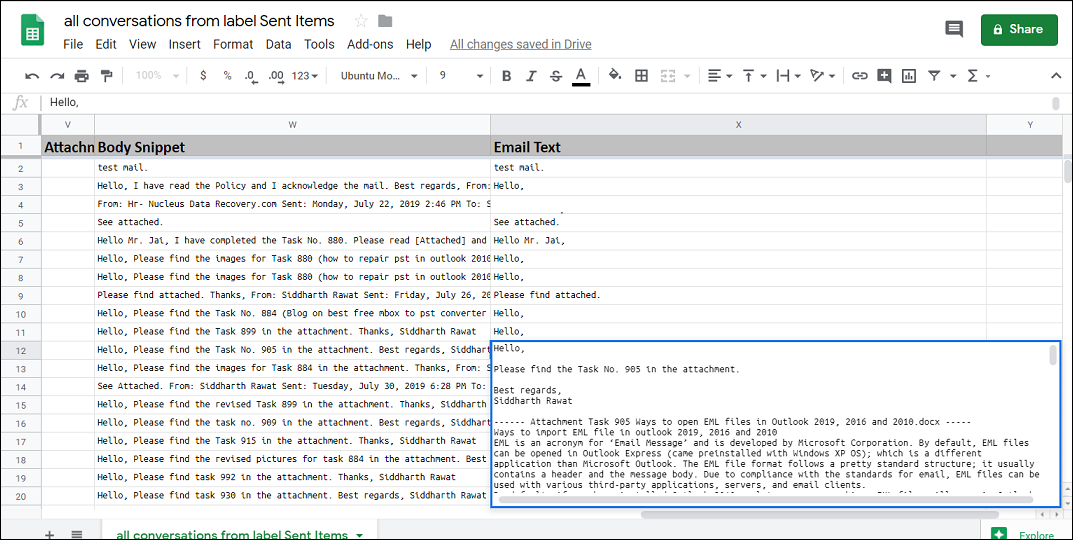
- Once done, you will receive an email with the spreadsheet link. Open up the link. Clicking on any email text expands the email body, as shown below:
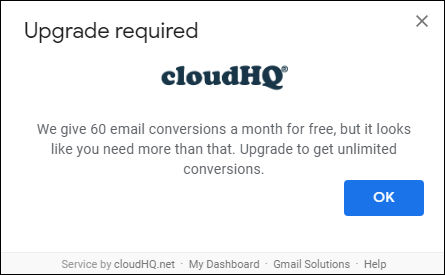
Note: Another advantage of this extension is that it also saves each of your emails in PDF format, which can be accessed from anywhere. - If you have many emails, then you might need to upgrade to the premium version as the trial version allows for only 60 conversions a month.
To Save Gmail Emails to PDF, one can also download Kernel Gmail Backup Software. It also allows you to save Gmail emails in PST, EML, MSG, HTML, and DOC formats.
To backup G Suite data, including Google Drive, Google Hangout Chats, Contacts, Calendar, & Mail, get Kernel G Suite Backup Tool.
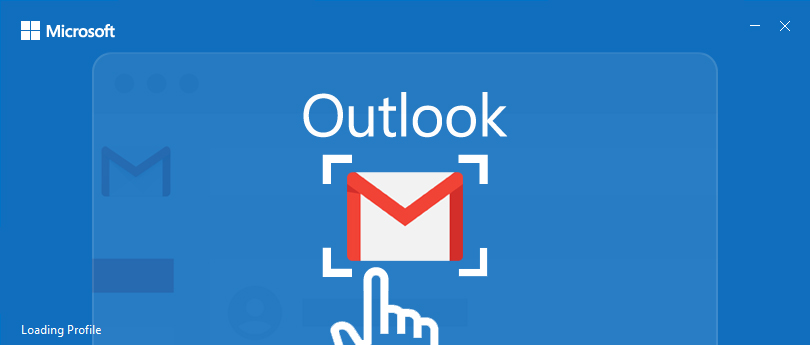
Way 3: Connect to Gmail over IMAP using MS Outlook
The following best possible way to export Gmail emails to a CSV format is by configuring/ adding the Gmail account in the MS Outlook desktop client. Once configured, the emails can then be exported to a CSV (or a PST) format. Before this, to add a Gmail account to the Outlook desktop client, make sure the two-factor authentication is turned on, and you have generated an App password (as your Gmail password won’t work while adding Gmail on Outlook). To generate the App password, follow the steps mentioned below:
Part 1: Prerequisite- Generate app password
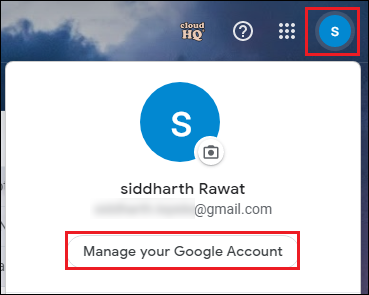
- Left-click on the user account icon and select Manage your Google Account. This will open a new tab in your browser.
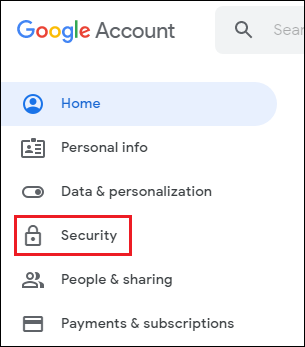
- Next, from the left pane, click on the Security button.
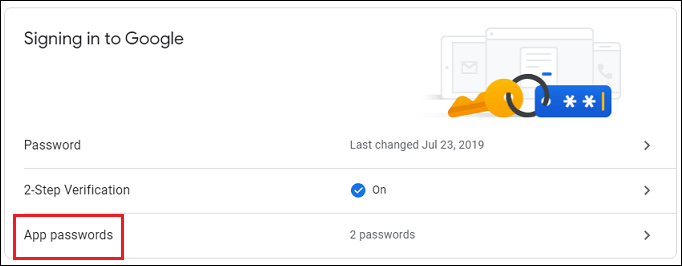
- Scroll down and turn on 2-Step Verification is turned on. Click on App passwords.
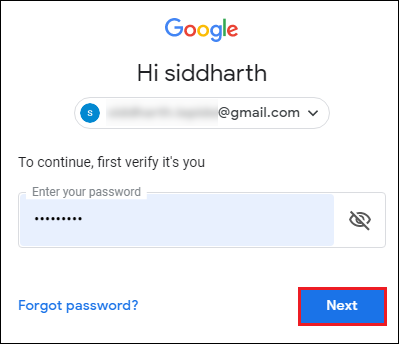
- Verify your identity by entering your Gmail credentials and hitting Next.
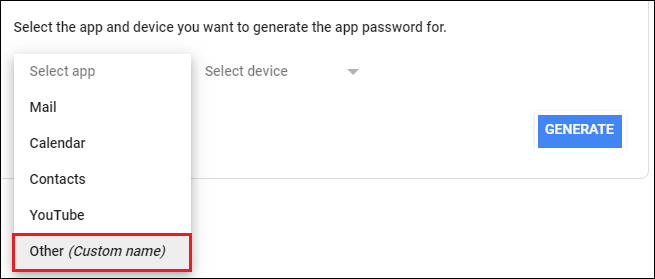
- From the drop-down menu of Select app, select Other (Custom name).
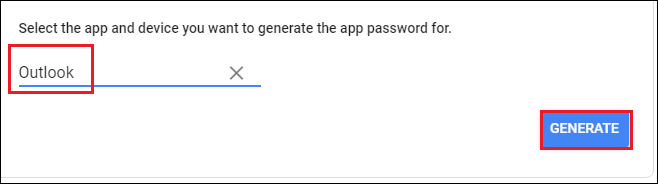
- Enter Outlook in the text field and hit Generate.
- Your generated App password will be displayed, so copy it somewhere and click Done.

Assuming that you are done with App password generation, next, we will proceed with adding a Gmail account to the Outlook desktop client. The detailed steps are mentioned below:
Part 2: Add a Gmail account in Outlook
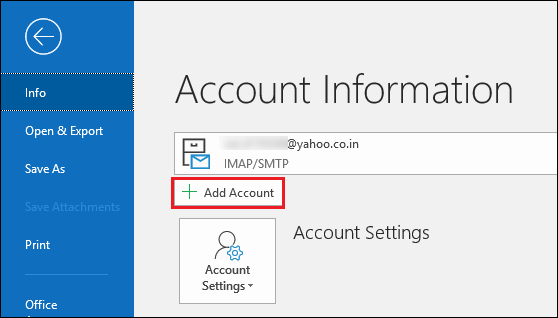
- Click on the File tab from the Outlook ribbon > click on Add Account.
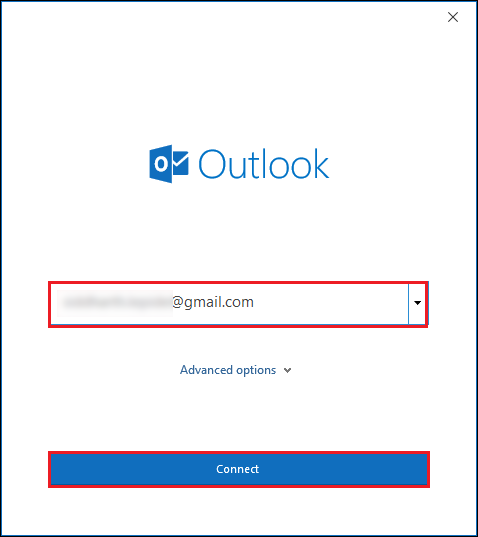
- Next, enter the email account that you would like to add and hit Connect.
- Next, in the text field, enter the earlier generated App password and hit Connect.

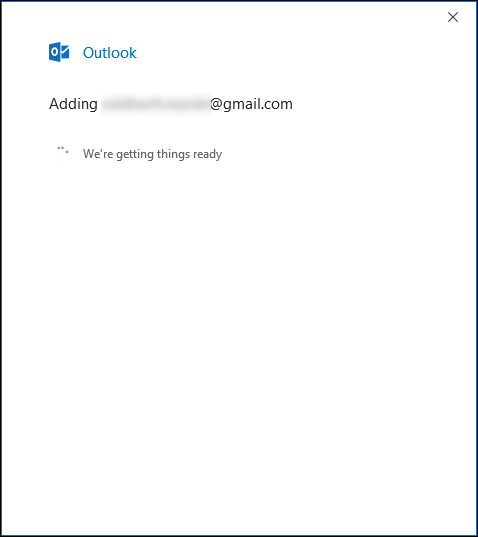
- Outlook will now attempt to add the Gmail account.
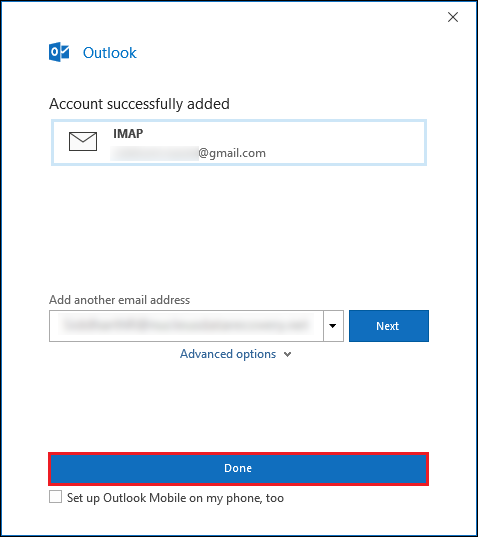
- If everything goes well, you will be prompted with a message: Account successfully added. Click done to proceed.
Part 3: Export emails to CSV format
To export the emails to a CSV format, follow the steps outlined below:
- Click on the File tab > Open & Export.
- Select Import/Export.
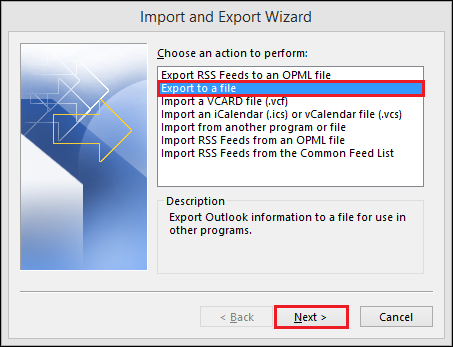
- In the Import and Export Wizard, select Export to a File and hit Next.
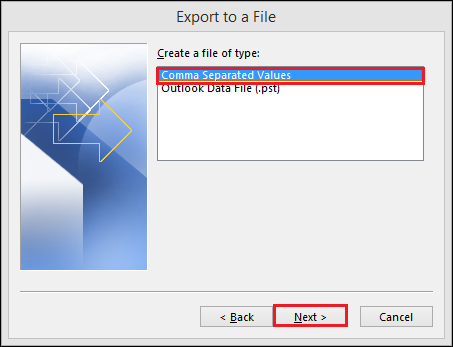
- In Export to a File, select Comma Separated Values.
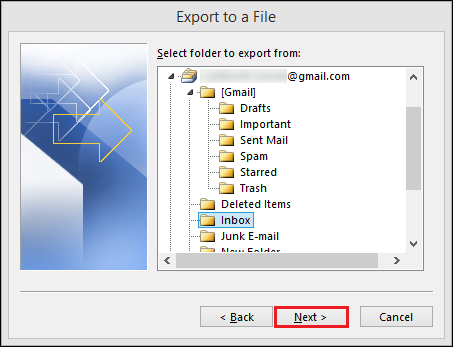
- In Export to a File, select the folder (containing emails) that you would like to export as CSV and hit Next.
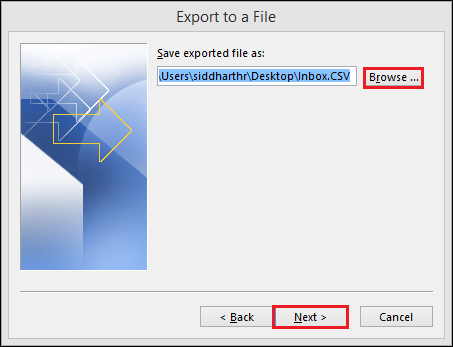
- Next, click the Browse button to provide a location (and filename) to save your CSV formatted emails and hit Next.
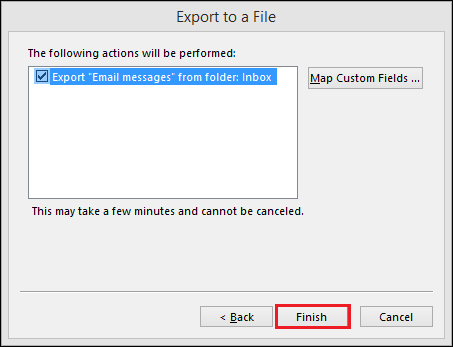
- Click on Finish to export email messages to the earlier provided location.
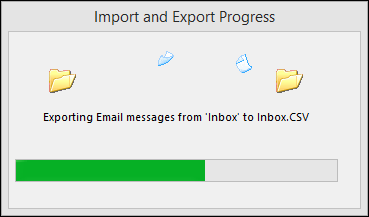
- A new dialog window shows the status of the task.
- You are all set!
As you are now a pro in exporting Gmail emails to CSV, it would also be wise to keep your emails backed up as an extra precautionary measure for your important emails and attachments. For safe and secure email backup, look out for the best-in-class tool: kernel IMAP Backup Tool.
Apart from Gmail, this tool supports Yahoo, Outlook.com, Amazon Work Mail, G Suite, AOL, etc., along with a smooth & flawless email incremental backup process. Furthermore, it ensures the accuracy and security of data at all stages of the backup process.
Conclusion
In this post, we have extensively discussed three feasible ways to export Gmail emails to CSV format. There are several advantages of storing emails in a CSV format as it is a universal format that can be opened using several readily available tools. We hope these solutions will make your export process quicker and easier.
Moreover, do not forget our recommended tool to keep a secure backup of all your emails. As the trial version is available 24×7, be ready to get hands-on experience with the tool today.