Read time: 9 minutes
Microsoft Outlook is an extensively used personal information manager which uses the PST (Personal Storage Table) file format to store calendar events, contacts, journals, notes, tasks, and web browsing information. PST files reduce the amount of data being stored on email servers. However, after a point, even the PST files exceed the maximum size limit of mostly 50GB. The increase in the size of PST files leads to rising issues in Outlook, which gives rise to the need to split these PST files.
What is the need to split PST files into smaller parts?
The increase in the size of PST files to the extent of its maximum file size starts affecting the day-to-day functioning of MS Outlook. The smooth functioning work can get disturbed. These are the reasons behind the need to split larger PST files into parts:
- The functioning and pace of Microsoft Outlook slow down with huge risk of losing the data which the PST file contains.
- If the PST file exceeds its maximum capacity, the data it contains may be inaccessible.
- Storage of more data becomes difficult, and users face issues in sending and receiving messages.
- By splitting the PST file into smaller ones, the data can be organized in a better way.
Manual methods to split PST files into smaller parts
This section contains complete manual procedures and methods to split the PST file safely in Outlook. So, try every method that works for you.
Method 1. Split large PST files using the Import/Export option
The Import/Export option is widely used for various tasks in MS Outlook. Its prime task is to move files in and out of the application. However, it can prove to be handy when it comes to splitting PST files into smaller parts. Follow these steps to efficiently split PST files using the Import/Export feature:
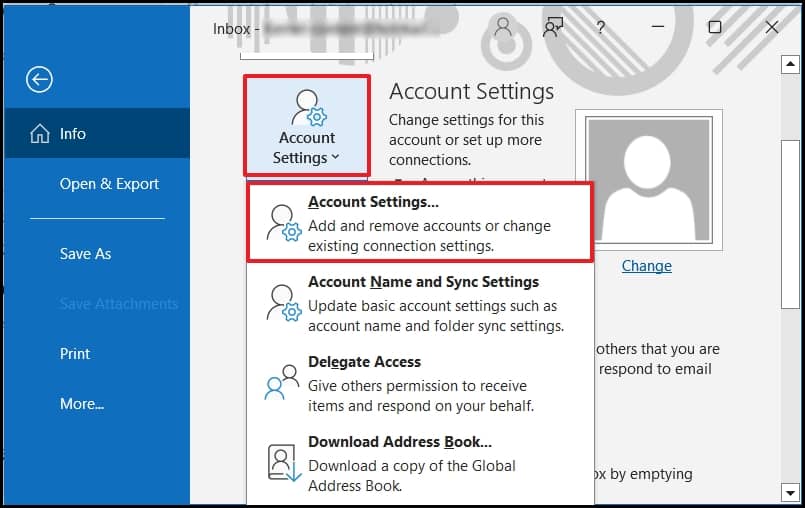
- Open Outlook, click on File and select the Account Settings in Account Settings.
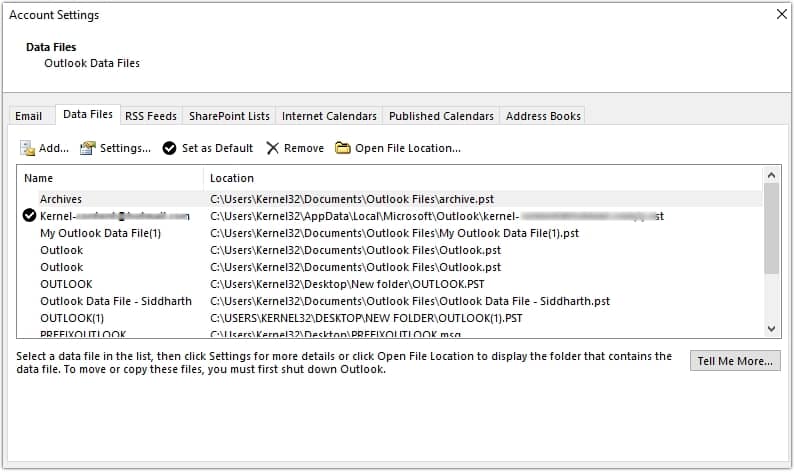
- A new dialog box will open. Click on Add under the Data Files section and add the new data file name as required. You can see this file in the Outlook data file section.
- Again, click on File. Select Open & Export from the left tab and then click on the Import/Export option.

- An Import & Export Wizard dialog box will appear. Click on Export to a file and then Next.

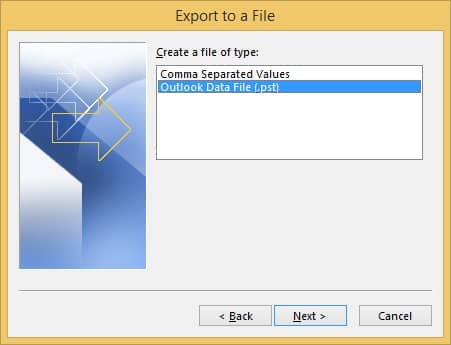
- Now, select Outlook Data File (.pst) and click on Next.

- Choose the folders and make sure to tick the checkbox of Include subfolders and click on Next.
- Choose a destination to save the exported files and highlight the option of Do not export duplicate items, and click on Finish.

Method 2. Reduce large PST files using Archive feature
Another way to split and manage large PST files is by using the Archive feature to clean out old items. Follow these steps to use the Archive feature to manage PST files:
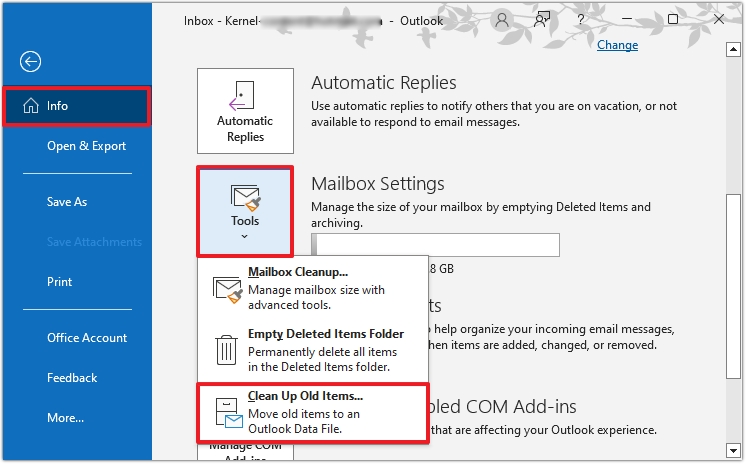
- Launch the MS Outlook on your system and click on File. Click on Mailbox Settings. A drop-down menu will appear and click on Clean up old Items.
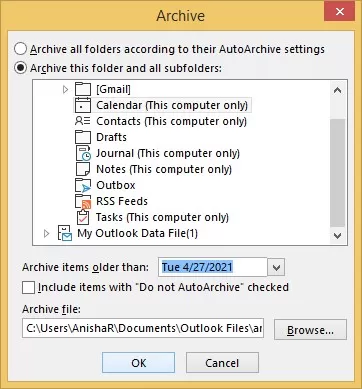
- Select the folder and date to archive and click on OK.
Method 3. Manage large PST files using the Move to Folder option
Move to Folder feature in MS Outlook can also be used to split large PST files into smaller ones. Follow the steps for easy navigation:
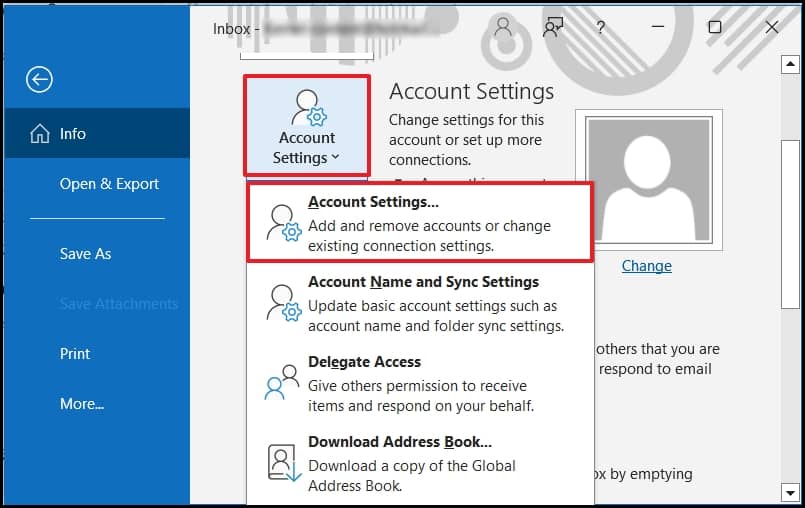
- Click on File. Go to Account Settings under the Account Settings.
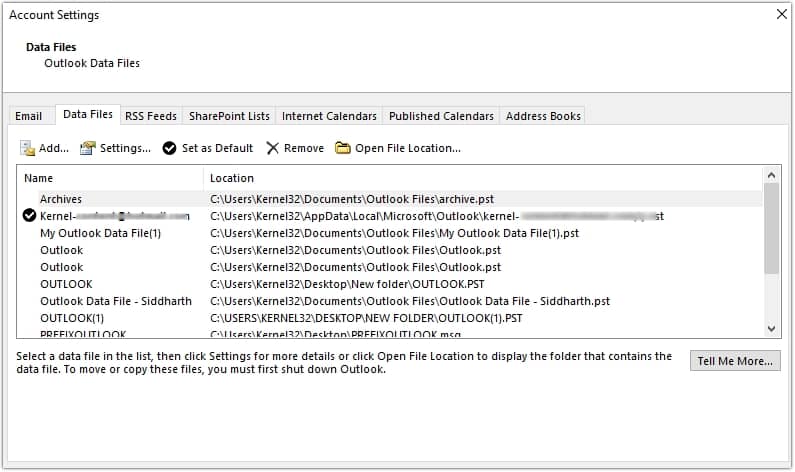
- Click on Add under the Data Files section.
- Return to the home screen and click on on Move to folder under New Quick step section and choose the folder you’ve created above.
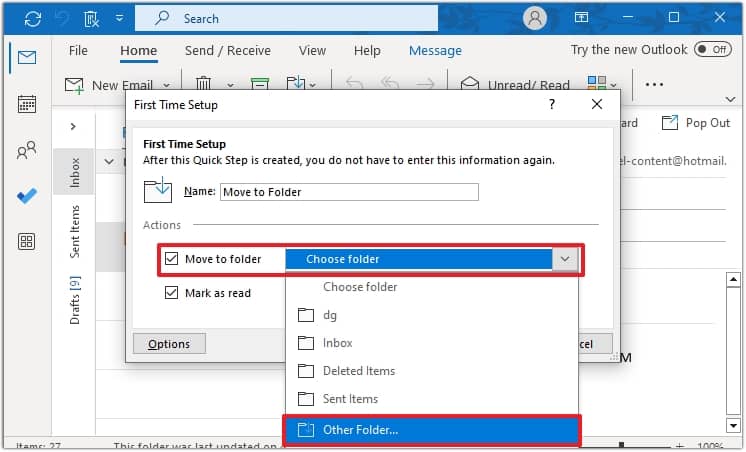
The items will be moved to the newly created PST file. You can delete the old data from the file to increase the space.
Limitations of manual methods
Manual methods to split PST file have an advantage as they are free of cost. However, they do tend to be complex to split PST files into smaller ones. These are a few setbacks due to which users do not opt for manual methods to perform this task-
- To begin with, it is a time-consuming process and there are high chances of losing important data permanently.
- In addition, there is no guarantee of integrity and security of data in the PST files.
- These methods are not beginner friendly, so the users should have a decent understanding of Outlook.
Try for a professional approach to split PST file
All the shortcomings of manual methods are brilliantly resolved by professional tools. One such tool is the Kernel for PST Split, which provides a unique and premium approach to split oversized PST files into smaller ones. It is ideal since it lets the users split PST files into smaller ones based on 5 factors- date, size, folder, sender email ID, and a separate PST file for all selected folders. There is full accuracy and integrity of data throughout the process. It is a well-compatible software with all versions of MS Outlook Office, including Office 365, 2019, 2016, 2013, 2010, 2007, 2003, 2002, 2000, 98, and 97.
Follow these simple steps for a hassle-free split of PST files:
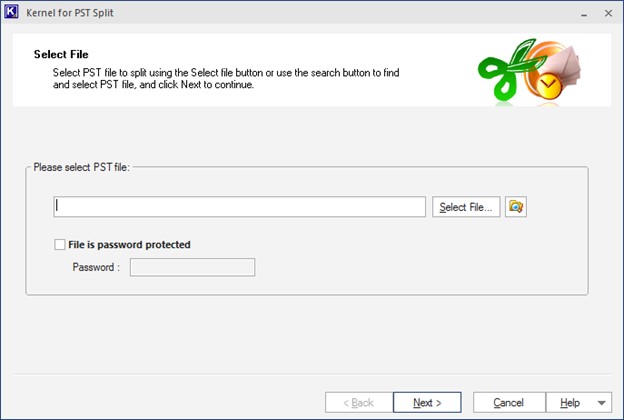
- Browse and select the PST file.
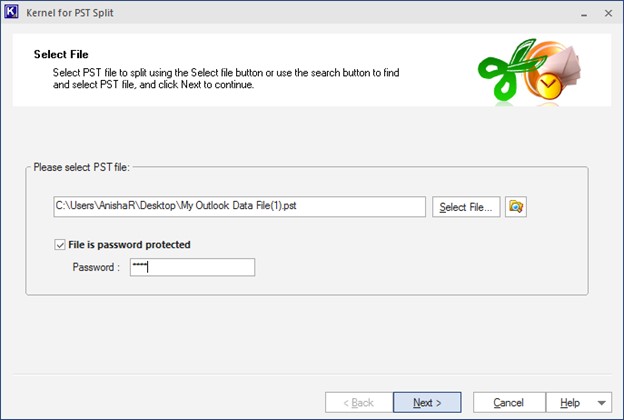
- The selected file will be displayed. Tick the checkbox and type the password if the file is password protected, and select Next to proceed.
- Select the basis on which you want to split the PST file. Click on Next.
Here, Split PST file on basis of Date has been selected.
- Set the parameters for the split.

- Choose the location to save the smaller PST files.

- The splitting process will be completed in a jiffy.

Conclusion
PST files store all the data in Microsoft Outlook, including tasks, events, contacts, notes, and web browsing information, due to which its size tends to exceed the maximum capacity. A large PST can slow down the functioning of Outlook. In addition, there is a high possibility of data getting lost or inaccessible. Due to these reasons, there is a high need to split the PST file into smaller ones. This can be done using the above-discussed manual methods. However, manual methods do bring along a few shortcomings as well. To maintain the integrity of data, a best Outlook PST Splitter tool like the Kernel for PST Split is recommended. Download today!


