Read time: 3 minutes
Outlook is a commonly used email client across the world. Its amazing features and high-security standards make it a perfect choice for businesses, professionals, and personal users. Having ease to manage all email accounts in one place makes it a more convenient platform for users. Outlook has the capability to manage email accounts of numerous email providers like Gmail and Yahoo easily. By doing this, you can securely send and receive email messages.
In this blog, we have provided some manual methods to set up a webmail account in Outlook. Once the webmail is configured in Outlook, you can easily use and access emails in Outlook.
How to set up webmail in Outlook
Outlook can manage email accounts from different providers, including Webmail. However, it permits users to easily compose, send/receive, and manage all their emails from a single platform. Here, we discuss some straightforward steps in different Outlook versions.
If you are using Outlook 2013, then you can easily set up webmail in Outlook by following the steps mentioned below:
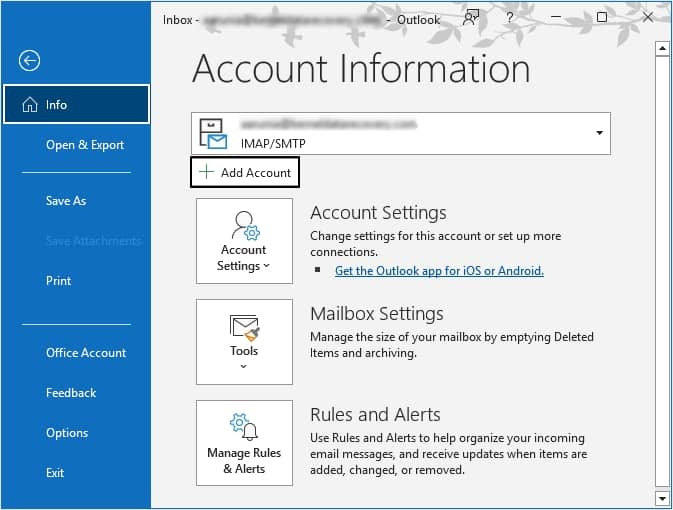
- Open Outlook and select the File menu.
- From the left pane, select Info and then select Add Account.
- From the Add Account dialogue box, select the ‘Manual setup, or additional server type.’ Click Next.
- Now select the box, POP or IMAP, and then click Next.
- Provide the details as asked for in the Account Settings option.
- Enter your Name and Email Address.
- Select IMAPas the account type.
- Enter incoming and outgoing server details.
- Under Log in details, enter the email address and password of the webmail you wish to configure.
- Select More Settings.
- Select the tab Outgoing Server and then check the dialogue box, My outgoing server requires authentication.
- Select the Advanced tab
- For Incoming Server (IMAP), enter 993 and select SSL.
- For Outgoing Server (SMTP), enter 465 and select SSL.
- Click OK.
- You will be asked, ‘Do you want to continue using this server.’ Click on Yes.
- Select Test Account Settings to verify the steps.
- Under the Test Account Settings option, there will be a tick bar on both ‘Log onto incoming mail server POP3’ and ‘Send test email message.’ This implies that the process is completed.
- Click Finish.
If you are using Outlook 2016 and 2019, then following the steps mentioned below:
- Launch Outlook on your device.
- Click on File option, then tap on Add Account button.
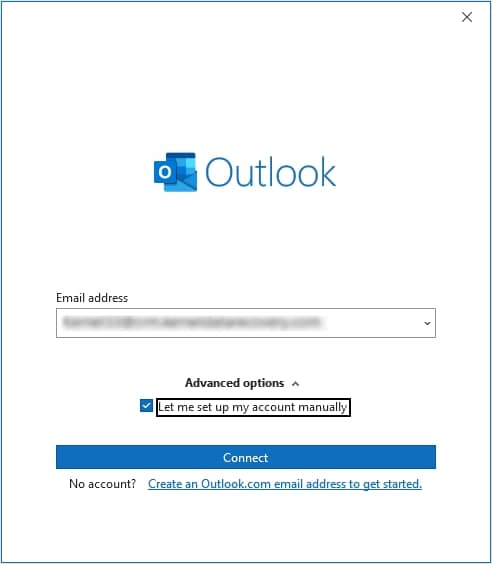
- Type in your email address and then click on Advanced options.
- Now select Let me set up my account manually option and click on Connect.
- Select account type POP or IMAP.
- Enter the incoming and outgoing serve details with port number. Then select SSL/TSL as encryption method.
- Moving ahead, select the check box ‘Require logon using Secure Password Authentication’ and press Next.
- Enter credentials of the provided email account and click Connect.
- You will receive a success confirmation message Account Successfully Added.
Which is better POP3 or IMAP?
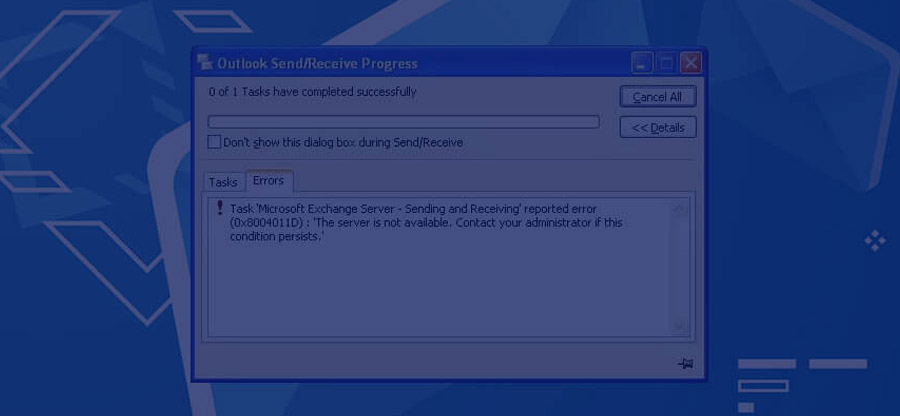
While configuring webmail in Outlook, one of the most common questions that arrives is whether to use IMAP or POP3 protocol to set up webmail in Outlook. Both email protocols allow accessing emails in Outlook, but each of them is used in a different manner. In IMAP, we can access emails on the server and Outlook. In POP3, you can view the downloaded messages locally but not on the server. Once downloaded, the emails cannot be accessed via webmail. In POP3 configuration, there is a high risk of important emails getting deleted or corrupted when they are saved as PST files on local systems.
To deal with such a situation, we have a professional tool that can repair corrupted PST files and recover all the mailbox items without hassle. One such tool is Kernel for Outlook PST Repair. This tool recovers and restores all the items, including deleted items, outbox, notes, journals, contacts, and much more. If in case you lose some important emails this software will always be there to the rescue the data. Moreover, this tool can repair your corrupted PST files easily by maintaining their original hierarchy.
Conclusion
Setting up different webmail accounts at one place makes it easy to handle them. You can easily configure multiple accounts in Outlook where you can access all the emails simultaneously. However, this action may create issues like email inaccessibility or PST file corruption. We suggest you use Kernel for Outlook PST Repair tool to handle PST file corruption or other issues causing complications in accessing the mailbox items.