Read time: 9 minutes
Migrating Outlook emails to Office 365 is a simple step that organization takes when moving from on-premises email server or legacy systems. Businesses are planning to migrate Outlook emails to Office 365 mailboxes due to organizational policies, mergers & acquisitions, or simply for frequent backups. Office admins have the right to easily move to Microsoft 365 environment from:
- Exchange servers.
- IMAP enabled email clients.
Apart from this, users have the right to import emails, contacts, calendars, and other data from their own mailboxes to Office 365. To move the data safely from your PST to Office 365, you need right methods, step-by-step instructions, and expert insights.
What is the need to Migrate Outlook emails to Office 365 mailbox?
Before we proceed to learn about the methods, let’s check out why you need to migrate Outlook email to O365:
- Organizational policies: Many businesses have policies that mention the necessity to migrate Outlook emails to Office 365 mailbox for security or backup purposes. This helps when an employee plans to switch to a new organization and starts working with a Microsoft 365 account.
- Creation of a new account: When you are using an Outlook email account and need to create a new mailbox, you will need to migrate PST files from Outlook to receive all the important information. This import email into Office 365 will make sure no data is lost in the process.
- Periodic backups: Taking regular backups of all the essential mailbox data is a wise practice. Users often back up all their email data from Outlook to keep it safe from all sorts of data loss and other risks. This is a precautionary measure that should be in every business strategy.
- Change of system: When switching from an existing environment to a new and advanced system, there is a need to create a new Outlook account. To migrate Outlook emails to Office 365, users have to migrate their necessary emails carefully.
- Accessibility from anywhere: One of the greatest advantages of Office 365 is its universal accessibility. You can access data from anywhere and from any device. So, after moving data from PST files to Office 365, you can access it from anywhere.
How to Migrate Outlook Emails to Microsoft 365?
Here are a few manual methods that permit you to migrate Outlook email to Office 365 step by step:
Solution 1: Using Import/Export feature of Outlook
To migrate Outlook emails to Office 365 mailbox or perform a bulk mailbox migration to Microsoft 365, configure Microsoft 365 account in MS Outlook. Then, use the Import/Export feature according to the steps below:
Step 1: Export data from Outlook to PST
Follow the steps mentioned below to export data from the Outlook mailboxes to a PST file:
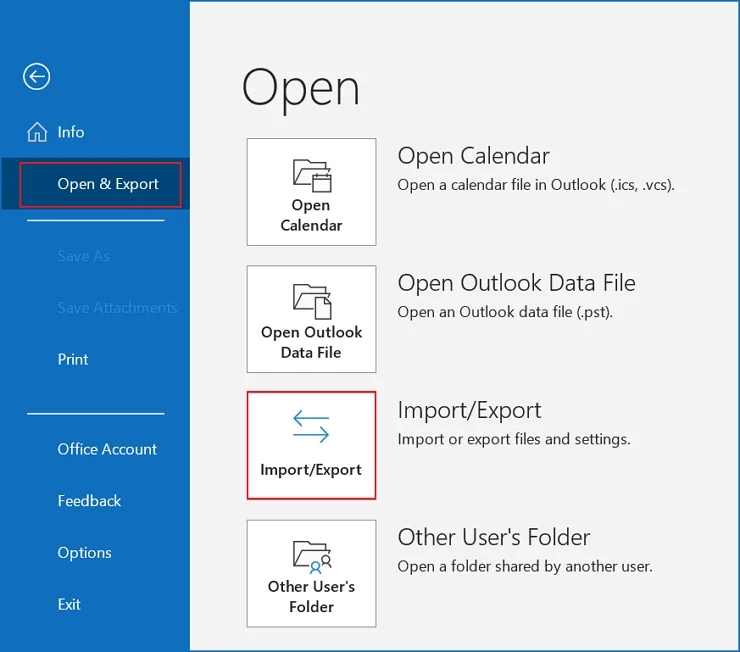
- Access the Outlook application & go to the File.
- Click on Open & Export, then the Import/Export.
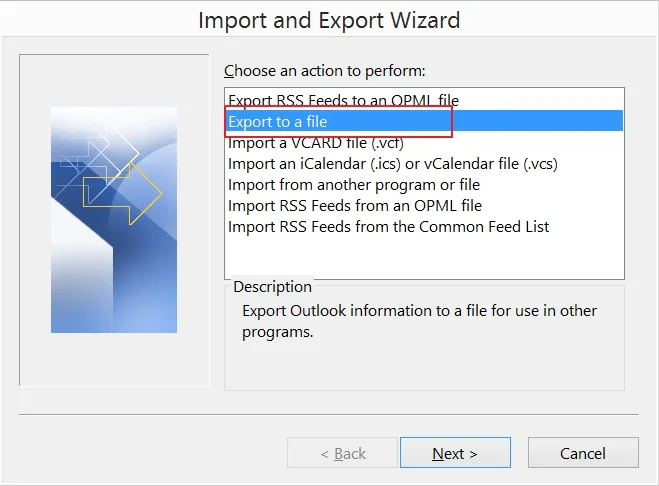
- In the next window, select Export to a file & click on the Next
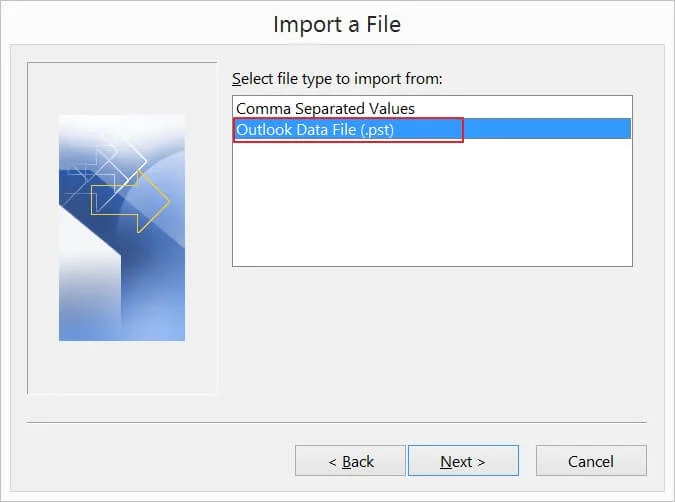
- Choose Outlook Data File(.pst) from the options & click Next.
- Select the folder to export from along with the given filters & then hit on the Next.
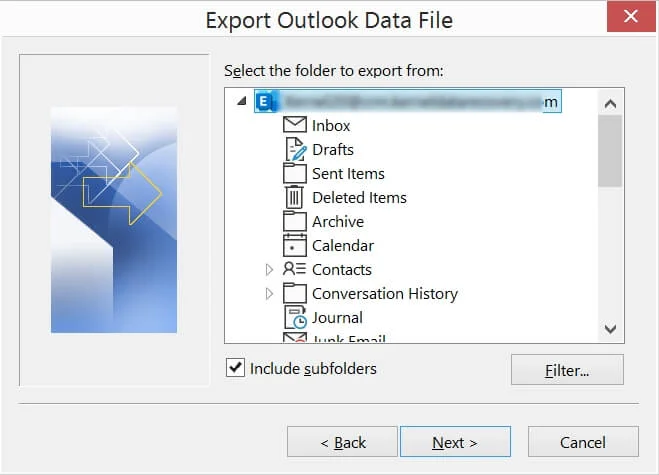
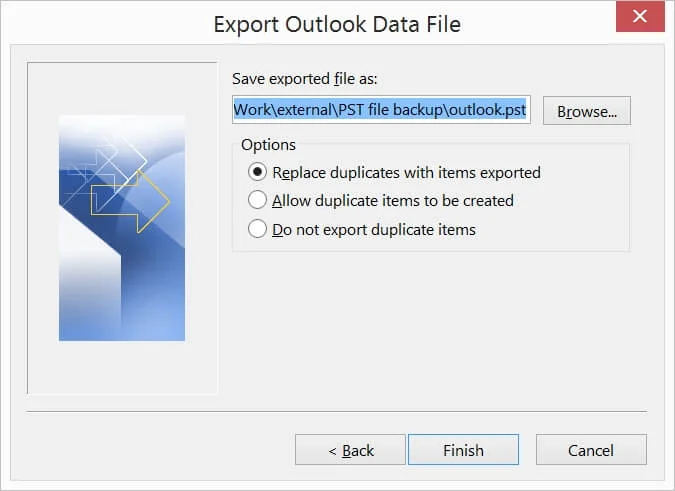
- Select Browse to provide the location to save the PST file, and click Finish.
Step 2: Import the Outlook PST to Office 365
- Open Outlook, click the File tab, click Open & Export, and select Import/Export.
- Select Import from another program in the Import and Export wizard and click Next.
- Select Outlook Data File (.pst) and click Next.

- Browse for the Outlook PST data file, select it and click Next.
- Set Options according to your preference to manage duplicate items in the file and click Next.
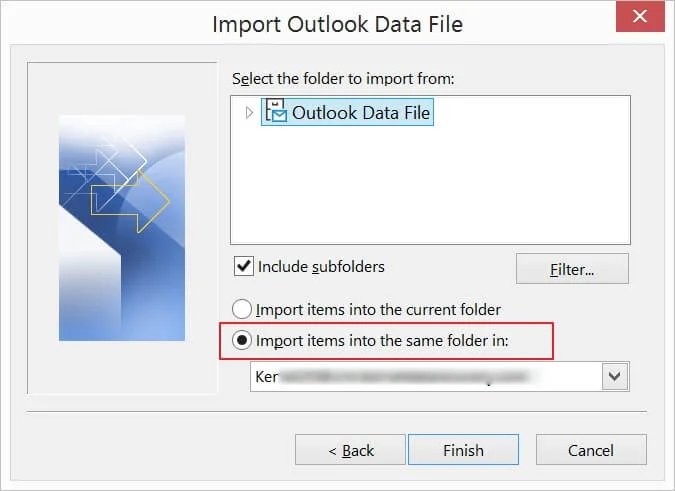
- Choose the Import items into the same folder in option and select the Microsoft 365 mailbox; Click Finish.
Note: If the PST file is password-protected, enter the password, and unlock it, click OK.
Limitations of Import/ Export method
Here are some limitations of the Import/ Export method that make it unreliable to use:
- Need to configure the Office 365 account in Outlook.
- It does not work for large PST files, such as 150GB.
- It can migrate only a single mailbox at a time.
- It is quite a lengthy process as only a single mailbox is migrated at once.
- There isn’t any guarantee of complete data migration. Chances are that some data might be missing.
- It is not suitable for a complete beginner. The user must have knowledge about Outlook to some extent.
- No PST import reports are available.
However, there are two more methods from Microsoft (Network Upload Method & Driving Shipping Method), which can be used to migrate Outlook email to Office 365 mailbox.
Solution 2: Network upload method to import Outlook email to Office 365
The Network Upload method is a great way to import email to Office 365. It allows administrators to import their entire PST data to Microsoft 365 using the Azure AzCopy tool. But keep in mind that the PST file should be stored on a file server or shared folder in your organization before migrating it to Microsoft 365.
For this method to work, the user account you will use to upload the Outlook PST to Office 365 must have the roles Import Export and Mail Recipients. Also, you’ll need the Azure AzCopy tool.
Some shortcomings of this method
- Allows you to export one PST file at a time and is not suitable for exporting more PST files to Microsoft 365.
- Involves a repeating and time-consuming process.
- Complex and time-taking process when moving multiple PSTs to the cloud destination.
- Needs technical knowledge otherwise chances of PST files getting corrupt are high.
Solution 3: Drive Shipping to import Email to Office 365
Drive Shipping is another way to migrate Outlook email to Office 365 mailbox, which works by using a Secure storage key and PST Import Tool. However, this method is to be carried out only by the administrators and the organization whose data is being migrated. With the drive shipping method, you will have to copy your PST data to a hard drive and then ship it to one of the physical locations of Microsoft 365.
However, it is important to remember that you need to send the PST data to Microsoft in a hard disk drive. It can take 1-2 weeks to import the PST data to Microsoft 365, and every organization cannot wait for such a long period.
Note: Both Network Upload and Drive Shipping methods are highly technical in nature and can be easily mishandled by users, leading to incomplete migration, data loss, or corruption.
Dealing with Bulk Outlook Emails? Here’s Another Solution
To simplify the lengthy and time-consuming manual task to migrate Outlook emails to Office 365 mailbox, using a professional Import PST to Office 365 tool would be the right option. Kernel Import PST to Office 365 is a top-quality tool available to migrate Outlook email to Office 365 step by step. Using this, you can migrate all or selective data without putting any limitations.
Some of the efficient features offered by the tool include:
- Migrate Outlook emails to Office 365 from Outlook PST file to primary, archive, or shared mailbox in Office 365.
- Map user mailboxes smoothly for quick data migration.
- Migrate data with retained metadata, structure, and email attachments.
- Run multiple import jobs at once to migrate Outlook emails to Office 365 mailboxes.
- An incremental migration feature to help you skip previously migrated data items.
Conclusion
Outlook’s built-in Import/Export utility, Network Upload, and Drive Shipping method can all be used to migrate your emails to Office 365, but choosing the right method depends on data volume, available technical resources, and timeline. But migration of emails is tricky, lengthy and sometimes maintaining the hierarchy can be tough using manual methods. To avoid any limitations you can choose the recommended solution and have a smooth migration experience.
Common User Queries
A: Here are some steps that you must follow before moving emails:
1: Create users and assign them mailboxes in Office 365 admin center before you begin.
2: Make sure to run a test migration on a small batch of users.
3: Update your MX records to point to Office 365 after the migration
A: What you can do to optimize your destination to deliver top performance is:
1: Implement multi-factor authentication for account logins.
2: Regularly review security policies.
3: Create and configure data retention policies.
Moreover, you can provide training to your users so that they develop a quick understanding of the platform quickly.