Read time: 7 minutes
Migrating emails is one of the common challenges that every IT team and business faces when they plan to move to Exchange Server. PST files are convenient for local storage but they become a problem because they get corrupted, they are hard to back up, and they don’t support collaboration. That’s where organizations import PST to Exchange Server.
Why Would You Need to Import PST File to Exchange Server?
There are multiple reasons to import PST files to Exchange Server. The most common reasons are:
- You can keep all your organization’s data stored securely on the server rather than distributed across individual users’ local hard drives.
- It allows administrators to meet legal hold and regulatory requirements by easily letting them search through all users’ emails.
- Allows users to access their mailbox data from any device or Outlook Web App rather than being tied to a local computer.
- Merges abandoned or obsolete PST files from former employees into archive mailboxes or active users.
Prerequisites: Permissions and Roles Required for PST Import
To import PST to Exchange Server, administrators must assign some required permissions and roles in Exchange Online via Exchange Admin Center. Here is what you need to do:
Assign Permissions via Exchange Admin Center
Exchange Server import/export operations require the Mailbox Import Export role, which is not already assigned to any role group by default, and not even Organization Management. You can assign Mailbox Import Export role by following the steps below:
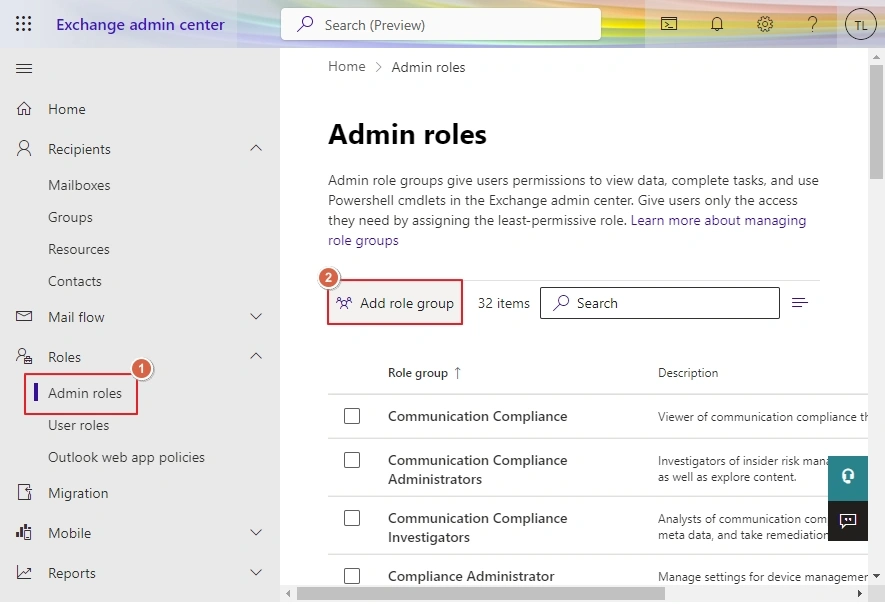
- Log into Exchange Admin Center with administrator credentials.
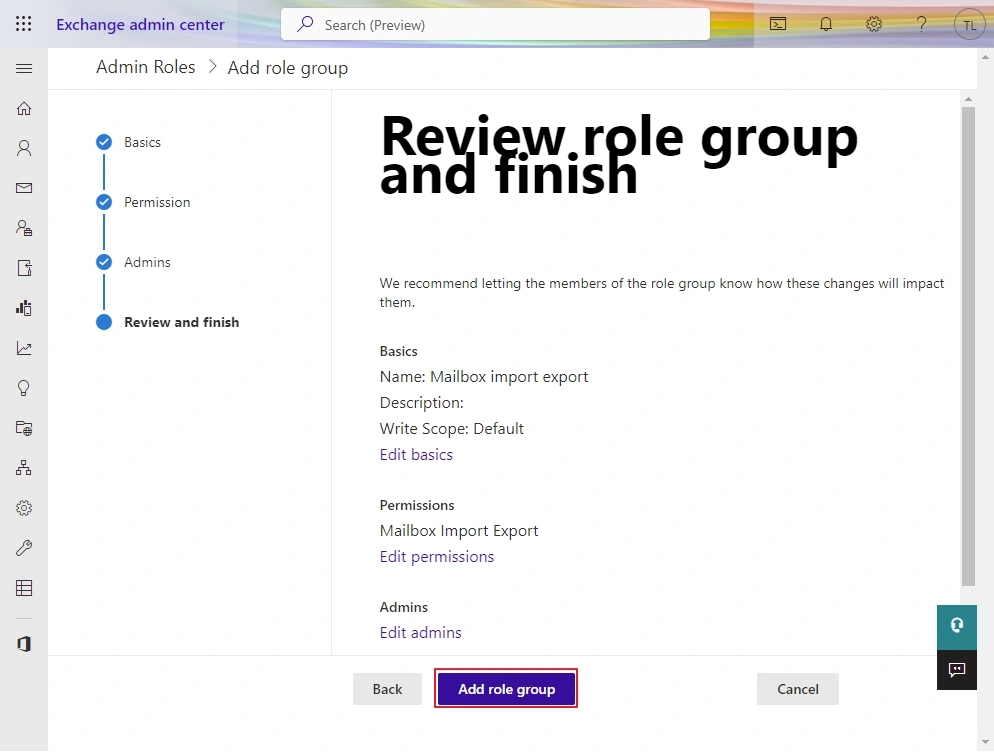
- Click on Roles > Admin roles > Add role group.
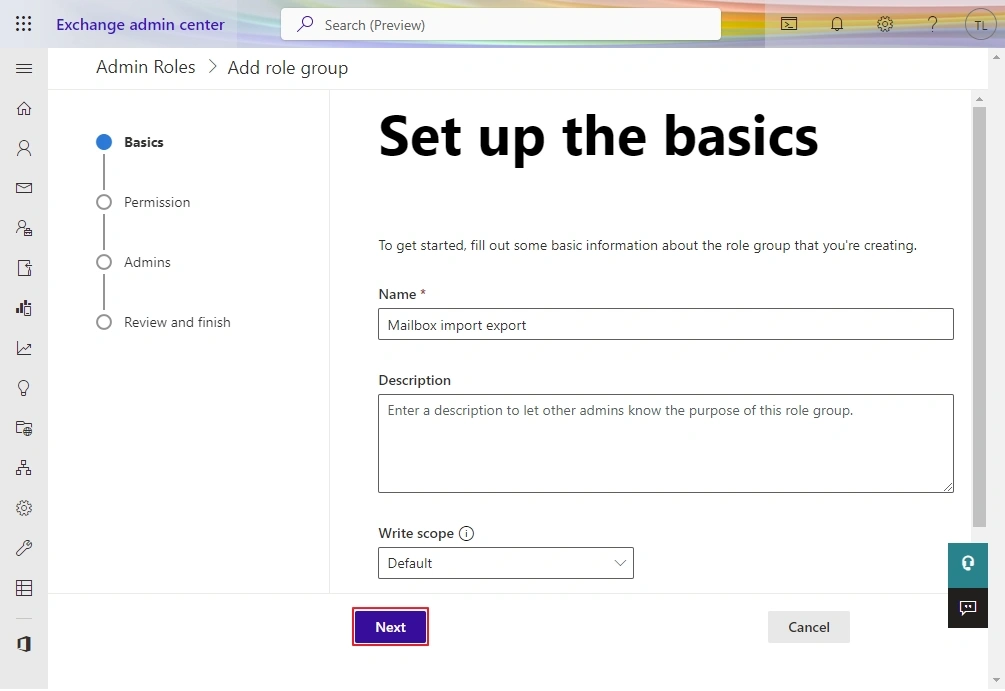
- Input a name to the role, and a description, and let the scope be set to Default. Click on Next.
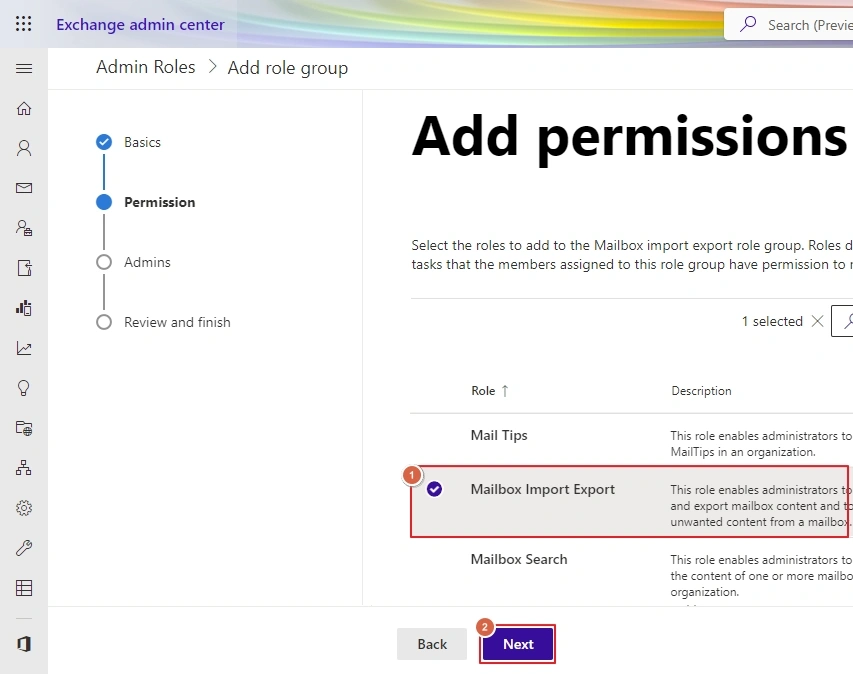
- Select Mailbox Import Export and click Next.
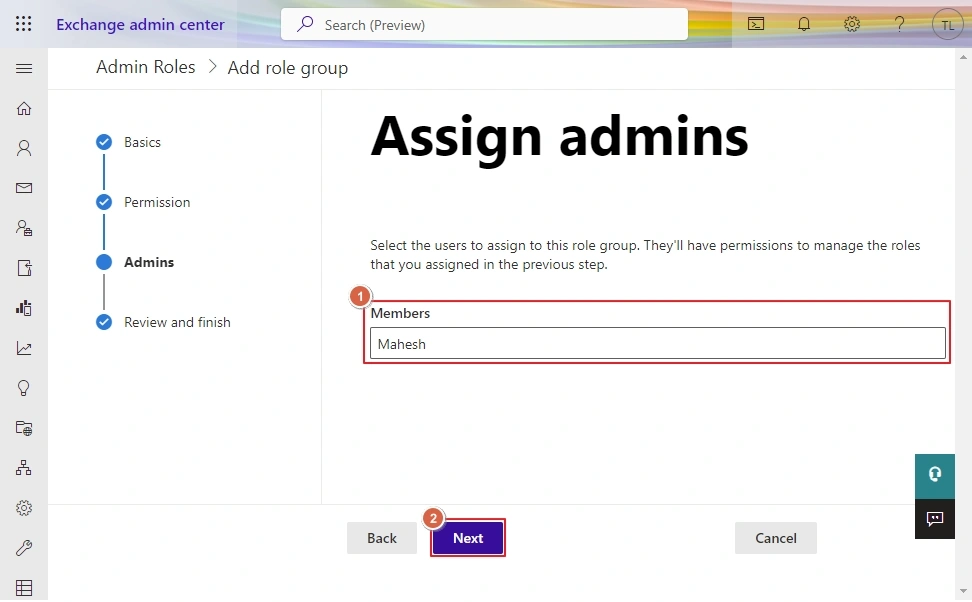
- Select the Members to assign this role group and click Next.
- Review role group and click Add role group.
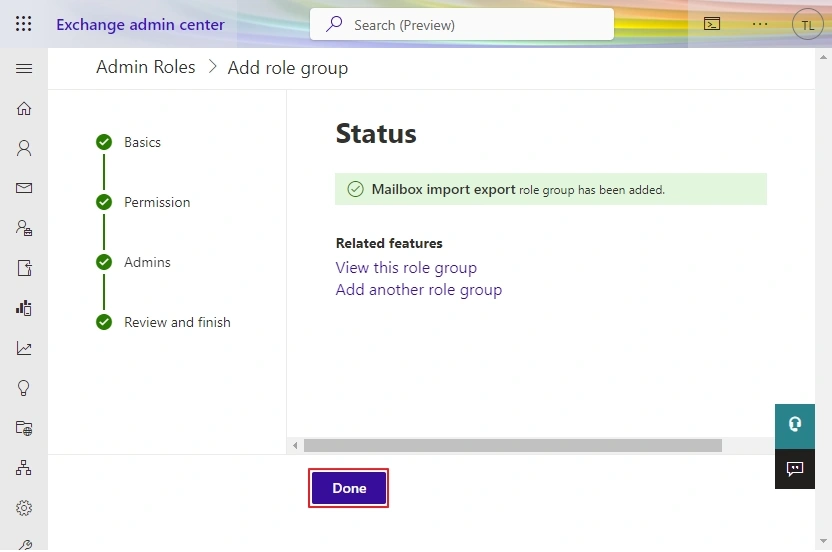
- The Mailbox Import Export admin role group has been added, click Done.
Network share requirements: The New-MailboxImportRequest cmdlet doesn’t read PST files from a local drive on the Mailbox server. It needs a UNC path to a network share that the Exchange Trusted Subsystem group can access.
File size and health: Make sure the PST file is not larger than 20GB and is in a healthy state. Run scanpst.exe before importing the PST file if necessary.
Target mailbox license: Verify if the target Microsoft 365 mailbox has an active Exchange Online license.
Method to Import PST File to Exchange Server
Once permissions and network shares are in place, you can now use New-MailboxImportRequest PowerShell cmdlet and Exchange Management Shell. Here is the procedure to do it:
Step 1. Verify Mailbox Import Export role
Get-ManagementRoleAssignment -Role “Mailbox Import Export” -RoleAssignee “Administrator”
Step 2. Place the PST file on an accessible network share
Copy the PST file to the shared folder and note the UNC path (you will need it in the next step).
Step 3. Run Import Request
New-MailboxImportRequest -Mailbox “username” -FilePath “\\ServerName\PSTShare\username.pst”
Note: If you want to import into a specific folder rather than the mailbox root, use the following command
New-MailboxImportRequest -Mailbox “username” -FilePath “\\ServerName\PSTShare\username.pst” -TargetRootFolder “Recovered Data”
Step 4. Monitor the import request
Get-MailboxImportRequest -Mailbox “username” | Get-MailboxImportRequestStatistics
Note: Check the percentcomplete and status fields. A completed request shows Status:Completed.
Step 5. Clean up completed request
Get-MailboxImportRequest -Status Completed | Remove-MailboxImportRequest
What to Do When a PST File is Corrupted or Oversized?
In case you have a corrupted or oversized PST file, you cannot import it to Exchange Server. Manually, you can only import a healthy PST file or a file that has an optimal size. This is where the need for a specialized tool comes in. Kernel Import PST to Office 365 directly transfers PST data into the Exchange Server, regardless of corruption and file size.
Use item type and date based filters to transfer selective data in the Exchange environment. Once you have transferred the data, the next time you can transfer only the newly added data with the incremental feature.
Final Thoughts
Importing a PST file to Exchange is important to modernize your email environment and get rid of risks that come with local archives. Once your PST file data is transferred to Exchange Server, you get real benefits such as centralized backups, compliance tools, eDiscovery, and more. With the right planning and steps outlined in this guide, you can import PST to Exchange Server securely.
Frequently Asked Questions
Import PST to Exchange Server for free using Microsoft’s built-in Exchange Management Shell (PowerShell) or the Exchange Admin Center (EAC).
No, New-MailboxImportRequest adds the PST file content into the target mailbox without deleting or overwriting what’s already there.
You need a Mailbox Import Export role assigned in the Exchange Admin Center.