Read time: 7 minutes
The Google Cloud Platform is a choice for many beginners and small enterprises because of its simplicity and quick availability. But as they grow further, they may need a more professional cloud platform like Office 365.
Microsoft offers powerful data analysis features with Excel, superior communication using Teams, offline application accessibility, and much more. By moving from Google Workspace to Office 365, organizations or users can leverage these features. You can either use the Google Workspace built-in migration feature or choose to export complete G Suite data into PST file with Google Vault. In this blog, we will discuss how you can move to Office 365 using the Google Vault’s export function along with a professional cross-environment migration tool.
How to Migrate Google Vault to Office 365?
Though there are no direct ways to migrate Google Vault data to Office 365, users can use the Matter, Hold, and Export features in Google Vault to move Google Vault data to Office 365.
Before you begin data export, make sure you have these permissions assigned: Manage Matters, Manage Searches, and Manage Exports. After assigning the permissions, use the following steps to move the emails:
Step 1: Export Google Vault to PST File
-
- Go to Google Vault, sign in if required with admin credentials.
- Click on the Matters option and create a new matter by clicking on the Create button.
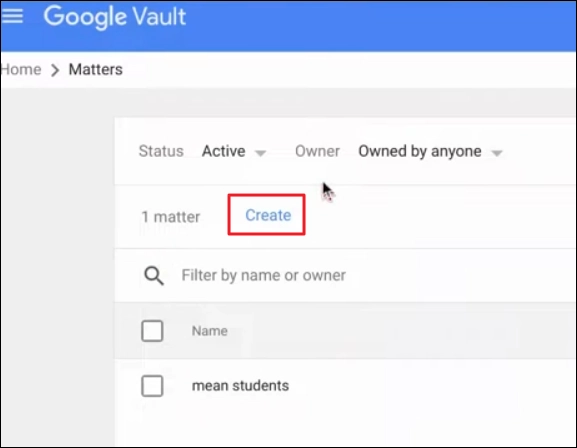
- Provide a name and description (optional) for the matter. Then, click Create.
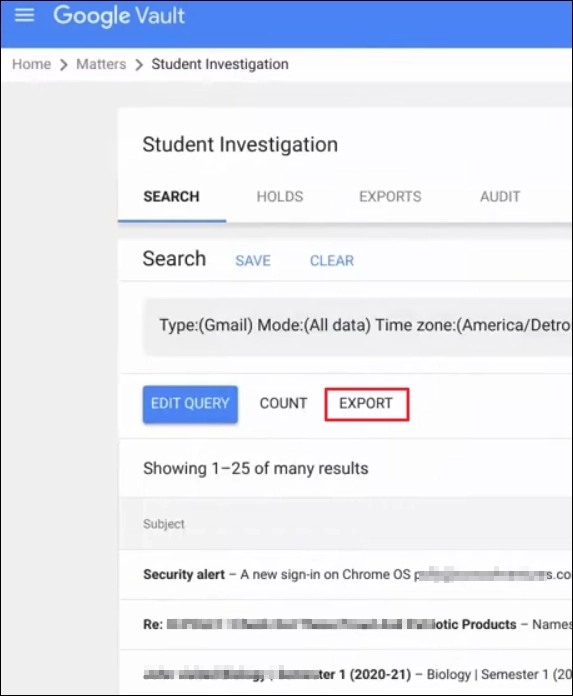
- Choose the service as Gmail, and specify search parameters.

- Click Search to begin searching.
- To export the results, click Export.
- Provide a name. Then choose the output type as PST and specify other parameters. Then click Export again.
- Click on the Exports tab to view the status of the export request you created.
- When the export is finished, click the Download button to save data to your local PC.
Note: The exported data is only available for a duration of 15 days.
The exported file might contain multiple PST files, depending on the export size. Now, we can begin uploading the saved PSTs to your target Office 365 account with the next step.
Step 2: Import PST to Office 365
We will use Outlook to Import PST to Office 365 with the following steps:
-
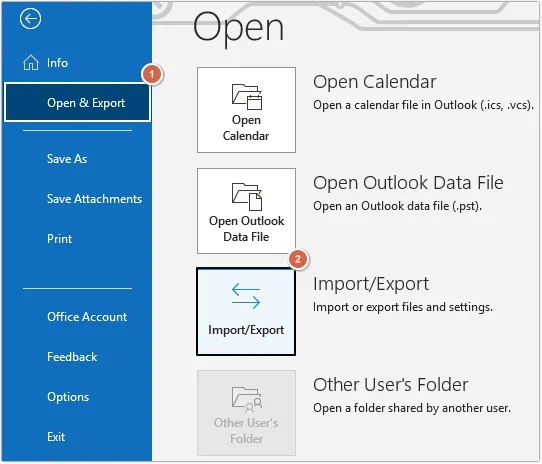
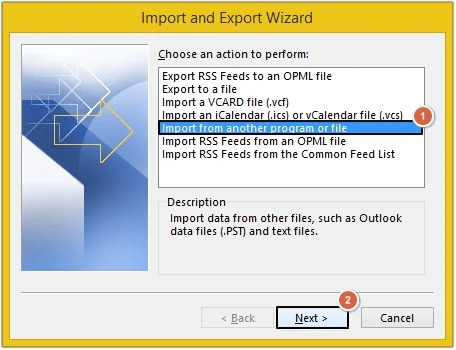
- Open Outlook, go to File. Click Open & Export and select Import/Export option.
- Choose Import from another program or file option and click Next.
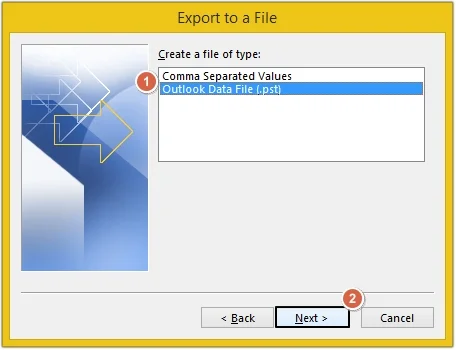
- Select Outlook Data File (.pst) and click Next.
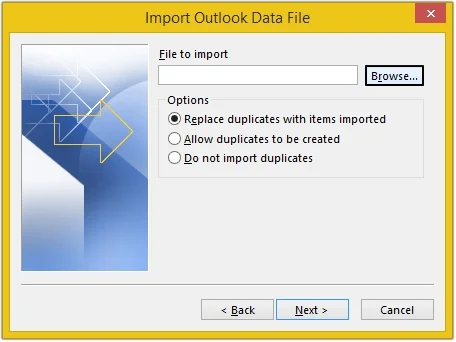
- Click Browse and select the PST files you want to import. Select the other options as needed and click Next.
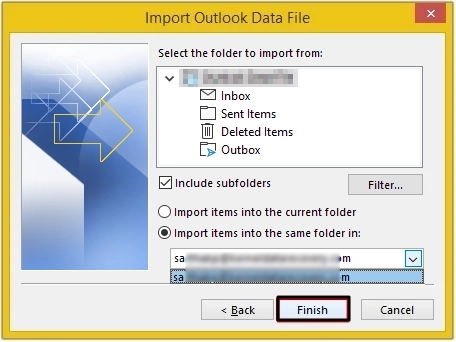
- Select the target Office 365 account mailbox as destination and click Finish.
- Open Outlook, go to File. Click Open & Export and select Import/Export option.
Note: Make sure to select the correct destination mailbox, if multiple accounts are added in Outlook.
Alternatively, you can use the Drive Shipping method or the network upload method to import PST to Office 365.
Limitations of the manual method:
- Involves multiple complex steps that make the data transfer very time-taking.
- You need permission to create matter and export search results.
- Configuring the export job for selective data export is challenging.
- The original folder hierarchy will be destroyed.
- You have to download all the PST files to the hard disk. Meaning, the import will fail if enough storage space is not available.
Effortless Google Workspace to Office 365 migration [Professional Method]
Admins rely on advanced tools for an easy and quick import process. You can automate the complete process we discussed above with our Kernel Google Workspace to Office 365 migration tool. It uses modern authentication to securely connect to source (G Suite account) and destination (Office 365 account) and allows a direct migration between the endpoints.
The tool offers precise data transfer with automatic user mapping (using CSV file). Furthermore, you can use the built-in smart filters to exclude any unwanted data from the migration. Unlike the native solution, our tool shows the live migration for each folder with item counts of moved files.
Concluding the blog
To move from Google Vault to Office 365, use the Vault’s export feature to download emails into PST format. Then, as per your requirement, you can use the Outlook or network upload method to import the PST to any O365 account. But it’s a time-taking process that demands high precision and multiple data access permissions.
The best way to move data between Google and Microsoft is by using the professional Kernel Google Workspace to Office 365 migration tool. However, if you have old (extracted) PST files, you can use the Kernel Import PST to Office 365 tool to directly move bulk PSTs to O365.
Frequently Asked Questions
A. Yes, Google Vault allows you to export complete G Drive data, including folders, files, and shared items with metadata. To extract the data, create a search with your requirements and export the results to your local system.
A. If it is a small-scale migration (approx. 100 mailboxes), the manual network upload method is sufficient. But for a large-scale migration (approx. 1000+ mailboxes), you should use a professional migration tool.
A. Yes. Since there is no manual way to map the mailboxes when using the manual method, you must create the mailbox mapping CSV file. If you don’t want to spend time creating it, use the Kernel migration tool, which allows for real-time mapping with the software.