


What Benefits Does Kernel Import PST to Office 365 Offer?
Import Large Files
PST to Office 365 migration tool supports a maximum file size of 50 GB, which makes it easy to import large files to the Office 365 cloud account. The integration of advanced algorithms into the software assists in the quick migration of multiple large PST files to Office 365 than any manual method.
No Post-Import Jobs
Move PST to Office 365 without the necessity to perform any additional tasks post-migration. After importing PST mailboxes to Office 365, the mailbox folders and their items are readily accessible as they were in the initial mailboxes.
Retention Email Status
Multiple unread emails might be available in the mailbox before the transfer, and the software will protect the status of each email. The unread email will remain unread. The PST to PST to Office 365 migration tool also supports the UNICODE characters.
Supports all Office 365 Plans
With the PST to Office 365 migration tool, it is easy to import the PST file to any Exchange Online account. It supports all the Microsoft 365 plans that have Exchange Online, including Business, Basic, Business Standard, Business Premium, Enterprise, etc.
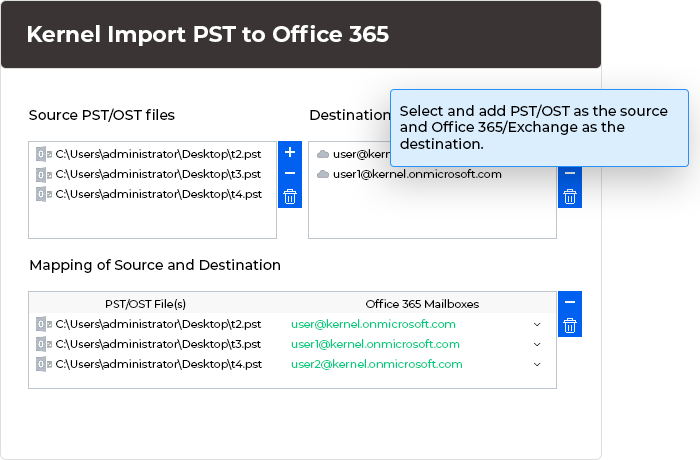
Perform Bulk Transfer
Use the import PST to Office 365 tool to perform bulk mailbox transfer. It offers the automated feature to download CSV files and add them to multiple PSTs. Select and add multiple PST files at once and then upload them in one go for complete migrations.
User-Friendly Interface
Easier to move PST to Office 365 with the help of a user-friendly and self-descriptive interface of the PST to Office 365 tool. It's easy to import a PST to Office 365 in just a few steps. Users with a non-technical background will face no hassles while navigating through the tool.