Related Posts
Read time 9 minutes
Getting data out of a dead PC can be hard. Unfortunate incidents like this do happen and can be agonizing most of the times. In every conceivable scenario, this issue won’t let your PC to boot up properly, and your PC might also shut off unexpectedly, or a boot loop might worsen the situation. Next, to salvage the data from the drives, you connect the drive to another system, but to your surprise, all of your data is gone. This triggers anxiety, but before giving up, you should consider trying the various data recovery options described in this tutorial.
A disk boot failure can be due to many reasons such as a problem with the power supply, a faulty motherboard, OS issues, or a logical error on the drive itself. Whatever the reason might be you want to recover your data. The easiest and most effective way to recover the data is by system restore from a recent backup. I bet you don’t have the backup; otherwise, you wouldn’t be here going through the trouble of looking for the ways to recover your lost data. So, let’s look for some other desirable ways to recover your lost data.
To help you out in your data recovery journey, we have devised a few ways which are outlined below:
The next feasible thing would be to try booting the PC in Safe mode. In Windows 7 and earlier versions, press F8 repeatedly to boot in Safe Mode. In Windows 8, press F8 or Shift+F8 to do so. If you can boot into Safe Mode, you can then use Windows Explorer to find the files copy them to an external drive.c
If the previous hack doesn’t work for you, try booting a free Linux OS from a Live CD/DVD/USB. We recommend making a bootable USB drive as you can reuse these. Also, optical drives are prone to wear and tear and are mostly dropped from the newer PC models. Creating a Live CD allows you to run Linux without even installing it on your machine. Next, restart your PC and boot into your BIOS and change the boot order.
If the aforementioned two methods couldn’t solve your problem, then try this one out. Remove the HDD from the Trayless Rack and use it as an external drive with another PC or laptop. You can use a SATA-USB adapter to turn this drive into an external drive. If your hard drive isn’t SATA compatible or support other interfaces like PATA or IDE, you will need a compatible disk enclosure or a cable to connect the hard drive.
Next, open the Disk Management tool. Just hold +R keys to open Run option. Then type diskmgmt.msc in the text box and hit Enter. This will launch the Disk Management utility, as shown below.
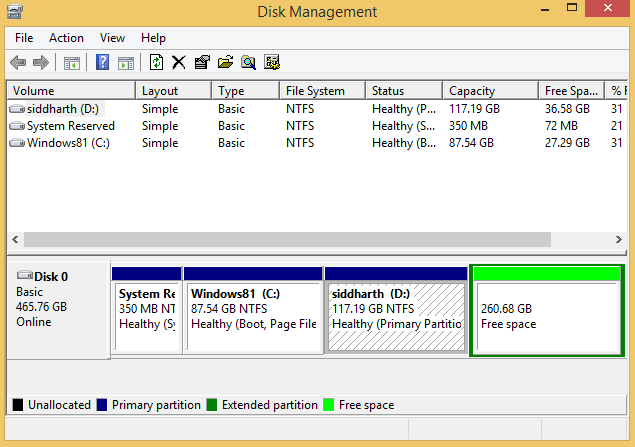
If your system detects a hard drive but is inaccessible, then you have to assign a new drive letter to the disk volume, if not already assigned. To do so, please follow the steps shown below:
I. To change the Drive letter right click on the drive and then select ‘Change Drive Letters and Paths.’
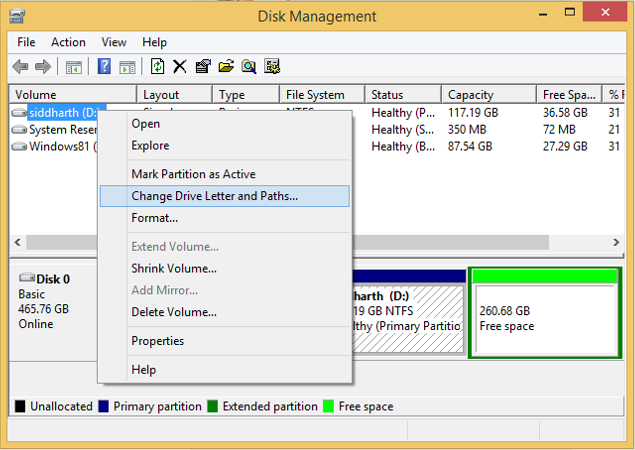
II. Click ‘Add’ /’Change’ and choose the letter from the drop-down.
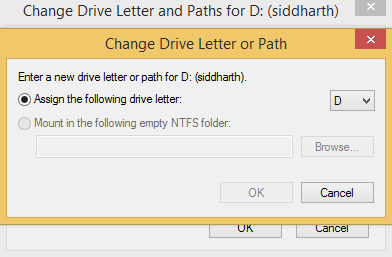
III. Next, click ‘Ok.’
NB: Do not format the drive as it will permanently erase the data off the drive.
Once the drive becomes accessible, quickly copy files from the drive to the system or an external drive. If you are still unable to get anything off of the hard drive, then you might have to use a third-party data recovery tool.
It is worth a try to try this option as there is a possibility that your Windows installation is damaged.
I. Insert the Windows installation disk into your computer and power up your system. Next, you will see a ‘Press any key to boot from CD or DVD’ message.

II. Click ‘Next’ and sect ‘Repair Your Computer’ in the Pop-up window.
III. If using Windows 8 or 10 installation disk, click Troubleshoot -> Advanced Options -> Command Prompt.
IV. This will open a Command Prompt, then type notepad and press Enter to launch a Notepad dialog box. Click ‘File’ and select Open in the Notepad window.
V. Next, click the ‘All Files’ option. And then click on the ‘Computer’ option.
VI. This will allow you to use this ‘Open’ dialog box as a Windows Explorer window. Just copy all the items that you want to recover and save them to an external drive.
If you have exhausted all of your resources and had no luck with the aforementioned methods, then you need to consider using a professiofnal Data Recovery tool. One such tool is Kernel for Windows Data Recovery. It can repair, recover, and restore Windows data from corrupt Windows partitions and severe corruption cases. It can also extract all deleted files and folders; Office documents, emails, media files etc.
Additionally, it has the following capabilities:
I. Retrieve data from an empty recycle bin
II. Retrieve from removable USB drives, Micro SD cards, SD cards, external Hard drives & more
III. Preview your retrieved files and folders immediately after scanning
IV. Recovery from FAT 16, FAT 32, NTFS, and NTFS5 file systems
V. Compatible with all Windows platforms: Windows 10, 8.1, 8, 7, Vista, XP, 2000, 98, NT, 95
Read Also : Recover Data From SD Card
Additionally, it has a ‘File Trace’ mode; which is an advanced scanning mode and performs a detailed scan of the hard disk sector-by-sector for searching for lost data. Another impressive feature is that you can run multiple system scans. If you want to resume the scan at a later instance, then pause the scan and save as a Snapshot. Later you can load the Snapshot and resume from there. See the steps below for a detailed tool process.
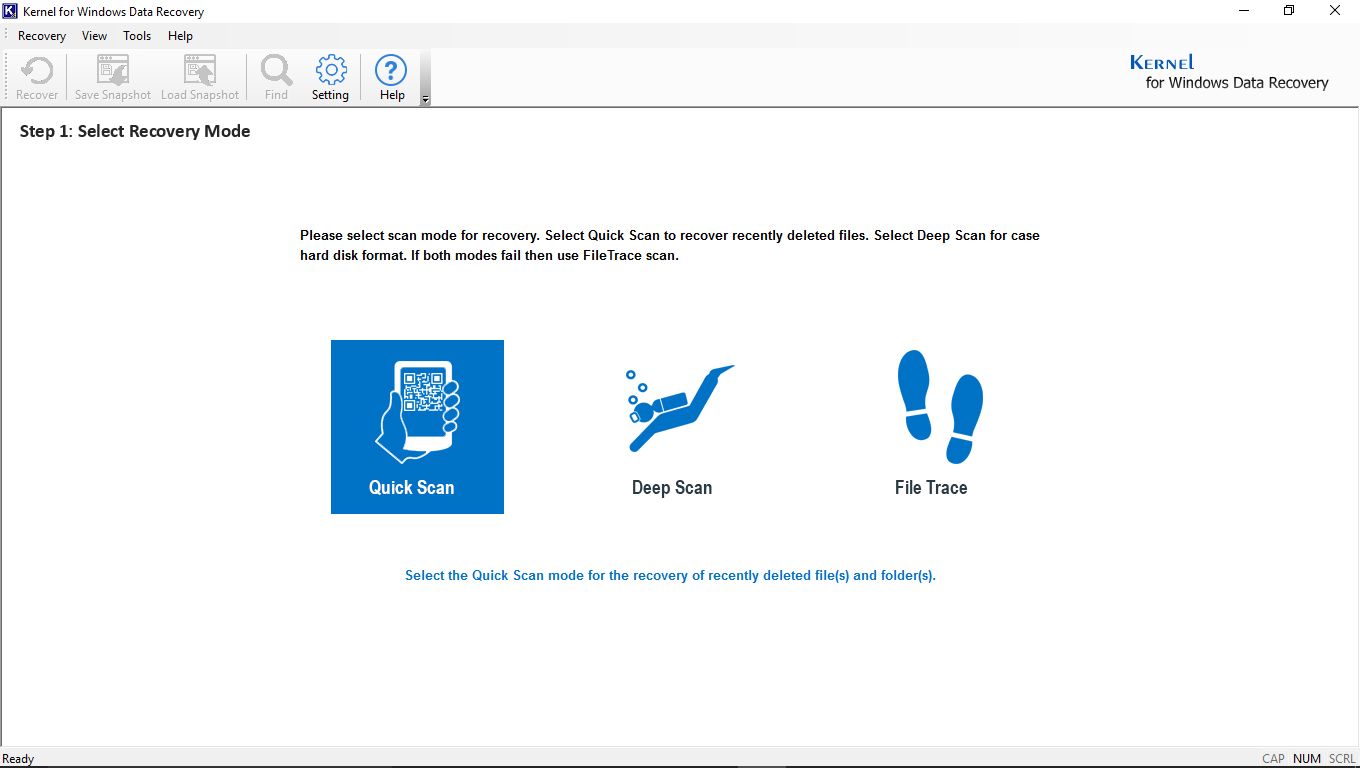
I. The welcome page will prompt you to choose from three scan modes. Choose the appropriate mode and proceed further.
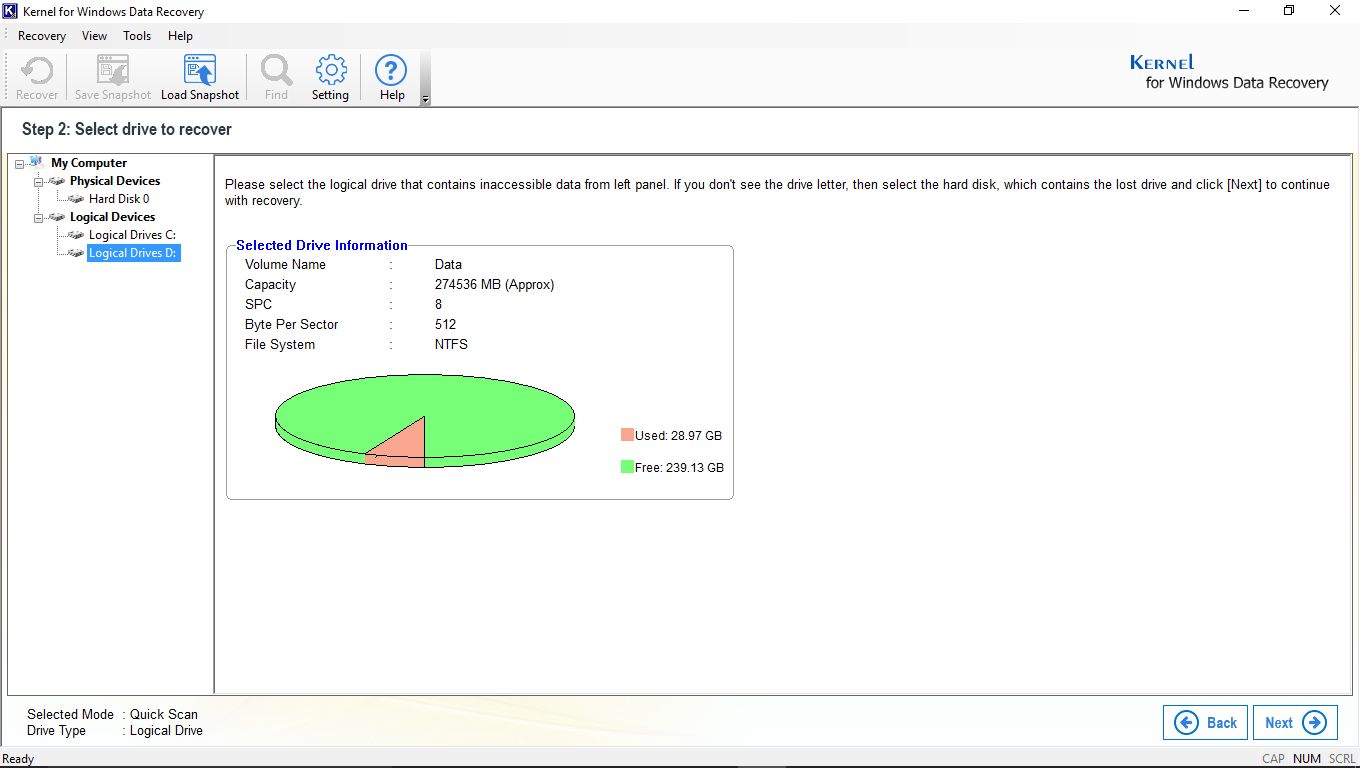
II. Next, from the tree view structure, select the drive you want to recover your data from and hits ‘Next.’
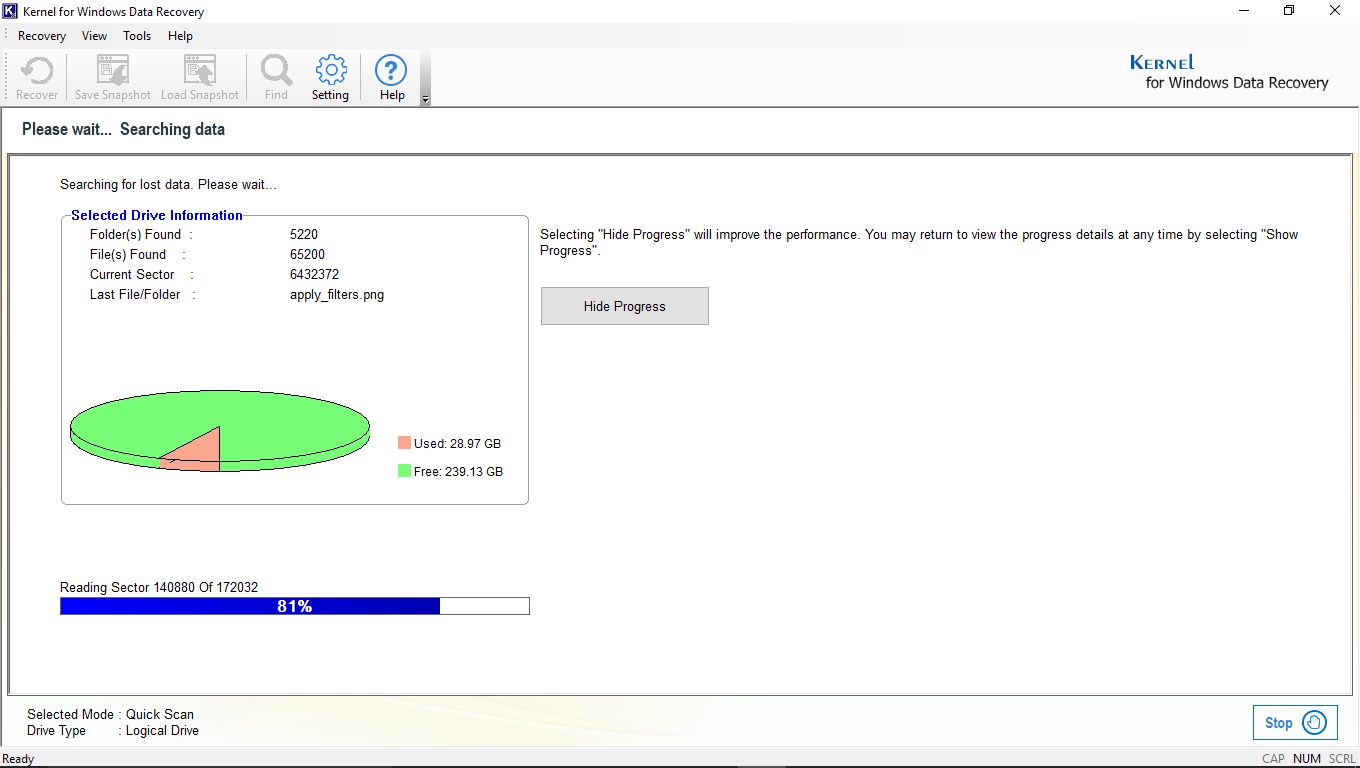
III. Next, the tool will search for all the lost and deleted files from the previously specified drive. The progress bar shows the recovery progress and status.
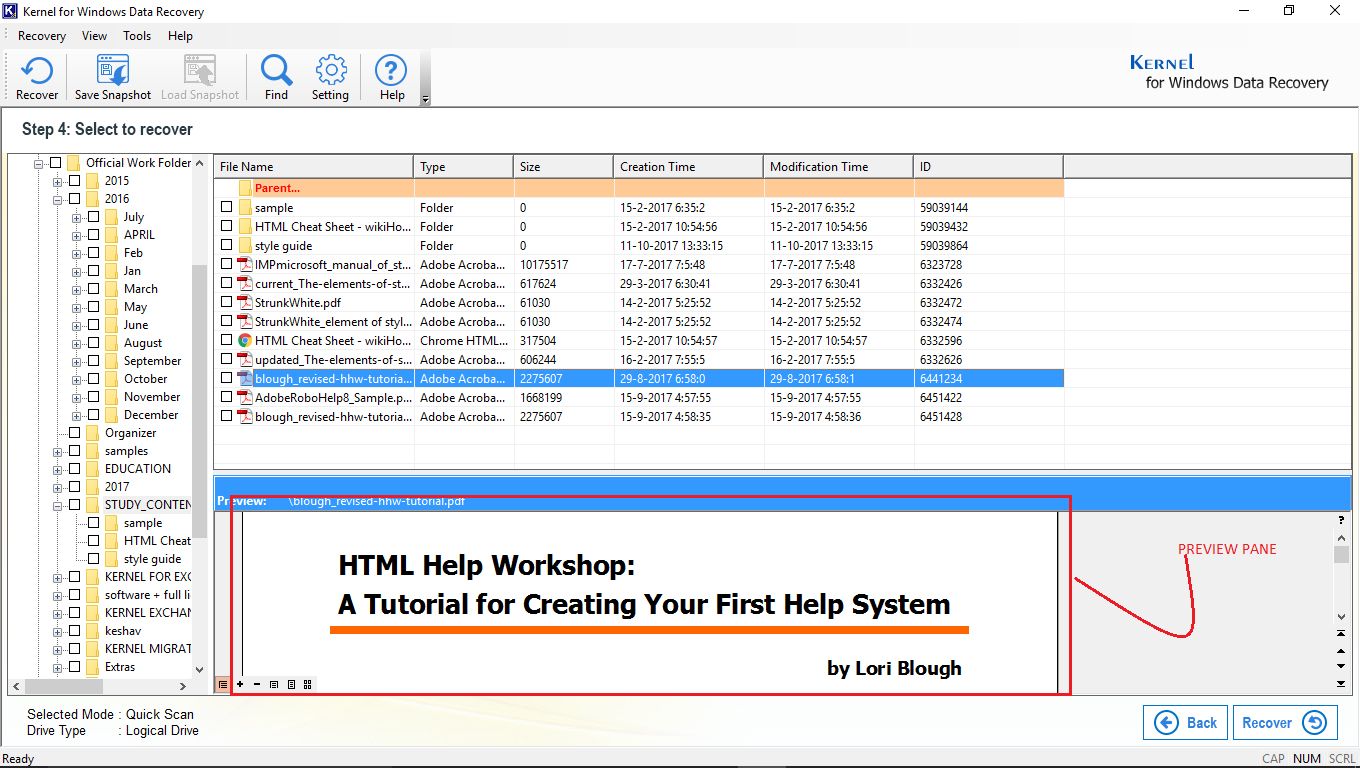
IV. Once it is done the searching, it will show you the list of recovered items in the right pane. Check on the items that that you want to recover and hit ‘Recover.’
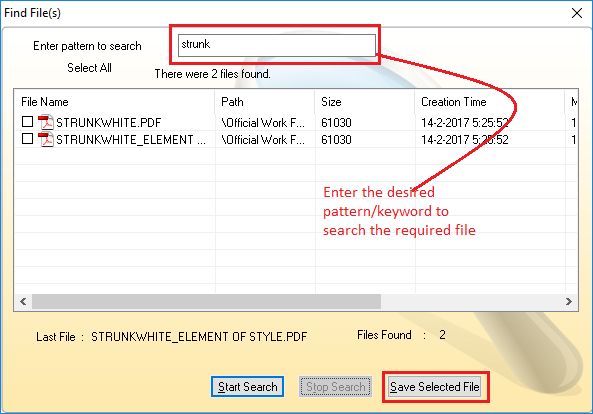
V. If you are looking for a specific file, then you can select ‘Find’ from the Menu Bar. Next, you can either choose to save the selected file or Start a new search.
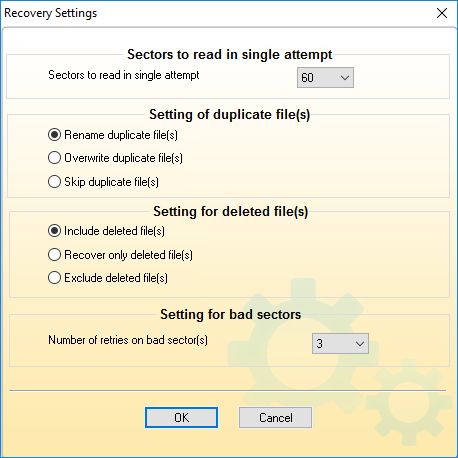
VI. Next, you can use recovery settings option to manage the recovery of duplicate and deleted files
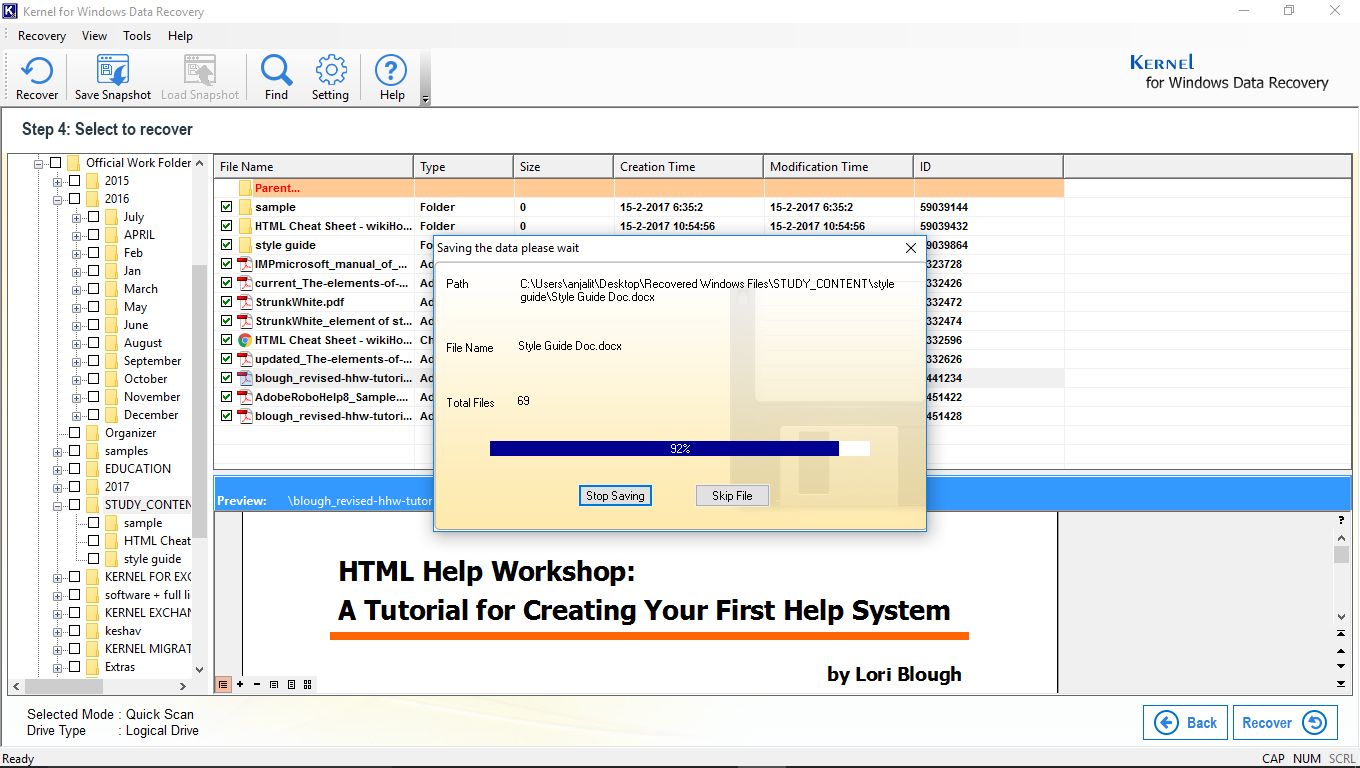
VII. Next, you can provide a location where you would like to save your recovered files.

VIII. The progress bar shows the status of the saving process.
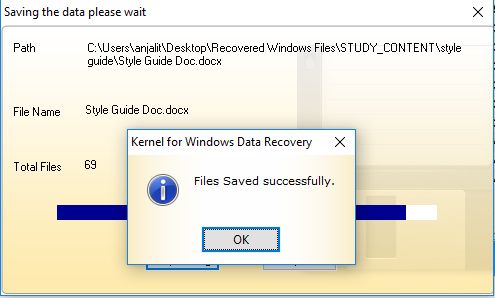
IX. A popup window displays a message one the files are successfully saved.
To wrap it up; in this post, we have discussed various ways to recover data from a dead PC. A total of 5 methods have been examined to recover your lost data from a dead PC. The first four methods are quite easy to implement and are DIY methods. If you are still unable to recover your data, we recommend you to use a professional tool such as Kernel for Windows Data Recovery. This should be your go-to tool for any Data recovery related grievances. It is to note that using Demo version you can only save up to 2 GB of data; hence, we recommend you to purchase the licensed version after you are satisfied with the tool.